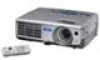
Operation Guide - EMP Monitor v4.30
Page 2
2 Meanings of symbols used The following table shows the symbols used in this manual, along with descriptions of the buttons on EMP Monitor. Example: Select "Timer" - Indicates the name of what they mean. Timer Settings. Example: Esc button Indicates the name of the buttons or items on the remote control or the control panel. "Timer Settings". s [ (name) ] "(name)" Timer Indicates a page where a related topic or a more detailed explanation is provided. Select Timer -
Operation Guide - EMP Monitor v4.30
Page 3
...an automatic search and registration . 13 Procedures for automatic search 13 Procedures for registration 15 Registration by specifying an IP address (Manual registration 17 Registering several projectors to a monitoring group all at once 18 If the projector name or IP address changes after ...registration 20 For projectors that have been registered manually 20 For projectors that have been registered using automatic search 20 Cancelling (deleting) projector registrations 20 Monitoring window layout 21 Monitoring ...
Operation Guide - EMP Monitor v4.30
Page 11
... Procedure A Right-click in the list, use "Registration by selecting New - s p.17 • You can also carry out this operation by specifying an IP address (Manual registration)". B Click "Search". The Create new projector (automatic registration) window will be displayed.
Operation Guide - EMP Monitor v4.30
Page 17
..."Registering several projectors to be displayed in Grouping view and select "New" - If Detail list view is displayed, click "OK". "Projector (manual registration)" from the Edit menu. Enter the port number in a group. When the message is displayed, select "New" - Enter the name... the projector, select Use Serial TCP/IP conversion adaptor. Select when registering a projector in Port Number and then click Search. Projector (manual registration) from the Edit menu. If using a serial TCP/IP conversion adapter to a maximum of the projector(s) to a monitoring group...
Operation Guide - EMP Monitor v4.30
Page 20
... or Detail list view and select "Delete". The methods of desired icons. You can be selected for the projector or group that have been registered manually Procedure A Right-click on the desired icons. • Use drag and drop to the Edit projector window, click "Change". s p.11 For projectors that is displayed...
Operation Guide - EasyMP Monitor v4.40
Page 2
...)" Timer (Boldface) Indicates additional information and points which may be found. 2 Notations Used in This Guide The following table shows the symbols used in this manual, along with descriptions of operations. Select Timer - Indicates operating methods and the order of what they mean.
Operation Guide - EasyMP Monitor v4.40
Page 3
...do an automatic search and registration 14 Procedures for automatic search 14 Procedures for registration 16 Registration by specifying an IP address (Manual registration 17 Registering several projectors to a monitoring group all at once 18 If the projector name or IP address changes after ...registration 20 For projectors that have been registered manually 20 For projectors that have been registered using automatic search 20 Cancelling projector registrations (Delete 20 Monitoring window layout 21 Types of...
Operation Guide - EasyMP Monitor v4.40
Page 12
... Edit menu. • Projectors that have been detected will be displayed. s p.17 q • You can also carry out this operation by specifying an IP address (Manual registration)". If a projector does not appear in Grouping view and select "New" - If Detail list view is displayed, select New - Automatic searching will be displayed...
Operation Guide - EasyMP Monitor v4.40
Page 17
... end the registration operation, click corner of the projector(s) you registered will be displayed in Grouping view or Detail list view. "Projector (manual registration)". Refer to s "Monitoring window layout" p.21 for monitoring 17 B After entering the details, click "Register" to start the ...registration. If Detail list view is displayed, click "OK". Projector (manual registration) from the Edit menu. The following window will be displayed. When the message is displayed, select New - in Grouping view ...
Operation Guide - EasyMP Monitor v4.40
Page 18
... it will be displayed at this cannot be used as the Parent group, monitoring and control operations can be possible to start the registration. Projector (manual registration) from the Edit menu. If using a serial W TCP/IP conversion adapter to connect the projector, the Monitor Password security function cannot be selected. A Parent...
Operation Guide - EasyMP Monitor v4.40
Page 20
... Detail list view and select "Delete". Procedure Right-click the icon for deleting by using the Edit menu. s p.12 For projectors that have been registered manually Procedure A Right-click on the desired icons. • Use drag and drop to be selected for the projector or group that is to select a range...
Installation Guide - ELPMBUNI Universal Mount Assembly
Page 3
... wooden stud must be taken at all times. At least two qualified people should perform the installation procedure. If the mount is commercially available). Installation Manual PROPER INSTALLATION PROCEDURE BY QUALIFIED PERSONNEL AS OUTLINED IN THE INSTALLATIONS INSTRUCTIONS MUST BE ADHERED TO. USE PROPER SAFETY GEAR AND TOOLS FOR THE INSTALLATION...
Installation Guide - ELPMBUNI Universal Mount Assembly
Page 4
... x 12mm Security Head Screws (Qty 4) Portable Drill Pencil Level (Supplied) Stud Finder (Commercially Available) M5 Allen Wrench NOTE: Mounting screws will vary by projector. Installation Manual Page - 5 - Lag Screws (#14 x 2") (Qty 3) M4 x 12 Security Head Screws (Qty 4) M3 x 16mm Phillips Head Screws (Qty 4) Installation Tools Phillips Head Screw Driver Soft Material...
Installation Guide - ELPMBUNI Universal Mount Assembly
Page 5
... Assembly L Projector (Not Supplied) M Tri-Lock Opening Option 1 H B D F Combination I Leg Single Leg D Option 2 M NOTE: See the best configuration for filter and lamp access. Page - 6 - K M J L J L Installation Manual ELPMBUNI A NOTE: The four (2-piece) leg assemblies can be used as shown in Options 1 and 2. The number of legs E may vary depending on the number...
Installation Guide - ELPMBUNI Universal Mount Assembly
Page 6
... in the installation instructions must be adhered to the ceiling installation instruction. NOTE: Review the projectors manufacture's operation manual and refer to . Mounting Points Inverted Projector Blanket, soft cloth etc Figure 1 Flat surface Installation Manual Page - 7 - Carefully invert the projector and place it on the screen. 1. Here you will enhance the quality...
Installation Guide - ELPMBUNI Universal Mount Assembly
Page 7
Next loosen the safety screw knurl knob far enough to allow the two parts to create free play between the bracket tri-lock assembly and the upper section tri-lock assembly points. 5. Separate the upper assembly from the projector mounting bracket by slightly loosening the two tension knurl knobs to be rotated 180° apart and separate. Figure 2 Tri-Lock Opening Rotate 180° To Unlock Tension Knobs Upper Assembly Safety Knob Figure 3 Figure 4 Page - 8 - ELPMBUNI 4. Installation Manual
Installation Guide - ELPMBUNI Universal Mount Assembly
Page 8
... flat washers attached through the leveling barrel. FIGURE 6 Two-Piece Leg FIGURE 7 One-Piece Leg Allen Wrench Mounting Hardware Inverted Projector Leveling Barrels FIGURE A Installation Manual Figure 5 Line up the leveling barrels to the projector (Figure A). Page - 9 - NOTE: If your projector. Using a Phillips screwdriver, loosely secure the screws to the mounting...
Installation Guide - ELPMBUNI Universal Mount Assembly
Page 9
PowerLite S3, S4, 62C, 76C, 82C, Hardware: M4 x 12mm (Qty 3) Page - 10 - PowerLite 830p, 835p Hardware: M4 x 12mm (Qty 4) Installation Manual ELPMBUNI NOTE: If your projector model is not shown, when arranging the leg combination, simply ensure access to filters and lamp housings when aligning brackets. This mount works with all sub-25 pound projectors.
Installation Guide - ELPMBUNI Universal Mount Assembly
Page 10
ELPMBUNI Top View Front View PowerLite 732c, 737c, 740C, 745C, 750c, 755c, 760c, 765c Hardware: M4 x 12mm (Qty 3) Installation Manual Page - 11 -
Installation Guide - ELPMBUNI Universal Mount Assembly
Page 13
... level the mounting bracket next, position the mounting bracket so that it avoids most, if not all, ventilation points (including lamp & filter access doors). 2. Installation Manual CAUTION: Secure but do so will result in damaging the threads in the projector.