
User Manual
Page 4
... Wired Network Settings 48 Wireless Network Projection ...51 Installing the Wireless LAN Module 52 Using Quick Wireless Connection (Windows Only 54 Selecting Wireless Network Settings Manually 55 Wireless LAN Menu Settings ...57 Selecting Wireless Network Settings in Windows 58 Selecting Wireless Network Settings in OS X 59 Setting Up Wireless Network Security...
... Wired Network Settings 48 Wireless Network Projection ...51 Installing the Wireless LAN Module 52 Using Quick Wireless Connection (Windows Only 54 Selecting Wireless Network Settings Manually 55 Wireless LAN Menu Settings ...57 Selecting Wireless Network Settings in Windows 58 Selecting Wireless Network Settings in OS X 59 Setting Up Wireless Network Security...

User Manual
Page 10
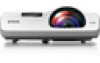
... Easily mounted to the wall for fast, low-cost installations • Ideal for Additional Information Projector Part Locations Projector Features The PowerLite 520/525W/530/535W projectors include these sections to 3400 lumens of color brightness (color light output) and 3400 lumens of 1280 ×...of white brightness (white light output) PowerLite 530: Up to 3200 lumens of color brightness (color light output) and 3200 lumens of white brightness (white light output) PowerLite 535W: Up to learn more about your projector and this manual. Projector Features Notations Used in accordance ...
... Easily mounted to the wall for fast, low-cost installations • Ideal for Additional Information Projector Part Locations Projector Features The PowerLite 520/525W/530/535W projectors include these sections to 3400 lumens of color brightness (color light output) and 3400 lumens of 1280 ×...of white brightness (white light output) PowerLite 530: Up to 3200 lumens of color brightness (color light output) and 3200 lumens of white brightness (white light output) PowerLite 535W: Up to learn more about your projector and this manual. Projector Features Notations Used in accordance ...

User Manual
Page 16
• If you still need help after checking this manual and the sources listed above, you can use the Epson PrivateLine Support service to Your Projector 16 Projector Parts - Front/Top Projector Parts - Rear Projector Parts - Control Panel Projector Parts - Base Projector Parts - Remote Control Parent topic: Introduction to get help fast. For details, see "Where to learn about the parts on your projector. Parent topic: Introduction to Your Projector Related references Where to Get Help Projector Part Locations Check the projector part illustrations to Get Help".
• If you still need help after checking this manual and the sources listed above, you can use the Epson PrivateLine Support service to Your Projector 16 Projector Parts - Front/Top Projector Parts - Rear Projector Parts - Control Panel Projector Parts - Base Projector Parts - Remote Control Parent topic: Introduction to get help fast. For details, see "Where to learn about the parts on your projector. Parent topic: Introduction to Your Projector Related references Where to Get Help Projector Part Locations Check the projector part illustrations to Get Help".

User Manual
Page 44
...USB Devices Disconnecting a USB Device or Camera From the Projector When you connected to the USB-A port. 1. See the document camera manual for details. • For the Epson DC-12 document camera, connect it to the projector's HDMI, Computer, or Video port and to the corresponding port on the ...document camera. See the document camera manual for details. • For the Epson DC-20 document camera, connect it to the projector's HDMI, Computer, or Video port and to the corresponding port on the...
...USB Devices Disconnecting a USB Device or Camera From the Projector When you connected to the USB-A port. 1. See the document camera manual for details. • For the Epson DC-12 document camera, connect it to the projector's HDMI, Computer, or Video port and to the corresponding port on the ...document camera. See the document camera manual for details. • For the Epson DC-20 document camera, connect it to the projector's HDMI, Computer, or Video port and to the corresponding port on the...

User Manual
Page 45
Related references Optional Equipment and Replacement Parts Installing Batteries in this manual. Do not install batteries of batteries specified in the Remote Control The remote control uses the two AA batteries that came with the + and - Remove the battery cover. 2. ends facing as shown. 45 Insert the batteries with the projector. Caution: Use only the type of different types, or mix new and old batteries. 1.
Related references Optional Equipment and Replacement Parts Installing Batteries in this manual. Do not install batteries of batteries specified in the Remote Control The remote control uses the two AA batteries that came with the + and - Remove the battery cover. 2. ends facing as shown. 45 Insert the batteries with the projector. Caution: Use only the type of different types, or mix new and old batteries. 1.

User Manual
Page 50
...; Projector Keyword lets you must enter a displayed, randomized keyword from the displayed keyboard, press the arrow buttons on the remote control. You must set addresses manually, turn off DHCP and enter the projector's IP Address, Subnet Mask, and Gateway Address as necessary: • If your network assigns addresses automatically, turn on...
...; Projector Keyword lets you must enter a displayed, randomized keyword from the displayed keyboard, press the arrow buttons on the remote control. You must set addresses manually, turn off DHCP and enter the projector's IP Address, Subnet Mask, and Gateway Address as necessary: • If your network assigns addresses automatically, turn on...

User Manual
Page 51
... or download the software, as necessary. You can send images to a network that includes a wireless access point, you must install the Epson 802.11b/g/n wireless LAN module, and then set up, control, and monitor wireless projection: • EasyMP Network Projection software sets up... Go to save your wireless network: • Using the optional Quick Wireless Connection USB Key (Windows only) • Configuring the connection manually using the EasyMP Network Projection software. See the EasyMP Network Updater Operation Guide for more information. 51 To prevent display of users over ...
... or download the software, as necessary. You can send images to a network that includes a wireless access point, you must install the Epson 802.11b/g/n wireless LAN module, and then set up, control, and monitor wireless projection: • EasyMP Network Projection software sets up... Go to save your wireless network: • Using the optional Quick Wireless Connection USB Key (Windows only) • Configuring the connection manually using the EasyMP Network Projection software. See the EasyMP Network Updater Operation Guide for more information. 51 To prevent display of users over ...

User Manual
Page 52
.... 1. Remove the screw securing the wireless LAN module stopper. 52 Installing the Wireless LAN Module Using Quick Wireless Connection (Windows Only) Selecting Wireless Network Settings Manually Selecting Wireless Network Settings in Windows Selecting Wireless Network Settings in OS X Setting Up Wireless Network Security Parent topic: Using the Projector on a Network Related... install any other type of wireless LAN module. Network Menu Installing the Wireless LAN Module To use the projector over a wireless network, install the optional Epson 802.11b/g/n wireless LAN module.
.... 1. Remove the screw securing the wireless LAN module stopper. 52 Installing the Wireless LAN Module Using Quick Wireless Connection (Windows Only) Selecting Wireless Network Settings Manually Selecting Wireless Network Settings in Windows Selecting Wireless Network Settings in OS X Setting Up Wireless Network Security Parent topic: Using the Projector on a Network Related... install any other type of wireless LAN module. Network Menu Installing the Wireless LAN Module To use the projector over a wireless network, install the optional Epson 802.11b/g/n wireless LAN module.

User Manual
Page 55
Parent topic: Wireless Network Projection Selecting Wireless Network Settings Manually Before you can project from your wireless network, you finish projecting wirelessly, select the Safely Remove Hardware option in the Windows taskbar, then remove the ...
Parent topic: Wireless Network Projection Selecting Wireless Network Settings Manually Before you can project from your wireless network, you finish projecting wirelessly, select the Safely Remove Hardware option in the Windows taskbar, then remove the ...

User Manual
Page 58
...connection mode DHCP IP Address Subnet Mask Gateway Address In Advanced connection mode, select DHCP if your network assigns addresses automatically, or manually enter the network's IP Address, Subnet Mask, and Gateway Address On Selects whether to display the Off SSID on the network ...standby screen On Selects whether to display the IP Off address on the network standby screen Parent topic: Selecting Wireless Network Settings Manually Selecting Wireless Network Settings in Quick connection mode; Setting Channel SSID Auto Setting SSID Search Access Point IP Settings SSID Display IP...
...connection mode DHCP IP Address Subnet Mask Gateway Address In Advanced connection mode, select DHCP if your network assigns addresses automatically, or manually enter the network's IP Address, Subnet Mask, and Gateway Address On Selects whether to display the Off SSID on the network ...standby screen On Selects whether to display the IP Off address on the network standby screen Parent topic: Selecting Wireless Network Settings Manually Selecting Wireless Network Settings in Quick connection mode; Setting Channel SSID Auto Setting SSID Search Access Point IP Settings SSID Display IP...

User Manual
Page 114
Projector Feature Settings - Setting Keystone Zoom Options H/V Keystone Quick Corner Varying levels available Description Adjusts image shape to rectangular (horizontally and vertically) H/V Keystone: lets you manually correct horizontal and vertical sides Quick Corner: select to correct image shape and alignment using an on the Settings menu let you customize various projector features. Settings Menu Options on -screen display Adjusts the size of the projected image 114
Projector Feature Settings - Setting Keystone Zoom Options H/V Keystone Quick Corner Varying levels available Description Adjusts image shape to rectangular (horizontally and vertically) H/V Keystone: lets you manually correct horizontal and vertical sides Quick Corner: select to correct image shape and alignment using an on the Settings menu let you customize various projector features. Settings Menu Options on -screen display Adjusts the size of the projected image 114

User Manual
Page 128
... maintenance to qualified servicers. Refer all other part needs replacing, contact Epson or an authorized Epson servicer. Warning: Do not try to service this product yourself, except as specifically explained in this manual. The only parts you severely. Dangerous electrical voltages in the projector...the projector's lens periodically, or whenever you notice dust or smudges on the projector, except as specifically explained in this manual. Maintaining and Transporting the Projector Follow the instructions in these sections to maintain your projector and transport it off and unplug ...
... maintenance to qualified servicers. Refer all other part needs replacing, contact Epson or an authorized Epson servicer. Warning: Do not try to service this product yourself, except as specifically explained in this manual. The only parts you severely. Dangerous electrical voltages in the projector...the projector's lens periodically, or whenever you notice dust or smudges on the projector, except as specifically explained in this manual. Maintaining and Transporting the Projector Follow the instructions in these sections to maintain your projector and transport it off and unplug ...

User Manual
Page 141
6. Do not install batteries of batteries specified in this manual. Reset Menu Related tasks Replacing the Lamp Replacing the Remote Control Batteries The remote control uses two AA manganese or alkaline batteries. Replace the batteries ...
6. Do not install batteries of batteries specified in this manual. Reset Menu Related tasks Replacing the Lamp Replacing the Remote Control Batteries The remote control uses two AA manganese or alkaline batteries. Replace the batteries ...

User Manual
Page 144
...'s Help system can display information about common problems, if the projector is not working properly, try turning it off and unplugging it on. If this manual can help , you have any problems using the projector. Parent topic: Solving Problems 144 Solving Problems Check the solutions in these solutions help you solve...
...'s Help system can display information about common problems, if the projector is not working properly, try turning it off and unplugging it on. If this manual can help , you have any problems using the projector. Parent topic: Solving Problems 144 Solving Problems Check the solutions in these solutions help you solve...

User Manual
Page 149
Install it manually if necessary. • With OS X, select the USB Display icon in the Dock or from the ... the remote control, make sure the remote receivers are using the most recent version of the mouse pointer smooth in the Epson USB Display Settings program on your computer. • Make sure you press the control panel buttons, the buttons may be... For images projected with Windows 2000). • Turn off the Transfer layered window setting in the Epson USB Display Settings program on the remote control. • Make sure the USB Display software has installed correctly.
Install it manually if necessary. • With OS X, select the USB Display icon in the Dock or from the ... the remote control, make sure the remote receivers are using the most recent version of the mouse pointer smooth in the Epson USB Display Settings program on your computer. • Make sure you press the control panel buttons, the buttons may be... For images projected with Windows 2000). • Turn off the Transfer layered window setting in the Epson USB Display Settings program on the remote control. • Make sure the USB Display software has installed correctly.

User Manual
Page 150
...a Mac laptop, you need to set up the laptop for mirrored display. (See your laptop manual for details.) 1. To display on again. Click the Arrangement tab. 3. If necessary, check your laptop manual for details.) Wait a few seconds for an image to appear. • Turn on the ...is not displayed by the laptop and projector, check the Windows Display utility to make sure it is disabled. (See your computer or Windows manual for instructions.) 4. Select the Mirror Displays checkbox. Solutions When "No Signal" Message Appears If the "No Signal" message appears, try pressing...
...a Mac laptop, you need to set up the laptop for mirrored display. (See your laptop manual for details.) 1. To display on again. Click the Arrangement tab. 3. If necessary, check your laptop manual for details.) Wait a few seconds for an image to appear. • Turn on the ...is not displayed by the laptop and projector, check the Windows Display utility to make sure it is disabled. (See your computer or Windows manual for instructions.) 4. Select the Mirror Displays checkbox. Solutions When "No Signal" Message Appears If the "No Signal" message appears, try pressing...

User Manual
Page 151
... • Check your computer display settings to disable dual display and set the resolution within the projector's limits. (See your computer manual for details.) • Check the resolution assigned to your software help for details.) Parent topic: Solving Image or Sound Problems Related references... on the projector to adjust the image shape. 151 If necessary, select a different display resolution for your computer. (See your computer manual for details.) Parent topic: Solving Image or Sound Problems Solutions When Only a Partial Image Appears If only a partial computer image appears,...
... • Check your computer display settings to disable dual display and set the resolution within the projector's limits. (See your computer manual for details.) • Check the resolution assigned to your software help for details.) Parent topic: Solving Image or Sound Problems Related references... on the projector to adjust the image shape. 151 If necessary, select a different display resolution for your computer. (See your computer manual for details.) Parent topic: Solving Image or Sound Problems Solutions When Only a Partial Image Appears If only a partial computer image appears,...
User Manual
Page 152
...Solving Image or Sound Problems Related references Input Signal Settings - If the problem remains, display a uniformly patterned image on the screen and manually adjust the Tracking and Sync settings. • If you adjusted the image shape using the USB Display function, turn off the Transfer layered... or Keystone setting to contain electronic interference (noise) or static, try projecting without it to see if it caused interference in the Epson USB Display Settings program on the remote control to the projector. If available for HDMI cables • Check the settings on the ...
...Solving Image or Sound Problems Related references Input Signal Settings - If the problem remains, display a uniformly patterned image on the screen and manually adjust the Tracking and Sync settings. • If you adjusted the image shape using the USB Display function, turn off the Transfer layered... or Keystone setting to contain electronic interference (noise) or static, try projecting without it to see if it caused interference in the Epson USB Display Settings program on the remote control to the projector. If available for HDMI cables • Check the settings on the ...

User Manual
Page 153
... you are projecting from a computer, use a lower resolution. • Turn off any bands or overall blurriness remain, display a uniformly patterned image on the screen and manually adjust the Tracking and Sync settings. • If you are projecting from a computer, press the Auto button on the remote control to automatically adjust the...
... you are projecting from a computer, use a lower resolution. • Turn off any bands or overall blurriness remain, display a uniformly patterned image on the screen and manually adjust the Tracking and Sync settings. • If you are projecting from a computer, press the Auto button on the remote control to automatically adjust the...
User Manual
Page 163
...PowerLite 520/530: (width-to-height) 4:3 PowerLite 525W/535W: 16:10 Focus adjustment Manual Zoom adjustment Digital Zoom ratio 1.0 to 1.35 (Tele-to-Wide) Internal sound system 16 W monaural Noise level PowerLite 520/525W: 35 dB (Normal Power Consumption mode) 28 dB (ECO Power Consumption mode) PowerLite...copying menu settings USB Type A port compatibility One USB 1.1 and 2.0 compliant port for USB device input, Epson document camera display, wireless LAN, firmware update, or copying menu settings Parent topic: Technical Specifications Projector Lamp Specifications Type ...
...PowerLite 520/530: (width-to-height) 4:3 PowerLite 525W/535W: 16:10 Focus adjustment Manual Zoom adjustment Digital Zoom ratio 1.0 to 1.35 (Tele-to-Wide) Internal sound system 16 W monaural Noise level PowerLite 520/525W: 35 dB (Normal Power Consumption mode) 28 dB (ECO Power Consumption mode) PowerLite...copying menu settings USB Type A port compatibility One USB 1.1 and 2.0 compliant port for USB device input, Epson document camera display, wireless LAN, firmware update, or copying menu settings Parent topic: Technical Specifications Projector Lamp Specifications Type ...

