User Manual
Page 24
... up your projector in the following ways: Front 24 You can also install the projector in a ceiling mount if you select a projector location: • Place the projector on a sturdy, level surface or install it using a compatible mount. • Leave plenty of space around and under the projector for use it in a fixed location...
... up your projector in the following ways: Front 24 You can also install the projector in a ceiling mount if you select a projector location: • Place the projector on a sturdy, level surface or install it using a compatible mount. • Leave plenty of space around and under the projector for use it in a fixed location...
User Manual
Page 76
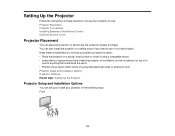
Turn on the remote control for five seconds. Hold down from a ceiling or wall mount. • Rear flips the image horizontally to project from behind a translucent screen. The image disappears briefly and reappears flipped top-to -bottom. 1. Changing the Projection ... you may need to change the projection mode to flip the image over top-to-bottom and horizontally to project from the ceiling and behind a translucent screen. • Rear/Ceiling flips the image over top-to -bottom. 76 2 Video and HDMI sources 3 USB port sources (computer display and external devices) 4 Network source...
Turn on the remote control for five seconds. Hold down from a ceiling or wall mount. • Rear flips the image horizontally to project from behind a translucent screen. The image disappears briefly and reappears flipped top-to -bottom. 1. Changing the Projection ... you may need to change the projection mode to flip the image over top-to-bottom and horizontally to project from the ceiling and behind a translucent screen. • Rear/Ceiling flips the image over top-to -bottom. 76 2 Video and HDMI sources 3 USB port sources (computer display and external devices) 4 Network source...
User Manual
Page 120
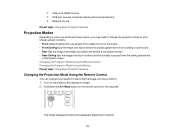
Turn off the projector and unplug the power cord. 2. Carefully open the air filter cover. 120 Note: Your product may look different from the illustrations in the following situations: • After cleaning the air filter, you see a message telling you to clean or replace it • The air filter is torn or damaged You can replace the air filter while the projector is mounted to the ceiling, if necessary. Replacing the Air Filter You need to replace the air filter in this guide, but the instructions are the same. 1. The illustrations here show the projector placed on a table.
Turn off the projector and unplug the power cord. 2. Carefully open the air filter cover. 120 Note: Your product may look different from the illustrations in the following situations: • After cleaning the air filter, you see a message telling you to clean or replace it • The air filter is torn or damaged You can replace the air filter while the projector is mounted to the ceiling, if necessary. Replacing the Air Filter You need to replace the air filter in this guide, but the instructions are the same. 1. The illustrations here show the projector placed on a table.
User Manual
Page 122
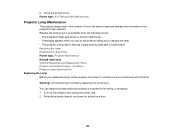
...topic: Projector Maintenance Related references Optional Equipment and Replacement Parts Projector Information Display - You can replace the lamp while the projector is mounted to replace the lamp • The projector's lamp light is flashing orange and its power light is used and displays this ... the projector's menu system. Allow the projector lamp to avoid injury. Info Menu Projector Lamp Specifications Replacing the Lamp Before you to the ceiling, if necessary. 1. Turn off the projector and unplug the power cord. 2. Replace the lamp as soon as possible when the following ...
...topic: Projector Maintenance Related references Optional Equipment and Replacement Parts Projector Information Display - You can replace the lamp while the projector is mounted to replace the lamp • The projector's lamp light is flashing orange and its power light is used and displays this ... the projector's menu system. Allow the projector lamp to avoid injury. Info Menu Projector Lamp Specifications Replacing the Lamp Before you to the ceiling, if necessary. 1. Turn off the projector and unplug the power cord. 2. Replace the lamp as soon as possible when the following ...
User Manual
Page 148
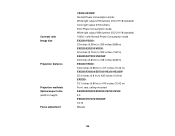
... m) to 318 inches (8.08 m) EX3220/VS230: 34.6 inches (0.88 m) to 411 inches (10.44 m) EX5220/EX6220/EX7220/VS330/VS335W: 35.4 inches (0.9 m) to 425 inches (10.8 m) EX5230: 33.1 inches (0.84 m) to 410 inches (10.42 m) Front, rear, ceiling-mounted EX3220/EX5220/EX5230/VS230/VS330: 4:3 EX6220/EX7220/VS335W: 16:10 Manual 148
... m) to 318 inches (8.08 m) EX3220/VS230: 34.6 inches (0.88 m) to 411 inches (10.44 m) EX5220/EX6220/EX7220/VS330/VS335W: 35.4 inches (0.9 m) to 425 inches (10.8 m) EX5230: 33.1 inches (0.84 m) to 410 inches (10.42 m) Front, rear, ceiling-mounted EX3220/EX5220/EX5230/VS230/VS330: 4:3 EX6220/EX7220/VS335W: 16:10 Manual 148
User Manual
Page 158
...projector from the wall outlet before cleaning. Do not operate the projector on a sofa, rug, or other soft surface, or set it on its ceiling mount. Use of a different power source may cause the projector case to crack and the projector to fall from loosening and do not use with a...indicated on the projector. Avoid standing in front of the projector so the bright light does not shine into the lens when the projector is mounted on a ceiling or wall, it . Important Safety Instructions Follow these precautions could result in fire or electric shock. • Do not place the projector...
...projector from the wall outlet before cleaning. Do not operate the projector on a sofa, rug, or other soft surface, or set it on its ceiling mount. Use of a different power source may cause the projector case to crack and the projector to fall from loosening and do not use with a...indicated on the projector. Avoid standing in front of the projector so the bright light does not shine into the lens when the projector is mounted on a ceiling or wall, it . Important Safety Instructions Follow these precautions could result in fire or electric shock. • Do not place the projector...


