
Users Guide
Page 3
Contents ES-400/ES-500W User's Guide ...7 Scanner Basics...8 Scanner Parts Locations ...8 Scanner Parts...8 Scanner Buttons and Lights...11 User Replaceable Epson Scanner Parts and Accessories 14 Changing the Power Off and Sleep Timer Settings 15 Loading Originals...17 Loading Originals in the Input Tray...17 Loading ...-Fi Connection 48 Wi-Fi Protected Setup (WPS)...48 Using WPS to Connect to a Network 49 Using WPS PIN Mode to Connect to a Network 49 Epson DocumentScan App for iOS/Android 50 Using the Network Interface Unit...50 Network Interface Unit Control Panel 51 3
Contents ES-400/ES-500W User's Guide ...7 Scanner Basics...8 Scanner Parts Locations ...8 Scanner Parts...8 Scanner Buttons and Lights...11 User Replaceable Epson Scanner Parts and Accessories 14 Changing the Power Off and Sleep Timer Settings 15 Loading Originals...17 Loading Originals in the Input Tray...17 Loading ...-Fi Connection 48 Wi-Fi Protected Setup (WPS)...48 Using WPS to Connect to a Network 49 Using WPS PIN Mode to Connect to a Network 49 Epson DocumentScan App for iOS/Android 50 Using the Network Interface Unit...50 Network Interface Unit Control Panel 51 3
Users Guide
Page 4
...52 Restoring Default Network Settings...52 Scanning ...54 Starting a Scan...54 Starting a Scan from a Scanner Button 54 Assigning Start Button Settings or Scan Jobs 55 Starting a Scan Using the Epson Scan 2 Icon 57 Starting a Scan from the ADF with Document Capture Pro and Document Capture 61 ...Scanning in Epson Scan 2 ...63 Additional Scanning Settings - Windows 76 Convert Scanned Documents to Editable Text (...
...52 Restoring Default Network Settings...52 Scanning ...54 Starting a Scan...54 Starting a Scan from a Scanner Button 54 Assigning Start Button Settings or Scan Jobs 55 Starting a Scan Using the Epson Scan 2 Icon 57 Starting a Scan from the ADF with Document Capture Pro and Document Capture 61 ...Scanning in Epson Scan 2 ...63 Additional Scanning Settings - Windows 76 Convert Scanned Documents to Editable Text (...

Users Guide
Page 5
......115 Solving Scanning Problems ...118 Scanner Does Not Turn On or Turns Off Unexpectedly 118 Scanner Button Does Not Work as Expected 118 Scanning Software Does Not Operate Correctly 119 Cannot Start Epson Scan 2 ...120 Original Feeds Incorrectly in Scanner 120 Original Jams in Scanner...121 Scanning is Slow... Ripple Patterns Appear in an Image 128 Spots or Lines Appear in All Scanned Images 128 Scanned Image is Cropped ...130 Resetting the Epson Scan 2 Settings 130 Solving Flatbed Scanner Dock Problems 131 Scanned Image Edges are Cropped 131 Line of Dots Appears in All Scanned Images...
......115 Solving Scanning Problems ...118 Scanner Does Not Turn On or Turns Off Unexpectedly 118 Scanner Button Does Not Work as Expected 118 Scanning Software Does Not Operate Correctly 119 Cannot Start Epson Scan 2 ...120 Original Feeds Incorrectly in Scanner 120 Original Jams in Scanner...121 Scanning is Slow... Ripple Patterns Appear in an Image 128 Spots or Lines Appear in All Scanned Images 128 Scanned Image is Cropped ...130 Resetting the Epson Scan 2 Settings 130 Solving Flatbed Scanner Dock Problems 131 Scanned Image Edges are Cropped 131 Line of Dots Appears in All Scanned Images...

Users Guide
Page 8
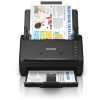
Scanner Parts Scanner Buttons and Lights User Replaceable Epson Scanner Parts and Accessories Parent topic: Scanner Basics Scanner Parts 8 Scanner Basics See these sections to learn about the basic features of your scanner. Scanner Parts Locations Changing the Power Off and Sleep Timer Settings Scanner Parts Locations See these sections to identify the parts on your scanner.
Scanner Parts Scanner Buttons and Lights User Replaceable Epson Scanner Parts and Accessories Parent topic: Scanner Basics Scanner Parts 8 Scanner Basics See these sections to learn about the basic features of your scanner. Scanner Parts Locations Changing the Power Off and Sleep Timer Settings Scanner Parts Locations See these sections to identify the parts on your scanner.

Users Guide
Page 11
2 Power cord 3 USB cable Parent topic: Scanner Parts Locations Scanner Buttons and Lights Buttons ES-400 1 power button 2 double feed detection skip button 3 slow mode button 4 stop button 5 start button 11
2 Power cord 3 USB cable Parent topic: Scanner Parts Locations Scanner Buttons and Lights Buttons ES-400 1 power button 2 double feed detection skip button 3 slow mode button 4 stop button 5 start button 11

Users Guide
Page 12
ES-500W 1 power button 2 Wi-Fi connect button 3 Wi-Fi on/off button 4 double feed detection skip button 5 slow mode button 6 stop button 7 start button 8 NFC tag 12
ES-500W 1 power button 2 Wi-Fi connect button 3 Wi-Fi on/off button 4 double feed detection skip button 5 slow mode button 6 stop button 7 start button 8 NFC tag 12

Users Guide
Page 23
... down the feeding speed; This may wrinkle or damage the original. Note: If scanning thin or wrinkled paper causes paper jams, press the slow mode button once before scanning to normal speed. Caution: Do not load photos, or valuable original documents or artwork, directly into the input tray. Open the input...
... down the feeding speed; This may wrinkle or damage the original. Note: If scanning thin or wrinkled paper causes paper jams, press the slow mode button once before scanning to normal speed. Caution: Do not load photos, or valuable original documents or artwork, directly into the input tray. Open the input...

Users Guide
Page 31
4. Press the double feed detection skip button to disable the Detect Double Feed feature, and scan again. 31 Slide the edge guides against the edges of the card. 5. Note: If you do not disable the Detect Double Feed setting and a double feed error occurs, remove the plastic or laminated card from the input tray and then reload it. Turn off the Detect Double Feed setting on the Main Settings tab in Epson Scan 2 when scanning the cards.
4. Press the double feed detection skip button to disable the Detect Double Feed feature, and scan again. 31 Slide the edge guides against the edges of the card. 5. Note: If you do not disable the Detect Double Feed setting and a double feed error occurs, remove the plastic or laminated card from the input tray and then reload it. Turn off the Detect Double Feed setting on the Main Settings tab in Epson Scan 2 when scanning the cards.

Users Guide
Page 48
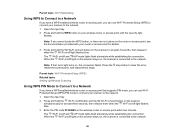
... blue. Parent topic: Direct Wi-Fi Mode Setup Using WPS to a WPS-enabled computer or device. 1. The scanner enters standby mode for WPS connection for a button labeled WPS on . Parent topic: Direct Wi-Fi Mode Setup Wi-Fi Protected Setup (WPS) If your network uses a WPS-enabled wireless router or access... on the scanner stays on, the connection is automatically connected to other Wi-Fi networks, so you must reconnect to a Network 48 Press the WPS button on the scanner's control panel. 2. Enter the password shown on the label on the back of the scanner. 1. Press and hold the Wi-Fi ...
... blue. Parent topic: Direct Wi-Fi Mode Setup Using WPS to a WPS-enabled computer or device. 1. The scanner enters standby mode for WPS connection for a button labeled WPS on . Parent topic: Direct Wi-Fi Mode Setup Wi-Fi Protected Setup (WPS) If your network uses a WPS-enabled wireless router or access... on the scanner stays on, the connection is automatically connected to other Wi-Fi networks, so you must reconnect to a Network 48 Press the WPS button on the scanner's control panel. 2. Enter the password shown on the label on the back of the scanner. 1. Press and hold the Wi-Fi ...
Users Guide
Page 49
... PIN code 01234565 on , the connection failed. Press and hold the Wi-Fi on/off button and the Wi-Fi connect button on /off and AP mode lights flash alternately while establishing the connection. Press the stop button to the network. When the Wi-Fi on /off light flashes blue. 3. Press and ...hold the WPS button on /off light flashes blue. Note: If the ! Note: If you cannot locate the WPS button, or there are no buttons on the router or access point, see the documentation provided with your wireless router or access...
... PIN code 01234565 on , the connection failed. Press and hold the Wi-Fi on/off button and the Wi-Fi connect button on /off and AP mode lights flash alternately while establishing the connection. Press the stop button to the network. When the Wi-Fi on /off light flashes blue. 3. Press and ...hold the WPS button on /off light flashes blue. Note: If the ! Note: If you cannot locate the WPS button, or there are no buttons on the router or access point, see the documentation provided with your wireless router or access...
Users Guide
Page 50
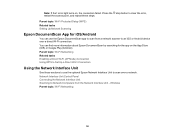
...- error light turns on the App Store (iOS) or Google Play (Android). Press the stop button to clear the error, restart the access point, and repeat these sections to use the Epson DocumentScan app to scan over a direct Wi-Fi connection. Network Interface Unit Control Panel Connecting the ...WPS to an iOS or Android device over a network. Parent topic: Wi-Fi Protected Setup (WPS) Related tasks Setting Up Network Scanning Epson DocumentScan App for iOS/Android You can find more information about Epson DocumentScan by searching for the app on , the connection failed. Note: If the !
...- error light turns on the App Store (iOS) or Google Play (Android). Press the stop button to clear the error, restart the access point, and repeat these sections to use the Epson DocumentScan app to scan over a direct Wi-Fi connection. Network Interface Unit Control Panel Connecting the ...WPS to an iOS or Android device over a network. Parent topic: Wi-Fi Protected Setup (WPS) Related tasks Setting Up Network Scanning Epson DocumentScan App for iOS/Android You can find more information about Epson DocumentScan by searching for the app on , the connection failed. Note: If the !

Users Guide
Page 51
... screen) 5 Stop button (cancels scanning) 6 OK button and arrows (use the arrows to highlight an option and the OK button to select it) 7 start button (starts scanning when networking is enabled) Parent topic: Using the Network Interface Unit Connecting the Network Interface Unit See the documentation that came with the optional Epson Network Interface Unit...
... screen) 5 Stop button (cancels scanning) 6 OK button and arrows (use the arrows to highlight an option and the OK button to select it) 7 start button (starts scanning when networking is enabled) Parent topic: Using the Network Interface Unit Connecting the Network Interface Unit See the documentation that came with the optional Epson Network Interface Unit...
Users Guide
Page 52
... the Network Interface Unit. 5. Select a scan job and press the OK button on the Network Interface Unit. 2. Your original is scanned and the file is sent to the computer you change your network connection (ES-500W). Scanning to Network Computers from the Network Interface Unit (Windows). You ...network name) and password, and any network settings selected for at the prompt. 4. Press and hold the Wi-Fi on the scanner for Epson DocumentScan. Parent topic: Wi-Fi Networking Restoring Default Network Settings If you need to solve a problem with your network connection, you want to...
... the Network Interface Unit. 5. Select a scan job and press the OK button on the Network Interface Unit. 2. Your original is scanned and the file is sent to the computer you change your network connection (ES-500W). Scanning to Network Computers from the Network Interface Unit (Windows). You ...network name) and password, and any network settings selected for at the prompt. 4. Press and hold the Wi-Fi on the scanner for Epson DocumentScan. Parent topic: Wi-Fi Networking Restoring Default Network Settings If you need to solve a problem with your network connection, you want to...

Users Guide
Page 53
Then release the buttons. 3. Parent topic: Wi-Fi Networking 53 The default network settings are restored. Turn off . Press and hold the Wi-Fi on/off button and the power button until the Wi-Fi on . Wait until the Wi-Fi on/off and AP mode lights turn on /off and AP mode lights flash alternately and then turn off your scanner. 2. 1.
Then release the buttons. 3. Parent topic: Wi-Fi Networking 53 The default network settings are restored. Turn off . Press and hold the Wi-Fi on/off button and the power button until the Wi-Fi on . Wait until the Wi-Fi on/off and AP mode lights turn on /off and AP mode lights flash alternately and then turn off your scanner. 2. 1.
Users Guide
Page 54
...product for scanning, start scanning using the start button. Starting a Scan from a Scanner Button Starting a Scan Using the Epson Scan 2 Icon Starting a Scan from a Scanning Program Parent topic: Scanning Starting a Scan from the start button on your scanner. Launch Epson Scan 2 before scanning from a Scanner Button You can scan original documents or photos and... from Your Android Device Scanning Special Projects Starting a Scan After placing your original documents or photos on your scanner over a wireless network (ES-500W). Scanning You can scan using one of these methods.
...product for scanning, start scanning using the start button. Starting a Scan from a Scanner Button Starting a Scan Using the Epson Scan 2 Icon Starting a Scan from a Scanning Program Parent topic: Scanning Starting a Scan from the start button on your scanner. Launch Epson Scan 2 before scanning from a Scanner Button You can scan original documents or photos and... from Your Android Device Scanning Special Projects Starting a Scan After placing your original documents or photos on your scanner over a wireless network (ES-500W). Scanning You can scan using one of these methods.
Users Guide
Page 55
... settings as necessary, and click OK. If you scan using Document Capture Pro (Windows) or Document Capture (OS X). Launch Epson Scan 2 before scanning from the start button on your scanner is connected to one of the following: • Windows: Click Event Settings. • OS X: Click ...55 Start Document Capture Pro or Document Capture on a computer connected to the wirelessly connected computer (ES-500W). Assigning Start Button Settings or Scan Jobs Parent topic: Starting a Scan Assigning Start Button Settings or Scan Jobs You can view or change the scan settings using the start...
... settings as necessary, and click OK. If you scan using Document Capture Pro (Windows) or Document Capture (OS X). Launch Epson Scan 2 before scanning from the start button on your scanner is connected to one of the following: • Windows: Click Event Settings. • OS X: Click ...55 Start Document Capture Pro or Document Capture on a computer connected to the wirelessly connected computer (ES-500W). Assigning Start Button Settings or Scan Jobs Parent topic: Starting a Scan Assigning Start Button Settings or Scan Jobs You can view or change the scan settings using the start...

Users Guide
Page 56
Do one of the following: • Windows: Select the job that you want to assign to 30 can only be selected when using the optional Network Interface Unit. 56 Note: Jobs 2 to the start button from the 1 drop-down list. 5.
Do one of the following: • Windows: Select the job that you want to assign to 30 can only be selected when using the optional Network Interface Unit. 56 Note: Jobs 2 to the start button from the 1 drop-down list. 5.

Users Guide
Page 57
Click OK. Parent topic: Starting a Scan from a Scanner Button Starting a Scan Using the Epson Scan 2 Icon You can start button. 6. • OS X: Select the job that you want to assign to the start the Epson Scan 2 program to select scan settings, scan, and save the scanned image to a file. • Windows 10: Click and select...
Click OK. Parent topic: Starting a Scan from a Scanner Button Starting a Scan Using the Epson Scan 2 Icon You can start button. 6. • OS X: Select the job that you want to assign to the start the Epson Scan 2 program to select scan settings, scan, and save the scanned image to a file. • Windows 10: Click and select...

Users Guide
Page 62
... Capture for details. 4. Click the Scan icon. Note: See the Help information in the Document Capture Pro or Document Capture window, click the Start Job button, and skip the rest of the following: • Windows: Click Detailed Settings. Select any displayed scan settings you want to select detailed scan settings, do...
... Capture for details. 4. Click the Scan icon. Note: See the Help information in the Document Capture Pro or Document Capture window, click the Start Job button, and skip the rest of the following: • Windows: Click Detailed Settings. Select any displayed scan settings you want to select detailed scan settings, do...

Users Guide
Page 63
...Scan. Start Epson Scan 2. 63 Check the scanned images and edit them to scan additional originals and add them as necessary. 1. Open the Scan menu at the top of your scanned files. (If you would like to the current captured images, click the Add Page button, select ... change the scanned file settings as necessary. 8. Parent topic: Scanning Related tasks Loading Originals in the Input Tray Scanning in Epson Scan 2 Scanning in Epson Scan 2 Epson Scan 2 automatically scans your document and saves the scanned file in PDF format in your operating system's Documents or My Documents...
...Scan. Start Epson Scan 2. 63 Check the scanned images and edit them to scan additional originals and add them as necessary. 1. Open the Scan menu at the top of your scanned files. (If you would like to the current captured images, click the Add Page button, select ... change the scanned file settings as necessary. 8. Parent topic: Scanning Related tasks Loading Originals in the Input Tray Scanning in Epson Scan 2 Scanning in Epson Scan 2 Epson Scan 2 automatically scans your document and saves the scanned file in PDF format in your operating system's Documents or My Documents...