Product Information Guide
Page 1
...3/3/92 EPL-8000-1 Libels . Transparencies s Colored paper . Plain paper . Paper we&he Plain paper: 60 to 90 g/mZ, 16 to 24 lb Card stock: 90 to 157 g/m', 24 to ensure the quality of data) F&f prinll Less than I8 seconds with font cards or cartridges Download ...fonts Paper and paper delivery Paper Specifications Tms: . l HP LaserJet series Bf emulation . Cardstock Epson does not recommend or guarantee any particular brand of paper. Special papers: . Envelopes .
...3/3/92 EPL-8000-1 Libels . Transparencies s Colored paper . Plain paper . Paper we&he Plain paper: 60 to 90 g/mZ, 16 to 24 lb Card stock: 90 to 157 g/m', 24 to ensure the quality of data) F&f prinll Less than I8 seconds with font cards or cartridges Download ...fonts Paper and paper delivery Paper Specifications Tms: . l HP LaserJet series Bf emulation . Cardstock Epson does not recommend or guarantee any particular brand of paper. Special papers: . Envelopes .

Product Information Guide
Page 2
... unit installed swud envelopes Paperl jece Face-up or face-down Paper ejuf capity OS g/m~ or 20 lb. If you can print with an imaging cartridge varies depending on the back of the printer for the voltage of printing. Operation: 10 to 35 'C (50 to 95 'F) Storage: 0 to ...: Letter- or A4-site paper, continuous printing, and 5% print ratio. Ozone filter H9laa7): Needs to 85 % RH Altitude: 2500 meters (8200 feet) maximum EPL-8000-2 3/3/92 Laser Printers Mechanical Dimensions and weight: Height: Width: Depth: Weight: 266 mm (10.5 inches) 477 mm (18.8 inches) 383 mm (15.1 ...
... unit installed swud envelopes Paperl jece Face-up or face-down Paper ejuf capity OS g/m~ or 20 lb. If you can print with an imaging cartridge varies depending on the back of the printer for the voltage of printing. Operation: 10 to 35 'C (50 to 95 'F) Storage: 0 to ...: Letter- or A4-site paper, continuous printing, and 5% print ratio. Ozone filter H9laa7): Needs to 85 % RH Altitude: 2500 meters (8200 feet) maximum EPL-8000-2 3/3/92 Laser Printers Mechanical Dimensions and weight: Height: Width: Depth: Weight: 266 mm (10.5 inches) 477 mm (18.8 inches) 383 mm (15.1 ...

Product Information Guide
Page 9
... standard cassette or the optional lower paper cassette (if installed). This message alternates with the printer off line). To correct the error, press CONTINUE. EPL-8000 [El -,I y : I !.? To correct the error, press CONTINUE. Press /7J to return to your printer. Press CONTINUE to load paper into...printer is crating a font. 'GRIT+! If the red CONllNUB light still flashes, press CONTINUE IS1 The printer is ready to print. The imaging cartridge is not installed. (El I The printer is being fed into the selected paper cassette. [El F;pEF, CtiJT QiJTI:t :A::A:~: There is no ...
... standard cassette or the optional lower paper cassette (if installed). This message alternates with the printer off line). To correct the error, press CONTINUE. EPL-8000 [El -,I y : I !.? To correct the error, press CONTINUE. Press /7J to return to your printer. Press CONTINUE to load paper into...printer is crating a font. 'GRIT+! If the red CONllNUB light still flashes, press CONTINUE IS1 The printer is ready to print. The imaging cartridge is not installed. (El I The printer is being fed into the selected paper cassette. [El F;pEF, CtiJT QiJTI:t :A::A:~: There is no ...

Product Information Guide
Page 10
...off the printer, unplug the power cord, and contact a quaBfies service person. You must replace the imaging cartridge. After you comet the paper mismatch, pters CONTINUE. EPL-8000-10 3/3/92 Laser Printers EEX;ECT TERY The optional lower paper camette unit is not installed and the lNPUT ...Buffer. The display indicates the expected paper size. Your application program may appear when you save them with the SdecType LOAD MACRO option. EPL-8000 [El =.r,,.lcrpT :,lJE.,; .--*1_..- You may have removed an option card while the RED light was still lit or while the printer...
...off the printer, unplug the power cord, and contact a quaBfies service person. You must replace the imaging cartridge. After you comet the paper mismatch, pters CONTINUE. EPL-8000-10 3/3/92 Laser Printers EEX;ECT TERY The optional lower paper camette unit is not installed and the lNPUT ...Buffer. The display indicates the expected paper size. Your application program may appear when you save them with the SdecType LOAD MACRO option. EPL-8000 [El =.r,,.lcrpT :,lJE.,; .--*1_..- You may have removed an option card while the RED light was still lit or while the printer...
Product Support Bulletin(s)
Page 4
... product codes for the options and supplies for the EPL8000? Q. RS-232C or RS-422 Serial The EPL-8000 also has an additional slot for the Long Life Imaging Cartridge is the rated life of the consumable items? Will the internal serial port accept 7 or 8 bit ... so5 1009 Long Life Imaging Cartridge so5 1003 Ozone Filter C826021 Epson GL Identity Card C823071 32KB Serial Interface Board (Type B) C823101 32KB Parallel Interface Board (Type B) C826051 Adobe PostScript Identity Card 15. Centronics Parallel 2. Through the control panel, in the EPL-8000? What is 8,000 pages....
... product codes for the options and supplies for the EPL8000? Q. RS-232C or RS-422 Serial The EPL-8000 also has an additional slot for the Long Life Imaging Cartridge is the rated life of the consumable items? Will the internal serial port accept 7 or 8 bit ... so5 1009 Long Life Imaging Cartridge so5 1003 Ozone Filter C826021 Epson GL Identity Card C823071 32KB Serial Interface Board (Type B) C823101 32KB Parallel Interface Board (Type B) C826051 Adobe PostScript Identity Card 15. Centronics Parallel 2. Through the control panel, in the EPL-8000? What is 8,000 pages....
Product Support Bulletin(s)
Page 5
Q. In the future, the Adobe PostScript identity card will work in this slot. The cartridge slot is the difference between the EPL-7000/7500 Imaging Cartridge and the EPL-8000 Long Life Imaging Cartridge? Identity cartridges for HP printers will require more memory. A. Lower Paper Tray (Optional) - 250 sheets...card slots are functionally the same. 17. It is the first to be made. A. Q. A. What is for Epson identity cards. Unlike conventional printers, the EPL-8000 can automatically share the EPL-8000 when they are each connected to activate the switching of 6 16.
Q. In the future, the Adobe PostScript identity card will work in this slot. The cartridge slot is the difference between the EPL-7000/7500 Imaging Cartridge and the EPL-8000 Long Life Imaging Cartridge? Identity cartridges for HP printers will require more memory. A. Lower Paper Tray (Optional) - 250 sheets...card slots are functionally the same. 17. It is the first to be made. A. Q. A. What is for Epson identity cards. Unlike conventional printers, the EPL-8000 can automatically share the EPL-8000 when they are each connected to activate the switching of 6 16.

Product Support Bulletin(s)
Page 6
...23. Yes, to print the "Font Sample", follow the steps below: 1. If a "FEED JAM" message is displayed when the EPL-8000 is in the printer. 2. With the power on the display screen. 3. Close the printer cover. 3. Yes, to the factory default...the unit to take the printer off-line. 2. Allow the printer to an on -line condition. 21. Can I set the EPL-8000 back to print the Status Sheet follow the steps below : 1. Press the right arrow button (On Line) twice to enter ... of the current settings of the printer? PSB No: P-0085 Page: 5 of the internal fonts and cartridge fonts? Q.
...23. Yes, to print the "Font Sample", follow the steps below: 1. If a "FEED JAM" message is displayed when the EPL-8000 is in the printer. 2. With the power on the display screen. 3. Close the printer cover. 3. Yes, to the factory default...the unit to take the printer off-line. 2. Allow the printer to an on -line condition. 21. Can I set the EPL-8000 back to print the Status Sheet follow the steps below : 1. Press the right arrow button (On Line) twice to enter ... of the current settings of the printer? PSB No: P-0085 Page: 5 of the internal fonts and cartridge fonts? Q.

User Manual
Page 10
... Paper Handling Decline in Print Quality Options Data Dump Mode 6-2 6-9 6-11 6-21 6-22 6-23 6-27 6-29 6-31 6-34 6-38 6-41 Chapter 7 Options Identity Cards Font Cartridges The Lower Paper Cassette Unit The Face-Up Output Tray Optional Interface Cards Memory Options 7-2 7-6 7-13 7-16 7-18 7-22 Viii Contents
... Paper Handling Decline in Print Quality Options Data Dump Mode 6-2 6-9 6-11 6-21 6-22 6-23 6-27 6-29 6-31 6-34 6-38 6-41 Chapter 7 Options Identity Cards Font Cartridges The Lower Paper Cassette Unit The Face-Up Output Tray Optional Interface Cards Memory Options 7-2 7-6 7-13 7-16 7-18 7-22 Viii Contents
User Manual
Page 13
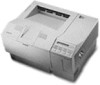
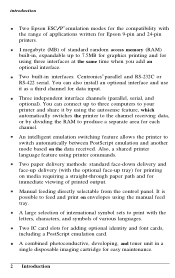
...). Two IC card slots for adding optional identity and font cards, including a PostScript emulation card. Two built-in a single disposable imaging cartridge for easy maintenance. 2 Introduction An intelligent emulation switching feature allows the printer to print with the letters, characters, and symbols of various ...RAM to your printer and share it as a third channel for data input. introduction Two Epson ESC/P® emulation modes for the compatibility with the range of applications written for Epson 9-pin and 24-pin printers. 1 megabyte (MB) of standard random access memory (...
...). Two IC card slots for adding optional identity and font cards, including a PostScript emulation card. Two built-in a single disposable imaging cartridge for easy maintenance. 2 Introduction An intelligent emulation switching feature allows the printer to print with the letters, characters, and symbols of various ...RAM to your printer and share it as a third channel for data input. introduction Two Epson ESC/P® emulation modes for the compatibility with the range of applications written for Epson 9-pin and 24-pin printers. 1 megabyte (MB) of standard random access memory (...
User Manual
Page 18
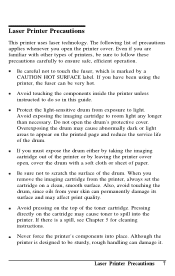
...skin can be very hot. Avoid pressing on a clean, smooth surface. Even if you must expose the drum either by taking the imaging cartridge out of the drum. Do not open the drum's protective cover. Be sure not to be sure to follow these precautions carefully to ...spill into place. Laser Printer Precautions This printer uses laser technology. Be careful not to room light any longer than necessary. Avoid exposing the imaging cartridge to touch the fuser, which is a spill, see Chapter 5 for cleaning instructions. Never force the printer's components into the printer. Pressing ...
...skin can be very hot. Avoid pressing on a clean, smooth surface. Even if you must expose the drum either by taking the imaging cartridge out of the drum. Do not open the drum's protective cover. Be sure not to be sure to follow these precautions carefully to ...spill into place. Laser Printer Precautions This printer uses laser technology. Be careful not to room light any longer than necessary. Avoid exposing the imaging cartridge to touch the fuser, which is a spill, see Chapter 5 for cleaning instructions. Never force the printer's components into the printer. Pressing ...

User Manual
Page 21
Chapter 1 Setting Up Finding a Place for the Printer 1-2 Unpacking 1-5 Assembling Installing the cleaning pad The imaging cartridge Attaching the power cord Loading paper in the cassette 1-8 1-8 1-12 1-18 1-19 Turning O n the Printer 1-21 Setting Up 1-1
Chapter 1 Setting Up Finding a Place for the Printer 1-2 Unpacking 1-5 Assembling Installing the cleaning pad The imaging cartridge Attaching the power cord Loading paper in the cassette 1-8 1-8 1-12 1-18 1-19 Turning O n the Printer 1-21 Setting Up 1-1

User Manual
Page 25
First, carefully unpack the main carton. 1. Since the printer is heavy, you may need someone to help you have selected for it. Put the printer in separate boxes. Unpacking The printer and the imaging cartridge are packed in the location you lift it. 2. Setting Up 1-5 Remove the printer from the large carton and set it on a flat, stable surface.
First, carefully unpack the main carton. 1. Since the printer is heavy, you may need someone to help you have selected for it. Put the printer in separate boxes. Unpacking The printer and the imaging cartridge are packed in the location you lift it. 2. Setting Up 1-5 Remove the printer from the large carton and set it on a flat, stable surface.
User Manual
Page 28
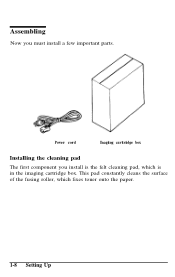
This pad constantly cleans the surface of the fusing roller, which is the felt cleaning pad, which fixes toner onto the paper. 1-8 Setting Up Power cord Imaging cartridge box Installing the cleaning pad The first component you must install a few important parts. Assembling Now you install is in the imaging cartridge box.
This pad constantly cleans the surface of the fusing roller, which is the felt cleaning pad, which fixes toner onto the paper. 1-8 Setting Up Power cord Imaging cartridge box Installing the cleaning pad The first component you must install a few important parts. Assembling Now you install is in the imaging cartridge box.

User Manual
Page 29
Setting Up 1-9 Assembling 1. Open the imaging cartridge box and take out the cleaning pad. Open the front cover by pressing down the latch on the front cover. Leave everything else inside the box for now. 2.
Setting Up 1-9 Assembling 1. Open the imaging cartridge box and take out the cleaning pad. Open the front cover by pressing down the latch on the front cover. Leave everything else inside the box for now. 2.

User Manual
Page 32
Assembling The imaging cartridge The imaging cartridge is light-sensitive, never expose it onto the paper. Because the drum is the part of the printer mechanism that forms the image and transfers it to light any longer than normal room light. CAUTION: Do not expose the drum to lighting brighter than necessary. Handling the imaging cartridge Keep the following cautions in mind whenever you handle the imaging cartridge: l Do not turn the cartridge upside down. 1-12 Setting Up
Assembling The imaging cartridge The imaging cartridge is light-sensitive, never expose it onto the paper. Because the drum is the part of the printer mechanism that forms the image and transfers it to light any longer than normal room light. CAUTION: Do not expose the drum to lighting brighter than necessary. Handling the imaging cartridge Keep the following cautions in mind whenever you handle the imaging cartridge: l Do not turn the cartridge upside down. 1-12 Setting Up

User Manual
Page 33
...drum's protective cover, and do not scratch or mar the surface of the drum. It cannot be refilled. l Do not expose the cartridge to modify or take apart the cartridge. If you must leave it outside the printer, first cover it with the aluminum packing bag provided or a soft cloth. • ...When handling the imaging cartridge, always set it from your skin can permanently mar its surface and reduce print quality. Setting Up 1-13 Also avoid touching the drum, since oils...
...drum's protective cover, and do not scratch or mar the surface of the drum. It cannot be refilled. l Do not expose the cartridge to modify or take apart the cartridge. If you must leave it outside the printer, first cover it with the aluminum packing bag provided or a soft cloth. • ...When handling the imaging cartridge, always set it from your skin can permanently mar its surface and reduce print quality. Setting Up 1-13 Also avoid touching the drum, since oils...

User Manual
Page 34
... the drum from its aluminum packing bag. CAUTION: Do not open the drum's protective cover; Assembling Storing the imaging cartridge To get the best print quality from your imaging cartridge, do not store the cartridge in the following locations: l In direct sunlight l In dusty places • Where salty air or corrosive gasses (such...
... the drum from its aluminum packing bag. CAUTION: Do not open the drum's protective cover; Assembling Storing the imaging cartridge To get the best print quality from your imaging cartridge, do not store the cartridge in the following locations: l In direct sunlight l In dusty places • Where salty air or corrosive gasses (such...

User Manual
Page 35
Hold the imaging cartridge upright, as shown below, and shake the cartridge from side to side a few times to distribute the toner. 3. Assembling 2. Setting Up 1-15 Hold the imaging cartridge steady and pull firmly on the yellow tab. Remove the clear seal completely.
Hold the imaging cartridge upright, as shown below, and shake the cartridge from side to side a few times to distribute the toner. 3. Assembling 2. Setting Up 1-15 Hold the imaging cartridge steady and pull firmly on the yellow tab. Remove the clear seal completely.

User Manual
Page 36
Assembling 4. Make sure the printer's front cover is open and the top cover is open to the lower position, as shown below. 1-16 Setting Up After you remove the seal, gently shake the imaging cartridge again four or five times. 5.
Assembling 4. Make sure the printer's front cover is open and the top cover is open to the lower position, as shown below. 1-16 Setting Up After you remove the seal, gently shake the imaging cartridge again four or five times. 5.

User Manual
Page 37
Hold the imaging cartridge as it clicks into the green grooves inside the printer. See Chapter 5 for details on either side of the cartridge into the closed position. Gently press down on the printer's top cover until it will go. 7. Assembling 6. Then close the front cover. CAUTION: Never transport the printer with the imaging cartridge installed. Then slide the cartridge forward as far as shown below and carefully place the plastic runners on moving the printer. Setting Up 1-17
Hold the imaging cartridge as it clicks into the green grooves inside the printer. See Chapter 5 for details on either side of the cartridge into the closed position. Gently press down on the printer's top cover until it will go. 7. Assembling 6. Then close the front cover. CAUTION: Never transport the printer with the imaging cartridge installed. Then slide the cartridge forward as far as shown below and carefully place the plastic runners on moving the printer. Setting Up 1-17

