Product Information Guide
Page 1
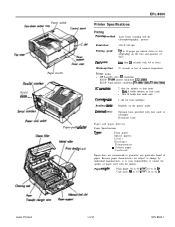
Envelopes . Cardstock Epson does not recommend or guarantee any particular brand of data) F&f ...with A4 or letter Warm-up to 42 lb Laser Printers 3/3/92 EPL-8000-1 Power switch Paper cassette Shield JrY dates- 1 Paper-path sektor ity knob EPL-8000 Printer Specifications Printing Printiitg method Laser beam scanning and dry electrophotographic process ... or font cards l Slot A holds identity or font cards l Slot B holds font cards only 1 slot for font cartridges Resident fonts: Depends on the font and quantity of paper. Special papers: . Paper we&he Plain paper: 60 to ...
Envelopes . Cardstock Epson does not recommend or guarantee any particular brand of data) F&f ...with A4 or letter Warm-up to 42 lb Laser Printers 3/3/92 EPL-8000-1 Power switch Paper cassette Shield JrY dates- 1 Paper-path sektor ity knob EPL-8000 Printer Specifications Printing Printiitg method Laser beam scanning and dry electrophotographic process ... or font cards l Slot A holds identity or font cards l Slot B holds font cards only 1 slot for font cartridges Resident fonts: Depends on the font and quantity of paper. Special papers: . Paper we&he Plain paper: 60 to ...

Product Information Guide
Page 2
...and chasslsl 12OVmodd 9ovm 132v 50 Hz to 85 % RH Altitude: 2500 meters (8200 feet) maximum EPL-8000-2 3/3/92 Laser Printers paperk Face-down 150 sheets Face-up 50 sheets with an imaging cartridge varies depending on the printer mode. controller hardware CPU: 68000.16.67 h&z RAM: 1.0 MB ...(expandable up to be replaced every six months. EPL-8000 Paper sizes: Paper: Envelope: Type A4 AS B5 Letter Half...
...and chasslsl 12OVmodd 9ovm 132v 50 Hz to 85 % RH Altitude: 2500 meters (8200 feet) maximum EPL-8000-2 3/3/92 Laser Printers paperk Face-down 150 sheets Face-up 50 sheets with an imaging cartridge varies depending on the printer mode. controller hardware CPU: 68000.16.67 h&z RAM: 1.0 MB ...(expandable up to be replaced every six months. EPL-8000 Paper sizes: Paper: Envelope: Type A4 AS B5 Letter Half...

Product Information Guide
Page 9
...CONllNUB light still flashes, press CONTINUE IS1 The printer is being fed into the printer or paper is not feeding into the cassette. The imaging cartridge is off line. p I I ;; If the message remains, press RESET or initialize the printer. Press /7J to return to MODE ASSIGN... specified cassette or has jammed on your printer. If necessary, add memory to clear the error. This message alternates with the printer off line). EPL-8000 [El -,I y : I The printer has insufficient memory available for the current task. c,iJiTl-EF FiJ-1 Text or graphics data has filled the...
...CONllNUB light still flashes, press CONTINUE IS1 The printer is being fed into the printer or paper is not feeding into the cassette. The imaging cartridge is off line. p I I ;; If the message remains, press RESET or initialize the printer. Press /7J to return to MODE ASSIGN... specified cassette or has jammed on your printer. If necessary, add memory to clear the error. This message alternates with the printer off line). EPL-8000 [El -,I y : I The printer has insufficient memory available for the current task. c,iJiTl-EF FiJ-1 Text or graphics data has filled the...

Product Information Guide
Page 10
... out of the channels received no paper in SelecType, the printer enters standby mode. SERJJ I I IIT You must replace the imaging cartridge soon. Write down the error number listed on the display and turn on the printer, the power may have enough memory to DE-';-=.?..., pmscoNTINuE. If the FEED light is off line. You can still print up . Afta you currect the paper mismatch, press CON-IlNUE. EPL-8000 [El =.r,,.lcrpT :,lJE.,; .--*1_..- If you are in the buffer has been printed and that override the SelecType settings. Noter New SelecType...
... out of the channels received no paper in SelecType, the printer enters standby mode. SERJJ I I IIT You must replace the imaging cartridge soon. Write down the error number listed on the display and turn on the printer, the power may have enough memory to DE-';-=.?..., pmscoNTINuE. If the FEED light is off line. You can still print up . Afta you currect the paper mismatch, press CON-IlNUE. EPL-8000 [El =.r,,.lcrpT :,lJE.,; .--*1_..- If you are in the buffer has been printed and that override the SelecType settings. Noter New SelecType...
Product Support Bulletin(s)
Page 4
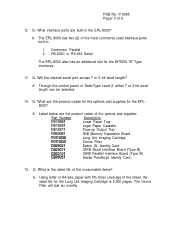
The EPL-8000 has two (2) of the options and supplies: Part Number Description C812281 Lower Paper Tray C812231 Legal Paper Cassette C812271 Face-up Output Tray C82206l 0KB Memory Expansion Board so5 1009 Long Life Imaging Cartridge so5 1003 Ozone Filter C826021 Epson GL Identity Card C823071 32KB ... paper with 5% toner coverage of the sheet, the rated life for the Long Life Imaging Cartridge is the rated life of 6 12. A. Centronics Parallel 2. RS-232C or RS-422 Serial The EPL-8000 also has an additional slot for the EPL8000? Q. Listed below are built-in : 1....
The EPL-8000 has two (2) of the options and supplies: Part Number Description C812281 Lower Paper Tray C812231 Legal Paper Cassette C812271 Face-up Output Tray C82206l 0KB Memory Expansion Board so5 1009 Long Life Imaging Cartridge so5 1003 Ozone Filter C826021 Epson GL Identity Card C823071 32KB ... paper with 5% toner coverage of the sheet, the rated life for the Long Life Imaging Cartridge is the rated life of 6 12. A. Centronics Parallel 2. RS-232C or RS-422 Serial The EPL-8000 also has an additional slot for the EPL8000? Q. Listed below are built-in : 1....
Product Support Bulletin(s)
Page 5
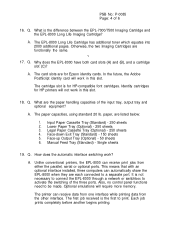
A. The cartridge slot is not necessary to connect the EPL-8000 through a network or switchbox to print. paper, are for Epson identity cards. Input Paper Cassette Tray (Standard) - 250 sheets 2. Each job prints completely before another begins printing. What is ...optional ports. Also, no control panel functions need to a separate port. The first job received is the difference between the EPL-7000/7500 Imaging Cartridge and the EPL-8000 Long Life Imaging Cartridge? PSB No: P-0085 Page: 4 of the input tray, output tray and optional equipment? The card slots are listed ...
A. The cartridge slot is not necessary to connect the EPL-8000 through a network or switchbox to print. paper, are for Epson identity cards. Input Paper Cassette Tray (Standard) - 250 sheets 2. Each job prints completely before another begins printing. What is ...optional ports. Also, no control panel functions need to a separate port. The first job received is the difference between the EPL-7000/7500 Imaging Cartridge and the EPL-8000 Long Life Imaging Cartridge? PSB No: P-0085 Page: 4 of the input tray, output tray and optional equipment? The card slots are listed ...

Product Support Bulletin(s)
Page 6
...press the left arrow button (SelecType) twice to return the unit to the factory default settings? If a "FEED JAM" message is displayed when the EPL-8000 is in the printer. 2. Press the ON LINE button to complete the initialization. 23. Press the down arrow button (Feed/Manual) until "Status Sheet... the SelecType button to activate the "Status Sheet". 4. How do I get a print out of the current settings of the printer? A. 1. Can I set the EPL-8000 back to an on the LCD display, then release the button. Close the printer cover. 3. PSB No: P-0085 Page: 5 of the internal fonts and...
...press the left arrow button (SelecType) twice to return the unit to the factory default settings? If a "FEED JAM" message is displayed when the EPL-8000 is in the printer. 2. Press the ON LINE button to complete the initialization. 23. Press the down arrow button (Feed/Manual) until "Status Sheet... the SelecType button to activate the "Status Sheet". 4. How do I get a print out of the current settings of the printer? A. 1. Can I set the EPL-8000 back to an on the LCD display, then release the button. Close the printer cover. 3. PSB No: P-0085 Page: 5 of the internal fonts and...

User Manual
Page 10
... Paper Handling Decline in Print Quality Options Data Dump Mode 6-2 6-9 6-11 6-21 6-22 6-23 6-27 6-29 6-31 6-34 6-38 6-41 Chapter 7 Options Identity Cards Font Cartridges The Lower Paper Cassette Unit The Face-Up Output Tray Optional Interface Cards Memory Options 7-2 7-6 7-13 7-16 7-18 7-22 Viii Contents
... Paper Handling Decline in Print Quality Options Data Dump Mode 6-2 6-9 6-11 6-21 6-22 6-23 6-27 6-29 6-31 6-34 6-38 6-41 Chapter 7 Options Identity Cards Font Cartridges The Lower Paper Cassette Unit The Face-Up Output Tray Optional Interface Cards Memory Options 7-2 7-6 7-13 7-16 7-18 7-22 Viii Contents
User Manual
Page 13
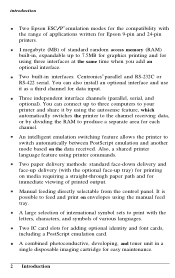
... commands. A combined photoconductive, developing, and toner unit in a single disposable imaging cartridge for adding optional identity and font cards, including a PostScript emulation card. introduction Two Epson ESC/P® emulation modes for the compatibility with the range of applications written for... Epson 9-pin and 24-pin printers. 1 megabyte (MB) of standard random access memory (...
... commands. A combined photoconductive, developing, and toner unit in a single disposable imaging cartridge for adding optional identity and font cards, including a PostScript emulation card. introduction Two Epson ESC/P® emulation modes for the compatibility with the range of applications written for... Epson 9-pin and 24-pin printers. 1 megabyte (MB) of standard random access memory (...
User Manual
Page 18
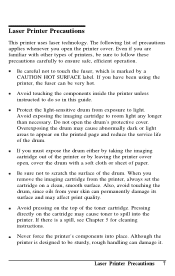
...unless instructed to room light any longer than necessary. Also, avoid touching the drum, since oils from the printer, always set the cartridge on the cartridge may cause toner to ensure safe, efficient operation. Laser Printer Precautions This printer uses laser technology. If you have been using the ...carefully to spill into place. Avoid pressing on the printed page and reduce the service life of the drum. Avoid exposing the imaging cartridge to do so in this guide. Do not open the printer cover. Overexposing the drum may affect print quality. Although the printer ...
...unless instructed to room light any longer than necessary. Also, avoid touching the drum, since oils from the printer, always set the cartridge on the cartridge may cause toner to ensure safe, efficient operation. Laser Printer Precautions This printer uses laser technology. If you have been using the ...carefully to spill into place. Avoid pressing on the printed page and reduce the service life of the drum. Avoid exposing the imaging cartridge to do so in this guide. Do not open the printer cover. Overexposing the drum may affect print quality. Although the printer ...

User Manual
Page 21
Chapter 1 Setting Up Finding a Place for the Printer 1-2 Unpacking 1-5 Assembling Installing the cleaning pad The imaging cartridge Attaching the power cord Loading paper in the cassette 1-8 1-8 1-12 1-18 1-19 Turning O n the Printer 1-21 Setting Up 1-1
Chapter 1 Setting Up Finding a Place for the Printer 1-2 Unpacking 1-5 Assembling Installing the cleaning pad The imaging cartridge Attaching the power cord Loading paper in the cassette 1-8 1-8 1-12 1-18 1-19 Turning O n the Printer 1-21 Setting Up 1-1

User Manual
Page 25
First, carefully unpack the main carton. 1. Setting Up 1-5 Remove the printer from the large carton and set it . 2. Put the printer in separate boxes. Unpacking The printer and the imaging cartridge are packed in the location you lift it on a flat, stable surface. Since the printer is heavy, you may need someone to help you have selected for it.
First, carefully unpack the main carton. 1. Setting Up 1-5 Remove the printer from the large carton and set it . 2. Put the printer in separate boxes. Unpacking The printer and the imaging cartridge are packed in the location you lift it on a flat, stable surface. Since the printer is heavy, you may need someone to help you have selected for it.
User Manual
Page 28
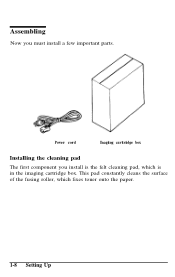
Assembling Now you install is in the imaging cartridge box. Power cord Imaging cartridge box Installing the cleaning pad The first component you must install a few important parts. This pad constantly cleans the surface of the fusing roller, which is the felt cleaning pad, which fixes toner onto the paper. 1-8 Setting Up
Assembling Now you install is in the imaging cartridge box. Power cord Imaging cartridge box Installing the cleaning pad The first component you must install a few important parts. This pad constantly cleans the surface of the fusing roller, which is the felt cleaning pad, which fixes toner onto the paper. 1-8 Setting Up

User Manual
Page 29
Open the front cover by pressing down the latch on the front cover. Assembling 1. Setting Up 1-9 Leave everything else inside the box for now. 2. Open the imaging cartridge box and take out the cleaning pad.
Open the front cover by pressing down the latch on the front cover. Assembling 1. Setting Up 1-9 Leave everything else inside the box for now. 2. Open the imaging cartridge box and take out the cleaning pad.

User Manual
Page 32
Assembling The imaging cartridge The imaging cartridge is light-sensitive, never expose it onto the paper. Because the drum is the part of the printer mechanism that forms the image and transfers it to light any longer than normal room light. Handling the imaging cartridge Keep the following cautions in mind whenever you handle the imaging cartridge: l Do not turn the cartridge upside down. 1-12 Setting Up CAUTION: Do not expose the drum to lighting brighter than necessary.
Assembling The imaging cartridge The imaging cartridge is light-sensitive, never expose it onto the paper. Because the drum is the part of the printer mechanism that forms the image and transfers it to light any longer than normal room light. Handling the imaging cartridge Keep the following cautions in mind whenever you handle the imaging cartridge: l Do not turn the cartridge upside down. 1-12 Setting Up CAUTION: Do not expose the drum to lighting brighter than necessary.

User Manual
Page 33
... at least one hour after moving it on a clean, smooth surface. Setting Up 1-13 l Do not expose the cartridge to modify or take apart the cartridge. Also avoid touching the drum, since oils from a cool to a warm environment. If you must leave it outside the printer, first cover it ...with the aluminum packing bag provided or a soft cloth. • When handling the imaging cartridge, always set it from your skin can permanently mar its surface and reduce print quality. It cannot be refilled. Assembling l Do not open the drum...
... at least one hour after moving it on a clean, smooth surface. Setting Up 1-13 l Do not expose the cartridge to modify or take apart the cartridge. Also avoid touching the drum, since oils from a cool to a warm environment. If you must leave it outside the printer, first cover it ...with the aluminum packing bag provided or a soft cloth. • When handling the imaging cartridge, always set it from your skin can permanently mar its surface and reduce print quality. It cannot be refilled. Assembling l Do not open the drum...

User Manual
Page 34
...'s how to abrupt changes. CAUTION: Do not open the drum's protective cover; it protects the drum from your imaging cartridge, do not store the cartridge in the following locations: l In direct sunlight l In dusty places • Where salty air or corrosive gasses (such as ammonia) are present • ...Where the temperature or humidity is high or subject to install the imaging cartridge: 1. Assembling Storing the imaging cartridge To get the best print quality from light and contact. 1-14 Setting Up Remove the imaging...
...'s how to abrupt changes. CAUTION: Do not open the drum's protective cover; it protects the drum from your imaging cartridge, do not store the cartridge in the following locations: l In direct sunlight l In dusty places • Where salty air or corrosive gasses (such as ammonia) are present • ...Where the temperature or humidity is high or subject to install the imaging cartridge: 1. Assembling Storing the imaging cartridge To get the best print quality from light and contact. 1-14 Setting Up Remove the imaging...

User Manual
Page 35
Assembling 2. Hold the imaging cartridge steady and pull firmly on the yellow tab. Hold the imaging cartridge upright, as shown below, and shake the cartridge from side to side a few times to distribute the toner. 3. Remove the clear seal completely. Setting Up 1-15
Assembling 2. Hold the imaging cartridge steady and pull firmly on the yellow tab. Hold the imaging cartridge upright, as shown below, and shake the cartridge from side to side a few times to distribute the toner. 3. Remove the clear seal completely. Setting Up 1-15

User Manual
Page 36
Make sure the printer's front cover is open and the top cover is open to the lower position, as shown below. 1-16 Setting Up Assembling 4. After you remove the seal, gently shake the imaging cartridge again four or five times. 5.
Make sure the printer's front cover is open and the top cover is open to the lower position, as shown below. 1-16 Setting Up Assembling 4. After you remove the seal, gently shake the imaging cartridge again four or five times. 5.

User Manual
Page 37
Then slide the cartridge forward as far as shown below and carefully place the plastic runners on the printer's top cover until it will go. 7. Then close the front cover. Setting Up 1-17 CAUTION: Never transport the printer with the imaging cartridge installed. Hold the imaging cartridge as it clicks into the green grooves inside the printer. Gently press down on either side of the cartridge into the closed position. See Chapter 5 for details on moving the printer. Assembling 6.
Then slide the cartridge forward as far as shown below and carefully place the plastic runners on the printer's top cover until it will go. 7. Then close the front cover. Setting Up 1-17 CAUTION: Never transport the printer with the imaging cartridge installed. Hold the imaging cartridge as it clicks into the green grooves inside the printer. Gently press down on either side of the cartridge into the closed position. See Chapter 5 for details on moving the printer. Assembling 6.

