

Owners Manual
Page 14
... stand or table. 2. Always follow these safety instructions when setting up and using the projector: 1. Do not overload wall sockets, extension leads or multi-way plug boards as recommended. 4. Do not place the projector on the projector. Insert the projector's three-pin earthed plug into a socket. &#...about the EMP-7100/5100. x Caution: Steps to avoid damage to avoid personal injury. x Note: Additional useful details or tips. Use the type of power available, consult your attention to replace it into a properly earthed socket. If you are used throughout the manual to ...
... stand or table. 2. Always follow these safety instructions when setting up and using the projector: 1. Do not overload wall sockets, extension leads or multi-way plug boards as recommended. 4. Do not place the projector on the projector. Insert the projector's three-pin earthed plug into a socket. &#...about the EMP-7100/5100. x Caution: Steps to avoid damage to avoid personal injury. x Note: Additional useful details or tips. Use the type of power available, consult your attention to replace it into a properly earthed socket. If you are used throughout the manual to ...
Owners Manual
Page 15
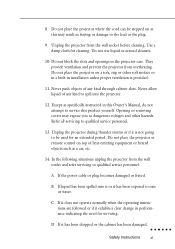
...damaged. Refer all servicing to dangerous voltages and other soft surface or in a built-in this Owner's Manual, do not attempt to qualified service personnel: A. D. Safety Instructions xi 8. Unplug the projector from overheating. Use a damp cloth for an extended period. Except as this product yourself. If the power... of any kind to the lead or the plug. 9. Unplug the projector during thunder storms or if it exhibits a clear change in the projector case. If it does not operate normally when the operating instructions are followed or if it is not going to be stepped on as...
...damaged. Refer all servicing to dangerous voltages and other soft surface or in a built-in this Owner's Manual, do not attempt to qualified service personnel: A. D. Safety Instructions xi 8. Unplug the projector from overheating. Use a damp cloth for an extended period. Except as this product yourself. If the power... of any kind to the lead or the plug. 9. Unplug the projector during thunder storms or if it exhibits a clear change in the projector case. If it does not operate normally when the operating instructions are followed or if it is not going to be stepped on as...
Owners Manual
Page 66
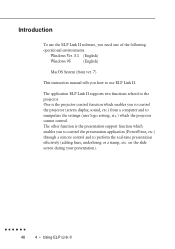
... function which enables you to control the projector (screen display, sound, etc.) from ver. 7) This instruction manual tells you need one of the following operational environments. Windows Ver. 3.1 (English) Windows 95 (English) MacOS System (from a computer and to manipulate ...presentation effectively (adding lines, underlining or a stamp, etc. One is the presentation support function which the projector cannot control. The application ELP Link II supports two functions related to the projector. Introduction To use the ELP Link II software, you how to use ELP Link II. on the ...
... function which enables you to control the projector (screen display, sound, etc.) from ver. 7) This instruction manual tells you need one of the following operational environments. Windows Ver. 3.1 (English) Windows 95 (English) MacOS System (from a computer and to manipulate ...presentation effectively (adding lines, underlining or a stamp, etc. One is the presentation support function which the projector cannot control. The application ELP Link II supports two functions related to the projector. Introduction To use the ELP Link II software, you how to use ELP Link II. on the ...

Owners Manual
Page 68
... the [OK] button. The drive letter [A] must designate the proper drive (the floppy disk drive into floppy disk drive [A]. (It is assumed your Windows Instruction Manual. 50 4 • Using ELP Link II The ELP Link II set-up window will be installed depends on the computer you are installing it in.... • If you inserted the disk with the ELP Link II software into which you use the software often, place it on. Follow the instructions on the screen. Insert the floppy disk with the ELP Link II software). How to your floppy disk drive is very convenient. • Please ...
... the [OK] button. The drive letter [A] must designate the proper drive (the floppy disk drive into floppy disk drive [A]. (It is assumed your Windows Instruction Manual. 50 4 • Using ELP Link II The ELP Link II set-up window will be installed depends on the computer you are installing it in.... • If you inserted the disk with the ELP Link II software into which you use the software often, place it on. Follow the instructions on the screen. Insert the floppy disk with the ELP Link II software). How to your floppy disk drive is very convenient. • Please ...
Owners Manual
Page 69
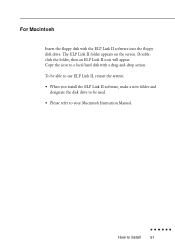
For Macintosh Insert the floppy disk with a drag-and-drop action. Copy the icon to your Macintosh Instruction Manual. To be able to use ELP Link II, restart the system. • When you install the ELP Link II software, make a new folder and designate the disk drive to be used. • Please refer to a local hard disk with the ELP Link II software into the floppy disk drive. Doubleclick the folder, then an ELP Link II icon will appear. The ELP Link II folder appears on the screen. How to install 51
For Macintosh Insert the floppy disk with a drag-and-drop action. Copy the icon to your Macintosh Instruction Manual. To be able to use ELP Link II, restart the system. • When you install the ELP Link II software, make a new folder and designate the disk drive to be used. • Please refer to a local hard disk with the ELP Link II software into the floppy disk drive. Doubleclick the folder, then an ELP Link II icon will appear. The ELP Link II folder appears on the screen. How to install 51

