Technical Brief (Multimedia Projectors)
Page 6
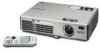
...Review captured images EasyFile : Transfer slides and captured images to computers on a select few of their respective owners. LL L EPSON Sales Training EPSON and EPSON Stylus are registered trademarks of Seiko Epson Corporation. 3/01 Other trademarks are available on the network EasyConfiguration : Set up EasyMP.net EasyTablet : Operate projector...-Multimedia projectors Page 6 LLL L LLL L LL Versatility-EasyMP and EasyMP.net EasyMP and EasyMP.net are the property of EPSON's multimedia projectors. EPSON's EasyMP.net (currently available only on the EPSON PowerLite 8150i)...
...Review captured images EasyFile : Transfer slides and captured images to computers on a select few of their respective owners. LL L EPSON Sales Training EPSON and EPSON Stylus are registered trademarks of Seiko Epson Corporation. 3/01 Other trademarks are available on the network EasyConfiguration : Set up EasyMP.net EasyTablet : Operate projector...-Multimedia projectors Page 6 LLL L LLL L LL Versatility-EasyMP and EasyMP.net EasyMP and EasyMP.net are the property of EPSON's multimedia projectors. EPSON's EasyMP.net (currently available only on the EPSON PowerLite 8150i)...

Installation Guide - ELPMBUNI Universal Mount Assembly
Page 6
... final image on a smooth flat surface. 2. Carefully invert the projector and place it on the screen. 1. Failure to do so could result in thread size (Figure 1). NOTE: Review the projectors manufacture's operation manual and refer to the ceiling installation instruction. HANDLE... WITH CARE AT ALL TIMES. ELPMBUNI Projector Preparation WARNING: Proper installation procedure by qualified personnel as (distance from ...
... final image on a smooth flat surface. 2. Carefully invert the projector and place it on the screen. 1. Failure to do so could result in thread size (Figure 1). NOTE: Review the projectors manufacture's operation manual and refer to the ceiling installation instruction. HANDLE... WITH CARE AT ALL TIMES. ELPMBUNI Projector Preparation WARNING: Proper installation procedure by qualified personnel as (distance from ...

Installation Guide - ELPMBUNI Universal Mount Assembly
Page 14
... Upper Assembly Installation Manual Knurl Knobs (3ea) Figure 9 Secure the ceiling mount to determine the proper placement of the center of the screen). 3. Review your screen and projector, make sure the mounting location will safely support the weight of the screen for best picture ratio. 2. NOTE: Make sure to measure from the...
... Upper Assembly Installation Manual Knurl Knobs (3ea) Figure 9 Secure the ceiling mount to determine the proper placement of the center of the screen). 3. Review your screen and projector, make sure the mounting location will safely support the weight of the screen for best picture ratio. 2. NOTE: Make sure to measure from the...

User Manual
Page 100
... Scenario Option(s) > Scenario Preview. Checking Your Scenario You can play your slides one by one. Use the navigation tools in the Scenario Preview window to review. Use the controls in the folders window to open the scenario. 2. Click the file, then click File > Open to locate the scenario file you 're...
... Scenario Option(s) > Scenario Preview. Checking Your Scenario You can play your slides one by one. Use the navigation tools in the Scenario Preview window to review. Use the controls in the folders window to open the scenario. 2. Click the file, then click File > Open to locate the scenario file you 're...

User Manual
Page 101
... SlideMaker 2. 5. Your scenario is transferred to open the scenario. 4. Presenting from the Scenario Option(s) menu. Most require a PC card adapter to allow insertion into the projector (check with your computer dealer to purchase a PC card adapter). ■ CompactFlash™ ■ Memory Stick™ ■ SD™ (Secure Digital ■ SmartMedia™...(s) menu, choose Send Scenario. You can transfer it . Use the navigation tools in your card is saved, you want to confirm. Click OK again to review. You must insert the memory card in the drive selection window.
... SlideMaker 2. 5. Your scenario is transferred to open the scenario. 4. Presenting from the Scenario Option(s) menu. Most require a PC card adapter to allow insertion into the projector (check with your computer dealer to purchase a PC card adapter). ■ CompactFlash™ ■ Memory Stick™ ■ SD™ (Secure Digital ■ SmartMedia™...(s) menu, choose Send Scenario. You can transfer it . Use the navigation tools in your card is saved, you want to confirm. Click OK again to review. You must insert the memory card in the drive selection window.