Product Specifications Sheet (English)
Page 1
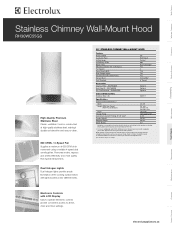
...-Free Kit - Appliance must be either ducted outside, or recirculated inside requiring no ducting. (Recirculated option requires use of the cooking surface below with LCD Display Fan Speeds Sound Level (dBA) Dual Halogen Lights Washable Stainless Steel Filters Exhaust Duct Duct Required 30" Wall Mount Vertical 600 Dual Centrifugal Yes 4 72.4 Yes Yes Convertible* 8" Round Accessories Charcoal Filter - NOTE: Always consult local and / or national electric codes. Microwaves Vent Hoods Dishwashers Refrigerators Freezers Electronic Controls with a separate ground wire. EIDFW60GS 52" Flue...
...-Free Kit - Appliance must be either ducted outside, or recirculated inside requiring no ducting. (Recirculated option requires use of the cooking surface below with LCD Display Fan Speeds Sound Level (dBA) Dual Halogen Lights Washable Stainless Steel Filters Exhaust Duct Duct Required 30" Wall Mount Vertical 600 Dual Centrifugal Yes 4 72.4 Yes Yes Convertible* 8" Round Accessories Charcoal Filter - NOTE: Always consult local and / or national electric codes. Microwaves Vent Hoods Dishwashers Refrigerators Freezers Electronic Controls with a separate ground wire. EIDFW60GS 52" Flue...
Product Specifications Sheet (English)
Page 2
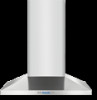
... Wall-Mount Hood RH30WC55GS 30" Stainless Chimney Wall-Mount Hood Specifications • Product Weight - 36 Lbs. • Wall-Mount Installation • Ventilation is convertible to be either ducted outside is 24" - 30" for electric and 30" for gas. (NOT more than 36" recommended.) • To prepare mounting surface, adequate structure and support must be grounded for detailed convertible ventilation installation instructions. Ducted Option Specifications • For outside ventilation only. • Exhaust Duct Required - 8" round • For most efficient airflow exhaust, use...
... Wall-Mount Hood RH30WC55GS 30" Stainless Chimney Wall-Mount Hood Specifications • Product Weight - 36 Lbs. • Wall-Mount Installation • Ventilation is convertible to be either ducted outside is 24" - 30" for electric and 30" for gas. (NOT more than 36" recommended.) • To prepare mounting surface, adequate structure and support must be grounded for detailed convertible ventilation installation instructions. Ducted Option Specifications • For outside ventilation only. • Exhaust Duct Required - 8" round • For most efficient airflow exhaust, use...
Complete Owner's Guide (English)
Page 2
... your Hood 6 Optional Accessories 6 Tools/Materials required 6 Installing the hood 7-13 Installing preparation 7 Wall framing for adequate support 7 Removing the packaging 7 Examples of Materials 6 Parts Included with Electrolux enhances our ability to serve you for hood support 10 Mounting the hood 10 Connecting the ductwork 11 Air deflector installation (Recirculating accessories 11 Making the electrical connections 12 Mounting the duct cover 13 Features 14 Control buttons 15 Special functions 16 Clock programming 16 Grease filter saturation alarm 16 Charcoal filter...
... your Hood 6 Optional Accessories 6 Tools/Materials required 6 Installing the hood 7-13 Installing preparation 7 Wall framing for adequate support 7 Removing the packaging 7 Examples of Materials 6 Parts Included with Electrolux enhances our ability to serve you for hood support 10 Mounting the hood 10 Connecting the ductwork 11 Air deflector installation (Recirculating accessories 11 Making the electrical connections 12 Mounting the duct cover 13 Features 14 Control buttons 15 Special functions 16 Clock programming 16 Grease filter saturation alarm 16 Charcoal filter...
Complete Owner's Guide (English)
Page 3
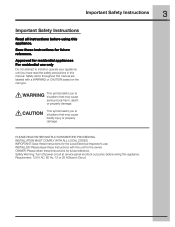
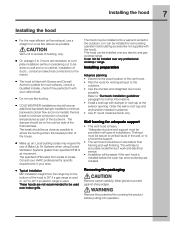
... For residential use . PLEASE READ ENTIRE INSTRUCTIONS BEFORE PROCEEDING. Safety items throughout this manual. OWNER: Please retain these instructions for future reference. Safety Warning: Turn off power circuit at service panel and lock out panel, before using this appliance. This symbol alerts you to situations that may cause serious body harm, death or property damage. Save these instructions for future reference. Requirement: 120 V AC...
... For residential use . PLEASE READ ENTIRE INSTRUCTIONS BEFORE PROCEEDING. Safety items throughout this manual. OWNER: Please retain these instructions for future reference. Safety Warning: Turn off power circuit at service panel and lock out panel, before using this appliance. This symbol alerts you to situations that may cause serious body harm, death or property damage. Save these instructions for future reference. Requirement: 120 V AC...
Complete Owner's Guide (English)
Page 4
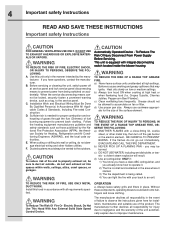
... the fire with integral disconnecting switch located inside the blower housing TO REDUCE THE RISK OF A RANGE TOP GREASE FIRE. If the flames do not vent exhaust air into wall or ceiling, do not damage electrical wiring and other metal tray, then turn hood ON when cooking at high settings. Always leave safety grills and filters in accordance with a close-fitting lid, cookie sheet, or other hidden utilities. TO...
... the fire with integral disconnecting switch located inside the blower housing TO REDUCE THE RISK OF A RANGE TOP GREASE FIRE. If the flames do not vent exhaust air into wall or ceiling, do not damage electrical wiring and other metal tray, then turn hood ON when cooking at high settings. Always leave safety grills and filters in accordance with a close-fitting lid, cookie sheet, or other hidden utilities. TO...
Complete Owner's Guide (English)
Page 5
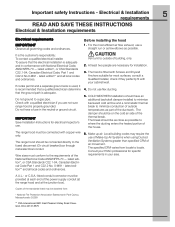
... a fuse in conformance with Screws and Drywall Anchors suitable for electrical inspector's use flex ducting. 5. latest edition*, or CSA Standards C22.1-94, Canadian Electrical Code Part 1 and C22.2 No. 0-M91 - Vent unit to minimize conduction of outside of the power supply conduit (at the range hood and at the junction box). Do not use . Important safety Instructions - COLD WEATHER installations should be connected with your area. The specified CFM varies...
... a fuse in conformance with Screws and Drywall Anchors suitable for electrical inspector's use flex ducting. 5. latest edition*, or CSA Standards C22.1-94, Canadian Electrical Code Part 1 and C22.2 No. 0-M91 - Vent unit to minimize conduction of outside of the power supply conduit (at the range hood and at the junction box). Do not use . Important safety Instructions - COLD WEATHER installations should be connected with your area. The specified CFM varies...
Complete Owner's Guide (English)
Page 6
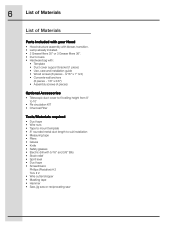
...; Use, care and installation guide • Wood screws (6 pieces - 3/16" x 1" 3/4) • Concrete wall anchors (6 pieces - 1/8" x 3/8") • Assembly screws (4 pieces) Optional Accessories • Telescopic duct cover to fit ceiling height from 8' to 10' • Re circulation KIT • Charcoal Filter Tools/Materials required • Duct tape • Wire nuts • Tape to mount template • 8" rounded metal duct length to suit installation • Measuring tape • Pliers • Gloves • Knife • Safety glasses • Electric drill...
...; Use, care and installation guide • Wood screws (6 pieces - 3/16" x 1" 3/4) • Concrete wall anchors (6 pieces - 1/8" x 3/8") • Assembly screws (4 pieces) Optional Accessories • Telescopic duct cover to fit ceiling height from 8' to 10' • Re circulation KIT • Charcoal Filter Tools/Materials required • Duct tape • Wire nuts • Tape to mount template • 8" rounded metal duct length to suit installation • Measuring tape • Pliers • Gloves • Knife • Safety glasses • Electric drill...
Complete Owner's Guide (English)
Page 7
... installation Min installation height from locale to protect against sharp edges. Wall framing for most efficient air flow exhaust, use of Make-Up Air Systems when using Ducted Ventilation Systems greater than specified CFM of the ductwork. Removing the packaging Remove carton carefully, Wear gloves to locale. This hood can be installed over any electric and gas cooktop/range. Order the wall or roof cap and anytransition needed in the wall, or to a horizontal support. • The vent hood should...
... installation Min installation height from locale to protect against sharp edges. Wall framing for most efficient air flow exhaust, use of Make-Up Air Systems when using Ducted Ventilation Systems greater than specified CFM of the ductwork. Removing the packaging Remove carton carefully, Wear gloves to locale. This hood can be installed over any electric and gas cooktop/range. Order the wall or roof cap and anytransition needed in the wall, or to a horizontal support. • The vent hood should...
Complete Owner's Guide (English)
Page 8
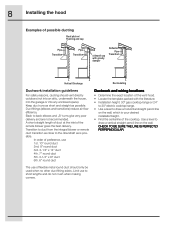
... vent directly outdoors (not into an attic, underneath the house, into the garage or into any enclosed space). Use a level to back elbows and „S" turns give very poor delivery and are not recommended. 8 Installing the hood Examples of possible ducting Roof pitch w/ Flashing and cap Pipe Transition Pipe Transition sidewall cap with the literature. • Installation height: 30" gas cooktop/range or 24" to 30" electric cooktop/range. • Use a level to the downdraft...
... vent directly outdoors (not into an attic, underneath the house, into the garage or into any enclosed space). Use a level to back elbows and „S" turns give very poor delivery and are not recommended. 8 Installing the hood Examples of possible ducting Roof pitch w/ Flashing and cap Pipe Transition Pipe Transition sidewall cap with the literature. • Installation height: 30" gas cooktop/range or 24" to 30" electric cooktop/range. • Use a level to the downdraft...
Complete Owner's Guide (English)
Page 9
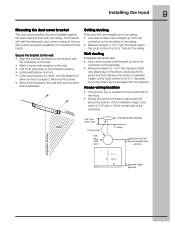
... on the elbow used) above the pencil line that indicates the bottom installation height, to expand. Wall ducting If ductwork will vent straight up to the ceiling: • Use level to draw a line straight up from the centerline on the template. • Measure at least 4 -3/4 " from the centerline on the template to the wall with the hood). . Remove the screws. • Secure the bracket to the ceiling. •...
... on the elbow used) above the pencil line that indicates the bottom installation height, to expand. Wall ducting If ductwork will vent straight up to the ceiling: • Use level to draw a line straight up from the centerline on the template. • Measure at least 4 -3/4 " from the centerline on the template to the wall with the hood). . Remove the screws. • Secure the bracket to the ceiling. •...

Complete Owner's Guide (English)
Page 11
... of the air deflector to the duct cover bracket with duct tape for an airtight seal. • Make the same connection in the direction of the deflector. • Place the assembled deflector and duct over the exhaust outlet. • Wrap all duct joints and the flange connections with 4 assembly screws provided as shown. Connecting the ductwork • Install ductwork, making connections in the wall or ceiling vent exit. Remove screws. • Mount the hood onto the "upper" screws. • Drive...
... of the air deflector to the duct cover bracket with duct tape for an airtight seal. • Make the same connection in the direction of the deflector. • Place the assembled deflector and duct over the exhaust outlet. • Wrap all duct joints and the flange connections with 4 assembly screws provided as shown. Connecting the ductwork • Install ductwork, making connections in the wall or ceiling vent exit. Remove screws. • Mount the hood onto the "upper" screws. • Drive...
Complete Owner's Guide (English)
Page 12
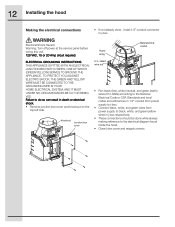
... power at the service panel before wiring this unit. 120 VAC, 15 or 20 Amp circuit required. Failure to the electrical diagram found inside the hood. • Close j-box cover and reapply screws. 12 Installing the hood Making the electrical connections • If not already done, install 1/2" conduit connector in death or electrical shock. • Remove junction box cover and knockout on the top left side. ELECTRICAL GROUNDING INSTRUCTIONS THIS APPLIANCE IS FITTED WITH AN ELECTRICAL JUNCTION BOX WITH 3 WIRES...
... power at the service panel before wiring this unit. 120 VAC, 15 or 20 Amp circuit required. Failure to the electrical diagram found inside the hood. • Close j-box cover and reapply screws. 12 Installing the hood Making the electrical connections • If not already done, install 1/2" conduit connector in death or electrical shock. • Remove junction box cover and knockout on the top left side. ELECTRICAL GROUNDING INSTRUCTIONS THIS APPLIANCE IS FITTED WITH AN ELECTRICAL JUNCTION BOX WITH 3 WIRES...
Complete Owner's Guide (English)
Page 13
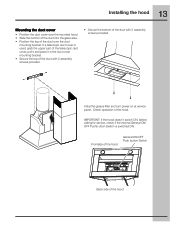
.../ OFF Pushb-utton Switch is used, grab the upper part of the telescopic duct cover, pull it and place it in the duct cover mounting bracket. • Secure the top of the duct with 2 assembly screws provided. • Secure the bottom of the hood Instal the grease filter and turn power on at service panel. Check operation of the duct over the duct mounting bracket. 13 Installing the hood Mounting the duct cover • Position the duct cover over the mounted hood. • Slide...
.../ OFF Pushb-utton Switch is used, grab the upper part of the telescopic duct cover, pull it and place it in the duct cover mounting bracket. • Secure the top of the duct with 2 assembly screws provided. • Secure the bottom of the hood Instal the grease filter and turn power on at service panel. Check operation of the duct over the duct mounting bracket. 13 Installing the hood Mounting the duct cover • Position the duct cover over the mounted hood. • Slide...
Complete Owner's Guide (English)
Page 16
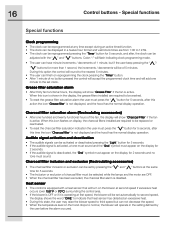
... charcoal filters installed are from 1:00 to normal, the blower will show "Grease Filter" if the fan is not displayed and the hood has the normal display operation. Heat sensor • The control is not displayed, and the hood has the normal display operation. Charcoal filter inclusion and exclusion (Recirculating accessories) • The charcoal filter inclusion or exclusion can be replaced or reactivated. • To reset the charcoal filter saturation indication the user...
... charcoal filters installed are from 1:00 to normal, the blower will show "Grease Filter" if the fan is not displayed and the hood has the normal display operation. Heat sensor • The control is not displayed, and the hood has the normal display operation. Charcoal filter inclusion and exclusion (Recirculating accessories) • The charcoal filter inclusion or exclusion can be replaced or reactivated. • To reset the charcoal filter saturation indication the user...
Complete Owner's Guide (English)
Page 17
... fan system while cooking helps keep the kitchen comfortable and less humid. • It also reduces cooking odors and soiling moisture that create a frequent need for strong odors or fumes. • Drafts across the range or cooktop will cause the escape of heat, smoke, moisture, grease and cooking odors from the hood. 17 For Best results • Continuous use and the higher speeds for cleaning...
... fan system while cooking helps keep the kitchen comfortable and less humid. • It also reduces cooking odors and soiling moisture that create a frequent need for strong odors or fumes. • Drafts across the range or cooktop will cause the escape of heat, smoke, moisture, grease and cooking odors from the hood. 17 For Best results • Continuous use and the higher speeds for cleaning...
Complete Owner's Guide (English)
Page 18
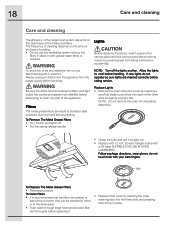
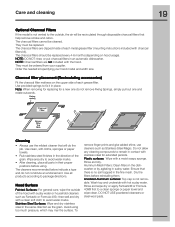
... bare fingers. 18 Care and cleaning Care and cleaning The efficiency of the range hood system depends on accidentally. To avoid risk of fire and explosion do not operate be washed by hand or in place. Filters The metal grease filters are made of the three slots and gently prying it free. Replace Lights • Remove the inner lamp lens cover by inserting the three retaining tabs...
... bare fingers. 18 Care and cleaning Care and cleaning The efficiency of the range hood system depends on accidentally. To avoid risk of fire and explosion do not operate be washed by hand or in place. Filters The metal grease filters are made of the three slots and gently prying it free. Replace Lights • Remove the inner lamp lens cover by inserting the three retaining tabs...
Complete Owner's Guide (English)
Page 19
.... Stainless Steel Surfaces: Wipe and dry stainless steel in the direction of each metal grease filter (mounting instructions included with charcoal filters kit). Plastic surfaces: Wipe with hot sudsy water. Wash top and underside with a moist soapy sponge. They must be replaced. Use clean, soft cloths, sponges or paper towels. • Rub stainless steel finishes in the same direction as the grain. Anodized Aluminum surfaces: Top cap is not vented...
.... Stainless Steel Surfaces: Wipe and dry stainless steel in the direction of each metal grease filter (mounting instructions included with charcoal filters kit). Plastic surfaces: Wipe with hot sudsy water. Wash top and underside with a moist soapy sponge. They must be replaced. Use clean, soft cloths, sponges or paper towels. • Rub stainless steel finishes in the same direction as the grain. Anodized Aluminum surfaces: Top cap is not vented...
Complete Owner's Guide (English)
Page 20
... date on models with all local plumbing, electrical and/or gas codes. 3. Product features or specifications as removal of trim, cupboards, shelves, etc., which are listed WARRANTY original purchase parts of light bulbs and/or fluorescent tubes (on the bill establishes the warranty period should service be obtained by servicers other than genuine Electrolux Home Products parts; In Canada, your appliance is warranted by Electrolux Canada Corp. Proper connection to...
... date on models with all local plumbing, electrical and/or gas codes. 3. Product features or specifications as removal of trim, cupboards, shelves, etc., which are listed WARRANTY original purchase parts of light bulbs and/or fluorescent tubes (on the bill establishes the warranty period should service be obtained by servicers other than genuine Electrolux Home Products parts; In Canada, your appliance is warranted by Electrolux Canada Corp. Proper connection to...
Wiring Diagram (All Languages)
Page 1
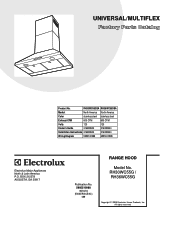
... America North America Color stainless steel stainless steel Exhaust-CFM 600 CFM 600 CFM Volts 120 120 Owner's Guide 316488524 316488524 Installation Instructions 316488524 316488524 Wiring Diagram 5995510988 5995510988 RH30-36WC55G Cover.eps RH30-36WC55G Parts.eps SE1Q5A.eps RANGE HOOD Electrolux Major Appliances North & Latin America P.O. RH30WC55G / RH36WC55G Copyright © 2008 Electrolux Home Products, Inc. BOX 212378 AUGUSTA, GA 30917 Publication No. 5995510988 08/04/04 (EN/SERVICE/KC) 099 Model No. All rights...
... America North America Color stainless steel stainless steel Exhaust-CFM 600 CFM 600 CFM Volts 120 120 Owner's Guide 316488524 316488524 Installation Instructions 316488524 316488524 Wiring Diagram 5995510988 5995510988 RH30-36WC55G Cover.eps RH30-36WC55G Parts.eps SE1Q5A.eps RANGE HOOD Electrolux Major Appliances North & Latin America P.O. RH30WC55G / RH36WC55G Copyright © 2008 Electrolux Home Products, Inc. BOX 212378 AUGUSTA, GA 30917 Publication No. 5995510988 08/04/04 (EN/SERVICE/KC) 099 Model No. All rights...
Wiring Diagram (All Languages)
Page 3
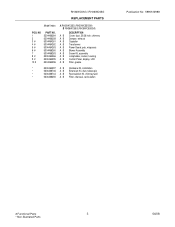
...DESCRIPTION A B Cover, duct, 30/36 inch, chimney A B Damper, exhaust A B Capacitor A B Transformer A B Power Board, pcb, w/spacers A B Blower Assembly A B Screw Kit, assembly A B Lampholder, socket, housing A B Control Panel, display, LCD A B Filter, grease * 5304464297 A B Hardware Kit, installation * 5304466746 A B Extension Kit, duct, telescopic * 5304466744 A B Recirculation Kit, chimney/wall * 5304466255 A B Filter, charcoal, recirculation Publication No: 5995510988 # Functional Parts 3 * Non-Illustrated Parts 04/08 RH30WC55G / RH36WC55G REPLACEMENT PARTS Model Index: POS...
...DESCRIPTION A B Cover, duct, 30/36 inch, chimney A B Damper, exhaust A B Capacitor A B Transformer A B Power Board, pcb, w/spacers A B Blower Assembly A B Screw Kit, assembly A B Lampholder, socket, housing A B Control Panel, display, LCD A B Filter, grease * 5304464297 A B Hardware Kit, installation * 5304466746 A B Extension Kit, duct, telescopic * 5304466744 A B Recirculation Kit, chimney/wall * 5304466255 A B Filter, charcoal, recirculation Publication No: 5995510988 # Functional Parts 3 * Non-Illustrated Parts 04/08 RH30WC55G / RH36WC55G REPLACEMENT PARTS Model Index: POS...


