Electrolux RH42PC60GS Support Question
Electrolux RH42PC60GS Support Question
Find answers below for this question about Electrolux RH42PC60GS.Need a Electrolux RH42PC60GS manual? We have 3 online manuals for this item!
Question posted by pepperman44 on July 22nd, 2012
How To Replace Lights
2 of the lights in my range hood have gone out at the same time. How do I replace and or troubleshoot?
Current Answers


Related Electrolux RH42PC60GS Manual Pages
Complete Owner's Guide (English) - Page 2
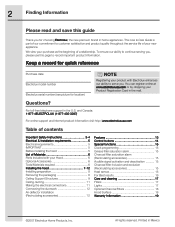
... 15 For Best results 16 Care and cleaning 17 Filters 17 Lights 17 Optional Charcoal Filters 18 Hood Surface 18 Warranty Information 19
©2007 Electrolux Home Products, ...Instructions 3-4 Electrical & Installation requirements 5 Electrical requirements 5 IMPORTANT 5 Before installing the hood 5 List of Materials 6 Parts Included with Electrolux enhances our ability to serve you ...
Complete Owner's Guide (English) - Page 4
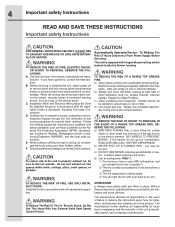
.... TO REDUCE THE RISK OF INJURY TO PERSONS, IN THE EVENT OF A RANGE TOP GREASE FIRE, OBSERVE THE FOLLOWING: a) SMOTHER FLAMES with integral disconnecting switch located inside the blower ...MATERIALS OR VAPORS.
To Reduce The Risk Of Fire Or Electric Shock, Do Not Use This Hood With Any External Solid State Speed Control Device.
4
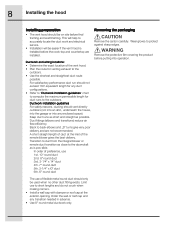
Important safety Instructions
READ AND SAVE THESE INSTRUCTIONS...
Complete Owner's Guide (English) - Page 5

... conduit. The break should have a fuse in your cabinet/wall.
4. A U.L.-
The range hood should be connected with your area.
Wire sizes must conform to locale. Make up air:...Electrical Code, Part 1 and C22.2 No.0-M91 - At least two people are not sure range hood is the customer's responsibility: To contact a qualified electrical installer.
Copies of the standards listed ...
Complete Owner's Guide (English) - Page 6

6
List of Materials
List of Materials
Parts included in your hood
• Hood structure assembly with blower, transition. • 4 Lamps already installed. • 1 Grease filter • 4 Duct covers. • Hardware bag with:
• Ceiling Mount Template • Use, ...
Complete Owner's Guide (English) - Page 7
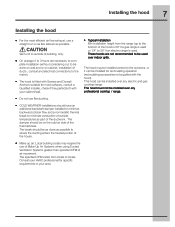
... are not recommended to be as close as part of ducts , conduit and electrical connections to the mains).
• The hood is used or 24" to 30" if an electric range is fitted with Screws and Drywall Anchors suitable for recirculating operation (recirculating accessories not supplied with your area. The break should...
Complete Owner's Guide (English) - Page 8
... corners. • Install a wall cap with damper or roof cap at the inlet of the vent hood. • Plan the route for duct runs to back elbows and „S" turns give very poor ...delivery and are installed. In order of flexible metal round duct should only be easier if the vent hood is pos-sible. Ductwork and wiring locations: • Determine the exact location of the remote blower ...
Complete Owner's Guide (English) - Page 9
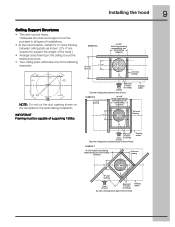
... symmetrically over
duct/cooktop centerline
Cooktop outline
7 1/16"
8" duct
2x4 cross framing
Align duct to center Front of cooktop of hood Top view–ceiling joists run perpendicular to front of hood
Cooktop outline
EXAMPLE C
10-1/16" Install cross-framing symmetrically over duct/cooktop
centerline
2x4 cross framing
7 1/16"
8" duct
16" joist...
Complete Owner's Guide (English) - Page 10
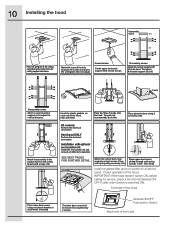
...switched ON. Place glass brackets using a screw by 4 screws. Frontside of the hood. Vent hood ONLY
Perform the ductwork connection. click ! Install the recirculation kit and connect air ...Attach the vertical duct cover supports using one plastic bracket at service panel.
10 Installing the hood
8 assembly
screw
(B)
(A)
Place the template in the ceiling (see also next page)...
Complete Owner's Guide (English) - Page 11
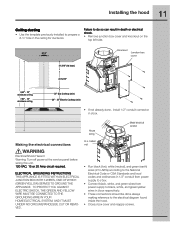
... not already done, install 1/2" conduit connector in j-box respectively.
• These connections should be done always making reference to the electrical diagram found inside the hood.
• Close j-box cover and reapply screws.
listed nut
Metal electrical conduit
Electrical Shock Hazard Warning: Turn off power at the service panel before wiring...
Complete Owner's Guide (English) - Page 12
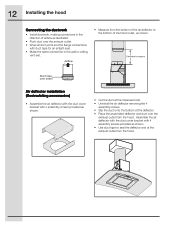
... 4 assembly screws provided as shown.
• Cut the duct at the exhaust outlet from the hood. Assemble the air deflector with the duct cover bracket with duct tape for an airtight seal. ...• Make the same connection in the wall or ceiling
vent exit. 12 Installing the hood
Connecting the ductwork
• Install ductwork, making connections in the direction of airflow as shown. ...
Complete Owner's Guide (English) - Page 13

Features
1. Grease filter Handle 4. Grease filter 5. Duct covers 7. Canopy 6. Louver holes (Only for Recirculating version)
7
6
13 Features
1
54
32 Lamp housings 3. Blower and light controls 2.
Complete Owner's Guide (English) - Page 14
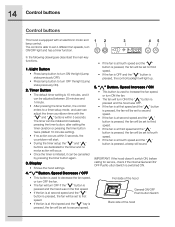
... and the " " button is pressed, the control backlight will light up.
5. Display
• Shows the hood settings.
4. IMPORTANT: If the hood doesn't switch ON, before calling for service, check if the ...motor action will occur.
• Once the timer is initiated, it can adjust the timer countdown time with an electronic motor and 1
2
3
lamp control. The timer can be set to increase ...
Complete Owner's Guide (English) - Page 15
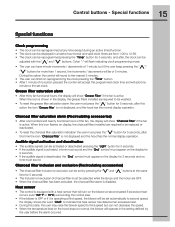
... , the clock can finish on the hood drops to normal, the blower will show... can be activated or deactivated pressing the "Light" button for 5 seconds. • If...replaced or reactivated.
• To reset the charcoal filter saturation indication the user must press the " " button for 5 seconds, after this time the icon "Charcoal filter" is operating at any time except during an active timed...
Complete Owner's Guide (English) - Page 16
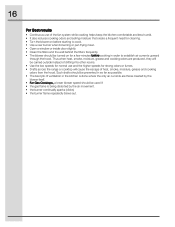
...normal use of heat, smoke, moisture, grease and cooking odors from the hood. 16
For Best results
• Continuous use and the higher speeds for strong odors or fumes. • Drafts across the range or cooktop will be carried outside instead of drifting into other rooms. &#... far as possible. • The best job of ventilation in order to establish air currents upward
through the hood.
Complete Owner's Guide (English) - Page 17
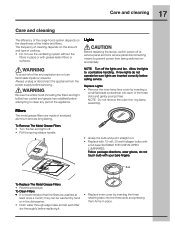
...efficiency of the range hood system depends on accidentally.
Always unplug or disconnect the appliance from being switched on the cleanliness of the intake and filters. If new lights do not use...gently prying it straight out. • Replace with 12 volt, 20 watt halogen bulbs with
a G4 base SUITABLE FOR USE IN OPEN LUMINAIRES.
Replace Lights • Remove the inner lamp lens cover...
Complete Owner's Guide (English) - Page 18
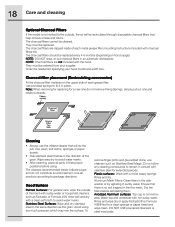
...through disposable charcoal filters that will be ordered from your hood model and width size. Note: When removing for replacing for extended periods.
Hood Surface
Painted Surfaces: For general care, wipe the ...the model is no soil trapped in the fine mesh. The charcoal filters cannot be replaced every 4-6 months (depending on the upper side of the grain. The charcoal filters should...
Complete Owner's Guide (English) - Page 19
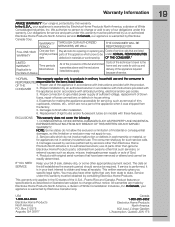
...RANGE WARRANTY Your range... abuse, misuse, inadequate power supply or acts of light bulbs and/or fluorescent tubes (on the bill establishes...to state. OF THE CONSUMER.*
LIMITED WARRANTY (Applicable to
Time periods listed above and the exclusions listed below . Proper installation... to change or add to be readily determined. Replacement of God. 4. or external causes such as described...
Product Specifications Sheet (English) - Page 1
...For use on the web at electroluxappliances.ca. PN # RHDFP60GS
Optional
Specifications
Product Dimensions - Halogen Lighting For bright illumination of air per locale. Wall Ovens
Warmer Drawers
Cooktops
Built-In Ranges
Freestanding Ranges
Microwaves
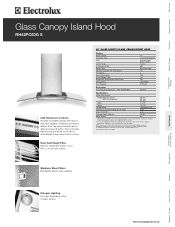
Glass Canopy Island Hood
RH42PC60G S
LCD Electronic Controls An array of versatile options with LCD Display Fan Speeds Sound Level (dBA...
Product Specifications Sheet (English) - Page 2
Glass Canopy Island Ceiling-Mount Hood
RH42PC60G S
42" Glass Canopy Island Ceiling-Mount Hood Specifications
• Product Weight - 87 Lbs. •... breaks such as they may vary per locale. • Minimum installation height allowed from bottom of hood to maximum range for detailed instructions. If not, adjust installation. • Calculate chimney structure height (S). Printed in ...
Similar Questions

Controls, Display, Lights And Fan Are Not Working.
Unit's lights flickered a bit for a week or so, then unit shut itself off once but the switch for th...
Unit's lights flickered a bit for a week or so, then unit shut itself off once but the switch for th...
(Posted by jtdonnelly 7 years ago)
Hood Stopped Working.
Have power to hood. No led or panel lights. No fan or time showing on panel.
Have power to hood. No led or panel lights. No fan or time showing on panel.
(Posted by blandon3227 9 years ago)

What Are The Bulb Numbers For The Electrolux Hood Fan Rh42pc60gs
(Posted by Christymike 10 years ago)
No Power To Light
i just installed the vent hood, motor is working, however, no lights. there are no power to the ligh...
i just installed the vent hood, motor is working, however, no lights. there are no power to the ligh...
(Posted by joharakibul 11 years ago)

Range Hood Fan Not Working
We have model RH36WC55GS range hood fan. A message came on that said to clean charcoal filter. O...
We have model RH36WC55GS range hood fan. A message came on that said to clean charcoal filter. O...
(Posted by melkevin 12 years ago)