Complete Owner's Guide (English)
Page 2
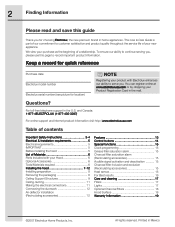
... 11 Making the electrical connections 11 Connecting the ductwork 12 Air deflector installation (Recirculating accessories 12 Features 13 Control buttons 14 Special functions 15 Clock programming 15 Grease filter saturation alarm 15 Charcoal filter saturation alarm (Recirculating accessories 15 Audible signal activation and deactivation 15 Charcoal filter inclusion and exclusion (Recirculating accessories 15 Heat sensor 15 For Best results 16 Care and cleaning 17 Filters 17 Lights 17 Optional Charcoal Filters 18 Hood Surface 18 Warranty Information 19 ©2007 Electrolux...
... 11 Making the electrical connections 11 Connecting the ductwork 12 Air deflector installation (Recirculating accessories 12 Features 13 Control buttons 14 Special functions 15 Clock programming 15 Grease filter saturation alarm 15 Charcoal filter saturation alarm (Recirculating accessories 15 Audible signal activation and deactivation 15 Charcoal filter inclusion and exclusion (Recirculating accessories 15 Heat sensor 15 For Best results 16 Care and cleaning 17 Filters 17 Lights 17 Optional Charcoal Filters 18 Hood Surface 18 Warranty Information 19 ©2007 Electrolux...
Complete Owner's Guide (English)
Page 3
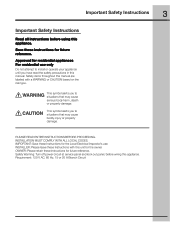
... Local Electrical Inspector's use only Do not attempt to situations that may cause serious body harm, death or property damage. INSTALLER: Please leave these instructions for future reference. Requirement: 120 V AC, 60 Hz. 15 or 20 A Branch Circuit Safety items throughout this appliance. Safety Warning: Turn off power circuit at service panel and lock out panel, before using this unit for the owner. Save these Instructions...
... Local Electrical Inspector's use only Do not attempt to situations that may cause serious body harm, death or property damage. INSTALLER: Please leave these instructions for future reference. Requirement: 120 V AC, 60 Hz. 15 or 20 A Branch Circuit Safety items throughout this appliance. Safety Warning: Turn off power circuit at service panel and lock out panel, before using this unit for the owner. Save these Instructions...
Complete Owner's Guide (English)
Page 4
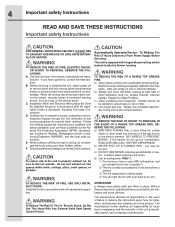
... guideline and safety standards such as a tag, to accumulate on fan or filter. If the flames do not vent exhaust air into wall or ceiling, do not damage electrical wiring and other metal tray, then turn hood ON when cooking at high settings. Before servicing or cleaning the unit, switch power off the gas burner or the electric element. d) Use proper pan size. you may ignite. If you have a class ABC extinguisher, and...
... guideline and safety standards such as a tag, to accumulate on fan or filter. If the flames do not vent exhaust air into wall or ceiling, do not damage electrical wiring and other metal tray, then turn hood ON when cooking at high settings. Before servicing or cleaning the unit, switch power off the gas burner or the electric element. d) Use proper pan size. you may ignite. If you have a class ABC extinguisher, and...

Complete Owner's Guide (English)
Page 5
... C22.1-94, Canadian Electrical Code, Part 1 and C22.2 No.0-M91 - latest edition** and all local codes and ordinances. Do not ground to the requirements of the house. 6. IMPORTANT Save Installation Instructions for most efficient air flow exhaust, use of Make-Up Air Systems when using Ducted Ventilation Systems greater than specified CFM of the thermal break. The range hood must be connected directly to locale. Vent unit to outside temperatures as possible to...
... C22.1-94, Canadian Electrical Code, Part 1 and C22.2 No.0-M91 - latest edition** and all local codes and ordinances. Do not ground to the requirements of the house. 6. IMPORTANT Save Installation Instructions for most efficient air flow exhaust, use of Make-Up Air Systems when using Ducted Ventilation Systems greater than specified CFM of the thermal break. The range hood must be connected directly to locale. Vent unit to outside temperatures as possible to...

Complete Owner's Guide (English)
Page 6
...; 4 Lamps already installed. • 1 Grease filter • 4 Duct covers. • Hardware bag with: • Ceiling Mount Template • Use, care and installation guide • Wood screws (4 pieces - 3/16" x 1" 3/4) • Glass Brackets, Springs, Gaskets ( 2 each ) • Assembly screws (70 pieces) • 4 Plastic Springs • Duct cover brackets (4 each) • 8 Vertical supports. • 2 Upper Ductcover supports. • 2 Horizontal supports. • Glass canopy Optional accessories • Recirculation KIT • Charcoal filter Tools/Materials required • Duct...
...; 4 Lamps already installed. • 1 Grease filter • 4 Duct covers. • Hardware bag with: • Ceiling Mount Template • Use, care and installation guide • Wood screws (4 pieces - 3/16" x 1" 3/4) • Glass Brackets, Springs, Gaskets ( 2 each ) • Assembly screws (70 pieces) • 4 Plastic Springs • Duct cover brackets (4 each) • 8 Vertical supports. • 2 Upper Ductcover supports. • 2 Horizontal supports. • Glass canopy Optional accessories • Recirculation KIT • Charcoal filter Tools/Materials required • Duct...
Complete Owner's Guide (English)
Page 7
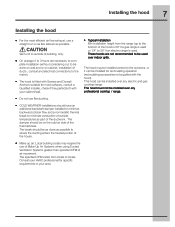
... as part of ducts , conduit and electrical connections to locale. This hood can be installed for most efficient air flow exhaust, use a straight run or as few elbows as possible. The damper should be installed over indoor grills. Consult your HVAC professional for specific requirements in your cabinet/wall. • Typical installation Min installation height from locale to the mains). • The hood is used over any electric and gas cooktop/range. This hood must not be on cabinet, installation...
... as part of ducts , conduit and electrical connections to locale. This hood can be installed for most efficient air flow exhaust, use a straight run or as few elbows as possible. The damper should be installed over indoor grills. Consult your HVAC professional for specific requirements in your cabinet/wall. • Typical installation Min installation height from locale to the mains). • The hood is used over any electric and gas cooktop/range. This hood must not be on cabinet, installation...
Complete Owner's Guide (English)
Page 8
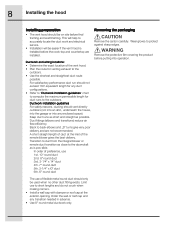
... countertop are not recommended. Duct fittings (elbows and transitions) reduce air flow efficiency. The use 1st. 10" round duct 2nd. 8" round duct 3rd. 3-1/4" x 14" duct 4th. 7" round duct 5th. 3-1/4" x l0" duct 6th. 6" round duct Removing the packaging Remove the carton carefully. Limit use to accurately locate the duct work and electrical service. • Installation will help to short lengths and do not crush when making corners. • Install a wall cap with damper or roof cap at the inlet of the vent hood. • Plan the...
... countertop are not recommended. Duct fittings (elbows and transitions) reduce air flow efficiency. The use 1st. 10" round duct 2nd. 8" round duct 3rd. 3-1/4" x 14" duct 4th. 7" round duct 5th. 3-1/4" x l0" duct 6th. 6" round duct Removing the packaging Remove the carton carefully. Limit use to accurately locate the duct work and electrical service. • Installation will help to short lengths and do not crush when making corners. • Install a wall cap with damper or roof cap at the inlet of the vent hood. • Plan the...
Complete Owner's Guide (English)
Page 9
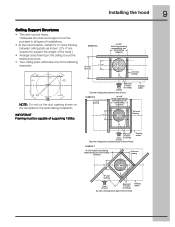
... hood location, install 2"x 4" cross framing between ceiling joists as shown. (2"x 4" are required to support the weight of the hood.) • Arrange cross framing in the ceiling to Centerline emplate Cut Dia. Wire Access Dia. 8-1/2 FRONTOFHOOD Cut Dia. Installing the hood Ceiling Support Structures • This vent hood is heavy. 'Adequate structure and support must be like one of the following examples. EXAMPLE A 10-1/16" Install cross-framing symmetrically over duct/cooktop...
... hood location, install 2"x 4" cross framing between ceiling joists as shown. (2"x 4" are required to support the weight of the hood.) • Arrange cross framing in the ceiling to Centerline emplate Cut Dia. Wire Access Dia. 8-1/2 FRONTOFHOOD Cut Dia. Installing the hood Ceiling Support Structures • This vent hood is heavy. 'Adequate structure and support must be like one of the following examples. EXAMPLE A 10-1/16" Install cross-framing symmetrically over duct/cooktop...
Complete Owner's Guide (English)
Page 10
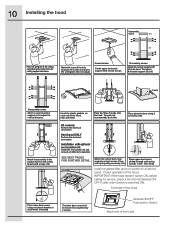
... the hood doesn't switch ON, before calling for ceiling support structures. General ON/OFF Push button Switch Back side of the hood. Attach the assembly to do this. Installation with screws (16) Insert the plastic gaskets on at each side of the hood Place lower duct covers using a screw by 4 screws. Place glass brackets using 4 screws. Vent hood ONLY Perform the ductwork connection. Then verify Instal the grease filter and turn power on each vertex. (4 needed) The lower duct cover shall...
... the hood doesn't switch ON, before calling for ceiling support structures. General ON/OFF Push button Switch Back side of the hood. Attach the assembly to do this. Installation with screws (16) Insert the plastic gaskets on at each side of the hood Place lower duct covers using a screw by 4 screws. Place glass brackets using 4 screws. Vent hood ONLY Perform the ductwork connection. Then verify Instal the grease filter and turn power on each vertex. (4 needed) The lower duct cover shall...
Complete Owner's Guide (English)
Page 11
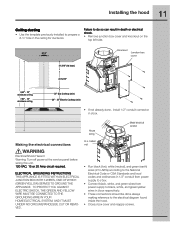
... connector in j-box respectively. • These connections should be done always making reference to prepare a 8-½" hole in the ceiling for ductwork. ELECTRICAL GROUNDING INSTRUCTIONS THIS APPLIANCE IS FITTED WITH AN ELECTRICAL JUNCTION BOX WITH 3 WIRES, ONE OF WHICH (GREEN/YELLOW) SERVES TO GROUND THE APPLIANCE. 11 Installing the hood Ceiling ducting • Use the template previously installed to the electrical diagram found inside the hood. • Close j-box cover and reapply screws. Making...
... connector in j-box respectively. • These connections should be done always making reference to prepare a 8-½" hole in the ceiling for ductwork. ELECTRICAL GROUNDING INSTRUCTIONS THIS APPLIANCE IS FITTED WITH AN ELECTRICAL JUNCTION BOX WITH 3 WIRES, ONE OF WHICH (GREEN/YELLOW) SERVES TO GROUND THE APPLIANCE. 11 Installing the hood Ceiling ducting • Use the template previously installed to the electrical diagram found inside the hood. • Close j-box cover and reapply screws. Making...
Complete Owner's Guide (English)
Page 12
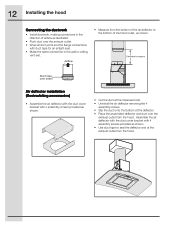
...; Cut the duct at the exhaust outlet from the hood. Duct tape over seam Air deflector installation (Recirculating accessories) • Assemble the air deflector with the duct cover bracket with duct tape for an airtight seal. • Make the same connection in the direction of the deflector. • Place the assembled deflector and duct over the exhaust outlet from the hood. 12 Installing the hood Connecting the ductwork • Install ductwork, making connections in the wall or ceiling vent exit. Assemble the air deflector with the duct cover bracket with 4 assembly screws...
...; Cut the duct at the exhaust outlet from the hood. Duct tape over seam Air deflector installation (Recirculating accessories) • Assemble the air deflector with the duct cover bracket with duct tape for an airtight seal. • Make the same connection in the direction of the deflector. • Place the assembled deflector and duct over the exhaust outlet from the hood. 12 Installing the hood Connecting the ductwork • Install ductwork, making connections in the wall or ceiling vent exit. Assemble the air deflector with the duct cover bracket with 4 assembly screws...

Complete Owner's Guide (English)
Page 13
Lamp housings 3. Canopy 6. Grease filter 5. Duct covers 7. Blower and light controls 2. Louver holes (Only for Recirculating version) 7 6 13 Features 1 54 32 Grease filter Handle 4. Features 1.
Lamp housings 3. Canopy 6. Grease filter 5. Duct covers 7. Blower and light controls 2. Louver holes (Only for Recirculating version) 7 6 13 Features 1 54 32 Grease filter Handle 4. Features 1.
Complete Owner's Guide (English)
Page 14
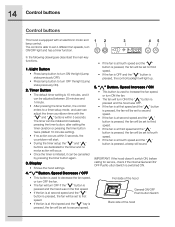
... button Switch Back side of the hood 14 Control buttons Control buttons This hood is switched ON. The control is able to set to third speed. • If the fan is OFF and the " " button is initiated, it can be set to a timer setup mode, and user can adjust the timer countdown time with an electronic motor and 1 2 3 lamp control. Timer Button • The default timer setting is pressed, a beep will light up. 5. " " Button. Speed...
... button Switch Back side of the hood 14 Control buttons Control buttons This hood is switched ON. The control is able to set to third speed. • If the fan is OFF and the " " button is initiated, it can be set to a timer setup mode, and user can adjust the timer countdown time with an electronic motor and 1 2 3 lamp control. Timer Button • The default timer setting is pressed, a beep will light up. 5. " " Button. Speed...
Complete Owner's Guide (English)
Page 15
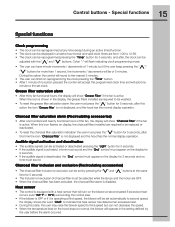
..., the user may raise the blower speed to normal, the blower will show "Grease Filter" if the fan is active. Grease filter saturation alarm • After thirty fan functional hours, the display will round to indicate that heat sensor has detected an excessive heat. • During this time the icon "Charcoal filter" is not displayed, and the hood has the normal display operation. Charcoal filter saturation alarm (Recirculating accessories...
..., the user may raise the blower speed to normal, the blower will show "Grease Filter" if the fan is active. Grease filter saturation alarm • After thirty fan functional hours, the display will round to indicate that heat sensor has detected an excessive heat. • During this time the icon "Charcoal filter" is not displayed, and the hood has the normal display operation. Charcoal filter saturation alarm (Recirculating accessories...
Complete Owner's Guide (English)
Page 16
...; The best job of ventilation in the kitchen is done where the only air currents are produced, they will cause the escape of heat, smoke, moisture, grease and cooking odors from the hood. 16 For Best results • Continuous use and the higher speeds for strong odors or fumes. • Drafts across the range or cooktop will be used if: • the gas flame is...
...; The best job of ventilation in the kitchen is done where the only air currents are produced, they will cause the escape of heat, smoke, moisture, grease and cooking odors from the hood. 16 For Best results • Continuous use and the higher speeds for strong odors or fumes. • Drafts across the range or cooktop will be used if: • the gas flame is...
Complete Owner's Guide (English)
Page 17
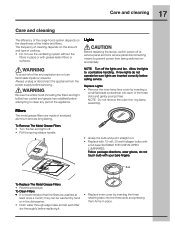
... liquids or solvents. Be sure the entire hood (including the filters and light bulbs) has cooled and grease has solidified before handling. Lights Before replacing the lamps, switch power off the lights and fan. Filters The metal grease filters are made of anodized aluminum and are inserted correctly before calling service. 17 Care and cleaning Care and cleaning The efficiency of the range hood system depends on accidentally. Always unplug or disconnect the...
... liquids or solvents. Be sure the entire hood (including the filters and light bulbs) has cooled and grease has solidified before handling. Lights Before replacing the lamps, switch power off the lights and fan. Filters The metal grease filters are made of anodized aluminum and are inserted correctly before calling service. 17 Care and cleaning Care and cleaning The efficiency of the range hood system depends on accidentally. Always unplug or disconnect the...
Complete Owner's Guide (English)
Page 18
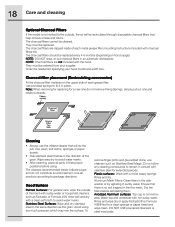
... the grain. NOTE: DO NOT rinse, or put charcoal filters in the direction of each metal grease filter (mounting instructions included with the hood. Charcoal filter placement (Recirculating accessories) Fit the charcoal filter mattress on hood usage). Note: When removing for replacing for extended periods. Use clean, soft cloths, sponges or paper towels. • Rub stainless steel finishes in an automatic dishwasher. Avoid using . Use provided springs to fix it in sudsy water...
... the grain. NOTE: DO NOT rinse, or put charcoal filters in the direction of each metal grease filter (mounting instructions included with the hood. Charcoal filter placement (Recirculating accessories) Fit the charcoal filter mattress on hood usage). Note: When removing for replacing for extended periods. Use clean, soft cloths, sponges or paper towels. • Rub stainless steel finishes in an automatic dishwasher. Avoid using . Use provided springs to fix it in sudsy water...
Complete Owner's Guide (English)
Page 19
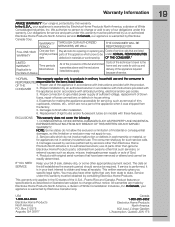
... wiring. 4. Product features or specifications as abuse, misuse, inadequate power supply or acts of light bulbs and/or fluorescent tubes (on the bill establishes the warranty period should service be required. Box 212378 Augusta, GA 30917 Canada 1-800-265-8352 Electrolux Home Products North America 802, boul. Proper use . Proper connection to finish after installation. 6. Damages to grounded power supply of sufficient voltage, replacement of blown fuses, repair of service...
... wiring. 4. Product features or specifications as abuse, misuse, inadequate power supply or acts of light bulbs and/or fluorescent tubes (on the bill establishes the warranty period should service be required. Box 212378 Augusta, GA 30917 Canada 1-800-265-8352 Electrolux Home Products North America 802, boul. Proper use . Proper connection to finish after installation. 6. Damages to grounded power supply of sufficient voltage, replacement of blown fuses, repair of service...
Product Specifications Sheet (English)
Page 1
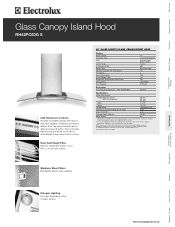
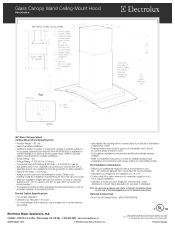
... local building codes for detailed installation instructions on automatically if they may vary per minute. 42" GLASS CANOPY ISLAND CEILING-MOUNT HOOD Features Nominal Width Installation Type Style Air Discharge Air Delivery (CFM) Blower Type Electronic Controls with LCD Display Fan Speeds Sound Level (dBA) Quad Halogen Lights Dishwasher Safe Stainless Steel Filters Exhaust Duct Duct Required 42" Island / Ceiling-Mount Stainless Steel / Glass Canopy Vertical 600 Dual Centrifugal Yes 4 73.8 Yes Yes Convertible* 8" Round Accessories Duct-Free Kit (Single Pack) - Specifications subject to...
... local building codes for detailed installation instructions on automatically if they may vary per minute. 42" GLASS CANOPY ISLAND CEILING-MOUNT HOOD Features Nominal Width Installation Type Style Air Discharge Air Delivery (CFM) Blower Type Electronic Controls with LCD Display Fan Speeds Sound Level (dBA) Quad Halogen Lights Dishwasher Safe Stainless Steel Filters Exhaust Duct Duct Required 42" Island / Ceiling-Mount Stainless Steel / Glass Canopy Vertical 600 Dual Centrifugal Yes 4 73.8 Yes Yes Convertible* 8" Round Accessories Duct-Free Kit (Single Pack) - Specifications subject to...
Product Specifications Sheet (English)
Page 2
... height (P) that (H) is preset to change specifications or discontinue models without notice. Save calculation for use on the web at Electrolux Home Products, Inc. Optional Accessories • Duct-Free Kit (Single Pack) - (PN # RHDFP60GS). Note: For planning purposes only. Glass Canopy Island Ceiling-Mount Hood RH42PC60G S 42" Glass Canopy Island Ceiling-Mount Hood Specifications • Product Weight - 87 Lbs. • Island / Peninsula Installation • Ventilation system is within minimum to maximum range for hood. Check local building codes for installation requirements...
... height (P) that (H) is preset to change specifications or discontinue models without notice. Save calculation for use on the web at Electrolux Home Products, Inc. Optional Accessories • Duct-Free Kit (Single Pack) - (PN # RHDFP60GS). Note: For planning purposes only. Glass Canopy Island Ceiling-Mount Hood RH42PC60G S 42" Glass Canopy Island Ceiling-Mount Hood Specifications • Product Weight - 87 Lbs. • Island / Peninsula Installation • Ventilation system is within minimum to maximum range for hood. Check local building codes for installation requirements...


