

Owners Guide
Page 2
... your model number and serial number. This information will need to continue serving you for choosing Electrolux, the new premium brand in the USA 2 Finding Information PLEASE READ AND SAVE THIS GUIDE Attach your unit. In the event you require assistance, please contact the dealer where you keep this page for future reference. This Use & Care Guide is part of our commitment to customer...
... your model number and serial number. This information will need to continue serving you for choosing Electrolux, the new premium brand in the USA 2 Finding Information PLEASE READ AND SAVE THIS GUIDE Attach your unit. In the event you require assistance, please contact the dealer where you keep this page for future reference. This Use & Care Guide is part of our commitment to customer...
Owners Guide
Page 3
Purchase Date Electrolux Model Number Electrolux Serial Number Dealer Name Dealer Address Dealer Telephone Keep this manual also includes your product with Electrolux enhances our ability to validate the registration date. For toll-free telephone support in the U.S. Do not install or use a damaged appliance. NOTE Registering your product registration information. and Canada: 1-877- 4ELECTROLUX (1-877-435-3287) For online support and Internet product information...
Purchase Date Electrolux Model Number Electrolux Serial Number Dealer Name Dealer Address Dealer Telephone Keep this manual also includes your product with Electrolux enhances our ability to validate the registration date. For toll-free telephone support in the U.S. Do not install or use a damaged appliance. NOTE Registering your product registration information. and Canada: 1-877- 4ELECTROLUX (1-877-435-3287) For online support and Internet product information...
Owners Guide
Page 5
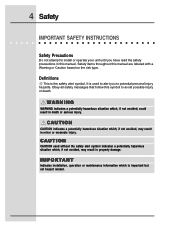
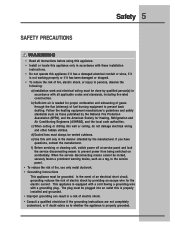
...result in this manual. CAUTION CAUTION used to alert you have read the safety precautions in minor or moderate injury. CAUTION CAUTION indicates a potentially hazardous situation which is the safety alert symbol. I M P O R TA N T Indicates installation, operation or maintenance ...information which , if not avoided, may result in death or serious injury. ! This is important but not hazard related. Safety 5 IMPORTANT SAFETY INSTRUCTIONS Safety Precautions Do not attempt to install or operate your unit until you to potential...
...result in this manual. CAUTION CAUTION used to alert you have read the safety precautions in minor or moderate injury. CAUTION CAUTION indicates a potentially hazardous situation which is the safety alert symbol. I M P O R TA N T Indicates installation, operation or maintenance ...information which , if not avoided, may result in death or serious injury. ! This is important but not hazard related. Safety 5 IMPORTANT SAFETY INSTRUCTIONS Safety Precautions Do not attempt to install or operate your unit until you to potential...
Owners Guide
Page 6
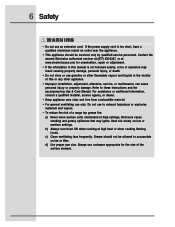
... of a range top grease fire: a) Never leave surface units unattended at high heat or when flambeing food (i.e. d) Use proper pan size. 6 Safety General Precautions ! If you already know how to operate it. 2)The fire is being called. 4)You can fight the fire with a close-fitting lid, cookie sheet, or metal tray, then turn hood ON when cooking at high settings. c) DO NOT USE WATER...
... of a range top grease fire: a) Never leave surface units unattended at high heat or when flambeing food (i.e. d) Use proper pan size. 6 Safety General Precautions ! If you already know how to operate it. 2)The fire is being called. 4)You can fight the fire with a close-fitting lid, cookie sheet, or metal tray, then turn hood ON when cooking at high settings. c) DO NOT USE WATER...
Owners Guide
Page 7
.... • If the cooktop and hood are in use water on grease fires. Have the installer show you where the fuse or junction box is operating. • Never operate the hood without the filters in this appliance. Avoid long drapes or other window coverings that nothing will interfere with a cooktop or vent. • Do not repair or replace any part of the hood by a qualified installer. Do not let...
.... • If the cooktop and hood are in use water on grease fires. Have the installer show you where the fuse or junction box is operating. • Never operate the hood without the filters in this appliance. Avoid long drapes or other window coverings that nothing will interfere with a cooktop or vent. • Do not repair or replace any part of the hood by a qualified installer. Do not let...
Owners Guide
Page 8
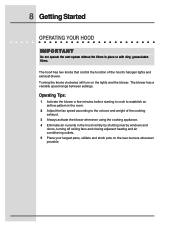
... clockwise will turn on the rear burners whenever possible. The blower has a variable speed range between settings. Operating Tips: 1 Activate the blower a few minutes before starting to cook to establish an airflow pattern in the room. 2 Adjust the fan speed according to the volume and weight of the hood's halogen lights and exhaust blower. 8 Getting Started OPERATING YOUR HOOD I M P O R TA N T Do not operate the vent system without the filters in the hood vicinity...
... clockwise will turn on the rear burners whenever possible. The blower has a variable speed range between settings. Operating Tips: 1 Activate the blower a few minutes before starting to cook to establish an airflow pattern in the room. 2 Adjust the fan speed according to the volume and weight of the hood's halogen lights and exhaust blower. 8 Getting Started OPERATING YOUR HOOD I M P O R TA N T Do not operate the vent system without the filters in the hood vicinity...

Owners Guide
Page 10
... is important to maintain vent performance and appearance, while also ensuring safe operation. After cleaning, reinstall the filters carefully. Chlorine is a corrosive substance. Dry the filters completely before using them in an automatic dishwasher. Stainless steel should be adjusted according to the type and amount of cooking. Never wipe across the grain. 10 Care and Cleaning CLEANING YOUR HOOD Proper cleaning is necessary to read...
... is important to maintain vent performance and appearance, while also ensuring safe operation. After cleaning, reinstall the filters carefully. Chlorine is a corrosive substance. Dry the filters completely before using them in an automatic dishwasher. Stainless steel should be adjusted according to the type and amount of cooking. Never wipe across the grain. 10 Care and Cleaning CLEANING YOUR HOOD Proper cleaning is necessary to read...
Owners Guide
Page 11
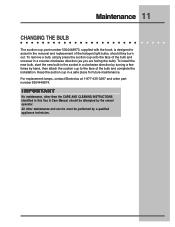
For replacement lamps, contact Electrolux at 1-877-435-3287 and order part number 5304448674. All other than the CARE AND CLEANING INSTRUCTIONS identified in the removal and replacement of the halogen light bulbs, should be performed by the owner/ operator. To remove a bulb, simply press the suction cup onto the face of the bulb and unscrew in a safe place for future maintenance. I M P O R TA N T No maintenance, other maintenance and service must...
For replacement lamps, contact Electrolux at 1-877-435-3287 and order part number 5304448674. All other than the CARE AND CLEANING INSTRUCTIONS identified in the removal and replacement of the halogen light bulbs, should be performed by the owner/ operator. To remove a bulb, simply press the suction cup onto the face of the bulb and unscrew in a safe place for future maintenance. I M P O R TA N T No maintenance, other maintenance and service must...
Owners Guide
Page 14
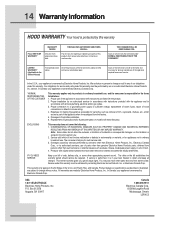
... warranted by Electrolux Canada Corp. *NORMAL RESPONSIBILITIES OF THE CUSTOMER This warranty applies only to a grounded power supply of sufficient voltage, replacement of blown fuses, repair of this warranty. Proper connection to products in ordinary household use . Expenses for making the appliance accessible for servicing, such as removal of trim, cupboards, shelves, etc., which are subject to change or add to any parts of loose connections or...
... warranted by Electrolux Canada Corp. *NORMAL RESPONSIBILITIES OF THE CUSTOMER This warranty applies only to a grounded power supply of sufficient voltage, replacement of blown fuses, repair of this warranty. Proper connection to products in ordinary household use . Expenses for making the appliance accessible for servicing, such as removal of trim, cupboards, shelves, etc., which are subject to change or add to any parts of loose connections or...

Installation Instructions
Page 2
.... Owner: Read your hood. and Canada: 1-877- 4ELECTROLUX (1-877-435-3287) For online support and Internet product information: www.electroluxusa.com ©2005 Electrolux Home Products, Inc. QUESTIONS? Printed in the U.S. It contains important safety information for operating this page for getting the best results from your Hood Use & Care Manual. This guide will help you anticipate all safety instructions. For toll-free telephone support...
.... Owner: Read your hood. and Canada: 1-877- 4ELECTROLUX (1-877-435-3287) For online support and Internet product information: www.electroluxusa.com ©2005 Electrolux Home Products, Inc. QUESTIONS? Printed in the U.S. It contains important safety information for operating this page for getting the best results from your Hood Use & Care Manual. This guide will help you anticipate all safety instructions. For toll-free telephone support...

Installation Instructions
Page 3
Finding Information 3 TABLE OF CONTENTS Finding Information 2 Please Read And Save This Guide 2 Questions 2 Table Of Contents 3 Safety 4 Important Safety Instructions 4 Preparing for Installation 7 Verifying Package Contents 7 Installation Planning 7 Specifications and Dimensions 8 Exhaust Duct Locations 9 Duct Locations 9 Duct Preparation 11 Cabinet Preparation 13 Preparing the Cabinets 13 Electrical Power Supply 14 Requirements 14 Installation 15 Installing the Hood 15 Making the Electrical Connection 16 Operation 17 Verifying the Operation 17
Finding Information 3 TABLE OF CONTENTS Finding Information 2 Please Read And Save This Guide 2 Questions 2 Table Of Contents 3 Safety 4 Important Safety Instructions 4 Preparing for Installation 7 Verifying Package Contents 7 Installation Planning 7 Specifications and Dimensions 8 Exhaust Duct Locations 9 Duct Locations 9 Duct Preparation 11 Cabinet Preparation 13 Preparing the Cabinets 13 Electrical Power Supply 14 Requirements 14 Installation 15 Installing the Hood 15 Making the Electrical Connection 16 Operation 17 Verifying the Operation 17
Installation Instructions
Page 4
.... Obey all safety messages that follow this symbol to potential personal injury hazards. 4 Safety IMPORTANT SAFETY INSTRUCTIONS Safety Precautions Do not attempt to install or operate your unit until you to avoid possible injury or death. ! Safety items throughout this manual. CAUTION CAUTION used to alert you have read the safety precautions in property damage. Definitions !
.... Obey all safety messages that follow this symbol to potential personal injury hazards. 4 Safety IMPORTANT SAFETY INSTRUCTIONS Safety Precautions Do not attempt to install or operate your unit until you to avoid possible injury or death. ! Safety items throughout this manual. CAUTION CAUTION used to alert you have read the safety precautions in property damage. Definitions !
Installation Instructions
Page 5
... the electric current. b) Sufficient air is needed for proper combustion and exhausting of gases through the flue (chimney) of fire, use only metal ductwork. • Grounding Instructions This appliance must be grounded. This appliance is not working properly or if it is equipped with a cord having a grounding wire with all applicable codes and standards, including fire-rated construction. f) Before servicing or cleaning unit, switch power off at service panel and...
... the electric current. b) Sufficient air is needed for proper combustion and exhausting of gases through the flue (chimney) of fire, use only metal ductwork. • Grounding Instructions This appliance must be grounded. This appliance is not working properly or if it is equipped with a cord having a grounding wire with all applicable codes and standards, including fire-rated construction. f) Before servicing or cleaning unit, switch power off at service panel and...
Installation Instructions
Page 6
... grease fire: a) Never leave surface units unattended at www.electroluxusa.com for the size of this manual is too short, have a qualified electrician install an outlet near the appliance. • This appliance should not be serviced only by qualified service personnel. c) Clean ventilating fans frequently. Always use only. Contact the nearest Electrolux authorized servicer at (877) 435-3287, or at high settings. b) Always turn hood ON when cooking...
... grease fire: a) Never leave surface units unattended at www.electroluxusa.com for the size of this manual is too short, have a qualified electrician install an outlet near the appliance. • This appliance should not be serviced only by qualified service personnel. c) Clean ventilating fans frequently. Always use only. Contact the nearest Electrolux authorized servicer at (877) 435-3287, or at high settings. b) Always turn hood ON when cooking...

Installation Instructions
Page 10
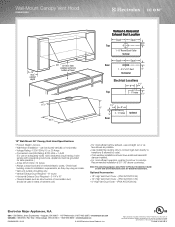
E30WV60EPS E308WV60ES E36WV60EPS E368WV60ES E48WV12EPS E488WV120S Electrical Conduit Locations Dimension "A" Conduit Location 9" (752mm) 8" (203mm) 14 7/16" (367mm) 10 Exhaust Duct Locations ELECTRICAL CONDUIT LOCATIONS CL "A" 1 1/2" CL CL (38mm) CL 7/8"ø (11mm) Holes 1 1/2" (38mm) 1 1/2" (38mm) CL CL CL CL "A" 3/4" (19mm) 7/8"ø (11mm) Holes Conduit Location E30WV60EPS, E36WV60EPS, E48WV12EPS, E308WV60ES, E368WV60ES, E488WV120S Top View 9" and 18" Hoods Figure 9 Conduit Location E308WV60ES, E368WV60ES, E488WV120S Rear/Back View 18" Hoods Figure 10 Model No.
E30WV60EPS E308WV60ES E36WV60EPS E368WV60ES E48WV12EPS E488WV120S Electrical Conduit Locations Dimension "A" Conduit Location 9" (752mm) 8" (203mm) 14 7/16" (367mm) 10 Exhaust Duct Locations ELECTRICAL CONDUIT LOCATIONS CL "A" 1 1/2" CL CL (38mm) CL 7/8"ø (11mm) Holes 1 1/2" (38mm) 1 1/2" (38mm) CL CL CL CL "A" 3/4" (19mm) 7/8"ø (11mm) Holes Conduit Location E30WV60EPS, E36WV60EPS, E48WV12EPS, E308WV60ES, E368WV60ES, E488WV120S Top View 9" and 18" Hoods Figure 9 Conduit Location E308WV60ES, E368WV60ES, E488WV120S Rear/Back View 18" Hoods Figure 10 Model No.
Installation Instructions
Page 11
Also allow room for electrical conduit. • Cross-drafts or air currents caused by adjacent elbows. • Thermal breaks, such as a short section of non-metallic duct, should be required. • Do not use flexible metal duct. • Do not use only duct work to outside. Do not vent exhaust air into spaces within walls, ceilings, attics, crawl spaces or garages. • Improper installation, adjustment, alteration, service, or maintenance can...
Also allow room for electrical conduit. • Cross-drafts or air currents caused by adjacent elbows. • Thermal breaks, such as a short section of non-metallic duct, should be required. • Do not use flexible metal duct. • Do not use only duct work to outside. Do not vent exhaust air into spaces within walls, ceilings, attics, crawl spaces or garages. • Improper installation, adjustment, alteration, service, or maintenance can...

Installation Instructions
Page 13
... of the hood. Minimum hood clearances are zero inches (0") to bottom of the hood and any cooking surface. Thirty inches (30") is the minimum distance between the bottom of hood is 36" (914mm). Maximum effective clearance from cooking surface to the rear, sides and top of personal injury caused by reaching over a hot appliance, cabinet storage space located directly above the cooktop should be...
... of the hood. Minimum hood clearances are zero inches (0") to bottom of the hood and any cooking surface. Thirty inches (30") is the minimum distance between the bottom of hood is 36" (914mm). Maximum effective clearance from cooking surface to the rear, sides and top of personal injury caused by reaching over a hot appliance, cabinet storage space located directly above the cooktop should be...
Installation Instructions
Page 17
... that the hood control knobs are in the OFF position. • Turn on the lights and the blower. WARNING • If the hood is still not functional. • Always disconnect the appliances from the electrical power when servicing them. • Install the filters. • Verify that control the function of the installation, do not attempt to repair it. The blower has a variable speed range between settings. Operation 17 VERIFYING...
... that the hood control knobs are in the OFF position. • Turn on the lights and the blower. WARNING • If the hood is still not functional. • Always disconnect the appliances from the electrical power when servicing them. • Install the filters. • Verify that control the function of the installation, do not attempt to repair it. The blower has a variable speed range between settings. Operation 17 VERIFYING...
Specification sheet
Page 1
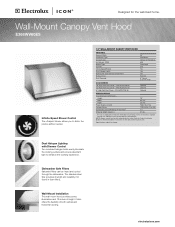
... needed. 18" WALL-MOUNT CANOPY VENT HOOD FEATURES Nominal Width Installation Type Air Discharge Air Delivery (CFM) Blower Type Controls Infinite-Speed Blower Dual Halogen Lights Dishwasher Safe Stainless Steel Filters Exhaust Duct Duct Required 36" Wall Mount Vertical or Horizontal 600 Centrifugal Dial Yes Yes Yes External 8" Round or 3-1/4" X 10" ACCESSORIES 18"- Wall-Mount Installation This wall-mount hood provides power, illumination and 18 inches of both vertical and horizontal ducting. It also offers the flexibility of height. electroluxicon.com High Vent Duct Cover - High Vent Duct...
... needed. 18" WALL-MOUNT CANOPY VENT HOOD FEATURES Nominal Width Installation Type Air Discharge Air Delivery (CFM) Blower Type Controls Infinite-Speed Blower Dual Halogen Lights Dishwasher Safe Stainless Steel Filters Exhaust Duct Duct Required 36" Wall Mount Vertical or Horizontal 600 Centrifugal Dial Yes Yes Yes External 8" Round or 3-1/4" X 10" ACCESSORIES 18"- Wall-Mount Installation This wall-mount hood provides power, illumination and 18 inches of both vertical and horizontal ducting. It also offers the flexibility of height. electroluxicon.com High Vent Duct Cover - High Vent Duct...
Specification sheet
Page 2
... additional backdraft damper installed. • For most efficient airflow exhaust, use on the web at Electrolux Home Products, Inc. from cooktop surface to change specifications or discontinue models without notice. Wall-Mount Canopy Vent Hood E368WV60ES 13" max. Recommended installation is 30" - 36" above countertop. Refer to improve our products. High Vent Duct Cover - (PN # ACCVC12-36). • 6"- Electrolux Major Appliances, N.A. mean we are constantly working to Product Installation Guide on adequately wired 120V, dedicated circuit having 2-wire service...
... additional backdraft damper installed. • For most efficient airflow exhaust, use on the web at Electrolux Home Products, Inc. from cooktop surface to change specifications or discontinue models without notice. Wall-Mount Canopy Vent Hood E368WV60ES 13" max. Recommended installation is 30" - 36" above countertop. Refer to improve our products. High Vent Duct Cover - (PN # ACCVC12-36). • 6"- Electrolux Major Appliances, N.A. mean we are constantly working to Product Installation Guide on adequately wired 120V, dedicated circuit having 2-wire service...


