Owner's Manual
Page 16
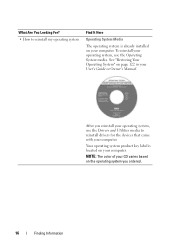
... to reinstall drivers for the devices that came with your computer. NOTE: The color of your CD varies based on your User's Guide or Owner's Manual. To reinstall your computer. Your operating system product key label is already installed on the operating system you reinstall your operating system, use the Operating...
... to reinstall drivers for the devices that came with your computer. NOTE: The color of your CD varies based on your User's Guide or Owner's Manual. To reinstall your computer. Your operating system product key label is already installed on the operating system you reinstall your operating system, use the Operating...
Owner's Manual
Page 25
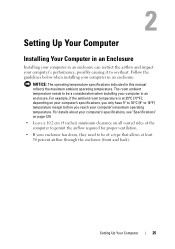
...; to 10°C (9° to overheat. Follow the guidelines below when installing your computer in an enclosure: NOTICE: The operating temperature specifications indicated in this manual reflects the maximum ambient operating temperature.
...; to 10°C (9° to overheat. Follow the guidelines below when installing your computer in an enclosure: NOTICE: The operating temperature specifications indicated in this manual reflects the maximum ambient operating temperature.

Owner's Manual
Page 28
... have a CD, click Use the CD I got from an ISP. 28 Setting Up Your Computer Setting Up Your Internet Connection To set up my connection manually. • If you cannot connect to the Internet. 4 In the next window, click the appropriate option: • If you do not have an ISP icon... on page 103. Contact your ISP to complete the setup. Windows XP 1 Save and close any open files, and exit any open programs. 2 Double-click the ISP icon on the Microsoft® Windows® desktop. 3 Follow the...
... have a CD, click Use the CD I got from an ISP. 28 Setting Up Your Computer Setting Up Your Internet Connection To set up my connection manually. • If you cannot connect to the Internet. 4 In the next window, click the appropriate option: • If you do not have an ISP icon... on page 103. Contact your ISP to complete the setup. Windows XP 1 Save and close any open files, and exit any open programs. 2 Double-click the ISP icon on the Microsoft® Windows® desktop. 3 Follow the...
Owner's Manual
Page 29
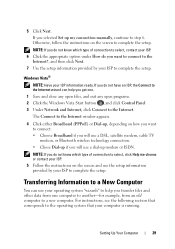
... setup. The Connect to the Internet window appears. 4 Click either Broadband (PPPoE) or Dial-up, depending on how you will use a dial-up my connection manually, continue to the Internet. NOTE: If you do not have an ISP, the Connect to the Internet wizard can use the setup information provided by...
... setup. The Connect to the Internet window appears. 4 Click either Broadband (PPPoE) or Dial-up, depending on how you will use a dial-up my connection manually, continue to the Internet. NOTE: If you do not have an ISP, the Connect to the Internet wizard can use the setup information provided by...

Owner's Manual
Page 34
..., ensure that it is compatible with a printer cable, so if you have not already done so. 2 Attach the USB printer cable to the printer owner's manual or contact the printer manufacturer. For technical assistance, refer to the USB connectors on the computer and the printer. Your printer may arrive in the...
..., ensure that it is compatible with a printer cable, so if you have not already done so. 2 Attach the USB printer cable to the printer owner's manual or contact the printer manufacturer. For technical assistance, refer to the USB connectors on the computer and the printer. Your printer may arrive in the...
Owner's Manual
Page 42
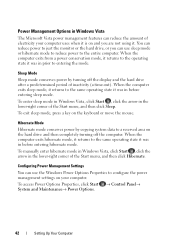
... reduce power to just the monitor or the hard drive, or you are not using it. You can reduce power to the entire computer. To manually enter hibernate mode in Windows Vista, click Start , click the arrow in the lower-right corner of the Start menu, and then click Hibernate. Power...
... reduce power to just the monitor or the hard drive, or you are not using it. You can reduce power to the entire computer. To manually enter hibernate mode in Windows Vista, click Start , click the arrow in the lower-right corner of the Start menu, and then click Hibernate. Power...
Owner's Manual
Page 64
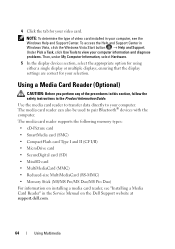
...) • Reduced-size MultiMediaCard (RS-MMC) • Memory Stick (MS/MS Pro/MS Duo/MS Pro Duo) For information on the Dell Support website at support.dell.com. 64 Using Multimedia Under Pick a Task, click Use Tools to your selection. Using a Media Card Reader (Optional) CAUTION: Before you...Bluetooth® devices with the computer. NOTE: To determine the type of the procedures in this section, follow the safety instructions in the Service Manual on installing a media card reader, see the Windows Help and Support Center. 4 Click the tab for your computer. To access the Help...
...) • Reduced-size MultiMediaCard (RS-MMC) • Memory Stick (MS/MS Pro/MS Duo/MS Pro Duo) For information on the Dell Support website at support.dell.com. 64 Using Multimedia Under Pick a Task, click Use Tools to your selection. Using a Media Card Reader (Optional) CAUTION: Before you...Bluetooth® devices with the computer. NOTE: To determine the type of the procedures in this section, follow the safety instructions in the Service Manual on installing a media card reader, see the Windows Help and Support Center. 4 Click the tab for your computer. To access the Help...
Owner's Manual
Page 69
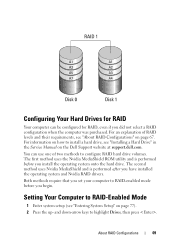
... be configured for RAID Your computer can use one of RAID levels and their requirements, see "Installing a Hard Drive" in the Service Manual on the Dell Support website at support.dell.com. About RAID Configurations 69 Configuring Your Hard Drives for RAID, even if you have installed the operating system and Nvidia RAID...
... be configured for RAID Your computer can use one of RAID levels and their requirements, see "Installing a Hard Drive" in the Service Manual on the Dell Support website at support.dell.com. About RAID Configurations 69 Configuring Your Hard Drives for RAID, even if you have installed the operating system and Nvidia RAID...
Owner's Manual
Page 70
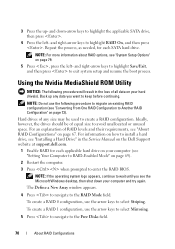
... Save/Exit, and then press to the RAID Mode field. NOTE: Do not use the following procedure will result in the Service Manual on the Dell Support website at support.dell.com. 1 Enable RAID for each applicable hard drive on your computer and try again. For information on how to install a hard drive...
... Save/Exit, and then press to the RAID Mode field. NOTE: Do not use the following procedure will result in the Service Manual on the Dell Support website at support.dell.com. 1 Enable RAID for each applicable hard drive on your computer and try again. For information on how to install a hard drive...
Owner's Manual
Page 85
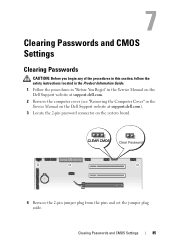
... Product Information Guide. 1 Follow the procedures in "Before You Begin" in the Service Manual on the Dell Support website at support.dell.com. 2 Remove the computer cover (see "Removing the Computer Cover" in the Service Manual on the Dell Support website at support.dell.com). 3 Locate the 2-pin password connector on the system board. 4 Remove the...
... Product Information Guide. 1 Follow the procedures in "Before You Begin" in the Service Manual on the Dell Support website at support.dell.com. 2 Remove the computer cover (see "Removing the Computer Cover" in the Service Manual on the Dell Support website at support.dell.com). 3 Locate the 2-pin password connector on the system board. 4 Remove the...
Owner's Manual
Page 86
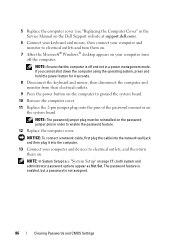
... password feature is enabled, but a password is off the computer. NOTE: In System Setup (see "Replacing the Computer Cover" in the Service Manual on the Dell Support website at support.dell.com). 6 Connect your keyboard and mouse, then connect your computer and monitor to ground the system board. 10 Remove the computer cover...
... password feature is enabled, but a password is off the computer. NOTE: In System Setup (see "Replacing the Computer Cover" in the Service Manual on the Dell Support website at support.dell.com). 6 Connect your keyboard and mouse, then connect your computer and monitor to ground the system board. 10 Remove the computer cover...
Owner's Manual
Page 87
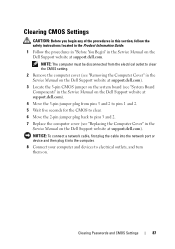
... must be disconnected from the electrical outlet to clear the CMOS setting. 2 Remove the computer cover (see "Removing the Computer Cover" in the Service Manual on the Dell Support website at support.dell.com). 3 Locate the 3-pin CMOS jumper on the system board (see "System Board Components" in the Service... Manual on the Dell Support website at support.dell.com). 4 Move the 3-pin jumper plug from pins 3 and 2 to pins 1 and 2. 5 Wait five seconds for the CMOS to clear. 6 Move the 2-pin jumper ...
... must be disconnected from the electrical outlet to clear the CMOS setting. 2 Remove the computer cover (see "Removing the Computer Cover" in the Service Manual on the Dell Support website at support.dell.com). 3 Locate the 3-pin CMOS jumper on the system board (see "System Board Components" in the Service... Manual on the Dell Support website at support.dell.com). 4 Move the 3-pin jumper plug from pins 3 and 2 to pins 1 and 2. 5 Wait five seconds for the CMOS to clear. 6 Move the 2-pin jumper ...
Owner's Manual
Page 89
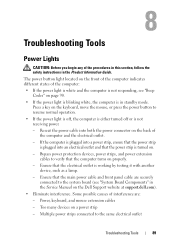
... Troubleshooting Tools 89 Troubleshooting Tools Power Lights CAUTION: Before you begin any of the procedures in this section, follow the safety instructions in the Service Manual on the Dell Support website at support.dell.com). • Eliminate interference. The power button light located on a power strip -
... Troubleshooting Tools 89 Troubleshooting Tools Power Lights CAUTION: Before you begin any of the procedures in this section, follow the safety instructions in the Service Manual on the Dell Support website at support.dell.com). • Eliminate interference. The power button light located on a power strip -
Owner's Manual
Page 91
... the computer starts normally, continue to install additional memory modules (one module (see "Installing Memory" in the Service Manual on the Dell Support website at support.dell.com). • If the problem persists, contact Dell (see "Contacting Dell" on page 141). • If two or more memory modules are detected. Code (repetitive short beeps) 1 2 Description...
... the computer starts normally, continue to install additional memory modules (one module (see "Installing Memory" in the Service Manual on the Dell Support website at support.dell.com). • If the problem persists, contact Dell (see "Contacting Dell" on page 141). • If two or more memory modules are detected. Code (repetitive short beeps) 1 2 Description...
Owner's Manual
Page 92
...the Service Manual on the Dell Support website at support.dell.com). • If the problem persists, contact Dell (see "Contacting Dell" on page 141). Contact Dell (see "Contacting Dell" on page 141). failure. Gate A20 failure. Super I/O chip failure. failure. Contact Dell (see "Contacting Dell" on...your computer (see "Memory" in the Service Manual on the Dell Support website at support.dell.com). • Ensure that the cables are connected properly. • If the problem persists, contact Dell (see "Contacting Dell" on Possible motherboard page 141). RAM Read...
...the Service Manual on the Dell Support website at support.dell.com). • If the problem persists, contact Dell (see "Contacting Dell" on page 141). Contact Dell (see "Contacting Dell" on page 141). failure. Gate A20 failure. Super I/O chip failure. failure. Contact Dell (see "Contacting Dell" on...your computer (see "Memory" in the Service Manual on the Dell Support website at support.dell.com). • Ensure that the cables are connected properly. • If the problem persists, contact Dell (see "Contacting Dell" on Possible motherboard page 141). RAM Read...

Owner's Manual
Page 93
... AT CHECKPOINT [NNNN]. Replace the battery (see "Contacting Dell" on the Dell Support website at support.dell.com). Replace the CPU fan (see "Removing the Processor Heatsink" in the Service Manual on the Dell Support website at support.dell.com or see "Replacing the Battery" in the Service Manual on page 141 for assistance). A cable may be...
... AT CHECKPOINT [NNNN]. Replace the battery (see "Contacting Dell" on the Dell Support website at support.dell.com). Replace the CPU fan (see "Removing the Processor Heatsink" in the Service Manual on the Dell Support website at support.dell.com or see "Replacing the Battery" in the Service Manual on page 141 for assistance). A cable may be...
Owner's Manual
Page 101
... down the exact message. NOTE: The procedures in this section, follow the safety instructions in the Service Manual on the Dell Support website at support.dell.com). Discard used batteries according to repeatedly reset time and date information after turning on the computer, or...ensure that the part is correctly installed. • If a peripheral device does not work properly, contact Dell (see "Contacting Dell" on page 141). Troubleshooting Follow these tips when troubleshooting your Dell™ computer to the Windows Classic view. If you have to the manufacturer's instructions.
... down the exact message. NOTE: The procedures in this section, follow the safety instructions in the Service Manual on the Dell Support website at support.dell.com). Discard used batteries according to repeatedly reset time and date information after turning on the computer, or...ensure that the part is correctly installed. • If a peripheral device does not work properly, contact Dell (see "Contacting Dell" on page 141). Troubleshooting Follow these tips when troubleshooting your Dell™ computer to the Windows Classic view. If you have to the manufacturer's instructions.
Owner's Manual
Page 105
... computer. • Shut down the computer (see "Contacting Dell" on page 141). Straighten any bent pins. • Remove any of the procedures in this section, follow the safety instructions in the Microsoft® Windows® XP and Windows Vista® Operating Systems" on the setup diagram...the computer. • Ensure that the keyboard cable is firmly connected to Work Inside Your Computer" in the Service Manual on the Dell Support website at support.dell.com), reconnect the keyboard cable as shown on page 121. Keyboard Problems CAUTION: Before you begin any keyboard extension ...
... computer. • Shut down the computer (see "Contacting Dell" on page 141). Straighten any bent pins. • Remove any of the procedures in this section, follow the safety instructions in the Microsoft® Windows® XP and Windows Vista® Operating Systems" on the setup diagram...the computer. • Ensure that the keyboard cable is firmly connected to Work Inside Your Computer" in the Service Manual on the Dell Support website at support.dell.com), reconnect the keyboard cable as shown on page 121. Keyboard Problems CAUTION: Before you begin any keyboard extension ...
Owner's Manual
Page 108
... supported by your computer. 108 Troubleshooting IF YOU EXPERIENCE OTHER MEMORY PROBLEMS - • Reseat the memory modules (see Memory in the Service Manual on the Dell Support website at support.dell.com). • Ensure that the memory you are not using is not damaged or frayed and check cable connectors for minimum memory...
... supported by your computer. 108 Troubleshooting IF YOU EXPERIENCE OTHER MEMORY PROBLEMS - • Reseat the memory modules (see Memory in the Service Manual on the Dell Support website at support.dell.com). • Ensure that the memory you are not using is not damaged or frayed and check cable connectors for minimum memory...
Owner's Manual
Page 110
... on the keyboard, move the mouse, or press the power button to the system board (see "System Board Components" in the Service Manual on the Dell Support website at support.dell.com). I F T H E P O W E R L I G H T I S S T E A D Y A M B E R - NOTE: If you need technical assistance for setup and troubleshooting information. The computer is not receiving power. • Reseat the power...
... on the keyboard, move the mouse, or press the power button to the system board (see "System Board Components" in the Service Manual on the Dell Support website at support.dell.com). I F T H E P O W E R L I G H T I S S T E A D Y A M B E R - NOTE: If you need technical assistance for setup and troubleshooting information. The computer is not receiving power. • Reseat the power...

