
Me and My Dell
Page 4
Setting Up Your Webcam 22 Integrated Webcam 22 External Webcam 22 Setting up Bluetooth 22 About Your Computer 23 Power Adapter 23 Battery 24 Coin-Cell Battery 24 Touchpad 25 Display 25 Touchscreen 25 3D 25 3D Camera 26 Keyboard 26 Physical Keyboard 27 Keyboard Backlight 27 On-Screen Keyboard 28 Keyboard Connection Types 28 Wired 28 Wireless 28 Service Tag and Express-Service Code 29 Locating the Label on Your Computer 29 Dell Support Website 29 BIOS Setup Program 29 4 Contents
Setting Up Your Webcam 22 Integrated Webcam 22 External Webcam 22 Setting up Bluetooth 22 About Your Computer 23 Power Adapter 23 Battery 24 Coin-Cell Battery 24 Touchpad 25 Display 25 Touchscreen 25 3D 25 3D Camera 26 Keyboard 26 Physical Keyboard 27 Keyboard Backlight 27 On-Screen Keyboard 28 Keyboard Connection Types 28 Wired 28 Wireless 28 Service Tag and Express-Service Code 29 Locating the Label on Your Computer 29 Dell Support Website 29 BIOS Setup Program 29 4 Contents
Me and My Dell
Page 10
Troubleshooting 85 Basic Troubleshooting Steps 85 Diagnostics 85 Pre-Boot System Assessment 85 Invoking PSA 85 Enhanced PSA 86 LCD BIST 87 Starting LCD BIST 87 Invoking ePSA 88 Beep Codes 89 BIOS 90 Changing BIOS Settings 90 Entering BIOS Setup Program 90 Resetting BIOS Password 91 Remove the CMOS Battery 91 Use System‑Board Jumper 91 Changing the Boot Sequence 92 Using Boot Menu 92 Using BIOS Setup Program 92 Getting Help and Contacting Dell 93 Getting Help 93 Contacting Dell 93 10 Contents
Troubleshooting 85 Basic Troubleshooting Steps 85 Diagnostics 85 Pre-Boot System Assessment 85 Invoking PSA 85 Enhanced PSA 86 LCD BIST 87 Starting LCD BIST 87 Invoking ePSA 88 Beep Codes 89 BIOS 90 Changing BIOS Settings 90 Entering BIOS Setup Program 90 Resetting BIOS Password 91 Remove the CMOS Battery 91 Use System‑Board Jumper 91 Changing the Boot Sequence 92 Using Boot Menu 92 Using BIOS Setup Program 92 Getting Help and Contacting Dell 93 Getting Help 93 Contacting Dell 93 10 Contents

Me and My Dell
Page 29
... is displayed, watch for a short time. Click Detect Service Tag and follow the instructions on (or restart) your computer or at dell.com/support • BIOS setup program Locating the Label on your computer. Turn on the screen. NOTE: The F2 prompt stays active only for the F2 prompt... system badge or in battery bay) Desktops - Navigate to the Main tab and look for your computer to boot up to dell.com/support. 2. Back of the tablet NOTE: For the specific location of your computer and try again. 3. BIOS Setup Program 1. Service Tag and Express-Service Code 29
... is displayed, watch for a short time. Click Detect Service Tag and follow the instructions on (or restart) your computer or at dell.com/support • BIOS setup program Locating the Label on your computer. Turn on the screen. NOTE: The F2 prompt stays active only for the F2 prompt... system badge or in battery bay) Desktops - Navigate to the Main tab and look for your computer to boot up to dell.com/support. 2. Back of the tablet NOTE: For the specific location of your computer and try again. 3. BIOS Setup Program 1. Service Tag and Express-Service Code 29

Me and My Dell
Page 34
...; Expansion‑card slots • CMOS to interact with each other. All other devices connect to the system board to be able to store the BIOS The figure below lists the basic components of system board and the computer it is designed for. 1 processor socket 3 power connector 5 PCI-Express x1 connector...
...; Expansion‑card slots • CMOS to interact with each other. All other devices connect to the system board to be able to store the BIOS The figure below lists the basic components of system board and the computer it is designed for. 1 processor socket 3 power connector 5 PCI-Express x1 connector...

Me and My Dell
Page 37
... cards are installed separately on a computer that also has an integrated video card, the integrated video card is installed on the system board. Use the BIOS setup program to select which card to switch between either cards, depending on . Switchable graphics allow computers equipped with both a low‑power integrated graphics...
... cards are installed separately on a computer that also has an integrated video card, the integrated video card is installed on the system board. Use the BIOS setup program to select which card to switch between either cards, depending on . Switchable graphics allow computers equipped with both a low‑power integrated graphics...
Me and My Dell
Page 44
.... Using your Keyboard Press the keys on your physical keyboard or tap the characters on the on improving the battery life of the key using BIOS setup program or using keyboard shortcuts. main display only, duplicate, extend to that option. The battery is charged while the computer or tablet is in...
.... Using your Keyboard Press the keys on your physical keyboard or tap the characters on the on improving the battery life of the key using BIOS setup program or using keyboard shortcuts. main display only, duplicate, extend to that option. The battery is charged while the computer or tablet is in...
Me and My Dell
Page 61
... charge reaches 10%. eSATA eSATA allows you to run the USB 3.0 ports in USB 2.0 mode temporarily for multimedia and storage applications. This is reinstalled using BIOS setup program. USB 1.x - The USB PowerShare feature allows you to connect external storage devices, such as hard drives and optical drives, to as SuperSpeed USB...
... charge reaches 10%. eSATA eSATA allows you to run the USB 3.0 ports in USB 2.0 mode temporarily for multimedia and storage applications. This is reinstalled using BIOS setup program. USB 1.x - The USB PowerShare feature allows you to connect external storage devices, such as hard drives and optical drives, to as SuperSpeed USB...

Me and My Dell
Page 66
... is a software repository that allows you will not be available in all regions. My Dell Downloads My Dell Downloads is to prevent an unauthorized changes to enter BIOS setup program. To register and use . 66 My Dell Downloads Turn on (or restart) your computer but did not receive the media for.... When the DELL logo appears, press immediately to this setting in the BIOS setup program, you to download and install software that was pre-installed on the screen to register your computer and try again. 3....
... is a software repository that allows you will not be available in all regions. My Dell Downloads My Dell Downloads is to prevent an unauthorized changes to enter BIOS setup program. To register and use . 66 My Dell Downloads Turn on (or restart) your computer but did not receive the media for.... When the DELL logo appears, press immediately to this setting in the BIOS setup program, you to download and install software that was pre-installed on the screen to register your computer and try again. 3....

Me and My Dell
Page 89
... or video controller failure Processor failure NOTE: This beep code is seated properly. If this occurs, note the beep code and contact Dell for computers with Intel processor only. BIOS ROM checksum failure No RAM detected NOTE: If you installed or replaced the memory module, ensure that the memory module is supported...
... or video controller failure Processor failure NOTE: This beep code is seated properly. If this occurs, note the beep code and contact Dell for computers with Intel processor only. BIOS ROM checksum failure No RAM detected NOTE: If you installed or replaced the memory module, ensure that the memory module is supported...

Me and My Dell
Page 90
Entering BIOS Setup Program 1. Changing BIOS Settings CAUTION: Incorrect settings in BIOS setup program may need to change , and follow the instructions on the screen. You may cause your computer to the operating system when the computer boots up. Press at the Dell logo to the basic hardware settings stored ... . • Change the system configuration information after you see the Windows desktop, then restart your computer. To change the settings, enter BIOS setup program, locate the setting that you want to change settings such as amount of memory, type of hard drive, and so on ...
Entering BIOS Setup Program 1. Changing BIOS Settings CAUTION: Incorrect settings in BIOS setup program may need to change , and follow the instructions on the screen. You may cause your computer to the operating system when the computer boots up. Press at the Dell logo to the basic hardware settings stored ... . • Change the system configuration information after you see the Windows desktop, then restart your computer. To change the settings, enter BIOS setup program, locate the setting that you want to change settings such as amount of memory, type of hard drive, and so on ...
Me and My Dell
Page 91
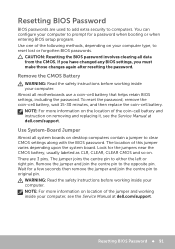
..., CLEAR CMOS and so on removing and replacing it, see the Service Manual at dell.com/support. Use one of this jumper varies depending upon the system board. Resetting BIOS Password BIOS passwords are 3 pins. Remove the jumper and join the centre pin to computers. Remove... the CMOS Battery WARNING: Read the safety instructions before working inside your computer. You can configure your computer, see the Service Manual at dell.com/support.
..., CLEAR CMOS and so on removing and replacing it, see the Service Manual at dell.com/support. Use one of this jumper varies depending upon the system board. Resetting BIOS Password BIOS passwords are 3 pins. Remove the jumper and join the centre pin to computers. Remove... the CMOS Battery WARNING: Read the safety instructions before working inside your computer. You can configure your computer, see the Service Manual at dell.com/support.

Me and My Dell
Page 92
... drive. Use the up or down ‑arrow keys to select the device you want to boot from the selected device only for booting. 4. Using BIOS Setup Program Use BIOS setup program to select the order of your computer for example when reinstalling the operating system or, using... program: 1. Changing the Boot Sequence You may need to change the boot sequence of devices your computer uses to enter BIOS setup program. Press at the Dell logo to boot every time. To change the boot sequence. Your computer boots from and press or press the number displayed next to the boot...
... drive. Use the up or down ‑arrow keys to select the device you want to boot from the selected device only for booting. 4. Using BIOS Setup Program Use BIOS setup program to select the order of your computer for example when reinstalling the operating system or, using... program: 1. Changing the Boot Sequence You may need to change the boot sequence of devices your computer uses to enter BIOS setup program. Press at the Dell logo to boot every time. To change the boot sequence. Your computer boots from and press or press the number displayed next to the boot...

Me and My Dell
Page 94
... may damage your computer. • Ensure that there is a power-saving state that you want to start working again. • Hibernation - The BIOS setup program and the operating system allow dust to accumulate in the air vents. • Back up your data regularly. • Perform a virus ...scan regularly. • Check your computer for errors using My Dell and other tools available on your computer. • Clean your computer regularly using a soft, dry cloth. Hibernation puts your open documents and programs on...
... may damage your computer. • Ensure that there is a power-saving state that you want to start working again. • Hibernation - The BIOS setup program and the operating system allow dust to accumulate in the air vents. • Back up your data regularly. • Perform a virus ...scan regularly. • Check your computer for errors using My Dell and other tools available on your computer. • Clean your computer regularly using a soft, dry cloth. Hibernation puts your open documents and programs on...

XPS 14Z L412z Owners Manual
Page 5
10 Display-Converter Board 39 Removing the Display-Converter Board 39 Replacing the Display-Converter Board 40 11 Heat Sink and Fan 41 Removing the Heat Sink and Fan 41 Replacing the Heat Sink and Fan 42 12 System Board 45 Removing the System Board 45 Replacing the System Board 48 Entering the Service Tag in the BIOS 49 13 Power-Button Board 51 Removing the Power-Button Board 51 Replacing the Power-Button Board 52 14 Keyboard 53 Removing the Keyboard Bracket 53 Replacing the Keyboard Bracket 57 Removing the Keyboard 58 Replacing the Keyboard 59 Contents 5
10 Display-Converter Board 39 Removing the Display-Converter Board 39 Replacing the Display-Converter Board 40 11 Heat Sink and Fan 41 Removing the Heat Sink and Fan 41 Replacing the Heat Sink and Fan 42 12 System Board 45 Removing the System Board 45 Replacing the System Board 48 Entering the Service Tag in the BIOS 49 13 Power-Button Board 51 Removing the Power-Button Board 51 Replacing the Power-Button Board 52 14 Keyboard 53 Removing the Keyboard Bracket 53 Replacing the Keyboard Bracket 57 Removing the Keyboard 58 Replacing the Keyboard 59 Contents 5

XPS 14Z L412z Owners Manual
Page 6
15 Speakers 61 Removing the Speakers 61 Replacing the Speakers 64 16 Display 65 Display Hinge Covers 65 Removing the Display Hinge Covers 65 Replacing the Display Hinge Covers 67 Display Assembly 68 Removing the Display Assembly 68 Replacing the Display Assembly 69 17 Palm-Rest Assembly 71 Removing the Palm-Rest Assembly 71 Replacing the Palm-Rest Assembly 72 18 Flashing the BIOS 73 6 Contents
15 Speakers 61 Removing the Speakers 61 Replacing the Speakers 64 16 Display 65 Display Hinge Covers 65 Removing the Display Hinge Covers 65 Replacing the Display Hinge Covers 67 Display Assembly 68 Removing the Display Assembly 68 Replacing the Display Assembly 69 17 Palm-Rest Assembly 71 Removing the Palm-Rest Assembly 71 Replacing the Palm-Rest Assembly 72 18 Flashing the BIOS 73 6 Contents

XPS 14Z L412z Owners Manual
Page 7
..., click Start Down. Unless otherwise noted, each procedure assumes that the following tools: • Small flat-blade screwdriver • Phillips screwdriver • BIOS executable update program available at support.dell.com Turning Off Your Computer CAUTION: To avoid losing data, save and close all open files and exit all open programs. 2 To...
..., click Start Down. Unless otherwise noted, each procedure assumes that the following tools: • Small flat-blade screwdriver • Phillips screwdriver • BIOS executable update program available at support.dell.com Turning Off Your Computer CAUTION: To avoid losing data, save and close all open files and exit all open programs. 2 To...

XPS 14Z L412z Owners Manual
Page 49
... any blank or card you have replaced the system board, enter the computer Service Tag in the BIOS of the replacement system board. 20 Enter the Service Tag (see "Entering the Service Tag in the BIOS" on page 49). System Board 49 NOTE: After you removed from the Media Card Reader. Entering... the Service Tag in the BIOS 1 Ensure that the AC adapter is installed properly. 2 Turn on the computer. Failure to do so may result in damage to the computer. 19 Turn ...
... any blank or card you have replaced the system board, enter the computer Service Tag in the BIOS of the replacement system board. 20 Enter the Service Tag (see "Entering the Service Tag in the BIOS" on page 49). System Board 49 NOTE: After you removed from the Media Card Reader. Entering... the Service Tag in the BIOS 1 Ensure that the AC adapter is installed properly. 2 Turn on the computer. Failure to do so may result in damage to the computer. 19 Turn ...

XPS 14Z L412z Owners Manual
Page 73
...of the menu. d Select the product model number in the Enter a service tag: field, click Go, and proceed to support.dell.com/support/downloads. 3 Locate the BIOS update file for your computer: NOTE: The Service Tag for your computer's Service Tag in the Select Your Product Model list. ...Enter your computer is available or when replacing the system board. If you have your computer's Service Tag: a Click Select Model. 18 Flashing the BIOS The BIOS may require flashing when an update is located on the computer. 2 Go to step 4. If you have your computer's Service Tag: a Click ...
...of the menu. d Select the product model number in the Enter a service tag: field, click Go, and proceed to support.dell.com/support/downloads. 3 Locate the BIOS update file for your computer: NOTE: The Service Tag for your computer's Service Tag in the Select Your Product Model list. ...Enter your computer is available or when replacing the system board. If you have your computer's Service Tag: a Click Select Model. 18 Flashing the BIOS The BIOS may require flashing when an update is located on the computer. 2 Go to step 4. If you have your computer's Service Tag: a Click ...

XPS 14Z L412z Owners Manual
Page 74
The file downloads to save the file on the screen. 74 Flashing the BIOS 6 Click Save to your desktop. 7 Click Close if the Download Complete window appears. The file icon appears on your desktop and is titled the same as the downloaded BIOS update file. 8 Double-click the file icon on the desktop and follow the instructions on your desktop.
The file downloads to save the file on the screen. 74 Flashing the BIOS 6 Click Save to your desktop. 7 Click Close if the Download Complete window appears. The file icon appears on your desktop and is titled the same as the downloaded BIOS update file. 8 Double-click the file icon on the desktop and follow the instructions on your desktop.


