
Re-imaging guide for Windows
Page 4
...networking, graphics, sound or other factory-reset methods. Installing device drivers from the Dell Drivers & Downloads website. Do not attempt to computers shipped with a Windows 11 operating system. Device drivers must be unnecessary. Installing or updating device drivers may be updated when you reinstall the operating system using the Dell Backup and Recovery application or other hardware-related problems. Dell recommends that you are no driver issues or updates being prompted by Windows, driver updates may lead to continue with malicious software. Updating drivers...
...networking, graphics, sound or other factory-reset methods. Installing device drivers from the Dell Drivers & Downloads website. Do not attempt to computers shipped with a Windows 11 operating system. Device drivers must be unnecessary. Installing or updating device drivers may be updated when you reinstall the operating system using the Dell Backup and Recovery application or other hardware-related problems. Dell recommends that you are no driver issues or updates being prompted by Windows, driver updates may lead to continue with malicious software. Updating drivers...
Re-imaging guide for Windows
Page 6
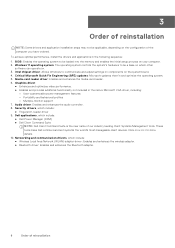
... setup process on your computer. 2. Click on the system board. 4. BIOS: Enables the operating system to be applicable, depending on the configuration of the computer you have ordered. Media-card reader driver: Enables and enhances the media-card reader. 6. Audio driver: Enables and enhances the audio controller. 8. Dell applications, which include: ● Fingerprint-reader driver 9. Intel chipset driver: Allows Windows to communicate and adjust settings on components on a link for more details. 10. Critical Microsoft Quick Fix Engineering (QFE) updates...
... setup process on your computer. 2. Click on the system board. 4. BIOS: Enables the operating system to be applicable, depending on the configuration of the computer you have ordered. Media-card reader driver: Enables and enhances the media-card reader. 6. Audio driver: Enables and enhances the audio controller. 8. Dell applications, which include: ● Fingerprint-reader driver 9. Intel chipset driver: Allows Windows to communicate and adjust settings on components on a link for more details. 10. Critical Microsoft Quick Fix Engineering (QFE) updates...

Re-imaging guide for Windows
Page 7
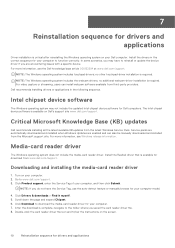
... Windows when an update is necessary. Select the latest version of your computer. 7. Go to enable and configure the TPM: 1. Clearing the CMOS settings will not enable the TPM during POST and it cannot be deployed on -screen instructions. Press F2 when the Dell logo is installed on the screen to enter the BIOS setup program. Click Drivers & downloads > Find drivers. 4. Select or clear any of the following options to enable or disable...
... Windows when an update is necessary. Select the latest version of your computer. 7. Go to enable and configure the TPM: 1. Clearing the CMOS settings will not enable the TPM during POST and it cannot be deployed on -screen instructions. Press F2 when the Dell logo is installed on the screen to enter the BIOS setup program. Click Drivers & downloads > Find drivers. 4. Select or clear any of the following options to enable or disable...

Re-imaging guide for Windows
Page 9
...In the Search support field, enter the Service Tag/Serial Number/Service Request/Model/Keyword of the drivers and applications available on your computer to www.dell.com/support. 3. NOTE: If you download the device drivers for your Dell computer from Drivers & Downloads. 6 Reinstalling drivers and applications Drivers and applications are software that enables Windows to automatically identify your computer. Devices such as video and sound cards require drivers to function correctly within Windows, and enable users to adjust hardware settings. Displaying drivers and applications...
...In the Search support field, enter the Service Tag/Serial Number/Service Request/Model/Keyword of the drivers and applications available on your computer to www.dell.com/support. 3. NOTE: If you download the device drivers for your Dell computer from Drivers & Downloads. 6 Reinstalling drivers and applications Drivers and applications are software that enables Windows to automatically identify your computer. Devices such as video and sound cards require drivers to function correctly within Windows, and enable users to adjust hardware settings. Displaying drivers and applications...
Re-imaging guide for Windows
Page 10
... update the device driver if you are enabled and can install webcam software available from the latest Windows Service Pack. Scroll down the page and expand Chipset. 6. no additional webcam-driver installation is complete, navigate to download the media-card reader driver for your computer. 2. Turn on Dell's support site www.dell.com/support. Double-click the card reader driver file icon and follow the instructions on your computer to www.dell.com/support. 3. For more information, see the Dell...
... update the device driver if you are enabled and can install webcam software available from the latest Windows Service Pack. Scroll down the page and expand Chipset. 6. no additional webcam-driver installation is complete, navigate to download the media-card reader driver for your computer. 2. Turn on Dell's support site www.dell.com/support. Double-click the card reader driver file icon and follow the instructions on your computer to www.dell.com/support. 3. For more information, see the Dell...
Re-imaging guide for Windows
Page 11
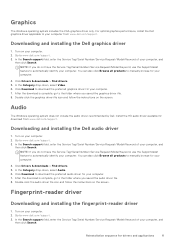
....dell.com/support. Fingerprint-reader driver Downloading and installing the fingerprint-reader driver 1. Go to www.dell.com/support. 3. Graphics The Windows operating system includes the VGA-graphics driver only. For optimal graphics performance, install the Dell graphics driver applicable to download the preferred audio driver for your computer. 2. Go to www.dell.com/support. 3. NOTE: If you saved the graphics driver file. 8. Turn on the screen. In the Search support field, enter the Service Tag/Serial Number/Service Request/Model...
....dell.com/support. Fingerprint-reader driver Downloading and installing the fingerprint-reader driver 1. Go to www.dell.com/support. 3. Graphics The Windows operating system includes the VGA-graphics driver only. For optimal graphics performance, install the Dell graphics driver applicable to download the preferred audio driver for your computer. 2. Go to www.dell.com/support. 3. NOTE: If you saved the graphics driver file. 8. Turn on the screen. In the Search support field, enter the Service Tag/Serial Number/Service Request/Model...
Re-imaging guide for Windows
Page 12
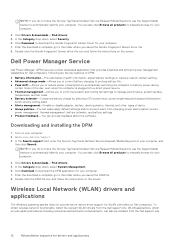
... management-Allows you to control processor and cooling fan settings to manage performance, system surface temperature, and fan noise. ● Battery extender-Conserves battery charge by affecting CPU power level, screen brightness and keyboard illumination levels, and by muting audio. ● Alerts management-Enable or disable adapter, battery, docking station, thermal, and other types of your computer, and then click Search. To obtain wireless network functionality, install the relevant WLAN drivers from changing power alerts system events, power management, thermal management, battery...
... management-Allows you to control processor and cooling fan settings to manage performance, system surface temperature, and fan noise. ● Battery extender-Conserves battery charge by affecting CPU power level, screen brightness and keyboard illumination levels, and by muting audio. ● Alerts management-Enable or disable adapter, battery, docking station, thermal, and other types of your computer, and then click Search. To obtain wireless network functionality, install the relevant WLAN drivers from changing power alerts system events, power management, thermal management, battery...

Re-imaging guide for Windows
Page 13
In the Search support field, enter the Service Tag/Serial Number/Service Request/Model/Keyword of your computer or not functioning optimally. Click Download to automatically identify your computer. Click Drivers & downloads > Find drivers. 5. CAUTION: You must update your computer's BIOS and the Dell Docking Station drivers to your computer. 4. Turn on Dell support site before using a USB (Type-C) cable interface. NOTE: If you do not have the Service Tag/Serial Number/Service Request/Model/Keyword, use the SupportAssist feature...
In the Search support field, enter the Service Tag/Serial Number/Service Request/Model/Keyword of your computer or not functioning optimally. Click Download to automatically identify your computer. Click Drivers & downloads > Find drivers. 5. CAUTION: You must update your computer's BIOS and the Dell Docking Station drivers to your computer. 4. Turn on Dell support site before using a USB (Type-C) cable interface. NOTE: If you do not have the Service Tag/Serial Number/Service Request/Model/Keyword, use the SupportAssist feature...

Service Manual
Page 3
... service kit ...8 Transporting sensitive components...9 After working inside your computer...9 Chapter 2: Removing and installing components 10 Recommended tools...10 Screw list...10 Major components of Vostro 5620...11 Base cover...13 Removing the base cover...13 Installing the base cover...14 Battery...16 Lithium-ion battery precautions...16 Removing the 3-cell battery...17 Installing the 3-cell battery...17 Removing the 4-cell battery...18 Installing the 4-cell battery...19 Memory modules...20 Removing the memory module...20 Installing the memory module...
... service kit ...8 Transporting sensitive components...9 After working inside your computer...9 Chapter 2: Removing and installing components 10 Recommended tools...10 Screw list...10 Major components of Vostro 5620...11 Base cover...13 Removing the base cover...13 Installing the base cover...14 Battery...16 Lithium-ion battery precautions...16 Removing the 3-cell battery...17 Installing the 3-cell battery...17 Removing the 4-cell battery...18 Installing the 4-cell battery...19 Memory modules...20 Removing the memory module...20 Installing the memory module...

Service Manual
Page 4
... setup password...64 Assigning a system setup password...64 Deleting or changing an existing system setup password 65 Clearing CMOS settings...65 Clearing BIOS (System Setup) and System passwords 65 Updating the BIOS...66 Updating the BIOS in Windows...66 Updating the BIOS in Linux and Ubuntu...66 Updating the BIOS using the USB drive in Windows 66 Updating the BIOS from the F12 One-Time boot menu 67 Chapter 5: Troubleshooting...68 Handling swollen Lithium-ion batteries...68 Locate the Service Tag or Express Service Code of your Dell...
... setup password...64 Assigning a system setup password...64 Deleting or changing an existing system setup password 65 Clearing CMOS settings...65 Clearing BIOS (System Setup) and System passwords 65 Updating the BIOS...66 Updating the BIOS in Windows...66 Updating the BIOS in Linux and Ubuntu...66 Updating the BIOS using the USB drive in Windows 66 Updating the BIOS from the F12 One-Time boot menu 67 Chapter 5: Troubleshooting...68 Handling swollen Lithium-ion batteries...68 Locate the Service Tag or Express Service Code of your Dell...

Service Manual
Page 7
... are unable to turn on the screen, press any key to radio frequency (RF) energy set up in previous Dell products. Enter the service mode, if you are catastrophic and intermittent failures. ● Catastrophic - Hold key on the screen. Once the computer shuts down immediately. Due to the increased density of the U.S. Two recognized types of device functionality. Press any key to the damage...
... are unable to turn on the screen, press any key to radio frequency (RF) energy set up in previous Dell products. Enter the service mode, if you are catastrophic and intermittent failures. ● Catastrophic - Hold key on the screen. Once the computer shuts down immediately. Due to the increased density of the U.S. Two recognized types of device functionality. Press any key to the damage...

Service Manual
Page 54
... with the screw holes on the system board. 5. Remove the base cover. 3. Remove the power button. 54 Removing and installing components Next steps 1. Palm-rest and keyboard assembly Removing the palm-rest and keyboard assembly Prerequisites 1. NOTE: Ensure that secures the power-adapter port cable to the system board. 3. Remove the wireless card. 6. Remove the fan. 9. Remove the coin-cell battery. 10. Remove the memory module. 4. Steps 1. Adhere the tape that your computer. 2. Close the left...
... with the screw holes on the system board. 5. Remove the base cover. 3. Remove the power button. 54 Removing and installing components Next steps 1. Palm-rest and keyboard assembly Removing the palm-rest and keyboard assembly Prerequisites 1. NOTE: Ensure that secures the power-adapter port cable to the system board. 3. Remove the wireless card. 6. Remove the fan. 9. Remove the coin-cell battery. 10. Remove the memory module. 4. Steps 1. Adhere the tape that your computer. 2. Close the left...
Service Manual
Page 58
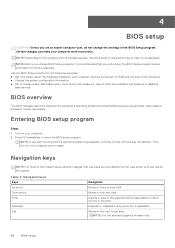
... are recorded but do not change a user-selectable option, such as the user password, type of hard drive installed, and enabling or disabling base devices. Certain changes can make are an expert computer user, do not take effect until you see the desktop. Moves to wait until you write down list, if applicable. Use the BIOS Setup program for future reference. NOTE: Before you change BIOS Setup program, it is recommended that...
... are recorded but do not change a user-selectable option, such as the user password, type of hard drive installed, and enabling or disabling base devices. Certain changes can make are an expert computer user, do not take effect until you see the desktop. Moves to wait until you write down list, if applicable. Use the BIOS Setup program for future reference. NOTE: Before you change BIOS Setup program, it is recommended that...

Service Manual
Page 60
...; Enabled ● Disabled (Default) IPv6 HTTP Support Displays the IPv6 support status. Options are : ● Enabled (Default) ● Disabled Battery Charge Configuration Displays the Battery Charge configuration. Camera Allows to select the SATA mode of the keyboard (option could be backlit or non-backlit). Options are : ● Multimedia Key(Default) ● Function Key Battery Health Shows Battery Health and Charge Status. Options are : ● Enabled ● Disabled (Default) 60 BIOS setup System setup options-Advance menu Advance Multi-Cores Support Displays the...
...; Enabled ● Disabled (Default) IPv6 HTTP Support Displays the IPv6 support status. Options are : ● Enabled (Default) ● Disabled Battery Charge Configuration Displays the Battery Charge configuration. Camera Allows to select the SATA mode of the keyboard (option could be backlit or non-backlit). Options are : ● Multimedia Key(Default) ● Function Key Battery Health Shows Battery Health and Charge Status. Options are : ● Enabled ● Disabled (Default) 60 BIOS setup System setup options-Advance menu Advance Multi-Cores Support Displays the...

Service Manual
Page 61
.... System setup options-Advance menu (continued) Advance Power Option Power on LID open Maintenance Data Wipe on next boot BIOS Recovery from 5 Seconds to permanently turn off/turn -on /switch-off the External USB ports in the Operating System. Keyboard Backlight with AC Controls the Power function on the Keyboard backlight without the AC adapter. Options are : ● Off ●1 ● 2 (Default) ●3 Enabled Support Assist OS recovery on next boot. Default option is set value failed boot attempts. Options are : ● Enabled (Default) ● Disabled...
.... System setup options-Advance menu (continued) Advance Power Option Power on LID open Maintenance Data Wipe on next boot BIOS Recovery from 5 Seconds to permanently turn off/turn -on /switch-off the External USB ports in the Operating System. Keyboard Backlight with AC Controls the Power function on the Keyboard backlight without the AC adapter. Options are : ● Off ●1 ● 2 (Default) ●3 Enabled Support Assist OS recovery on next boot. Default option is set value failed boot attempts. Options are : ● Enabled (Default) ● Disabled...

Service Manual
Page 65
... or change the existing System and/or Setup password. In the System Security screen, verify that Password Status is Unlocked (in the Confirm new password field and click OK. 4. Replace the base cover. 7. About this task CAUTION: Clearing CMOS settings will reset the BIOS settings on or reboot. Clearing CMOS settings About this task To enter the System Setup, press F12 immediately after a power-on your computer. Deleting or changing an existing system setup password Prerequisites...
... or change the existing System and/or Setup password. In the System Security screen, verify that Password Status is Unlocked (in the Confirm new password field and click OK. 4. Replace the base cover. 7. About this task CAUTION: Clearing CMOS settings will reset the BIOS settings on or reboot. Clearing CMOS settings About this task To enter the System Setup, press F12 immediately after a power-on your computer. Deleting or changing an existing system setup password Prerequisites...

Service Manual
Page 67
... a USB port of the Dell computers built after the BIOS update is connected to the computer ● Functional computer battery to flash the BIOS Perform the following : ● USB drive formatted to the FAT32 file system (key does not have this capability, and you downloaded from Windows using the mouse or arrow keys then press Enter. NOTE: Only computers with BIOS Flash Update option in data loss or an unnecessary operating system re-install. Steps 1. The flash BIOS menu...
... a USB port of the Dell computers built after the BIOS update is connected to the computer ● Functional computer battery to flash the BIOS Perform the following : ● USB drive formatted to the FAT32 file system (key does not have this capability, and you downloaded from Windows using the mouse or arrow keys then press Enter. NOTE: Only computers with BIOS Flash Update option in data loss or an unnecessary operating system re-install. Steps 1. The flash BIOS menu...

Service Manual
Page 71
..., black and red. 7. Recovering the operating system When your computer, back up . 5. The following procedure provides the instructions on the laptop to diagnose and troubleshoot issues that are experiencing is unable to access the internet due to WiFi connectivity issues a WiFi power cycle procedure may occur before your computer to software or hardware failures. You can also download it from the Dell Support website to troubleshoot and fix your...
..., black and red. 7. Recovering the operating system When your computer, back up . 5. The following procedure provides the instructions on the laptop to diagnose and troubleshoot issues that are experiencing is unable to access the internet due to WiFi connectivity issues a WiFi power cycle procedure may occur before your computer to software or hardware failures. You can also download it from the Dell Support website to troubleshoot and fix your...
Setup and Specifications
Page 6
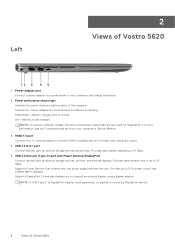
..., external display or another HDMI-in your computer and charge the battery. 2. Power and battery-status light Indicates the power state and battery state of Vostro 5620 Left 1. Provides data transfer rate of Vostro 5620 For more information, see the Troubleshooting section in enabled device. Supports Power Delivery that enables faster charging. USB 3.2 Gen 2x2 (Type-C) port with Power Delivery/DisplayPort Connect devices such as external storage devices and printers. 2 Views of the computer. Provides up to your computer's Service Manual. 3. Solid...
..., external display or another HDMI-in your computer and charge the battery. 2. Power and battery-status light Indicates the power state and battery state of Vostro 5620 Left 1. Provides data transfer rate of Vostro 5620 For more information, see the Troubleshooting section in enabled device. Supports Power Delivery that enables faster charging. USB 3.2 Gen 2x2 (Type-C) port with Power Delivery/DisplayPort Connect devices such as external storage devices and printers. 2 Views of the computer. Provides up to your computer's Service Manual. 3. Solid...
Setup and Specifications
Page 13
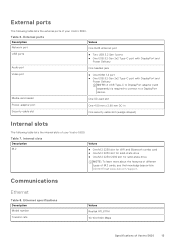
... slot for WiFi and Bluetooth combo card ● One M.2 2230 slot for solid-state drive ● One M.2 2230/2280 slot for solid-state drive NOTE: To learn more about the features of different types of Vostro 5620 13 Media-card reader One SD-card slot Power-adapter port One 4.50 mm x 2.90 mm DC-in Security-cable slot One security cable slot (wedge-shaped) Internal slots The following table lists the external ports of your Vostro 5620. Table 6. Ethernet specifications Description Model number...
... slot for WiFi and Bluetooth combo card ● One M.2 2230 slot for solid-state drive ● One M.2 2230/2280 slot for solid-state drive NOTE: To learn more about the features of different types of Vostro 5620 13 Media-card reader One SD-card slot Power-adapter port One 4.50 mm x 2.90 mm DC-in Security-cable slot One security cable slot (wedge-shaped) Internal slots The following table lists the external ports of your Vostro 5620. Table 6. Ethernet specifications Description Model number...


