
User Guide
Page 13
... switches to PictBridge mode when you want appears on the display, press the Select button to access the Paper Setup Menu. until 2. When your printer changes to PictBridge mode, use the left and right Arrow buttons to scroll through the available menu items. 3. Wallet 3.5 x 5 in. 5 x 7 in. 8...cm *Automatic Borderless 1 Per Page to save the setting. PictBridge menu item Paper Setup Photo Size Layout Settings Press the Select button *4 x 6 in . Main Menu PictBridge Mode Main Menu Paper Setup Photo Size Layout Quality 1. Use the left and right Arrow buttons the heading ...
... switches to PictBridge mode when you want appears on the display, press the Select button to access the Paper Setup Menu. until 2. When your printer changes to PictBridge mode, use the left and right Arrow buttons to scroll through the available menu items. 3. Wallet 3.5 x 5 in. 5 x 7 in. 8...cm *Automatic Borderless 1 Per Page to save the setting. PictBridge menu item Paper Setup Photo Size Layout Settings Press the Select button *4 x 6 in . Main Menu PictBridge Mode Main Menu Paper Setup Photo Size Layout Quality 1. Use the left and right Arrow buttons the heading ...
User Guide
Page 16
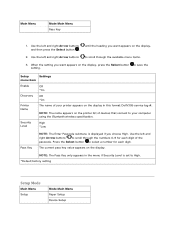
...the display in the menu if Security Level is displayed if you want appears on the printer list of your computer using the Bluetooth wireless specification. NOTE: The Pass Key only appears in this format:DellV305-service tag #. until ...the heading you choose High. Setup Settings menu item Enable Off *On Discovery Off *On Printer Name The name of devices that connect to High. *Default factory setting Setup Mode Main Menu Setup Mode Main Menu Paper Setup Device Setup...
...the display in the menu if Security Level is displayed if you want appears on the printer list of your computer using the Bluetooth wireless specification. NOTE: The Pass Key only appears in this format:DellV305-service tag #. until ...the heading you choose High. Setup Settings menu item Enable Off *On Discovery Off *On Printer Name The name of devices that connect to High. *Default factory setting Setup Mode Main Menu Setup Mode Main Menu Paper Setup Device Setup...

User Guide
Page 23
... Windows® XP, click Start Control Panel Printers and Other Hardware Printers and Faxes. Click Preferences, Properties, Options, or Setup (depending on the program or operating system). On the Print Setup tab, select the paper type. 5. Right-click the printer icon. 3. Click OK. The automatic paper type sensor is always on, unless...
... Windows® XP, click Start Control Panel Printers and Other Hardware Printers and Faxes. Click Preferences, Properties, Options, or Setup (depending on the program or operating system). On the Print Setup tab, select the paper type. 5. Right-click the printer icon. 3. Click OK. The automatic paper type sensor is always on, unless...

User Guide
Page 25
With your computer and printer, and make any necessary changes for your settings, click OK. The Print dialog box opens. 4. Click OK or Print. Turn on the program or operating system). On the Print Setup and Advanced tabs, make sure they are connected. 2. Load the paper. The Printing Preferences dialog box closes. 7....box opens. 5. Printing Printing Documents 1. After customizing your document. 6. For more information, see Loading Paper into the Paper Support. 3. Click Preferences, Properties, Options, or Setup (depending on your document open, click File Print.
With your computer and printer, and make any necessary changes for your settings, click OK. The Print dialog box opens. 4. Click OK or Print. Turn on the program or operating system). On the Print Setup and Advanced tabs, make sure they are connected. 2. Load the paper. The Printing Preferences dialog box closes. 7....box opens. 5. Printing Printing Documents 1. After customizing your document. 6. For more information, see Loading Paper into the Paper Support. 3. Click Preferences, Properties, Options, or Setup (depending on your document open, click File Print.
User Guide
Page 26
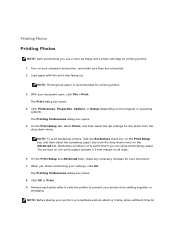
... check box on your computer and printer, and make any necessary changes for the photo from the drop-down menu on the Advanced tab. When you use a color cartridge and a photo cartridge for Click Preferences, Properties, Options, or Setup (depending on all sides. 6. Printing Photos Printing Photos NOTE: Dell recommends you finish customizing your...
... check box on your computer and printer, and make any necessary changes for the photo from the drop-down menu on the Advanced tab. When you use a color cartridge and a photo cartridge for Click Preferences, Properties, Options, or Setup (depending on all sides. 6. Printing Photos Printing Photos NOTE: Dell recommends you finish customizing your...
User Guide
Page 30
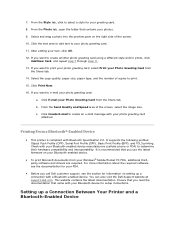
... style and/or photo, click Add New Card, and repeat step 7 through step 11. 13. Click Create E-mail to select a style for setup instructions. From the Style tab, click to create an e-mail message with Bluetooth Specification 2.0. Setting up a connection with your photo greeting card. 11.... Printing From a Bluetooth®Enabled Device This printer is recommended that you call Dell customer support, see the documentation for information on the right side of copies to print. 15.
... style and/or photo, click Add New Card, and repeat step 7 through step 11. 13. Click Create E-mail to select a style for setup instructions. From the Style tab, click to create an e-mail message with Bluetooth Specification 2.0. Setting up a connection with your photo greeting card. 11.... Printing From a Bluetooth®Enabled Device This printer is recommended that you call Dell customer support, see the documentation for information on the right side of copies to print. 15.

User Guide
Page 31
...Refer to the instructions included with the device for each Bluetooth device that you need to repeat the setup if: You reset the printer to set up a connection with the printer. For more information, see Bluetooth Mode. The name of the Bluetooth device you are using... pass key. You need to repeat the setup of the deleted device to set up a connection between a Bluetooth-enabled device and your computer using is automatically deleted from the list so that have previously set up a connection between the printer and a Bluetooth-enabled device: 1. When ...
...Refer to the instructions included with the device for each Bluetooth device that you need to repeat the setup if: You reset the printer to set up a connection with the printer. For more information, see Bluetooth Mode. The name of the Bluetooth device you are using... pass key. You need to repeat the setup of the deleted device to set up a connection between a Bluetooth-enabled device and your computer using is automatically deleted from the list so that have previously set up a connection between the printer and a Bluetooth-enabled device: 1. When ...

User Guide
Page 33
... keypad to High, you set the security level to the instructions included with the device for Bluetooth printing setup information. 6. NOTE: A Bluetooth adapter is set to enter your printer without requiring users to enter a pass key. Choose High to require users to enter a ...Printing From a Bluetooth-Enabled Device 1. Refer to High. For more information, see Bluetooth Mode. 4. See the instructions included with the printer. 3. For more information, see Setting up to receive Bluetooth connections. Use the left and right Arrow buttons to scroll to Yes when ...
... keypad to High, you set the security level to the instructions included with the device for Bluetooth printing setup information. 6. NOTE: A Bluetooth adapter is set to enter your printer without requiring users to enter a pass key. Choose High to require users to enter a ...Printing From a Bluetooth-Enabled Device 1. Refer to High. For more information, see Bluetooth Mode. 4. See the instructions included with the printer. 3. For more information, see Setting up to receive Bluetooth connections. Use the left and right Arrow buttons to scroll to Yes when ...

User Guide
Page 34
With your computer and printer, and ensure that they are connected. 2. The Printing Preferences dialog box opens. 5. On the Print Setup tab, select Envelope, and then choose the size of the envelope from the Paper size: drop-down menu. If you are mailing internationally, ... right corner or in landscape orientation with the print side facing up. 3. Turn on the program or operating system). Click Preferences, Properties, Options, or Setup (depending on your document open, click File Print. NOTE: If you are mailing within Japan, the envelopes can be loaded in two ways:...
With your computer and printer, and ensure that they are connected. 2. The Printing Preferences dialog box opens. 5. On the Print Setup tab, select Envelope, and then choose the size of the envelope from the Paper size: drop-down menu. If you are mailing internationally, ... right corner or in landscape orientation with the print side facing up. 3. Turn on the program or operating system). Click Preferences, Properties, Options, or Setup (depending on your document open, click File Print. NOTE: If you are mailing within Japan, the envelopes can be loaded in two ways:...
User Guide
Page 35
...One Page on one sheet. 7. For more information, see Loading Paper into the Paper Support. 3. With your document. 10. The Printing Preferences dialog box closes. 11. From the Pages per sheet drop-down list. 6. Select the Print Page Borders check box if you finish customizing your computer and printer..., and ensure that they are connected. 2. The Printing Preferences dialog box opens. 5. Turn on the program or operating system). Click Preferences, Properties, Options, or Setup (depending on your settings, click OK. On the Print Setup and Advanced tabs,...
...One Page on one sheet. 7. For more information, see Loading Paper into the Paper Support. 3. With your document. 10. The Printing Preferences dialog box closes. 11. From the Pages per sheet drop-down list. 6. Select the Print Page Borders check box if you finish customizing your computer and printer..., and ensure that they are connected. 2. The Printing Preferences dialog box opens. 5. Turn on the program or operating system). Click Preferences, Properties, Options, or Setup (depending on your settings, click OK. On the Print Setup and Advanced tabs,...
User Guide
Page 36
...your document open , click File Print. 4. With your computer and printer, and make sure they are connected. 2. Turn on your settings, click OK. With your settings, click OK. On the Print Setup tab, make any additional changes for your document. 9. Load the paper.... For more information, see Loading Paper into the Paper Support. 3. Click Preferences, Properties, Options, or Setup (depending on the program or operating system). The Printing Preferences dialog box opens. 8. Click OK or Print. The Printing Preferences dialog box...
...your document open , click File Print. 4. With your computer and printer, and make sure they are connected. 2. Turn on your settings, click OK. With your settings, click OK. On the Print Setup tab, make any additional changes for your document. 9. Load the paper.... For more information, see Loading Paper into the Paper Support. 3. Click Preferences, Properties, Options, or Setup (depending on the program or operating system). The Printing Preferences dialog box opens. 8. Click OK or Print. The Printing Preferences dialog box...

User Guide
Page 37
... opens. 4. Select the Collate copies check box. 7. After customizing your computer and printer, and make sure they are connected. 2. After customizing your document. 7. On the Print Setup tab, specify the number of the printer. The Printing Preferences dialog box closes. 9. 5. On the Advanced tab, select Banner... floor in front of copies to become active. 6. For more than one copy for your document open, click File Print. Click OK or Print. Click OK or Print. On the Print Setup and Advanced tabs, make any additional changes for your settings, click OK...
... opens. 4. Select the Collate copies check box. 7. After customizing your computer and printer, and make sure they are connected. 2. After customizing your document. 7. On the Print Setup tab, specify the number of the printer. The Printing Preferences dialog box closes. 9. 5. On the Advanced tab, select Banner... floor in front of copies to become active. 6. For more than one copy for your document open, click File Print. Click OK or Print. Click OK or Print. On the Print Setup and Advanced tabs, make any additional changes for your settings, click OK...

User Guide
Page 38
...: A bundle is a set it with a heavier paper stock, select a smaller number of the first bundle. The printed bundles are stacked, one on the program or operating system). 4. When printing with the front page down on top of Sheets per bundle. Take the next bundle from ...order. With your document open . 8. From the Print dialog box, click Properties, Preferences, Options, or Setup (depending on top of Sheets per bundle. 7. Printing a Booklet Before you change any printer software dialog boxes that are open , click File Print. 3. NOTE: For help binding and assembling...
...: A bundle is a set it with a heavier paper stock, select a smaller number of the first bundle. The printed bundles are stacked, one on the program or operating system). 4. When printing with the front page down on top of Sheets per bundle. Take the next bundle from ...order. With your document open . 8. From the Print dialog box, click Properties, Preferences, Options, or Setup (depending on top of Sheets per bundle. 7. Printing a Booklet Before you change any printer software dialog boxes that are open , click File Print. 3. NOTE: For help binding and assembling...

User Guide
Page 39
... the document on both sides of the paper. Reload the document with the front page down, one on top of the paper. 1. After customizing your document open, click File Print. ...Click OK or Print. 9. Turn on the program or operating system). 5. Click Preferences, Properties, Options, or Setup (depending on your pages. 7. 4. Duplexing a Print Job (TwoSided Printing) Manual duplex allows you...sided printing check box. 6. Select how you to print your computer screen. The printer prints the odd-numbered pages of the document on your document on the back sides of the...
... the document on both sides of the paper. Reload the document with the front page down, one on top of the paper. 1. After customizing your document open, click File Print. ...Click OK or Print. 9. Turn on the program or operating system). 5. Click Preferences, Properties, Options, or Setup (depending on your pages. 7. 4. Duplexing a Print Job (TwoSided Printing) Manual duplex allows you...sided printing check box. 6. Select how you to print your computer screen. The printer prints the odd-numbered pages of the document on your document on the back sides of the...
User Guide
Page 42
...default from most programs. From the Print Setup tab, you want to set as default. From here, you want to set as default when printing from the Maintenance tab. In Windows 2000, click Start Settings Printers. 2. Select Printing Preferences. 4. In ...Windows XP, click Start Settings Control Panel Printers and Other Hardware Printers and Faxes. Right-click the Dell V305 icon. 3. Change the settings that you can : &#...
...default from most programs. From the Print Setup tab, you want to set as default. From here, you want to set as default when printing from the Maintenance tab. In Windows 2000, click Start Settings Printers. 2. Select Printing Preferences. 4. In ...Windows XP, click Start Settings Control Panel Printers and Other Hardware Printers and Faxes. Right-click the Dell V305 icon. 3. Change the settings that you can : &#...
User Guide
Page 68
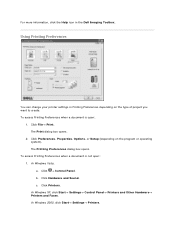
Using Printing Preferences You can change your printer settings in the Dell Imaging Toolbox. The Print dialog box opens. 2. Click File Print. b. Click Preferences, Properties, Options, or Setup (depending on the type of project you want to create. To access Printing Preferences when a document is open : 1. In Windows XP, click Start Settings...
Using Printing Preferences You can change your printer settings in the Dell Imaging Toolbox. The Print dialog box opens. 2. Click File Print. b. Click Preferences, Properties, Options, or Setup (depending on the type of project you want to create. To access Printing Preferences when a document is open : 1. In Windows XP, click Start Settings...
User Guide
Page 69
... most programs. The Printing Preferences dialog box has three sections: Tab Print Setup Options Quality/Speed - Automatically select the best image-sharpening level based on the printed page. Dell Customer Experience Improvement Program - You can print using portrait or landscape orientation....can also view the paper type that the printer detects. Copies - Select this setting if you to assist in , the Dell Customer Experience Improvement Program. Layout - Select Draft, Normal, or Photo depending on both sides of your color cartridge. Draft is arranged on image content...
... most programs. The Printing Preferences dialog box has three sections: Tab Print Setup Options Quality/Speed - Automatically select the best image-sharpening level based on the printed page. Dell Customer Experience Improvement Program - You can print using portrait or landscape orientation....can also view the paper type that the printer detects. Copies - Select this setting if you to assist in , the Dell Customer Experience Improvement Program. Layout - Select Draft, Normal, or Photo depending on both sides of your color cartridge. Draft is arranged on image content...
User Guide
Page 74
... then double-click setup.exe. In order to use of the advanced XPS color and graphics features that are only available for Windows Vista users. Double-click the CD-ROM drive icon, and then double-click Drivers. When the printer software installation screen appears, click Using a USB cable or Using a wireless network. Double-click...
... then double-click setup.exe. In order to use of the advanced XPS color and graphics features that are only available for Windows Vista users. Double-click the CD-ROM drive icon, and then double-click Drivers. When the printer software installation screen appears, click Using a USB cable or Using a wireless network. Double-click...
User Guide
Page 75
...printer using an Ethernet or wireless connection, make sure the USB cable is not in the Hostname or IP address: box, and then click Next. 4. f. Type your printer IP address in the list, click The printer that has your printer from the Network Setup menu under the Setup menu on the printer...To install the driver: 1. From the Add Printer dialog box, choose one of the following : a. Click Have disk. d. Double-click xps, and then double-click setupxps. Follow the instructions on your printer IP address, print a Network Setup Page from the list. To locate your computer...
...printer using an Ethernet or wireless connection, make sure the USB cable is not in the Hostname or IP address: box, and then click Next. 4. f. Type your printer IP address in the list, click The printer that has your printer from the Network Setup menu under the Setup menu on the printer...To install the driver: 1. From the Add Printer dialog box, choose one of the following : a. Click Have disk. d. Double-click xps, and then double-click setupxps. Follow the instructions on your printer IP address, print a Network Setup Page from the list. To locate your computer...

User Guide
Page 77
...Setup NOTE: This section is equipped with either 64-bit or 128-bit key Here are supported: No security WEP with a wireless adapter. NOTE: For more wireless information, see your router's Operation Manual or contact your router manufacturer's helpline or your printer A computer running one of wireless... Security Key(s) Wireless Encryption The following operating systems: o Windows Vista™ o Microsoft® Windows® XP o Microsoft Windows 2000 Wireless Network Settings Some wireless network settings may be needed to the Dell V305w printer, which is...
...Setup NOTE: This section is equipped with either 64-bit or 128-bit key Here are supported: No security WEP with a wireless adapter. NOTE: For more wireless information, see your router's Operation Manual or contact your router manufacturer's helpline or your printer A computer running one of wireless... Security Key(s) Wireless Encryption The following operating systems: o Windows Vista™ o Microsoft® Windows® XP o Microsoft Windows 2000 Wireless Network Settings Some wireless network settings may be needed to the Dell V305w printer, which is...


