Getting Started Guide
Page 2
... United States or other countries. WARNING: A WARNING indicates a potential for property damage, personal injury, or death. © 2013 Dell Inc. Intel®, Pentium®, Xeon®, Core® and Celeron® are registered trademarks of VMware, Inc. Microsoft®, Windows®, Windows Server®,..., Cautions, and Warnings NOTE: A NOTE indicates important information that helps you how to hardware or loss of data and tells you make better use of Advanced Micro Devices, Inc. Trademarks used in the United States and/or other countries. in the United States and/or other...
... United States or other countries. WARNING: A WARNING indicates a potential for property damage, personal injury, or death. © 2013 Dell Inc. Intel®, Pentium®, Xeon®, Core® and Celeron® are registered trademarks of VMware, Inc. Microsoft®, Windows®, Windows Server®,..., Cautions, and Warnings NOTE: A NOTE indicates important information that helps you how to hardware or loss of data and tells you make better use of Advanced Micro Devices, Inc. Trademarks used in the United States and/or other countries. in the United States and/or other...
Getting Started Guide
Page 3
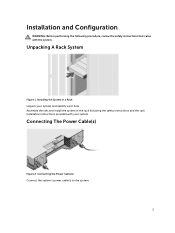
Installation and Configuration WARNING: Before performing the following the safety instructions and the rack installation instructions provided with the system. Connecting the Power Cable(s) Connect the system's power cable(s) to the system. 3 Assemble the rails and install the system in a Rack Unpack your system. Connecting The Power Cable(s) Figure 2. Unpacking A Rack System Figure 1. Installing the System in the rack following procedure, review the safety instructions that came with your system and identify each item.
Installation and Configuration WARNING: Before performing the following the safety instructions and the rack installation instructions provided with the system. Connecting the Power Cable(s) Connect the system's power cable(s) to the system. 3 Assemble the rails and install the system in a Rack Unpack your system. Connecting The Power Cable(s) Figure 2. Unpacking A Rack System Figure 1. Installing the System in the rack following procedure, review the safety instructions that came with your system and identify each item.
Getting Started Guide
Page 4
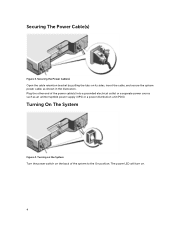
The power LED will turn on its sides, insert the cable, and secure the system power cable, as an uninterruptible power supply (UPS) or a power distribution unit (PDU). Plug the other end of the system to the On position. Securing the Power Cable(s) Open the cable retention bracket by pulling the tabs on . 4 Turning on the System Turn the power switch on the back of the power cable(s) into a grounded electrical outlet or a separate power source such as shown in the illustration. Turning On The System Figure 4. Securing The Power Cable(s) Figure 3.
The power LED will turn on its sides, insert the cable, and secure the system power cable, as an uninterruptible power supply (UPS) or a power distribution unit (PDU). Plug the other end of the system to the On position. Securing the Power Cable(s) Open the cable retention bracket by pulling the tabs on . 4 Turning on the System Turn the power switch on the back of the power cable(s) into a grounded electrical outlet or a separate power source such as shown in the illustration. Turning On The System Figure 4. Securing The Power Cable(s) Figure 3.
Getting Started Guide
Page 5
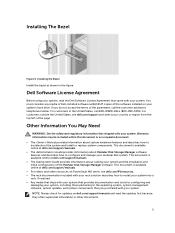
... available online at dell.com/support/manuals. • For videos and other documents. 5 Dell Software License Agreement Before using your system, read the updates first because they often supersede information in the figure. If you purchased with your modular disk system. Installing the Bezel Install the bezel as BACKUP copies of the page. This document is available online at dell.com/support/manuals. • The Deployment Guide provides information about cabling your system's hard drive...
... available online at dell.com/support/manuals. • For videos and other documents. 5 Dell Software License Agreement Before using your system, read the updates first because they often supersede information in the figure. If you purchased with your modular disk system. Installing the Bezel Install the bezel as BACKUP copies of the page. This document is available online at dell.com/support/manuals. • The Deployment Guide provides information about cabling your system's hard drive...
Getting Started Guide
Page 6
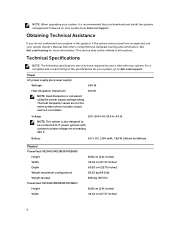
... inches) 6 Obtaining Technical Assistance If you download and install the systems management firmware on your system Owner's Manual. See dell.com/training for your system. Voltage 100-240 V AC (8.6 A-4.3 A) NOTE: This system is calculated using the power supply wattage rating. NOTE: When upgrading your system, it is recommended that you do not understand a procedure in all locations. Technical Specifications NOTE: The following specifications are for the...
... inches) 6 Obtaining Technical Assistance If you download and install the systems management firmware on your system Owner's Manual. See dell.com/training for your system. Voltage 100-240 V AC (8.6 A-4.3 A) NOTE: This system is calculated using the power supply wattage rating. NOTE: When upgrading your system, it is recommended that you do not understand a procedure in all locations. Technical Specifications NOTE: The following specifications are for the...
Getting Started Guide
Page 7
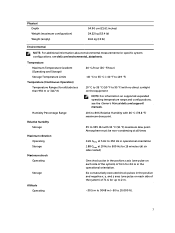
... NOTE: For additional information about environmental measurements for specific system configurations, see the Owner's Manual dell.com/support/ manuals. Temperature Maximum Temperature Gradient (Operating and Storage) Storage Temperature Limits Temperature (Continuous Operation) Temperature Ranges (for up to 2 m. -30.5 m to 3048 m (-50 to 10,000 ft). 7 Humidity Percentage Range Relative humidity Storage Maximum vibration Operating Storage Maximum shock Operating Storage Altitude Operating 10% to 80% Relative Humidity with 26 °...
... NOTE: For additional information about environmental measurements for specific system configurations, see the Owner's Manual dell.com/support/ manuals. Temperature Maximum Temperature Gradient (Operating and Storage) Storage Temperature Limits Temperature (Continuous Operation) Temperature Ranges (for up to 2 m. -30.5 m to 3048 m (-50 to 10,000 ft). 7 Humidity Percentage Range Relative humidity Storage Maximum vibration Operating Storage Maximum shock Operating Storage Altitude Operating 10% to 80% Relative Humidity with 26 °...
Getting Started Guide
Page 8
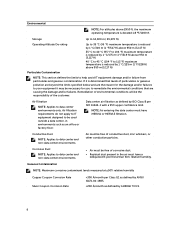
...free of environmental conditions will be used outside a data center, in the air must have MERV11 or MERV13 filtration. Corrosive Dust NOTE: Applies to data center and non-data center environments. • Air must have a deliquescent point less than 60% relative humidity. Operating Altitude De-rating Up to 35 °C (95 °F) maximum... to help avoid IT equipment damage and/or failure from particulates and gaseous contamination. Data center air filtration as an office or factory floor. Gaseous Contamination NOTE: Maximum corrosive contaminant levels measured at ≤50% ...
...free of environmental conditions will be used outside a data center, in the air must have MERV11 or MERV13 filtration. Corrosive Dust NOTE: Applies to data center and non-data center environments. • Air must have a deliquescent point less than 60% relative humidity. Operating Altitude De-rating Up to 35 °C (95 °F) maximum... to help avoid IT equipment damage and/or failure from particulates and gaseous contamination. Data center air filtration as an office or factory floor. Gaseous Contamination NOTE: Maximum corrosive contaminant levels measured at ≤50% ...


