Rack Installation Guide (.pdf)
Page 11
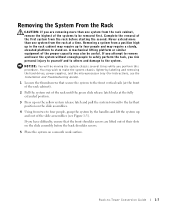
... farthest position on a smooth work surface. Never extend more than one system from two to four people, grasp the system by labeling and removing the hard drives, power supplies, and the microprocessor tray (for instructions, see Figure 1-3). NOTICE: You will be useful. You may require a sturdy, elevated platform to stand on the...
... farthest position on a smooth work surface. Never extend more than one system from two to four people, grasp the system by labeling and removing the hard drives, power supplies, and the microprocessor tray (for instructions, see Figure 1-3). NOTICE: You will be useful. You may require a sturdy, elevated platform to stand on the...

Rack Installation Guide (.pdf)
Page 14
...dell.com | support.dell.com Figure 1-5. Removing the System Cover system key front cover back cover thumbscrew 3 Remove the front system cover: a Slide the front cover backward and grasp the cover at both ends (see Figure 1-5). b Carefully lift the cover away from the system and set it aside. 4 Label each hard drive... with its location in the chassis. 5 Remove the hard drives from the system. 6 Remove the four T-15 Torx screws that secure the rack front panel to the chassis. 11...
...dell.com | support.dell.com Figure 1-5. Removing the System Cover system key front cover back cover thumbscrew 3 Remove the front system cover: a Slide the front cover backward and grasp the cover at both ends (see Figure 1-5). b Carefully lift the cover away from the system and set it aside. 4 Label each hard drive... with its location in the chassis. 5 Remove the hard drives from the system. 6 Remove the four T-15 Torx screws that secure the rack front panel to the chassis. 11...
Rack Installation Guide (.pdf)
Page 18
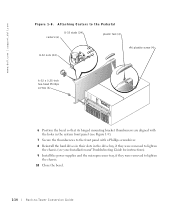
...front panel (see Figure 1-9). 7 Secure the thumbscrews to the front panel with a Phillips screwdriver. 8 Reinstall the hard drives in their slots in the drive bay, if they were removed to lighten the chassis (see your Installation and Troubleshooting Guide for instructions). 9 Install ...the power supplies and the microprocessor tray, if they were removed to lighten the chassis. 10 Close the bezel. 1-14 Rack-to-Tower Conversion Guide www.dell.com | support.dell...
...front panel (see Figure 1-9). 7 Secure the thumbscrews to the front panel with a Phillips screwdriver. 8 Reinstall the hard drives in their slots in the drive bay, if they were removed to lighten the chassis (see your Installation and Troubleshooting Guide for instructions). 9 Install ...the power supplies and the microprocessor tray, if they were removed to lighten the chassis. 10 Close the bezel. 1-14 Rack-to-Tower Conversion Guide www.dell.com | support.dell...


