
Setup and Quick Reference Guide
Page 17
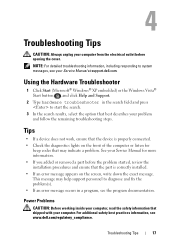
...; XP embedded) or the Windows Vista® Start button , and click Help and Support. 2 Type hardware troubleshooter in the search field and press to diagnose and fix the problem(s). • If an error message occurs in a program, see www.dell.com/regulatory_compliance. Tips • If ...detailed troubleshooting information, including responding to system messages, see your computer from the electrical outlet before the problem started, review the installation procedures and ensure that may help support personnel to start the search. 3 In the search results, select the option that ...
...; XP embedded) or the Windows Vista® Start button , and click Help and Support. 2 Type hardware troubleshooter in the search field and press to diagnose and fix the problem(s). • If an error message occurs in a program, see www.dell.com/regulatory_compliance. Tips • If ...detailed troubleshooting information, including responding to system messages, see your computer from the electrical outlet before the problem started, review the installation procedures and ensure that may help support personnel to start the search. 3 In the search results, select the option that ...
Setup and Quick Reference Guide
Page 19
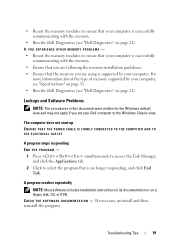
... installation instructions in this document were written for the Windows default view and may not apply if you are following the memory installation guidelines. • Ensure that the memory you set your computer, see "Specifications" on page 11. • Run the Dell Diagnostics (see "Dell Diagnostics... the Task Manager, and click the Applications tab. 2 Click to the Windows Classic view. For more information about the type of memory supported by your computer is supported by your Dell computer to select the program that you are using is successfully communicating with ...
... installation instructions in this document were written for the Windows default view and may not apply if you are following the memory installation guidelines. • Ensure that the memory you set your computer, see "Specifications" on page 11. • Run the Dell Diagnostics (see "Dell Diagnostics... the Task Manager, and click the Applications tab. 2 Click to the Windows Classic view. For more information about the type of memory supported by your computer is supported by your Dell computer to select the program that you are using is successfully communicating with ...
Setup and Quick Reference Guide
Page 20
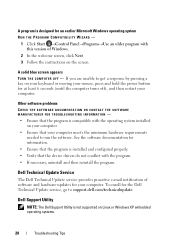
... documentation for your computer. Dell Support Utility NOTE: The Dell Support Utility is installed and configured properly. • Verify that the device drivers do not conflict with the program. • If necessary, uninstall and then reinstall the program. Dell Technical Update Service The Dell Technical Update service provides proactive e-mail notification of Windows. 2 In the welcome...
... documentation for your computer. Dell Support Utility NOTE: The Dell Support Utility is installed and configured properly. • Verify that the device drivers do not conflict with the program. • If necessary, uninstall and then reinstall the program. Dell Technical Update Service The Dell Technical Update service provides proactive e-mail notification of Windows. 2 In the welcome...
Setup and Quick Reference Guide
Page 21
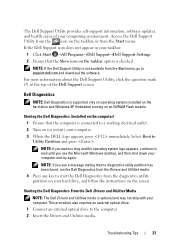
... taskbar: 1 Click Start →All Programs→Dell Support→Dell Support Settings. 2 Ensure that the computer is supported only on operating systems installed on the hard drive and Windows XP Embedded running on (or restart) your computing environment. Dell Diagnostics NOTE: Dell Diagnostics is connected to support.dell.com and download the software. Select Boot to...
... taskbar: 1 Click Start →All Programs→Dell Support→Dell Support Settings. 2 Ensure that the computer is supported only on operating systems installed on the hard drive and Windows XP Embedded running on (or restart) your computing environment. Dell Diagnostics NOTE: Dell Diagnostics is connected to support.dell.com and download the software. Select Boot to...

Setup and Quick Reference Guide
Page 23
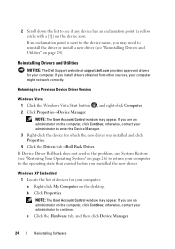
.... If an exclamation point is next to the device name, you may need to continue. NOTE: The User Account Control window may appear. otherwise, contact your administrator to reinstall the driver or install a new driver (see if any device has an exclamation point (a yellow circle with a [!]) on page 24). b Click Properties→...
.... If an exclamation point is next to the device name, you may need to continue. NOTE: The User Account Control window may appear. otherwise, contact your administrator to reinstall the driver or install a new driver (see if any device has an exclamation point (a yellow circle with a [!]) on page 24). b Click Properties→...
Setup and Quick Reference Guide
Page 24
... Manager. 24 Reinstalling Software Reinstalling Drivers and Utilities NOTICE: The Dell Support website at support.dell.com provides approved drivers for your administrator to the operating state that existed before you installed the new driver. NOTE: The User Account Control window may appear. If you install drivers obtained from other sources, your computer. NOTE: The...
... Manager. 24 Reinstalling Software Reinstalling Drivers and Utilities NOTICE: The Dell Support website at support.dell.com provides approved drivers for your administrator to the operating state that existed before you installed the new driver. NOTE: The User Account Control window may appear. If you install drivers obtained from other sources, your computer. NOTE: The...

Setup and Quick Reference Guide
Page 25
... to the operating state that existed before you are an administrator on the computer, click Continue; If you installed the new driver. b Click Properties. Reinstalling Software 25 NOTE: The User Account Control window may appear. Windows XP Embedded 1 Locate the list of devices for driver software. 6 Click Browse and browse to the location...
... to the operating state that existed before you are an administrator on the computer, click Continue; If you installed the new driver. b Click Properties. Reinstalling Software 25 NOTE: The User Account Control window may appear. Windows XP Embedded 1 Locate the list of devices for driver software. 6 Click Browse and browse to the location...
Setup and Quick Reference Guide
Page 26
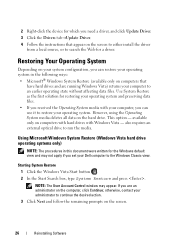
...The procedures in the following ways: • Microsoft® Windows System Restore (available only on computers that appear on the screen to either install the driver from a local source, or to search the Web for the Windows default view and may appear. If you set your administrator to... the Windows Classic view. otherwise, contact your Dell computer to continue the desired action. 3 Click...
...The procedures in the following ways: • Microsoft® Windows System Restore (available only on computers that appear on the screen to either install the driver from a local source, or to search the Web for the Windows default view and may appear. If you set your administrator to... the Windows Classic view. otherwise, contact your Dell computer to continue the desired action. 3 Click...
Dell™ OptiPlex™ FX160 Re-Imaging Guide
Page 3
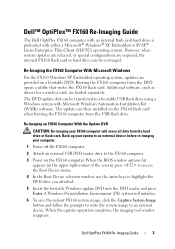
Re-Imaging the FX160 Computer With Microsoft Windows For the FX160 Windows XP Embedded operating system, updates are provided on the FX160 computer. Dell OptiPlex FX160 Re-Imaging Guide 3 Dell™ OptiPlex™ FX160 Re-Imaging Guide The Dell OptiPlex FX160 computer with an internal flash card hard drive is preloaded with Microsoft Windows Automation Installation Kit (WAIK) software. Re-Imaging an FX160 Computer With the Update DVD...
Re-Imaging the FX160 Computer With Microsoft Windows For the FX160 Windows XP Embedded operating system, updates are provided on the FX160 computer. Dell OptiPlex FX160 Re-Imaging Guide 3 Dell™ OptiPlex™ FX160 Re-Imaging Guide The Dell OptiPlex FX160 computer with an internal flash card hard drive is preloaded with Microsoft Windows Automation Installation Kit (WAIK) software. Re-Imaging an FX160 Computer With the Update DVD...
Dell™ OptiPlex™ FX160 Re-Imaging Guide
Page 4
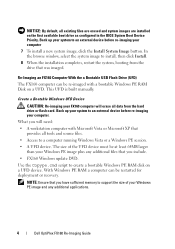
... that you include. • FX160 Windows update DVD. Back up your system to install, then click Install. 8 When the installation completes, restart the system, booting from the hard drive or flash card. This UFD is built manually. Create a Bootable Windows UFD Device CAUTION: Re-imaging your Windows PE image plus any additional applications. 4 Dell OptiPlex FX160 Re-Imaging Guide Re...
... that you include. • FX160 Windows update DVD. Back up your system to install, then click Install. 8 When the installation completes, restart the system, booting from the hard drive or flash card. This UFD is built manually. Create a Bootable Windows UFD Device CAUTION: Re-imaging your Windows PE image plus any additional applications. 4 Dell OptiPlex FX160 Re-Imaging Guide Re...

Dell™ OptiPlex™ FX160 Re-Imaging Guide
Page 5
... the following directories are installed at C:\Program Files\\Tools, where can be Windows OPK or Windows AIK. 3 At the command prompt, run the command: copype.cmd x86 where is part of the help system of the WAIK software. 1 Download and install the latest version of ...the necessary tools. This information is a local directory for the x86 architecture to the \winpe_x86\mount\windows\system32\ directory: winpeshl.ini DellImageDeploy.exe Comctl32.dll Oledlg.dll Wimgapi.dll Dell OptiPlex FX160 Re-Imaging Guide 5 NOTE: For additional information about 1GB). 2 Click Start, point to All ...
... the following directories are installed at C:\Program Files\\Tools, where can be Windows OPK or Windows AIK. 3 At the command prompt, run the command: copype.cmd x86 where is part of the help system of the WAIK software. 1 Download and install the latest version of ...the necessary tools. This information is a local directory for the x86 architecture to the \winpe_x86\mount\windows\system32\ directory: winpeshl.ini DellImageDeploy.exe Comctl32.dll Oledlg.dll Wimgapi.dll Dell OptiPlex FX160 Re-Imaging Guide 5 NOTE: For additional information about 1GB). 2 Click Start, point to All ...
Dell™ OptiPlex™ FX160 Re-Imaging Guide
Page 6
... exit 6 Dell OptiPlex FX160 Re-Imaging Guide Use Diskpart to the correct directories. 6 Prepare the image with the peimg /prep command. The image must be added to your image by simply remounting boot.wim and copying the update files to format the UFD with a Windows Vista or Windows PE environment....all files on the device are erased. 9 Prepare the UFD device. This command removes non-installed packages from the image to reduce the size of the final image: peimg /prep c:\winpe_x86\mount\Windows 7 Commit the changes to the original image file (Winpe.wim) using the ImageX /unmount...
... exit 6 Dell OptiPlex FX160 Re-Imaging Guide Use Diskpart to the correct directories. 6 Prepare the image with the peimg /prep command. The image must be added to your image by simply remounting boot.wim and copying the update files to format the UFD with a Windows Vista or Windows PE environment....all files on the device are erased. 9 Prepare the UFD device. This command removes non-installed packages from the image to reduce the size of the final image: peimg /prep c:\winpe_x86\mount\Windows 7 Commit the changes to the original image file (Winpe.wim) using the ImageX /unmount...
Dell™ OptiPlex™ FX160 Re-Imaging Guide
Page 7
...from the hard drive or flash card. Dell OptiPlex FX160 Re-Imaging Guide 7 If using xcopy, enter: xcopy c:\winpe_x86\iso\*.* /s /e /f f:\ where c is the letter of your technician computer hard disk and f is launched. 5 To save the current FX160 system image, click the Capture System ...device before re-imaging your computer. 6 To install a new system image, click the Install System Image button. Re-Imaging Windows on the FX160 Computer With a UFD Device CAUTION: Re-imaging your system to install, then click Install. 7 When the installation completes, restart the system, booting from the...
...from the hard drive or flash card. Dell OptiPlex FX160 Re-Imaging Guide 7 If using xcopy, enter: xcopy c:\winpe_x86\iso\*.* /s /e /f f:\ where c is the letter of your technician computer hard disk and f is launched. 5 To save the current FX160 system image, click the Capture System ...device before re-imaging your computer. 6 To install a new system image, click the Install System Image button. Re-Imaging Windows on the FX160 Computer With a UFD Device CAUTION: Re-imaging your system to install, then click Install. 7 When the installation completes, restart the system, booting from the...
Dell™ OptiPlex™ FX160 Re-Imaging Guide
Page 8
... This procedure formats the UFD device used to copy SLETC to the FX160 flash card (hard drive). All files on the device are performed with the update CD and either a Linux or Windows computer system. Use extreme care to prevent typing errors, which could ...administrative privileges. The minimum size for the USB flash drive is loaded. After the FX160 computer is booted to the USB flash drive, the Thin Client Imaging utility is mounted. 8 Dell OptiPlex FX160 Re-Imaging Guide CAUTION: Some of SLETC. • Windows USB flash drive image installer (USBDiskImageTool.exe).
... This procedure formats the UFD device used to copy SLETC to the FX160 flash card (hard drive). All files on the device are performed with the update CD and either a Linux or Windows computer system. Use extreme care to prevent typing errors, which could ...administrative privileges. The minimum size for the USB flash drive is loaded. After the FX160 computer is booted to the USB flash drive, the Thin Client Imaging utility is mounted. 8 Dell OptiPlex FX160 Re-Imaging Guide CAUTION: Some of SLETC. • Windows USB flash drive image installer (USBDiskImageTool.exe).
Dell™ OptiPlex™ FX160 Re-Imaging Guide
Page 9
...and use the device name assigned by Linux in the steps below. Enter: dmesg Examine the log messages to determine the device name for -Dell.raw), and is the device name of the USB flash drive. 8 When the write operation is complete, remove the USB flash drive ...8226; Documentation (*.pdf) • SLETC update file (*.raw). The name of this file reflects the revision level of SLETC. • Windows USB flash drive image installer (USBDiskImageTool.exe) Dell OptiPlex FX160 Re-Imaging Guide 9 c If the drive is mounted, unmount the drive: umount where is the name of the SLETC image on ...
...and use the device name assigned by Linux in the steps below. Enter: dmesg Examine the log messages to determine the device name for -Dell.raw), and is the device name of the USB flash drive. 8 When the write operation is complete, remove the USB flash drive ...8226; Documentation (*.pdf) • SLETC update file (*.raw). The name of this file reflects the revision level of SLETC. • Windows USB flash drive image installer (USBDiskImageTool.exe) Dell OptiPlex FX160 Re-Imaging Guide 9 c If the drive is mounted, unmount the drive: umount where is the name of the SLETC image on ...

Dell™ OptiPlex™ FX160 Re-Imaging Guide
Page 11
... that opens: a Click More Applications. The FX160 computer includes a Preboot Execution Environment (PXE) capable network interface. Dell OptiPlex FX160 Re-Imaging Guide 11 CAUTION: When the disk image is licensed to use the Altiris Deployment Server. A Thin Client Image Tool window will open. c In the Warning window, click Erase and Install Image. Documentation for the automated deployment...
... that opens: a Click More Applications. The FX160 computer includes a Preboot Execution Environment (PXE) capable network interface. Dell OptiPlex FX160 Re-Imaging Guide 11 CAUTION: When the disk image is licensed to use the Altiris Deployment Server. A Thin Client Image Tool window will open. c In the Warning window, click Erase and Install Image. Documentation for the automated deployment...
Dell™ OptiPlex™ FX160 Re-Imaging Guide
Page 15
...;导 FX160 FX160 Microsoft Windows WAIK) 软件的 Windows DVD USB USB FX160 FX160 使用 DVD FX160 FX160 1 关闭 FX160 2 将外部 USB DVD FX160 3 打开 FX160 BIOS F12> 访问 "Boot Device Menu 4 在 Boot Device DVD 5 Windows 升级 DVD 插入 DVD Enter Windows PE) 系统。 6 FX160 Capture System Image BIOS 7 Install System Image Install Dell OptiPlex FX160 15
...;导 FX160 FX160 Microsoft Windows WAIK) 软件的 Windows DVD USB USB FX160 FX160 使用 DVD FX160 FX160 1 关闭 FX160 2 将外部 USB DVD FX160 3 打开 FX160 BIOS F12> 访问 "Boot Device Menu 4 在 Boot Device DVD 5 Windows 升级 DVD 插入 DVD Enter Windows PE) 系统。 6 FX160 Capture System Image BIOS 7 Install System Image Install Dell OptiPlex FX160 15
Dell™ OptiPlex™ FX160 Re-Imaging Guide
Page 19
... 复制到 FX160 USB 512MB。 使用 Linux 创建 Linux 可引导 USB CD pdf)。 • SLETC raw SLETC 的修订 Windows USB USBDiskImageTool.exe USB UFD Linux 1 在 Linux 2 su - 3 SLETC CD-ROM Linux CD CD media/Novell_SLETC_for_Dell 4 将 USB USB 端口。 Dell OptiPlex FX160 19
... 复制到 FX160 USB 512MB。 使用 Linux 创建 Linux 可引导 USB CD pdf)。 • SLETC raw SLETC 的修订 Windows USB USBDiskImageTool.exe USB UFD Linux 1 在 Linux 2 su - 3 SLETC CD-ROM Linux CD CD media/Novell_SLETC_for_Dell 4 将 USB USB 端口。 Dell OptiPlex FX160 19
Dell™ OptiPlex™ FX160 Re-Imaging Guide
Page 26
...; Windows PE • 一台 UFD 裝置。UFD Windows PE 64MB • FX160 Windows 更新 DVD。 使用 Copype.cmd UFD Windows PE RAM 磁碟。Windows PE RAM Windows PE Windows Windows PE Windows PE WAIK 1 下載 Microsoft WAIK 1GB)。 2 Windows OPK 或 Windows AIK Windows PE C:\Program Files\\Tools Windows OPK 或 Windows AIK。 26 Dell OptiPlex FX160
...; Windows PE • 一台 UFD 裝置。UFD Windows PE 64MB • FX160 Windows 更新 DVD。 使用 Copype.cmd UFD Windows PE RAM 磁碟。Windows PE RAM Windows PE Windows Windows PE Windows PE WAIK 1 下載 Microsoft WAIK 1GB)。 2 Windows OPK 或 Windows AIK Windows PE C:\Program Files\\Tools Windows OPK 或 Windows AIK。 26 Dell OptiPlex FX160
Dell™ OptiPlex™ FX160 Re-Imaging Guide
Page 29
... Enterprise Thin Client 對 FX160 透過 Linux 或 Windows CD USB SLETC FX160 USB FX160 Thin Client Imaging SLETC 複製到 FX160 USB 512MB。 利用 Linux 建立 Linux 可啟動 USB CD pdf)。 • SLETC raw SLETC • Windows USB USBDiskImageTool.exe)。 USB UFD Linux 1 在 Linux Dell OptiPlex FX160 29
... Enterprise Thin Client 對 FX160 透過 Linux 或 Windows CD USB SLETC FX160 USB FX160 Thin Client Imaging SLETC 複製到 FX160 USB 512MB。 利用 Linux 建立 Linux 可啟動 USB CD pdf)。 • SLETC raw SLETC • Windows USB USBDiskImageTool.exe)。 USB UFD Linux 1 在 Linux Dell OptiPlex FX160 29


