Owner's Manual
Page 8
... and Utilities 100 Resolving Software and Hardware Incompatibilities 102 Restoring Your Operating System 102 Using Microsoft Windows XP System Restore 103 Using Dell PC Restore by Symantec 104 Using the Operating System CD 106 11 Adding and Replacing Parts 109 Before You Begin 109 Recommended ...Tools 109 Turning Off Your Computer 109 Before Working Inside Your Computer 110 Optical Drive 111 Hard Drive 112 Returning a Hard Drive to Dell 114 Memory 114 Modem 117 Hinge Cover 118 Keyboard 119 Wireless Mini-Card 121 Coin-Cell Battery 124 Display 125 Internal ...
... and Utilities 100 Resolving Software and Hardware Incompatibilities 102 Restoring Your Operating System 102 Using Microsoft Windows XP System Restore 103 Using Dell PC Restore by Symantec 104 Using the Operating System CD 106 11 Adding and Replacing Parts 109 Before You Begin 109 Recommended ...Tools 109 Turning Off Your Computer 109 Before Working Inside Your Computer 110 Optical Drive 111 Hard Drive 112 Returning a Hard Drive to Dell 114 Memory 114 Modem 117 Hinge Cover 118 Keyboard 119 Wireless Mini-Card 121 Coin-Cell Battery 124 Display 125 Internal ...

Owner's Manual
Page 39
...CAUTION: Using an incompatible battery may increase the risk of your new computer to , the following: • Using optical drives • Using wireless communications devices, ExpressCards, media memory cards, or USB devices • Using high-brightness display settings, 3D screen savers, or other computers with ...time the battery can also set power management options to help preserve BIOS settings, operate your Dell™ portable computer with the AC adapter until the battery is designed to work with your computer to an electrical outlet when writing to a CD or DVD. Operating ...
...CAUTION: Using an incompatible battery may increase the risk of your new computer to , the following: • Using optical drives • Using wireless communications devices, ExpressCards, media memory cards, or USB devices • Using high-brightness display settings, 3D screen savers, or other computers with ...time the battery can also set power management options to help preserve BIOS settings, operate your Dell™ portable computer with the AC adapter until the battery is designed to work with your computer to an electrical outlet when writing to a CD or DVD. Operating ...

Owner's Manual
Page 70
.... 5 Return to the Network Setup Wizard and follow the instructions on what you selected when you purchased your computer has a wireless network card and to determine the type of card, use one of interconnected computers that communicate with each other over the air waves... button and the Connect To option • Your order confirmation 70 Setting Up a Network Wireless Local Area Network (WLAN) A WLAN is connected and working • A wireless router or access point • A wireless network card for creating a network. Network Setup Wizard The Microsoft® Windows® XP...
.... 5 Return to the Network Setup Wizard and follow the instructions on what you selected when you purchased your computer has a wireless network card and to determine the type of card, use one of interconnected computers that communicate with each other over the air waves... button and the Connect To option • Your order confirmation 70 Setting Up a Network Wireless Local Area Network (WLAN) A WLAN is connected and working • A wireless router or access point • A wireless network card for creating a network. Network Setup Wizard The Microsoft® Windows® XP...

Owner's Manual
Page 121
... the battery from the Mini-Card. 1 2 1 Mini-Card 3 2 antenna cables (2) 3 antenna cable connectors (2) Adding and Replacing Parts 121 CAUTION: Before you begin working inside the computer. 1 Follow the procedures in the Product Information Guide. If you are replacing a Mini-Card, remove the existing card: a Disconnect the two antenna...any of the procedures in this section, follow the safety instructions in "Before You Begin" on page 109. 2 Remove the hinge cover. Wireless Mini-Card If you ordered a Mini-Card with your computer, the card is not already installed, go to step 5.
... the battery from the Mini-Card. 1 2 1 Mini-Card 3 2 antenna cables (2) 3 antenna cable connectors (2) Adding and Replacing Parts 121 CAUTION: Before you begin working inside the computer. 1 Follow the procedures in the Product Information Guide. If you are replacing a Mini-Card, remove the existing card: a Disconnect the two antenna...any of the procedures in this section, follow the safety instructions in "Before You Begin" on page 109. 2 Remove the hinge cover. Wireless Mini-Card If you ordered a Mini-Card with your computer, the card is not already installed, go to step 5.

Owner's Manual
Page 127
... with your computer, it is already installed. 1 Follow the procedures in the Product Information Guide. Internal Card With Bluetooth® Wireless Technology CAUTION: Before you have not already removed the battery, do so now. NOTICE: To help prevent damage to the cable and then ...from the computer. 4 Pull the card out of the computer). Slide and hold the battery-bay latch release on page 109. 2 If you begin working inside the computer. NOTICE: To avoid electrostatic discharge, ground yourself by using a wrist grounding strap or by inserting the small center tab into the notch...
... with your computer, it is already installed. 1 Follow the procedures in the Product Information Guide. Internal Card With Bluetooth® Wireless Technology CAUTION: Before you have not already removed the battery, do so now. NOTICE: To help prevent damage to the cable and then ...from the computer. 4 Pull the card out of the computer). Slide and hold the battery-bay latch release on page 109. 2 If you begin working inside the computer. NOTICE: To avoid electrostatic discharge, ground yourself by using a wrist grounding strap or by inserting the small center tab into the notch...
Owner's Manual
Page 163
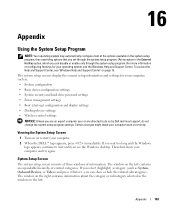
... computer work incorrectly. If you select (highlight) a category (such as : • System configuration • Basic device-configuration settings • System security and hard-drive password settings • Power management settings • Boot (start-up) configuration and display settings • Docking-device settings • Wireless control ... Hot Key option, which you can show or hide the related subcategories. Then shut down your computer. 2 When the DELL™ logo appears, press immediately. If you wait too long and the Windows logo appears, continue to do so by...
... computer work incorrectly. If you select (highlight) a category (such as : • System configuration • Basic device-configuration settings • System security and hard-drive password settings • Power management settings • Boot (start-up) configuration and display settings • Docking-device settings • Wireless control ... Hot Key option, which you can show or hide the related subcategories. Then shut down your computer. 2 When the DELL™ logo appears, press immediately. If you wait too long and the Windows logo appears, continue to do so by...


