Dell™ Technology Guide
Page 3
Contents 1 Finding Information 23 Start Button 23 Microsoft Windows Help and Support 24 Windows Vista 25 Windows® XP 25 Control Panel 26 Information About Installed Hardware 26 Device Manager 26 Hardware Devices Installed on Your Computer 27 Programs Installed on Your Computer 28 Wireless Networking 28 Dell Support Website 29 Technical Support 29 Customer Service 30 Warranty Information 30 Dell Forums 31 Contact Us 31 BIOS (System Setup Program) Settings 31 2 Microsoft Windows Desktop 33 Overview 33 Taskbar 34 Contents 3
Contents 1 Finding Information 23 Start Button 23 Microsoft Windows Help and Support 24 Windows Vista 25 Windows® XP 25 Control Panel 26 Information About Installed Hardware 26 Device Manager 26 Hardware Devices Installed on Your Computer 27 Programs Installed on Your Computer 28 Wireless Networking 28 Dell Support Website 29 Technical Support 29 Customer Service 30 Warranty Information 30 Dell Forums 31 Contact Us 31 BIOS (System Setup Program) Settings 31 2 Microsoft Windows Desktop 33 Overview 33 Taskbar 34 Contents 3

Dell™ Technology Guide
Page 21
Changing Boot Sequence to a USB Device . . . . 310 Changing the BIOS Settings 310 Viewing the BIOS Settings 311 Upgrading the BIOS (Flashing the BIOS 311 22 Ports 313 USB Port 313 IEEE 1394 Port 314 RS232 Serial Port 315 Parallel Port 316 eSATA Port 317 Modem 318 Ethernet Port 319 Keyboard and Mouse Port (PS2 320 VGA Port 321 DVI-I Port 322 S-Video TV-Out Port 323 Component Video 324 Composite Video 325 HDMI Port 326 DisplayPort 327 S/PDIF Port (Coaxial RCA 328 Contents 21
Changing Boot Sequence to a USB Device . . . . 310 Changing the BIOS Settings 310 Viewing the BIOS Settings 311 Upgrading the BIOS (Flashing the BIOS 311 22 Ports 313 USB Port 313 IEEE 1394 Port 314 RS232 Serial Port 315 Parallel Port 316 eSATA Port 317 Modem 318 Ethernet Port 319 Keyboard and Mouse Port (PS2 320 VGA Port 321 DVI-I Port 322 S-Video TV-Out Port 323 Component Video 324 Composite Video 325 HDMI Port 326 DisplayPort 327 S/PDIF Port (Coaxial RCA 328 Contents 21
Dell™ Technology Guide
Page 31
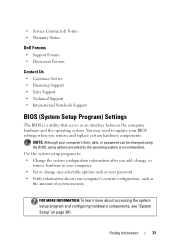
...You may need to : • Change the system configuration information after you remove and replace certain hardware components. NOTE: Although your BIOS settings when you add, change, or remove hardware in your computer. • Set or change user-selectable options such as your ... the system setup program and configuring hardware components, see "System Setup" on page 301. • Service Contracts & Forms • Warranty Status Dell Forums • Support Forums • Discussion Forums Contact Us • Customer Service • Financing Support • Sales Support • Technical ...
...You may need to : • Change the system configuration information after you remove and replace certain hardware components. NOTE: Although your BIOS settings when you add, change, or remove hardware in your computer. • Set or change user-selectable options such as your ... the system setup program and configuring hardware components, see "System Setup" on page 301. • Service Contracts & Forms • Warranty Status Dell Forums • Support Forums • Discussion Forums Contact Us • Customer Service • Financing Support • Sales Support • Technical ...
Dell™ Technology Guide
Page 89
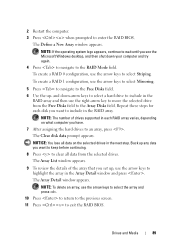
... Free Disks field to move the selected drive from the selected drives. NOTE: To delete an array, use the arrow keys to exit the RAID BIOS. NOTE: The number of the array that you set up - To create a RAID 0 configuration, use the arrow keys to select the array and press . 10... what computer you want to keep before continuing. 8 Press to include in each disk you have. 7 After assigning the hard drives to enter the RAID BIOS. Repeat these steps for each RAID array varies, depending on the selected drives in the RAID array and then use the arrow keys to the...
... Free Disks field to move the selected drive from the selected drives. NOTE: To delete an array, use the arrow keys to exit the RAID BIOS. NOTE: The number of the array that you set up - To create a RAID 0 configuration, use the arrow keys to select the array and press . 10... what computer you want to keep before continuing. 8 Press to include in each disk you have. 7 After assigning the hard drives to enter the RAID BIOS. Repeat these steps for each RAID array varies, depending on the selected drives in the RAID array and then use the arrow keys to the...
Dell™ Technology Guide
Page 130
... Device Settings interface displays the available settings and options for further review as well as CPUs, video cards, memory, system board, and chassis components. Dynamic BIOS Access This section of the NVIDIA Control Panel allows you to track the system's performance over time as well as evaluate the effectiveness of compatible... operating life or permanent component damage. Selecting a component in the Device Settings sections are used to monitor, track and log performance characteristics of a change available BIOS settings via a Windows user interface.
... Device Settings interface displays the available settings and options for further review as well as CPUs, video cards, memory, system board, and chassis components. Dynamic BIOS Access This section of the NVIDIA Control Panel allows you to track the system's performance over time as well as evaluate the effectiveness of compatible... operating life or permanent component damage. Selecting a component in the Device Settings sections are used to monitor, track and log performance characteristics of a change available BIOS settings via a Windows user interface.
Dell™ Technology Guide
Page 141
... information on battery operating time and to ensure that provides temporary power to connected devices when AC power is supplied as a printer, to help preserve BIOS settings, operate your laptop computer with the main battery installed at all times. Power line conditioners are different from the typical uninterruptible power supply in...
... information on battery operating time and to ensure that provides temporary power to connected devices when AC power is supplied as a printer, to help preserve BIOS settings, operate your laptop computer with the main battery installed at all times. Power line conditioners are different from the typical uninterruptible power supply in...
Dell™ Technology Guide
Page 167
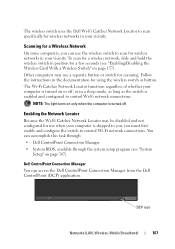
.... The Wi-Fi Catcher Network Locator functions regardless of whether your computer is shipped to you, you can accomplish this task through: • Dell ControlPoint Connection Manager • System BIOS, available through the system setup program (see "Enabling/Disabling the Wireless Card With a Wireless Switch" on or off . Scanning for a Wireless Network...
.... The Wi-Fi Catcher Network Locator functions regardless of whether your computer is shipped to you, you can accomplish this task through: • Dell ControlPoint Connection Manager • System BIOS, available through the system setup program (see "Enabling/Disabling the Wireless Card With a Wireless Switch" on or off . Scanning for a Wireless Network...
Dell™ Technology Guide
Page 276
... message you received is correct (see "Keyboard Problems for either the operating system or the program that the boot sequence information is not listed in BIOS setup. A PARAMETER OUT OF RANGE MAY OR M A Y N O T I N D I C A T E A P O T E N T I A L H A R D D R I T E P R O T E C T E... CONNECTORS. G A T E A 2 0 F A I L U R E - MEMORY ADDRESS LINE FAILURE AT (ADDRESS), READ VALUE EXPECTING 276 Troubleshooting Keyboard failure or keyboard cable loose (see "Contacting Dell" on page 337 for External Keyboards" on page 307). K E Y B O A R D F A I L U R E - N O T I M E R T I C K ...
... message you received is correct (see "Keyboard Problems for either the operating system or the program that the boot sequence information is not listed in BIOS setup. A PARAMETER OUT OF RANGE MAY OR M A Y N O T I N D I C A T E A P O T E N T I A L H A R D D R I T E P R O T E C T E... CONNECTORS. G A T E A 2 0 F A I L U R E - MEMORY ADDRESS LINE FAILURE AT (ADDRESS), READ VALUE EXPECTING 276 Troubleshooting Keyboard failure or keyboard cable loose (see "Contacting Dell" on page 337 for External Keyboards" on page 307). K E Y B O A R D F A I L U R E - N O T I M E R T I C K ...
Dell™ Technology Guide
Page 310
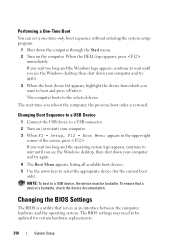
... device list appears, highlight the device from which you reboot the computer, the previous boot order is bootable, check the device documentation. When the DELL logo appears, press immediately. If you wait too long and the Windows logo appears, continue to wait until you see the Windows desktop, then ...down your computer and try again. 4 The Boot Menu appears, listing all available boot devices. 5 Use the arrow keys to boot and press . The BIOS settings may need to a USB device, the device must be updated for the current boot only). Performing a One-Time Boot You can set a one-...
... device list appears, highlight the device from which you reboot the computer, the previous boot order is bootable, check the device documentation. When the DELL logo appears, press immediately. If you wait too long and the Windows logo appears, continue to wait until you see the Windows desktop, then ...down your computer and try again. 4 The Boot Menu appears, listing all available boot devices. 5 Use the arrow keys to boot and press . The BIOS settings may need to a USB device, the device must be updated for the current boot only). Performing a One-Time Boot You can set a one-...
Dell™ Technology Guide
Page 311
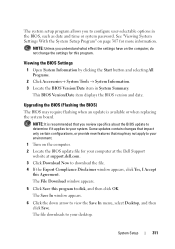
... by clicking the Start button and selecting All Programs. 2 Click Accessories→ System Tools → System Information. 3 Locate the BIOS Version/Date item in the BIOS, such as date and time or system password. The File Download window appears. 5 Click Save this program to view the Save... do not change the settings for more information. Upgrading the BIOS (Flashing the BIOS) The BIOS may require flashing when an update is recommended that may/may not apply to your computer at the Dell Support website at support.dell.com. 3 Click Download Now to configure user-selectable options in...
... by clicking the Start button and selecting All Programs. 2 Click Accessories→ System Tools → System Information. 3 Locate the BIOS Version/Date item in the BIOS, such as date and time or system password. The File Download window appears. 5 Click Save this program to view the Save... do not change the settings for more information. Upgrading the BIOS (Flashing the BIOS) The BIOS may require flashing when an update is recommended that may/may not apply to your computer at the Dell Support website at support.dell.com. 3 Click Download Now to configure user-selectable options in...

Dell™ Technology Guide
Page 312
7 Click Close when the Download Complete window appears. The file icon appears on your desktop and is titled the same as the downloaded BIOS update file. 8 Double-click the file icon on the desktop and follow the instructions on the screen. 312 System Setup
7 Click Close when the Download Complete window appears. The file icon appears on your desktop and is titled the same as the downloaded BIOS update file. 8 Double-click the file icon on the desktop and follow the instructions on the screen. 312 System Setup
Dell™ Technology Guide
Page 339
... of electricity that enables Microsoft® Windows® operating systems to put a computer in to identify, quarantine, and/or delete viruses from your particular computer. BIOS - Unless you plug the AC adapter power cable in standby or hibernate mode to conserve the amount of time (years) during which allows the storage...
... of electricity that enables Microsoft® Windows® operating systems to put a computer in to identify, quarantine, and/or delete viruses from your particular computer. BIOS - Unless you plug the AC adapter power cable in standby or hibernate mode to conserve the amount of time (years) during which allows the storage...
Dell™ Technology Guide
Page 348
... that uses optical technology to the PCMCIA standard. programmed input/output - Plug and Play provides automatic installation, configuration, and compatibility with existing hardware if the BIOS, operating system, and all devices are common types of a second. nonvolatile random access memory - peripheral component interconnect - Diagnostics programs, loaded automatically by the number of...
... that uses optical technology to the PCMCIA standard. programmed input/output - Plug and Play provides automatic installation, configuration, and compatibility with existing hardware if the BIOS, operating system, and all devices are common types of a second. nonvolatile random access memory - peripheral component interconnect - Diagnostics programs, loaded automatically by the number of...
Dell™ Technology Guide
Page 349
BIOS, that perform basic tests on the major computer components, such as its contents after 349 A WfM (Wired for Management) standard that allows networked computers that ...
BIOS, that perform basic tests on the major computer components, such as its contents after 349 A WfM (Wired for Management) standard that allows networked computers that ...
Dell™ Technology Guide
Page 351
... as date and time or system password. A video standard for video cards and controllers that supports resolutions up to configure user-selectable options in the BIOS, such as those that supports resolutions up to authenticate a user on the capabilities of the monitor, the video controller and its drivers, and the amount...
... as date and time or system password. A video standard for video cards and controllers that supports resolutions up to configure user-selectable options in the BIOS, such as those that supports resolutions up to authenticate a user on the capabilities of the monitor, the video controller and its drivers, and the amount...
Service Manual
Page 2
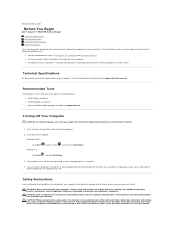
... your computer. 1. if you pull connectors apart, keep them evenly aligned to Contents Page Before You Begin Dell™ Inspiron™ 560/570 Service Manual Technical Specifications Recommended Tools Turning Off Your Computer Safety Instructions This manual provides procedures for removing ... l Small Phillips screwdriver l Small flat-blade screwdriver l BIOS executable update program available at support.dell.com/manuals. Technical Specifications For information on your warranty. Ensure that is not authorized by Dell is not covered by performing the removal procedure in your...
... your computer. 1. if you pull connectors apart, keep them evenly aligned to Contents Page Before You Begin Dell™ Inspiron™ 560/570 Service Manual Technical Specifications Recommended Tools Turning Off Your Computer Safety Instructions This manual provides procedures for removing ... l Small Phillips screwdriver l Small flat-blade screwdriver l BIOS executable update program available at support.dell.com/manuals. Technical Specifications For information on your warranty. Ensure that is not authorized by Dell is not covered by performing the removal procedure in your...
Service Manual
Page 31
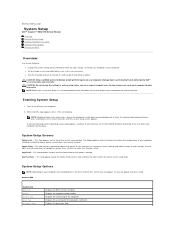
...computer. 2. This field provides context sensitive help based on the top of time. Inspiron 560 System Info BIOS Info System Service Tag Asset Tag Processor Type Displays the BIOS version and date Displays the computer model number Displays the service tag of hard drive..., power conservation, and security features. Back to Contents Page System Setup Dell™ Inspiron™ 560/570 Service Manual Overview Entering System Setup Clearing Forgotten Passwords Clearing CMOS Settings Flashing the BIOS Overview Use System Setup to: l Change the system configuration information after...
...computer. 2. This field provides context sensitive help based on the top of time. Inspiron 560 System Info BIOS Info System Service Tag Asset Tag Processor Type Displays the BIOS version and date Displays the computer model number Displays the service tag of hard drive..., power conservation, and security features. Back to Contents Page System Setup Dell™ Inspiron™ 560/570 Service Manual Overview Entering System Setup Clearing Forgotten Passwords Clearing CMOS Settings Flashing the BIOS Overview Use System Setup to: l Change the system configuration information after...

Service Manual
Page 32
... by default) l Virtualization - Enabled; Disabled (Enabled by default) Remote Wake Up Enabled; Disabled (Enabled by default) Removable Boot Priority Used to the SATA 3 connector Advanced BIOS Features CPU Feature l Hyper-Threading Technology - Processor L1 Cache Processor L2 Cache Memory Installed Memory Available Memory Speed Memory Technology Displays the amount of processor...
... by default) l Virtualization - Enabled; Disabled (Enabled by default) Remote Wake Up Enabled; Disabled (Enabled by default) Removable Boot Priority Used to the SATA 3 connector Advanced BIOS Features CPU Feature l Hyper-Threading Technology - Processor L1 Cache Processor L2 Cache Memory Installed Memory Available Memory Speed Memory Technology Displays the amount of processor...
Service Manual
Page 33
... by default) Numlock Key On; Full Speed (High Speed by default) l USB Operation Mode - On; Enabled (Disabled by default) Inspiron 570 System Info System BIOS Version Service Tag Asset Tag Processor Type L2 Cache L3 Cache Installed Memory Memory Speed Memory Technology Displays the computer model number Shows... the BIOS version number and date information Displays the service tag of the computer Displays the asset tag for the computer, if present ...
... by default) Numlock Key On; Full Speed (High Speed by default) l USB Operation Mode - On; Enabled (Disabled by default) Inspiron 570 System Info System BIOS Version Service Tag Asset Tag Processor Type L2 Cache L3 Cache Installed Memory Memory Speed Memory Technology Displays the computer model number Shows... the BIOS version number and date information Displays the service tag of the computer Displays the asset tag for the computer, if present ...
Service Manual
Page 37
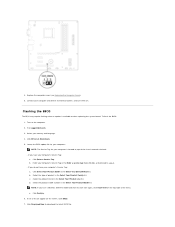
...computer's Service Tag: a. Turn on the screen. b. e. A list of the menu. Click BIOS. 7. d. Select the product model number in the Select Your Entry Method list. Visit support.dell.com. 3. Click Confirm. 6. Click Select Your Product Model in the Select Your Product Model list.... Flashing the BIOS The BIOS may require flashing when an update is located on . Enter your country ...
...computer's Service Tag: a. Turn on the screen. b. e. A list of the menu. Click BIOS. 7. d. Select the product model number in the Select Your Entry Method list. Visit support.dell.com. 3. Click Confirm. 6. Click Select Your Product Model in the Select Your Product Model list.... Flashing the BIOS The BIOS may require flashing when an update is located on . Enter your country ...


