Owner's Manual
Page 3
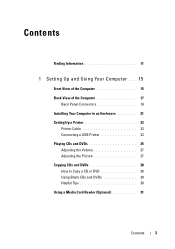
Contents Finding Information 11 1 Setting Up and Using Your Computer . . . 15 Front View of the Computer 15 Back View of the Computer 17 Back Panel Connectors 19 Installing Your Computer in an Enclosure 21 Setting Up a Printer 23 Printer Cable 23 Connecting a USB Printer 23 Playing CDs and DVDs 25 Adjusting the Volume 27 Adjusting the Picture 27 Copying CDs and DVDs 28 How to Copy a CD or DVD 28 Using Blank CDs and DVDs 29 Helpful Tips 30 Using a Media Card Reader (Optional 31 Contents 3
Contents Finding Information 11 1 Setting Up and Using Your Computer . . . 15 Front View of the Computer 15 Back View of the Computer 17 Back Panel Connectors 19 Installing Your Computer in an Enclosure 21 Setting Up a Printer 23 Printer Cable 23 Connecting a USB Printer 23 Playing CDs and DVDs 25 Adjusting the Volume 27 Adjusting the Picture 27 Copying CDs and DVDs 28 How to Copy a CD or DVD 28 Using Blank CDs and DVDs 29 Helpful Tips 30 Using a Media Card Reader (Optional 31 Contents 3
Owner's Manual
Page 5
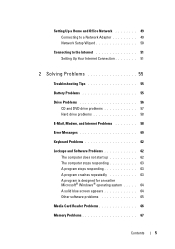
... Connecting to the Internet 51 Setting Up Your Internet Connection 51 2 Solving Problems 55 Troubleshooting Tips 55 Battery Problems 55 Drive Problems 56 CD and DVD drive problems 57 Hard drive problems 58 E-Mail, Modem, and Internet Problems 58 Error Messages 60 Keyboard Problems 62 Lockups and Software Problems 62 The...
... Connecting to the Internet 51 Setting Up Your Internet Connection 51 2 Solving Problems 55 Troubleshooting Tips 55 Battery Problems 55 Drive Problems 56 CD and DVD drive problems 57 Hard drive problems 58 E-Mail, Modem, and Internet Problems 58 Error Messages 60 Keyboard Problems 62 Lockups and Software Problems 62 The...
Owner's Manual
Page 8
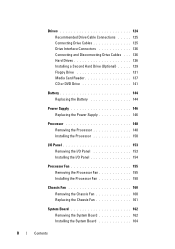
... 126 Connecting and Disconnecting Drive Cables . . . 126 Hard Drives 126 Installing a Second Hard Drive (Optional) . . . . . 129 Floppy Drive 131 Media Card Reader 137 CD or DVD Drive 141 Battery 144 Replacing the Battery 144 Power Supply 146 Replacing the Power Supply 146 Processor 148 Removing the Processor 148 Installing the Processor...
... 126 Connecting and Disconnecting Drive Cables . . . 126 Hard Drives 126 Installing a Second Hard Drive (Optional) . . . . . 129 Floppy Drive 131 Media Card Reader 137 CD or DVD Drive 141 Battery 144 Replacing the Battery 144 Power Supply 146 Replacing the Power Supply 146 Processor 148 Removing the Processor 148 Installing the Processor...
Owner's Manual
Page 9
... 176 Clearing CMOS Settings 177 Flashing the BIOS 178 Cleaning Your Computer 179 Computer, Keyboard, and Monitor 179 Mouse 179 Floppy Drive 180 CDs and DVDs 180 Dell Technical Support Policy (U.S. Only 180 Definition of "Dell-Installed" Software and Peripherals 181 Definition of "Third-Party" Software and Peripherals 181 FCC Notice (U.S.
... 176 Clearing CMOS Settings 177 Flashing the BIOS 178 Cleaning Your Computer 179 Computer, Keyboard, and Monitor 179 Mouse 179 Floppy Drive 180 CDs and DVDs 180 Dell Technical Support Policy (U.S. Only 180 Definition of "Dell-Installed" Software and Peripherals 181 Definition of "Third-Party" Software and Peripherals 181 FCC Notice (U.S.
Owner's Manual
Page 16
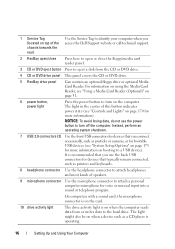
... computers with a sound card, the microphone connector is on the card. 10 drive activity light The drive activity light is recommended that you access the Dell Support website or call technical support. 2 FlexBay open/close Press here to open or close the floppy/media card reader panel. 3 CD or... to turn on the computer. The light might also be on when the computer reads data from the CD or DVD drive. 4 CD or DVD drive panel This panel covers the CD or DVD drive. 5 FlexBay drive panel Can contain an optional floppy drive or optional Media Card Reader. For information on using...
... computers with a sound card, the microphone connector is on the card. 10 drive activity light The drive activity light is recommended that you access the Dell Support website or call technical support. 2 FlexBay open/close Press here to open or close the floppy/media card reader panel. 3 CD or... to turn on the computer. The light might also be on when the computer reads data from the CD or DVD drive. 4 CD or DVD drive panel This panel covers the CD or DVD drive. 5 FlexBay drive panel Can contain an optional floppy drive or optional Media Card Reader. For information on using...
Owner's Manual
Page 25
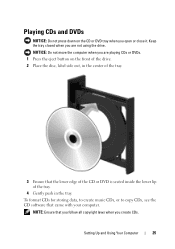
.... Setting Up and Using Your Computer 25 Keep the tray closed when you are playing CDs or DVDs. 1 Press the eject button on the CD or DVD tray when you create CDs. Playing CDs and DVDs NOTICE: Do not press down on the front of the drive. 2 Place the disc, label side out..., in the center of the tray. 3 Ensure that the lower edge of the CD or DVD is seated inside the lower...
.... Setting Up and Using Your Computer 25 Keep the tray closed when you are playing CDs or DVDs. 1 Press the eject button on the CD or DVD tray when you create CDs. Playing CDs and DVDs NOTICE: Do not press down on the front of the drive. 2 Place the disc, label side out..., in the center of the tray. 3 Ensure that the lower edge of the CD or DVD is seated inside the lower...
Owner's Manual
Page 26
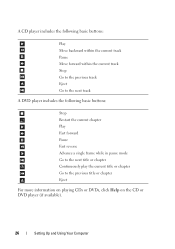
... Move backward within the current track Pause Move forward within the current track Stop Go to the previous track Eject Go to the next track A DVD player includes the following basic buttons: Stop Restart the current chapter Play Fast forward Pause Fast reverse Advance a single frame while in pause mode Go... title or chapter Continuously play the current title or chapter Go to the previous title or chapter Eject For more information on playing CDs or DVDs, click Help on the CD or DVD player (if available). 26 Setting Up and Using Your Computer
... Move backward within the current track Pause Move forward within the current track Stop Go to the previous track Eject Go to the next track A DVD player includes the following basic buttons: Stop Restart the current chapter Play Fast forward Pause Fast reverse Advance a single frame while in pause mode Go... title or chapter Continuously play the current title or chapter Go to the previous title or chapter Eject For more information on playing CDs or DVDs, click Help on the CD or DVD player (if available). 26 Setting Up and Using Your Computer
Owner's Manual
Page 27
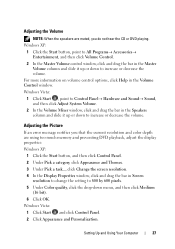
.... 2 Click Appearance and Personalization. Setting Up and Using Your Computer 27 Adjusting the Volume NOTE: When the speakers are using too much memory and preventing DVD playback, adjust the display properties: Windows XP: 1 Click the Start button, and then click Control Panel. 2 Under Pick a category, click Appearance and Themes. 3 Under Pick.... Adjusting the Picture If an error message notifies you that the current resolution and color depth are muted, you do not hear the CD or DVD playing. For more information on volume control options, click Help in the Volume Control window.
.... 2 Click Appearance and Personalization. Setting Up and Using Your Computer 27 Adjusting the Volume NOTE: When the speakers are using too much memory and preventing DVD playback, adjust the display properties: Windows XP: 1 Click the Start button, and then click Control Panel. 2 Under Pick a category, click Appearance and Themes. 3 Under Pick.... Adjusting the Picture If an error message notifies you that the current resolution and color depth are muted, you do not hear the CD or DVD playing. For more information on volume control options, click Help in the Volume Control window.
Owner's Manual
Page 28
...bar in the upper-right corner of the window. Windows® XP 1 Click the Start button, point to make an exact copy of CD or DVD drives offered by Dell may not read DVD+/-R, DVD+/-RW, and DVD+R DL (dual layer) media, but cannot write to 800 by country. NOTE: The types of a CD or... problems, check for other purposes, such as creating music CDs from audio files stored on the Sonic support website at www.sonic.com. The DVD-writable drives installed in Dell™ computers can also use Sonic Digital Media for available software patches on your computer or backing up important data.
...bar in the upper-right corner of the window. Windows® XP 1 Click the Start button, point to make an exact copy of CD or DVD drives offered by Dell may not read DVD+/-R, DVD+/-RW, and DVD+R DL (dual layer) media, but cannot write to 800 by country. NOTE: The types of a CD or... problems, check for other purposes, such as creating music CDs from audio files stored on the Sonic support website at www.sonic.com. The DVD-writable drives installed in Dell™ computers can also use Sonic Digital Media for available software patches on your computer or backing up important data.
Owner's Manual
Page 29
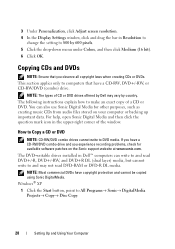
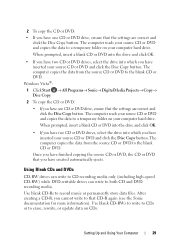
...174;: 1 Click Start → All Programs→ Sonic→ DigitalMedia Projects→ Copy→ Disc Copy. 2 To copy the CD or DVD: • If you have one CD or DVD drive, ensure that the settings are correct and click the Disc Copy button. Setting Up and Using Your Computer 29 Use blank... select the drive into which you have inserted your computer hard drive. When prompted, insert a blank CD or DVD into the drive and click OK. • If you have two CD or DVD drives, select the drive into which you have inserted your computer hard drive. The computer copies the data from...
...174;: 1 Click Start → All Programs→ Sonic→ DigitalMedia Projects→ Copy→ Disc Copy. 2 To copy the CD or DVD: • If you have one CD or DVD drive, ensure that the settings are correct and click the Disc Copy button. Setting Up and Using Your Computer 29 Use blank... select the drive into which you have inserted your computer hard drive. When prompted, insert a blank CD or DVD into the drive and click OK. • If you have two CD or DVD drives, select the drive into which you have inserted your computer hard drive. The computer copies the data from...

Owner's Manual
Page 30
... stage of information. CD-Writable Drives Media Type CD-R CD-RW Read Yes Yes Write Yes Yes Rewritable No Yes DVD-Writable Drives Media Type CD-R CD-RW DVD+R DVD-R DVD+RW DVD-RW DVD+R DL Read Yes Yes Yes Yes Yes Yes Yes Write Yes Yes Yes Yes Yes Yes Yes Rewritable No Yes No... permanently store large amounts of the disc creation process. CD-RWs do not play in most home or car stereos. • You cannot create audio DVDs with Sonic Digital Media. • Music MP3 files can be used to erase, rewrite, or update information on computers that disc later. Use blank...
... stage of information. CD-Writable Drives Media Type CD-R CD-RW Read Yes Yes Write Yes Yes Rewritable No Yes DVD-Writable Drives Media Type CD-R CD-RW DVD+R DVD-R DVD+RW DVD-RW DVD+R DL Read Yes Yes Yes Yes Yes Yes Yes Write Yes Yes Yes Yes Yes Yes Yes Rewritable No Yes No... permanently store large amounts of the disc creation process. CD-RWs do not play in most home or car stereos. • You cannot create audio DVDs with Sonic Digital Media. • Music MP3 files can be used to erase, rewrite, or update information on computers that disc later. Use blank...
Owner's Manual
Page 31
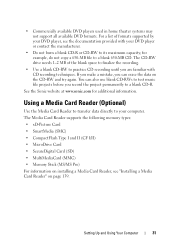
... can also use blank CD-RWs to test music file projects before you are familiar with your DVD player or contact the manufacturer. • Do not burn a blank CD-R or CD-RW to your DVD player, see "Installing a Media Card Reader" on the CD-RW and try again. Setting Up and Using... the recording. • Use a blank CD-RW to practice CD recording until you record the project permanently to a blank 650-MB CD. • Commercially available DVD players used in home theater systems may not support all available...
... can also use blank CD-RWs to test music file projects before you are familiar with your DVD player or contact the manufacturer. • Do not burn a blank CD-R or CD-RW to your DVD player, see "Installing a Media Card Reader" on the CD-RW and try again. Setting Up and Using... the recording. • Use a blank CD-RW to practice CD recording until you record the project permanently to a blank 650-MB CD. • Commercially available DVD players used in home theater systems may not support all available...
Owner's Manual
Page 56
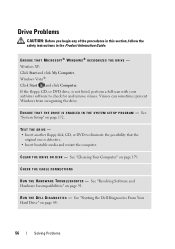
... N T H E H A R D W A R E TR O U B L E S H O O T E R - ENSURE THAT MICROSOFT® WINDOWS® RECOGNIZES THE DRIVE - If the floppy, CD, or DVD drive, is defective. • Insert bootable media and restart the computer. See "System Setup" on page 179. R U N T H E D E L L D I A G N O S T I S K - TEST...: Before you begin any of the procedures in this section, follow the safety instructions in the Product Information Guide. See "Starting the Dell Diagnostics From Your Hard Drive" on page 91. Viruses can sometimes prevent Windows from recognizing the drive. E N S U R E T H A T T H E D...
... N T H E H A R D W A R E TR O U B L E S H O O T E R - ENSURE THAT MICROSOFT® WINDOWS® RECOGNIZES THE DRIVE - If the floppy, CD, or DVD drive, is defective. • Insert bootable media and restart the computer. See "System Setup" on page 179. R U N T H E D E L L D I A G N O S T I S K - TEST...: Before you begin any of the procedures in this section, follow the safety instructions in the Product Information Guide. See "Starting the Dell Diagnostics From Your Hard Drive" on page 91. Viruses can sometimes prevent Windows from recognizing the drive. E N S U R E T H A T T H E D...
Owner's Manual
Page 57
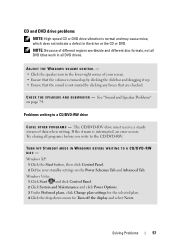
...Power Schemes Tab and Advanced Tab. If the stream is not muted by clicking any boxes that are checked. CD and DVD drive problems NOTE: High-speed CD or DVD drive vibration is normal and may cause noise, which does not indicate a defect in the lower-right corner of your ... clicking the slidebar and dragging it up. • Ensure that the sound is interrupted, an error occurs. Solving Problems 57 Problems writing to the CD/DVD-RW. Windows Vista: 1 Click Start and click Control Panel. 2 Click System and Maintenance and click Power Options. 3 Under Preferred plans, click Change plan...
...Power Schemes Tab and Advanced Tab. If the stream is not muted by clicking any boxes that are checked. CD and DVD drive problems NOTE: High-speed CD or DVD drive vibration is normal and may cause noise, which does not indicate a defect in the lower-right corner of your ... clicking the slidebar and dragging it up. • Ensure that the sound is interrupted, an error occurs. Solving Problems 57 Problems writing to the CD/DVD-RW. Windows Vista: 1 Click Start and click Control Panel. 2 Click System and Maintenance and click Power Options. 3 Under Preferred plans, click Change plan...
Owner's Manual
Page 85
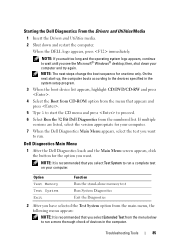
...operating system logo appears, continue to wait until you want . If multiple versions are listed, select the version appropriate for your computer. 7 When the Dell Diagnostics Main Menu appears, select the test you see the Microsoft® Windows® desktop; NOTE: It is recommended that you select Extended Test ... select Test System to run a more thorough check of devices in the system setup program. 3 When the boot device list appears, highlight CD/DVD/CD-RW and press . 4 Select the Boot from CD-ROM option from the menu that you want to run a complete test on your computer...
...operating system logo appears, continue to wait until you want . If multiple versions are listed, select the version appropriate for your computer. 7 When the Dell Diagnostics Main Menu appears, select the test you see the Microsoft® Windows® desktop; NOTE: It is recommended that you select Extended Test ... select Test System to run a more thorough check of devices in the system setup program. 3 When the boot device list appears, highlight CD/DVD/CD-RW and press . 4 Select the Boot from CD-ROM option from the menu that you want to run a complete test on your computer...
Owner's Manual
Page 99
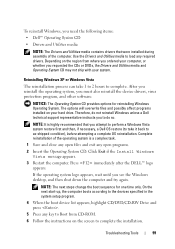
...devices specified in the system setup program. 4 When the boot device list appears, highlight CD/DVD/CD-RW Drive and press . 5 Press any required drivers. Press immediately after the DELL™ logo appears. If the operating system logo appears, wait until you to do not ...take it back to as-shipped condition), before attempting a complete OS reinstallation. To reinstall Windows, you need the following items: • Dell™ Operating System CD • Drivers and Utilities media NOTE: The Drivers and Utilities media contains drivers that were installed during assembly ...
...devices specified in the system setup program. 4 When the boot device list appears, highlight CD/DVD/CD-RW Drive and press . 5 Press any required drivers. Press immediately after the DELL™ logo appears. If the operating system logo appears, wait until you to do not ...take it back to as-shipped condition), before attempting a complete OS reinstallation. To reinstall Windows, you need the following items: • Dell™ Operating System CD • Drivers and Utilities media NOTE: The Drivers and Utilities media contains drivers that were installed during assembly ...

Owner's Manual
Page 106
Inside View of Your Computer CAUTION: Before you begin any of the procedures in this section, follow the safety instructions in the Product Information Guide. 1 2 3 6 4 5 1 power supply 2 hard drive 3 front I/O panel 4 floppy drive or Media 5 CD or DVD drive 6 chassis fan Card Reader (optional) 106 Removing and Installing Parts
Inside View of Your Computer CAUTION: Before you begin any of the procedures in this section, follow the safety instructions in the Product Information Guide. 1 2 3 6 4 5 1 power supply 2 hard drive 3 front I/O panel 4 floppy drive or Media 5 CD or DVD drive 6 chassis fan Card Reader (optional) 106 Removing and Installing Parts
Owner's Manual
Page 124
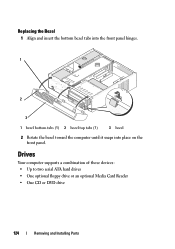
Drives Your computer supports a combination of these devices: • Up to two serial ATA hard drives • One optional floppy drive or an optional Media Card Reader • One CD or DVD drive 124 Removing and Installing Parts Replacing the Bezel 1 Align and insert the bottom bezel tabs into the front panel hinges. 1 2 3 1 bezel bottom tabs (3) 2 bezel top tabs (3) 3 bezel 2 Rotate the bezel toward the computer until it snaps into place on the front panel.
Drives Your computer supports a combination of these devices: • Up to two serial ATA hard drives • One optional floppy drive or an optional Media Card Reader • One CD or DVD drive 124 Removing and Installing Parts Replacing the Bezel 1 Align and insert the bottom bezel tabs into the front panel hinges. 1 2 3 1 bezel bottom tabs (3) 2 bezel top tabs (3) 3 bezel 2 Rotate the bezel toward the computer until it snaps into place on the front panel.

Owner's Manual
Page 125
... Drive Cable Connections • Connect serial ATA hard drives to connectors labeled "SATA0" or "SATA1" on the system board. • Connect serial ATA CD or DVD drives to the back of the drive. Power Connector 1 2 1 power cable 2 power input connector Removing and Installing Parts 125 Connecting Drive Cables When you install...
... Drive Cable Connections • Connect serial ATA hard drives to connectors labeled "SATA0" or "SATA1" on the system board. • Connect serial ATA CD or DVD drives to the back of the drive. Power Connector 1 2 1 power cable 2 power input connector Removing and Installing Parts 125 Connecting Drive Cables When you install...
Owner's Manual
Page 131
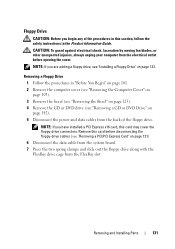
..., or other unexpected injuries, always unplug your computer from the FlexBay slot. NOTE: If you are adding a floppy drive, see "Removing a CD or DVD Drive" on page 142). 5 Disconnect the power and data cables from the back of the procedures in this section, follow the safety instructions in "Before...computer cover (see "Removing the Computer Cover" on page 103). 3 Remove the bezel (see "Removing the Bezel" on page 123). 4 Remove the CD or DVD drive (see "Installing a Floppy Drive" on page 121) 6 Disconnect the data cable from the system board. 7 Press the two spring clamps and slide out ...
..., or other unexpected injuries, always unplug your computer from the FlexBay slot. NOTE: If you are adding a floppy drive, see "Removing a CD or DVD Drive" on page 142). 5 Disconnect the power and data cables from the back of the procedures in this section, follow the safety instructions in "Before...computer cover (see "Removing the Computer Cover" on page 103). 3 Remove the bezel (see "Removing the Bezel" on page 123). 4 Remove the CD or DVD drive (see "Installing a Floppy Drive" on page 121) 6 Disconnect the data cable from the system board. 7 Press the two spring clamps and slide out ...


