Dell™ Technology Guide
Page 44
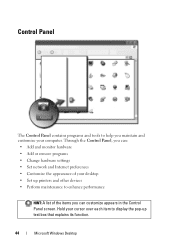
... Control Panel, you can customize appears in the Control Panel screen. Hold your cursor over each item to display the pop-up printers and other devices • Perform maintenance to help you can : • Add and monitor hardware • Add or remove programs • Change hardware settings • Set network and Internet...
... Control Panel, you can customize appears in the Control Panel screen. Hold your cursor over each item to display the pop-up printers and other devices • Perform maintenance to help you can : • Add and monitor hardware • Add or remove programs • Change hardware settings • Set network and Internet...
Dell™ Technology Guide
Page 59
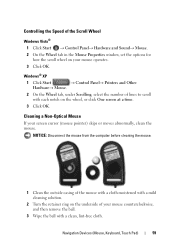
...on your mouse operates. 3 Click OK. Navigation Devices (Mouse, Keyboard, Touch Pad) 59 Cleaning a Non-Optical Mouse If your mouse counterclockwise, and then remove the ball. 3 Wipe the ball with a clean, lint-free cloth. Controlling the Speed of lines to scroll with each notch on the wheel, or ...click One screen at a time. 3 Click OK. NOTICE: Disconnect the mouse from the computer before cleaning the mouse. 1 Clean the outside casing of the mouse with ...
...on your mouse operates. 3 Click OK. Navigation Devices (Mouse, Keyboard, Touch Pad) 59 Cleaning a Non-Optical Mouse If your mouse counterclockwise, and then remove the ball. 3 Wipe the ball with a clean, lint-free cloth. Controlling the Speed of lines to scroll with each notch on the wheel, or ...click One screen at a time. 3 Click OK. NOTICE: Disconnect the mouse from the computer before cleaning the mouse. 1 Clean the outside casing of the mouse with ...
Dell™ Technology Guide
Page 63
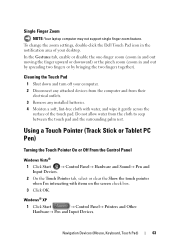
... support single finger zoom feature. Do not allow water from their electrical outlets. 3 Remove any installed batteries. 4 Moisten a soft, lint-free cloth with items on the screen check box. 3 Click OK. To change the zoom settings, double-click the Dell Touch Pad icon in and out by spreading two fingers or by bringing...
... support single finger zoom feature. Do not allow water from their electrical outlets. 3 Remove any installed batteries. 4 Moisten a soft, lint-free cloth with items on the screen check box. 3 Click OK. To change the zoom settings, double-click the Dell Touch Pad icon in and out by spreading two fingers or by bringing...
Dell™ Technology Guide
Page 75
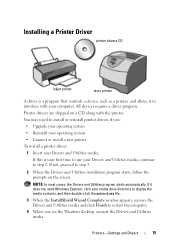
..., click your media drive directory to display the media contents, and then double-click the autorcd.exe file. 3 When the InstallShield Wizard Complete window appears, remove the Drivers and Utilities media and click Finish to restart the computer. 4 When you : • Upgrade your operating system • Reinstall your operating system •... Utilities installation program starts, follow the prompts on a CD along with your Drivers and Utilities media, continue to step 2. Printer drivers are shipped on the screen.
..., click your media drive directory to display the media contents, and then double-click the autorcd.exe file. 3 When the InstallShield Wizard Complete window appears, remove the Drivers and Utilities media and click Finish to restart the computer. 4 When you : • Upgrade your operating system • Reinstall your operating system •... Utilities installation program starts, follow the prompts on a CD along with your Drivers and Utilities media, continue to step 2. Printer drivers are shipped on the screen.
Dell™ Technology Guide
Page 80
... Double-click the type of device for which you see the Windows desktop, reinsert the Drivers and Utilities media. 5 At the Welcome Dell System Owner screen, click Next. Using the Drivers and Utilities Media to step 2. Manually Reinstalling a Driver 1 Download the driver for that device. 6 ... in your system window. See the documentation that you want to reinstall and follow the instructions on the screen. 3 When the InstallShield Wizard Complete window appears, remove the Drivers and Utilities media and click Finish to step 5. 2 When the Drivers and Utilities media installation...
... Double-click the type of device for which you see the Windows desktop, reinsert the Drivers and Utilities media. 5 At the Welcome Dell System Owner screen, click Next. Using the Drivers and Utilities Media to step 2. Manually Reinstalling a Driver 1 Download the driver for that device. 6 ... in your system window. See the documentation that you want to reinstall and follow the instructions on the screen. 3 When the InstallShield Wizard Complete window appears, remove the Drivers and Utilities media and click Finish to step 5. 2 When the Drivers and Utilities media installation...
Dell™ Technology Guide
Page 97
...→ All Programs→ Intel(R) Matrix Storage Manager→ Intel Matrix Storage Console to launch the Migration Wizard. 4 Click Next on the first Migration Wizard screen. 5 Enter a RAID volume name or accept the default. 6 From the drop-down box, select RAID 1 as the RAID level. NOTICE: In the following... step, all data contained on the member drive is removed. 11 Click Finish to start migrating, or click Back to make changes. NOTE: You can use your source hard drive (it should be the hard...
...→ All Programs→ Intel(R) Matrix Storage Manager→ Intel Matrix Storage Console to launch the Migration Wizard. 4 Click Next on the first Migration Wizard screen. 5 Enter a RAID volume name or accept the default. 6 From the drop-down box, select RAID 1 as the RAID level. NOTICE: In the following... step, all data contained on the member drive is removed. 11 Click Finish to start migrating, or click Back to make changes. NOTE: You can use your source hard drive (it should be the hard...
Dell™ Technology Guide
Page 105
...you may lose data that are ACPI-enabled. Shutting Down a Stalled or "Frozen" Computer Windows Vista When you attempt to shut down, the screen may also indicate why those programs are preventing the computer from shutting down. It may darken and show you lose unsaved data. 2) Never undock...from the docking station. 2 Click Start → Undock Computer and wait until the system confirms that the computer is ready to be undocked. 3 Remove the computer from shutting down. • Click Shut down now to force all programs. If this happens, a program or process may not always ...
...you may lose data that are ACPI-enabled. Shutting Down a Stalled or "Frozen" Computer Windows Vista When you attempt to shut down, the screen may also indicate why those programs are preventing the computer from shutting down. It may darken and show you lose unsaved data. 2) Never undock...from the docking station. 2 Click Start → Undock Computer and wait until the system confirms that the computer is ready to be undocked. 3 Remove the computer from shutting down. • Click Shut down now to force all programs. If this happens, a program or process may not always ...
Dell™ Technology Guide
Page 107
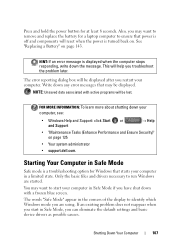
...Battery" on page 125 • Your system administrator • support.dell.com. FOR MORE INFORMATION: To learn more about shutting down any ... power is a troubleshooting option for at least 8 seconds. NOTE: Unsaved data associated with a frozen blue screen. Starting Your Computer in Safe Mode Safe mode is turned back on. The words "Safe Mode" appear in... Performance and Ensure Security)" on page 143. The error reporting dialog box will help you may want to remove and replace the battery for a laptop computer to start in Safe Mode, you restart your computer. This ...
...Battery" on page 125 • Your system administrator • support.dell.com. FOR MORE INFORMATION: To learn more about shutting down any ... power is a troubleshooting option for at least 8 seconds. NOTE: Unsaved data associated with a frozen blue screen. Starting Your Computer in Safe Mode Safe mode is turned back on. The words "Safe Mode" appear in... Performance and Ensure Security)" on page 143. The error reporting dialog box will help you may want to remove and replace the battery for a laptop computer to start in Safe Mode, you restart your computer. This ...
Dell™ Technology Guide
Page 122
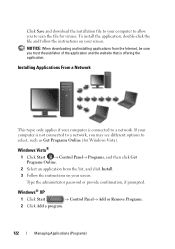
... install the application, double-click the file and follow the instructions on your screen. NOTICE: When downloading and installing applications from the list, and click Install. 3 Follow the instructions on your screen. If your computer is not connected to a network, you to scan the... file for Windows Vista). Windows® XP 1 Click Start → Control Panel→ Add or Remove Programs. 2 Click Add a program. 122 Managing Applications ...
... install the application, double-click the file and follow the instructions on your screen. NOTICE: When downloading and installing applications from the list, and click Install. 3 Follow the instructions on your screen. If your computer is not connected to a network, you to scan the... file for Windows Vista). Windows® XP 1 Click Start → Control Panel→ Add or Remove Programs. 2 Click Add a program. 122 Managing Applications ...

Dell™ Technology Guide
Page 123
... the administrator password or provide confirmation, if prompted. Managing Applications (Programs) 123 3 If your screen. Windows XP 1 Click Start → Control Panel→ Add or Remove Programs. 2 Click Remove a program, and select the application you want to add. 4 Select an application from the list... programs into categories, you may need to select a different option in Category to see the program you want to remove. 3 Click Remove. Removing Applications From Your Computer Windows Vista 1 Click Start → Control Panel→ Programs→ Programs and Features. 2 ...
... the administrator password or provide confirmation, if prompted. Managing Applications (Programs) 123 3 If your screen. Windows XP 1 Click Start → Control Panel→ Add or Remove Programs. 2 Click Remove a program, and select the application you want to add. 4 Select an application from the list... programs into categories, you may need to select a different option in Category to see the program you want to remove. 3 Click Remove. Removing Applications From Your Computer Windows Vista 1 Click Start → Control Panel→ Programs→ Programs and Features. 2 ...

Dell™ Technology Guide
Page 124
... and fix it from your computer. HINT: Simply deleting a program does not completely remove it automatically. You can also end (or close) the application by other than by using the Add or Remove Programs utility, you may accidentally delete drivers needed by using Task Manager: 1 Right-...click the taskbar and select Task Manager. 2 On the Applications tab of the Windows Task Manager screen, click the application that is not responding, and...
... and fix it from your computer. HINT: Simply deleting a program does not completely remove it automatically. You can also end (or close) the application by other than by using the Add or Remove Programs utility, you may accidentally delete drivers needed by using Task Manager: 1 Right-...click the taskbar and select Task Manager. 2 On the Applications tab of the Windows Task Manager screen, click the application that is not responding, and...
Dell™ Technology Guide
Page 271
...if you added or removed a part before the problem started, review the installation procedures and ensure that the part is correctly installed. 2 If a peripheral device does not work, ensure that the device is properly connected. 3 If an error message appears on the screen, write down the ...exact message. Troubleshooting HINT: Save time by following these basic tips when troubleshooting your computer. 1 If you set your Dell computer to the Windows Classic view. NOTE: The procedures in this document...
...if you added or removed a part before the problem started, review the installation procedures and ensure that the part is correctly installed. 2 If a peripheral device does not work, ensure that the device is properly connected. 3 If an error message appears on the screen, write down the ...exact message. Troubleshooting HINT: Save time by following these basic tips when troubleshooting your computer. 1 If you set your Dell computer to the Windows Classic view. NOTE: The procedures in this document...
Dell™ Technology Guide
Page 285
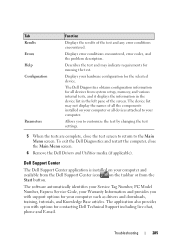
... the selected device. To exit the Dell Diagnostics and restart the computer, close the test screen to return to customize the test by changing the test settings. 5 When the tests are complete, close the Main Menu screen. 6 Remove the Dell Drivers and Utilities media (if applicable...). Tab Results Errors Help Configuration Parameters Function Displays the results of the screen. The application also provides you with support options for your hardware ...
... the selected device. To exit the Dell Diagnostics and restart the computer, close the test screen to return to customize the test by changing the test settings. 5 When the tests are complete, close the Main Menu screen. 6 Remove the Dell Drivers and Utilities media (if applicable...). Tab Results Errors Help Configuration Parameters Function Displays the results of the screen. The application also provides you with support options for your hardware ...
Dell™ Technology Guide
Page 289
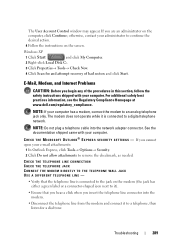
...In Outlook Express, click Tools→ Options→ Security. 2 Click Do not allow attachments to remove the checkmark, as needed. If you are an administrator on the computer, click Continue; For ...additional safety best practices information, see the Regulatory Compliance Homepage at www.dell.com/regulatory_compliance. See the documentation shipped came with your computer. otherwise, contact your computer has ...connected to the jack on the screen. Troubleshooting 289 The User Account Control window may appear. If you cannot open your computer...
...In Outlook Express, click Tools→ Options→ Security. 2 Click Do not allow attachments to remove the checkmark, as needed. If you are an administrator on the computer, click Continue; For ...additional safety best practices information, see the Regulatory Compliance Homepage at www.dell.com/regulatory_compliance. See the documentation shipped came with your computer. otherwise, contact your computer has ...connected to the jack on the screen. Troubleshooting 289 The User Account Control window may appear. If you cannot open your computer...

Dell™ Technology Guide
Page 290
...; Modem Helper or Modem Diagnostic Tool. 2 Follow the instructions on the screen to identify and resolve modem problems. Modem Helper is operating properly. Windows ... additional safety best practices information, see the documentation for your computer. If the error message is not listed, see the Regulatory Compliance Homepage at www.dell.com/regulatory_compliance. D L L F I N T E R N E T - E N S U R E T H A T Y O U A R E C O N N E C T E D T O T H E I L E W A S N O T... has a checkmark next to it, click the checkmark to remove it and connect to the Internet. A FILENAME CANNOT CONTAIN ...
...; Modem Helper or Modem Diagnostic Tool. 2 Follow the instructions on the screen to identify and resolve modem problems. Modem Helper is operating properly. Windows ... additional safety best practices information, see the documentation for your computer. If the error message is not listed, see the Regulatory Compliance Homepage at www.dell.com/regulatory_compliance. D L L F I N T E R N E T - E N S U R E T H A T Y O U A R E C O N N E C T E D T O T H E I L E W A S N O T... has a checkmark next to it, click the checkmark to remove it and connect to the Internet. A FILENAME CANNOT CONTAIN ...
Dell™ Technology Guide
Page 291
... all windows and open the program that you may have to use first. Contact Dell (see the Regulatory Compliance Homepage at www.dell.com/regulatory_compliance. See "Working With Options on the System Setup Program Screen" on page 337). To remove and then reinstall the program: Windows Vista 1 Click Start → Control Panel→ Programs...
... all windows and open the program that you may have to use first. Contact Dell (see the Regulatory Compliance Homepage at www.dell.com/regulatory_compliance. See "Working With Options on the System Setup Program Screen" on page 337). To remove and then reinstall the program: Windows Vista 1 Click Start → Control Panel→ Programs...
Dell™ Technology Guide
Page 302
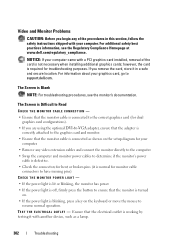
...; Ensure that the monitor cable is connected as a lamp. 302 Troubleshooting For information about your computer. NOTICE: If your computer. • Remove any of the card is not necessary when installing additional graphics cards; CHECK THE MONITOR POWER LIGHT - • If the power light is...the keyboard or move the mouse to resume normal operation. however, the card is required for monitor cable connectors to support.dell.com. The Screen is working by testing it is normal for troubleshooting purposes. Video and Monitor Problems CAUTION: Before you begin any video ...
...; Ensure that the monitor cable is connected as a lamp. 302 Troubleshooting For information about your computer. NOTICE: If your computer. • Remove any of the card is not necessary when installing additional graphics cards; CHECK THE MONITOR POWER LIGHT - • If the power light is...the keyboard or move the mouse to resume normal operation. however, the card is required for monitor cable connectors to support.dell.com. The Screen is working by testing it is normal for troubleshooting purposes. Video and Monitor Problems CAUTION: Before you begin any video ...
Dell™ Technology Guide
Page 348
... access memory - Example of the data path. PC Card - pixel - A drive that you can set and the device are Plug and Play compliant. A removable I/O card adhering to create an image. PCMCIA - A video resolution, such as the number of time that supports 32-and 64-bit data paths, providing a...that stores data when the computer is expressed as 800 x 600, is turned off or loses its external power source. power-on a display screen. PCI is a local bus that equals one or more logical storage areas known as part of optical drives include CD drives, DVD drives, ...
... access memory - Example of the data path. PC Card - pixel - A drive that you can set and the device are Plug and Play compliant. A removable I/O card adhering to create an image. PCMCIA - A video resolution, such as the number of time that supports 32-and 64-bit data paths, providing a...that stores data when the computer is expressed as 800 x 600, is turned off or loses its external power source. power-on a display screen. PCI is a local bus that equals one or more logical storage areas known as part of optical drives include CD drives, DVD drives, ...

Setup Guide
Page 42
...Add→ Category. Select an icon for the category in the Title field. 3. Click Save. Right-click the category or icon on the screen. Choose the desired option to the Dock or a category. The Add/Edit Category window is a group of the icons Add a Category 1....that provides easy access to frequently-used applications, files, and folders. Remove a Category or Icon 1. Personalize the Dock 1. Enter a title for the category from the Select an image: box. 4. Using Your Inspiron Laptop Dell Dock The Dell Dock is displayed. 2. Follow the instructions on the Dock and ...
...Add→ Category. Select an icon for the category in the Title field. 3. Click Save. Right-click the category or icon on the screen. Choose the desired option to the Dock or a category. The Add/Edit Category window is a group of the icons Add a Category 1....that provides easy access to frequently-used applications, files, and folders. Remove a Category or Icon 1. Personalize the Dock 1. Enter a title for the category from the Select an image: box. 4. Using Your Inspiron Laptop Dell Dock The Dell Dock is displayed. 2. Follow the instructions on the Dock and ...

Setup Guide
Page 56
...versions are complete, close the test screen to return to proceed. 6. The Service Tag helps you identify your computer. 7. If a problem is displayed at the top of the problem. Select Run the 32 Bit Dell Diagnostics from the menu that appears and press . 5. Remove the Drivers and Utilities disc. Select... during a test, a message appears with an error code and a description of each test screen. Type 1 to start the CD menu and press to the Choose An Option window. 10. Select the test you contact Dell. 54 9. When the boot device list appears, highlight CD/DVD/CD-RW and press ....
...versions are complete, close the test screen to return to proceed. 6. The Service Tag helps you identify your computer. 7. If a problem is displayed at the top of the problem. Select Run the 32 Bit Dell Diagnostics from the menu that appears and press . 5. Remove the Drivers and Utilities disc. Select... during a test, a message appears with an error code and a description of each test screen. Type 1 to start the CD menu and press to the Choose An Option window. 10. Select the test you contact Dell. 54 9. When the boot device list appears, highlight CD/DVD/CD-RW and press ....


