
Owner's Manual
Page 105
Reinstall the memory modules and, if necessary, replace them (see "Memory" on page 139). Reinstall the memory modules and, if necessary, replace them (see "Contacting Dell" on page 131). Contact Dell (see "Memory" on page 139). Close all windows and open the program that... (see "Contacting Dell" on page 166). You have a defective sector or corrupted FAT on the hard drive. The computer cannot find the hard drive. A chip on the screen. 5 See the program documentation for instructions (click Start → Help and Support). A R E Q U I N T E R R U P T - VALUE - A memory...
Reinstall the memory modules and, if necessary, replace them (see "Memory" on page 139). Reinstall the memory modules and, if necessary, replace them (see "Contacting Dell" on page 131). Contact Dell (see "Memory" on page 139). Close all windows and open the program that... (see "Contacting Dell" on page 166). You have a defective sector or corrupted FAT on the hard drive. The computer cannot find the hard drive. A chip on the screen. 5 See the program documentation for instructions (click Start → Help and Support). A R E Q U I N T E R R U P T - VALUE - A memory...

Owner's Manual
Page 113
...Network [WWAN]) NOTE: The Dell Mobile Broadband Card Utility user's guide and the Mobile Broadband ExpressCard user's guide are correct and that no network communication exists. Replace the network cable. You ...can connect to launch the utility. Troubleshooting 113 NOTE: The icon appears in the taskbar, at the lower-right corner of your card. C H E C K T H E N E T W O R K C A B L E C O N N E C T O R - Ensure that the network cable is functioning. If the card is not a Dellbranded card, see the manufacturer's instructions for your screen...
...Network [WWAN]) NOTE: The Dell Mobile Broadband Card Utility user's guide and the Mobile Broadband ExpressCard user's guide are correct and that no network communication exists. Replace the network cable. You ...can connect to launch the utility. Troubleshooting 113 NOTE: The icon appears in the taskbar, at the lower-right corner of your card. C H E C K T H E N E T W O R K C A B L E C O N N E C T O R - Ensure that the network cable is functioning. If the card is not a Dellbranded card, see the manufacturer's instructions for your screen...
Owner's Manual
Page 122
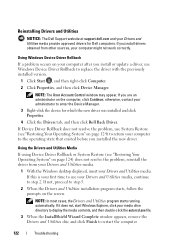
...NOTE: In most cases, the Drivers and Utilities program starts running automatically. Using Windows Device Driver Rollback If a problem occurs on the screen. otherwise, contact your media drive directory to display the media contents, and then double-click the autorcd.exe file. 3 When the InstallShield... appears, remove the Drivers and Utilities disc and click Finish to enter the Device Manager. 3 Right-click the device for Dell computers. If not, proceed to replace the driver with the previously installed version. 1 Click Start , and then right-click Computer. 2 Click Properties, and then...
...NOTE: In most cases, the Drivers and Utilities program starts running automatically. Using Windows Device Driver Rollback If a problem occurs on the screen. otherwise, contact your media drive directory to display the media contents, and then double-click the autorcd.exe file. 3 When the InstallShield... appears, remove the Drivers and Utilities disc and click Finish to enter the Device Manager. 3 Right-click the device for Dell computers. If not, proceed to replace the driver with the previously installed version. 1 Click Start , and then right-click Computer. 2 Click Properties, and then...

Owner's Manual
Page 181
... any installed batteries (see "Battery Performance" on page 45). 4 Moisten a soft, lint-free cloth with a mild cleaning solution. 2 Turn the retainer ring on the rollers. 7 Replace the ball and retainer ring, and turn off your screen cursor skips or moves abnormally, clean the mouse.
... any installed batteries (see "Battery Performance" on page 45). 4 Moisten a soft, lint-free cloth with a mild cleaning solution. 2 Turn the retainer ring on the rollers. 7 Replace the ball and retainer ring, and turn off your screen cursor skips or moves abnormally, clean the mouse.

Service Manual
Page 44
...periodically touching an unpainted metal surface, such as the back panel on the computer. For replacement of the computer to the computer. 4. NOTE: After replacing the system board, enter the computer's alpha-numeric Service Tag into the appropriate drive....any of the computer. 1 IO panel connector 2 speaker connector 3 system board 18. With the rear of the replacement system board. 5. Replacing the System Board CAUTION: Before you , gently lift the system board assembly from the system board. 20. Turn ... outward slightly on the plastic around the connectors on the screen.
...periodically touching an unpainted metal surface, such as the back panel on the computer. For replacement of the computer to the computer. 4. NOTE: After replacing the system board, enter the computer's alpha-numeric Service Tag into the appropriate drive....any of the computer. 1 IO panel connector 2 speaker connector 3 system board 18. With the rear of the replacement system board. 5. Replacing the System Board CAUTION: Before you , gently lift the system board assembly from the system board. 20. Turn ... outward slightly on the plastic around the connectors on the screen.


