
Owner's Manual
Page 10
... and Replacing Parts 129 Before You Begin 129 Recommended Tools 129 Turning Off Your Computer 129 Before Working Inside Your Computer 130 Hard Drive 131 Removing the Hard Drive 132 Replacing the Hard Drive 133 Returning a Hard Drive to Dell 134 Optical Drive 134 Removing the Optical Drive 134 Replacing the Optical...
... and Replacing Parts 129 Before You Begin 129 Recommended Tools 129 Turning Off Your Computer 129 Before Working Inside Your Computer 130 Hard Drive 131 Removing the Hard Drive 132 Replacing the Hard Drive 133 Returning a Hard Drive to Dell 134 Optical Drive 134 Removing the Optical Drive 134 Replacing the Optical...

Owner's Manual
Page 23
... volume down. Play the next track. D I C R O P H O N E S - About Your Computer 23 C A M E R A - Turn the volume up. 1 camera indicator 3 digital microphones (2) 5 media control buttons 7 touch pad buttons 9 headphone connectors (2) 11 device status lights 13 keyboard 15 keyboard...Play or pause. Control CD, DVD, and Media Player playback. Mute the sound. Play the previous track. M E D I C A T O R - Stop. Built-in -1 memory card reader 14 Dell™ MediaDirect™ button 16 power button C A M E R A I N D I A C O N T R O L B U T T O N S - Based on page 39.
... volume down. Play the next track. D I C R O P H O N E S - About Your Computer 23 C A M E R A - Turn the volume up. 1 camera indicator 3 digital microphones (2) 5 media control buttons 7 touch pad buttons 9 headphone connectors (2) 11 device status lights 13 keyboard 15 keyboard...Play or pause. Control CD, DVD, and Media Player playback. Mute the sound. Play the previous track. M E D I C A T O R - Stop. Built-in -1 memory card reader 14 Dell™ MediaDirect™ button 16 power button C A M E R A I N D I A C O N T R O L B U T T O N S - Based on page 39.

Owner's Manual
Page 24
M I T C H - When enabled through Dell QuickSet, this connector. H E A D P H O N E C O N N E C T O R S - Turns on page 43). Turns on any wireless devices such as WLAN cards and internal cards with Bluetooth wireless technology. ...the following: Power light - You can scan for attaching headphones. T O U C H P A D - T O U C H P A D B U T T O N S - Use these buttons much like the buttons on a mouse when you turn on page 43). W I R E L E S S S W I C R O P H O N E C O N N E C T O R - DEVICE STATUS LIGHTS The lights located on the palm rest towards the front of a mouse ...
M I T C H - When enabled through Dell QuickSet, this connector. H E A D P H O N E C O N N E C T O R S - Turns on page 43). Turns on any wireless devices such as WLAN cards and internal cards with Bluetooth wireless technology. ...the following: Power light - You can scan for attaching headphones. T O U C H P A D - T O U C H P A D B U T T O N S - Use these buttons much like the buttons on a mouse when you turn on page 43). W I R E L E S S S W I C R O P H O N E C O N N E C T O R - DEVICE STATUS LIGHTS The lights located on the palm rest towards the front of a mouse ...

Owner's Manual
Page 25
... R E A D E R - -Provides a fast and convenient way to indicate battery charge status. The 8-in the notification area, and then click Disable Bluetooth Radio. Battery status light - Turns on steadily or blinks to view and share digital photos, music, and videos stored on a memory card. To enable or disable wireless networking, use the...: The battery is adequately charged (or the computer is critically low. 8 - Solid amber: The battery charge is turned off only the Bluetooth wireless technology functionality, right-click the icon in -1 media memory card reader reads the following digital...
... R E A D E R - -Provides a fast and convenient way to indicate battery charge status. The 8-in the notification area, and then click Disable Bluetooth Radio. Battery status light - Turns on steadily or blinks to view and share digital photos, music, and videos stored on a memory card. To enable or disable wireless networking, use the...: The battery is adequately charged (or the computer is critically low. 8 - Solid amber: The battery charge is turned off only the Bluetooth wireless technology functionality, right-click the icon in -1 media memory card reader reads the following digital...

Owner's Manual
Page 26
..., press and hold the power button until the computer turns off your computer by performing a Microsoft® Windows® operating system shutdown rather than by pressing the power button. Press the power button to launch Dell MediaDirect (see "Configuring Power Management Settings" on when the... uppercase letter (caps lock) function is enabled. NOTICE: To avoid losing data, turn on the computer or exit a power management mode (see "Using Dell MediaDirect™" on when the scroll lock function is enabled. KEYBOARD STATUS LIGHTS The blue lights located above...
..., press and hold the power button until the computer turns off your computer by performing a Microsoft® Windows® operating system shutdown rather than by pressing the power button. Press the power button to launch Dell MediaDirect (see "Configuring Power Management Settings" on when the... uppercase letter (caps lock) function is enabled. NOTICE: To avoid losing data, turn on the computer or exit a power management mode (see "Using Dell MediaDirect™" on when the scroll lock function is enabled. KEYBOARD STATUS LIGHTS The blue lights located above...

Owner's Manual
Page 27
... overheating. Attaches an AC adapter to the DC power required by the computer. You can connect the AC adapter with electrical outlets worldwide. The computer turns the fan on or off. A C A D A P T E R C O N N E C T O R - Using an incompatible cable or improperly connecting the cable to the computer (see "Security ...Cable Lock" on page 91). About Your Computer 27 CAUTION: The AC adapter works with your computer turned on when the computer gets hot. Fan noise is normal and does not indicate a problem with the fan or the computer. Connects...
... overheating. Attaches an AC adapter to the DC power required by the computer. You can connect the AC adapter with electrical outlets worldwide. The computer turns the fan on or off. A C A D A P T E R C O N N E C T O R - Using an incompatible cable or improperly connecting the cable to the computer (see "Security ...Cable Lock" on page 91). About Your Computer 27 CAUTION: The AC adapter works with your computer turned on when the computer gets hot. Fan noise is normal and does not indicate a problem with the fan or the computer. Connects...

Owner's Manual
Page 36
... the USB printer cable to your computer, the cable may not come with a printer cable, so if you purchase a cable separately, ensure that it is turned on. 1 Complete the operating system setup if you purchased your computer with your printer and computer. Your printer may arrive in the computer's shipping box.
... the USB printer cable to your computer, the cable may not come with a printer cable, so if you purchase a cable separately, ensure that it is turned on. 1 Complete the operating system setup if you purchased your computer with your printer and computer. Your printer may arrive in the computer's shipping box.

Owner's Manual
Page 37
... the network wall jack during electrical storms or after power interruptions. NOTE: To install the printer driver, see "Reinstalling Drivers and Utilities" on the computer. 3 Turn on the printer, and then turn on page 122 and the documentation that can occur during electrical storms. Setting Up Your Computer 37
... the network wall jack during electrical storms or after power interruptions. NOTE: To install the printer driver, see "Reinstalling Drivers and Utilities" on the computer. 3 Turn on the printer, and then turn on page 122 and the documentation that can occur during electrical storms. Setting Up Your Computer 37
Owner's Manual
Page 39
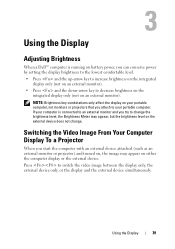
...external monitor). • Press and the down-arrow key to your portable computer. Using the Display 39 Using the Display Adjusting Brightness When a Dell™ computer is connected to an external monitor and you try to switch the video image between the display only, the external device only,... computer, not monitors or projectors that you start the computer with an external device attached (such as an external monitor or projector) and turned on, the image may appear, but the brightness level on the external device does not change the brightness level, the Brightness Meter may...
...external monitor). • Press and the down-arrow key to your portable computer. Using the Display 39 Using the Display Adjusting Brightness When a Dell™ computer is connected to an external monitor and you try to switch the video image between the display only, the external device only,... computer, not monitors or projectors that you start the computer with an external device attached (such as an external monitor or projector) and turned on, the image may appear, but the brightness level on the external device does not change the brightness level, the Brightness Meter may...

Owner's Manual
Page 49
... exit Sleep state, press the power button. The battery is too hot to an electrical outlet. For more information about resolving problems with the computer turned on. The battery's internal circuitry prevents the battery from the electrical outlet and allow the computer and the battery to cool to room temperature, then...
... exit Sleep state, press the power button. The battery is too hot to an electrical outlet. For more information about resolving problems with the computer turned on. The battery's internal circuitry prevents the battery from the electrical outlet and allow the computer and the battery to cool to room temperature, then...

Owner's Manual
Page 50
... of fire or explosion. Do not use it. 50 Using a Battery A battery discharges during prolonged storage. CAUTION: Before performing these procedures, turn off . 2 Turn the computer over. 3 Slide and click the battery release latches to keep them open. 4 Slide the battery out of the bay. 1 ...2 1 battery 2 battery release latches (2) To replace the battery, follow the removal procedure in Sleep state, you choose to work with your Dell computer....
... of fire or explosion. Do not use it. 50 Using a Battery A battery discharges during prolonged storage. CAUTION: Before performing these procedures, turn off . 2 Turn the computer over. 3 Slide and click the battery release latches to keep them open. 4 Slide the battery out of the bay. 1 ...2 1 battery 2 battery release latches (2) To replace the battery, follow the removal procedure in Sleep state, you choose to work with your Dell computer....

Owner's Manual
Page 51
For more information about camera features, see "Specifications" on . The camera and its integrated digital microphones allow you bought your computer, the camera is turned on page 167. Click Help from the menu and select Contents. Using the Optional Camera 51 NOTE: It is in use. 12 3 1 digital microphones (2) 2 camera ...
For more information about camera features, see "Specifications" on . The camera and its integrated digital microphones allow you bought your computer, the camera is turned on page 167. Click Help from the menu and select Contents. Using the Optional Camera 51 NOTE: It is in use. 12 3 1 digital microphones (2) 2 camera ...

Owner's Manual
Page 52
... manually adjust the camera settings. 1 Right-click the icon in the notification area and click QuickCapture. The QuickCapture window appears and the blue camera light turns on the screen shows you can now direct the camera to point at the object or person that you want the camera to use automatic...
... manually adjust the camera settings. 1 Right-click the icon in the notification area and click QuickCapture. The QuickCapture window appears and the blue camera light turns on the screen shows you can now direct the camera to point at the object or person that you want the camera to use automatic...
Owner's Manual
Page 59
...more information on the hinge cover, to launch Dell MediaDirect. Adjusting the Picture If an error message notifies you can press the Dell MediaDirect button to start the computer and automatically launch the Dell MediaDirect application. Press the Dell MediaDirect button, located on volume control options, click...The Volume Meter displays the current volume level, including mute, on your computer is an instant-on the screen. Using Dell MediaDirect™ Dell MediaDirect is turned off or in Sleep state, you that the current resolution and color depth are muted, you do not hear the ...
...more information on the hinge cover, to launch Dell MediaDirect. Adjusting the Picture If an error message notifies you can press the Dell MediaDirect button to start the computer and automatically launch the Dell MediaDirect application. Press the Dell MediaDirect button, located on volume control options, click...The Volume Meter displays the current volume level, including mute, on your computer is an instant-on the screen. Using Dell MediaDirect™ Dell MediaDirect is turned off or in Sleep state, you that the current resolution and color depth are muted, you do not hear the ...

Owner's Manual
Page 63
...Using Multimedia 63 1 2 1 standard S-video cable 2 standard audio cable 1 Turn off the computer and the TV and/or audio device that you want to ... on the other end of the audio cable into the audio input connectors on your TV or other audio device. 6 Turn on page 74 to connect. NOTE: If your TV or audio device supports S-video but not S/PDIF digital audio, you... connected (if applicable), and then turn on the computer. 7 See "Enabling the Display Settings for a TV" on the TV and any audio device that the...
...Using Multimedia 63 1 2 1 standard S-video cable 2 standard audio cable 1 Turn off the computer and the TV and/or audio device that you want to ... on the other end of the audio cable into the audio input connectors on your TV or other audio device. 6 Turn on page 74 to connect. NOTE: If your TV or audio device supports S-video but not S/PDIF digital audio, you... connected (if applicable), and then turn on the computer. 7 See "Enabling the Display Settings for a TV" on the TV and any audio device that the...

Owner's Manual
Page 65
Using Multimedia 65 1 Turn off the computer and the TV and/or the audio device that you want to connect. 2 Connect the composite video adapter to the S-video TV-... end of the S/PDIF digital audio cable into the audio input connector on your TV or audio device. 7 Turn on the TV, turn on any audio device that you connected (if applicable), and then turn on the computer. 8 See "Enabling the Display Settings for a TV" on page 74 to ensure that the computer...
Using Multimedia 65 1 Turn off the computer and the TV and/or the audio device that you want to connect. 2 Connect the composite video adapter to the S-video TV-... end of the S/PDIF digital audio cable into the audio input connector on your TV or audio device. 7 Turn on the TV, turn on any audio device that you connected (if applicable), and then turn on the computer. 8 See "Enabling the Display Settings for a TV" on page 74 to ensure that the computer...

Owner's Manual
Page 67
Using Multimedia 67 1 Turn off the computer and the TV and/or audio device that you want to connect. 2 Connect the composite video adapter to the S-video TV-out ... other end of the audio cable into the audio input connectors on your TV or other audio device. 7 Turn on the TV, turn on any audio device that you connected (if applicable), and then turn on the computer. 8 See "Enabling the Display Settings for a TV" on page 74 to ensure that the computer...
Using Multimedia 67 1 Turn off the computer and the TV and/or audio device that you want to connect. 2 Connect the composite video adapter to the S-video TV-out ... other end of the audio cable into the audio input connectors on your TV or other audio device. 7 Turn on the TV, turn on any audio device that you connected (if applicable), and then turn on the computer. 8 See "Enabling the Display Settings for a TV" on page 74 to ensure that the computer...

Owner's Manual
Page 69
1 Turn off the computer and the TV and/or audio device that you want to connect. 2 Connect the composite video adapter to the S-video TV-out ... end of the digital audio cable into the S/PDIF input connector on your TV or other audio device. 7 Turn on the TV, turn on any audio device that you connected (if applicable), and then turn on the computer. 8 See "Enabling the Display Settings for a TV" on page 74 to ensure that the computer...
1 Turn off the computer and the TV and/or audio device that you want to connect. 2 Connect the composite video adapter to the S-video TV-out ... end of the digital audio cable into the S/PDIF input connector on your TV or other audio device. 7 Turn on the TV, turn on any audio device that you connected (if applicable), and then turn on the computer. 8 See "Enabling the Display Settings for a TV" on page 74 to ensure that the computer...

Owner's Manual
Page 71
...RCA connectors on the other end of the component video cable into the component video-output connectors on the component video adapter. Using Multimedia 71 1 Turn off the computer and the TV and/or audio device that you want to connect. 2 Connect the component video adapter to the S-video TV-out... connector on your TV or audio device. 7 Turn on the TV, turn on any audio device that you connected (if applicable), and then turn on the computer. 8 See "Enabling the Display Settings for a TV" on page 74 to ensure that the ...
...RCA connectors on the other end of the component video cable into the component video-output connectors on the component video adapter. Using Multimedia 71 1 Turn off the computer and the TV and/or audio device that you want to connect. 2 Connect the component video adapter to the S-video TV-out... connector on your TV or audio device. 7 Turn on the TV, turn on any audio device that you connected (if applicable), and then turn on the computer. 8 See "Enabling the Display Settings for a TV" on page 74 to ensure that the ...

Owner's Manual
Page 73
... colors of the TV input connectors. 5 Plug one end of the S/PDIF digital audio cable into the S/PDIF audio connector on the component video adapter. 1 Turn off the computer and the TV and/or audio device that you want to connect. 2 Connect the component video adapter to the S-video TV-out...
... colors of the TV input connectors. 5 Plug one end of the S/PDIF digital audio cable into the S/PDIF audio connector on the component video adapter. 1 Turn off the computer and the TV and/or audio device that you want to connect. 2 Connect the component video adapter to the S-video TV-out...


