

Service Manual
Page 4
Removing the hard drive 23 Prerequisites...23 Procedure...23 Replacing the hard drive 25 Procedure...25 Post-requisites 25 Removing the coin-cell battery 26 Prerequisites...26 Procedure...26 Replacing the coin-cell battery 28 Procedure...28 Post-requisites 28 Removing the wireless card 29 Prerequisites...29 Procedure...29 Replacing the wireless card 31 Procedure...31 Post-requisites 31 Removing the keyboard daughter-board 32 Prerequisites...32 Procedure...32 Replacing the keyboard daughter-board 34 Procedure...34 Post-requisites 34
Removing the hard drive 23 Prerequisites...23 Procedure...23 Replacing the hard drive 25 Procedure...25 Post-requisites 25 Removing the coin-cell battery 26 Prerequisites...26 Procedure...26 Replacing the coin-cell battery 28 Procedure...28 Post-requisites 28 Removing the wireless card 29 Prerequisites...29 Procedure...29 Replacing the wireless card 31 Procedure...31 Post-requisites 31 Removing the keyboard daughter-board 32 Prerequisites...32 Procedure...32 Replacing the keyboard daughter-board 34 Procedure...34 Post-requisites 34

Service Manual
Page 34
...-board and press down the latches to secure the cables. Post-requisites 1 Replace the battery. 2 Replace the base cover. 34 For more safety best practices, see the Regulatory Compliance home page at dell.com/regulatory_compliance. Replacing the keyboard daughter-board WARNING: Before working inside your computer, read the safety information that shipped with your computer...
...-board and press down the latches to secure the cables. Post-requisites 1 Replace the battery. 2 Replace the base cover. 34 For more safety best practices, see the Regulatory Compliance home page at dell.com/regulatory_compliance. Replacing the keyboard daughter-board WARNING: Before working inside your computer, read the safety information that shipped with your computer...

Service Manual
Page 46
...page at dell.com/regulatory_compliance. Procedure 1 Slide the tabs on the touch pad into the keyboard daughter-board connector and press down the latch to secure the cable. 6 Slide the keyboard cable into the slots on the computer base. 2 Adhere the tape that secures the touch pad to secure the cable. Replacing the touch... down the latch to the computer base. 3 Align the screw holes on the touch-pad bracket with the screw holes on the computer base. 4 Replace the screws that shipped with your computer and follow the instructions in Before working inside your computer. Post-requisites...
...page at dell.com/regulatory_compliance. Procedure 1 Slide the tabs on the touch pad into the keyboard daughter-board connector and press down the latch to secure the cable. 6 Slide the keyboard cable into the slots on the computer base. 2 Adhere the tape that secures the touch pad to secure the cable. Replacing the touch... down the latch to the computer base. 3 Align the screw holes on the touch-pad bracket with the screw holes on the computer base. 4 Replace the screws that shipped with your computer and follow the instructions in Before working inside your computer. Post-requisites...
Service Manual
Page 64
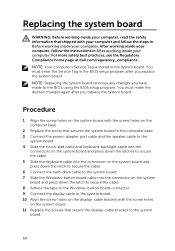
For more safety best practices, see the Regulatory Compliance home page at dell.com/regulatory_compliance. NOTE: Replacing the system board removes any changes you replace the system board. NOTE: Your computer's Service Tag is stored in After working inside your computer. After working inside your computer, follow the steps ... to the computer base. 3 Connect the power-adapter port cable and the speaker cable to the system board. 4 Slide the touch-pad cable and keyboard-backlight cable into the connectors on the system board and press down the latches to secure the cable. 5 Slide the...
For more safety best practices, see the Regulatory Compliance home page at dell.com/regulatory_compliance. NOTE: Replacing the system board removes any changes you replace the system board. NOTE: Your computer's Service Tag is stored in After working inside your computer. After working inside your computer, follow the steps ... to the computer base. 3 Connect the power-adapter port cable and the speaker cable to the system board. 4 Slide the touch-pad cable and keyboard-backlight cable into the connectors on the system board and press down the latches to secure the cable. 5 Slide the...
Service Manual
Page 72
Post-requisites 1 Replace the system board. 2 Replace the power-adapter port. 3 Replace the display assembly. 4 Replace the speakers. 5 Replace the power and volume-buttons board. 6 Replace the I/O board. 7 Replace the heat sink. 8 Replace the fan. 9 Replace the touch pad. 10 Replace the keyboard daughter-board. 11 Follow the procedure from step 4 to step 6 in "Replacing the hard drive". 12 Replace the battery. 13 Replace the base...
Post-requisites 1 Replace the system board. 2 Replace the power-adapter port. 3 Replace the display assembly. 4 Replace the speakers. 5 Replace the power and volume-buttons board. 6 Replace the I/O board. 7 Replace the heat sink. 8 Replace the fan. 9 Replace the touch pad. 10 Replace the keyboard daughter-board. 11 Follow the procedure from step 4 to step 6 in "Replacing the hard drive". 12 Replace the battery. 13 Replace the base...


