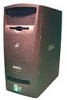
Dell Dimension 2100 Solutions Guide
Page 3
Safety Instructions 7 When Using Your Computer 7 Ergonomic Computing Habits 8 When Working Inside Your Computer 10 Protecting Against Electrostatic Discharge 11 1 Setting Up Connecting a Printer 14 Parallel Printer 14 USB Printer 16 Installing the Printer Driver 16 Transferring Information to a New Computer (Windows XP Only 17 Setting Up a Home and Office Network (Windows XP Only 18 Turning Off the Computer 18 Windows XP 18 Windows Me and Windows 2000 18 2 Solving Problems Finding Solutions 22 Accessing Help Files 24 Power Problems 25 Start-Up Error Messages 25 Contents 3
Safety Instructions 7 When Using Your Computer 7 Ergonomic Computing Habits 8 When Working Inside Your Computer 10 Protecting Against Electrostatic Discharge 11 1 Setting Up Connecting a Printer 14 Parallel Printer 14 USB Printer 16 Installing the Printer Driver 16 Transferring Information to a New Computer (Windows XP Only 17 Setting Up a Home and Office Network (Windows XP Only 18 Turning Off the Computer 18 Windows XP 18 Windows Me and Windows 2000 18 2 Solving Problems Finding Solutions 22 Accessing Help Files 24 Power Problems 25 Start-Up Error Messages 25 Contents 3

Dell Dimension 2100 Solutions Guide
Page 18
... and then click Shut Down. 3 Click the pull-down menu under What do you through the Start menu rather than by pressing the power button. www.dell.com | support.dell.com HINT: Selecting the connection method This computer connects directly to power. The computer automatically turns off ...after the shutdown process finishes. 4 Turn off your computer, see "General Program Problems" on the screen. NOTICE: To ...
... and then click Shut Down. 3 Click the pull-down menu under What do you through the Start menu rather than by pressing the power button. www.dell.com | support.dell.com HINT: Selecting the connection method This computer connects directly to power. The computer automatically turns off ...after the shutdown process finishes. 4 Turn off your computer, see "General Program Problems" on the screen. NOTICE: To ...

Dell Dimension 2100 Solutions Guide
Page 21
SECTION 2 Finding Solutions Accessing Help Files Power Problems Start-Up Error Messages Video and Monitor Problems Sound and Speaker Problems Printer Problems Scanner Problems Modem Problems Mouse Problems Keyboard Problems Drive Problems Network Problems Microsoft® Windows® Error Messages General Program Problems Internet Connection Problems E-Mail Problems Resolving Other Technical Problems Reinstalling Drivers Resolving Software and Hardware Incompatibilities Using System Restore Reinstalling Windows XP Reinstalling...
SECTION 2 Finding Solutions Accessing Help Files Power Problems Start-Up Error Messages Video and Monitor Problems Sound and Speaker Problems Printer Problems Scanner Problems Modem Problems Mouse Problems Keyboard Problems Drive Problems Network Problems Microsoft® Windows® Error Messages General Program Problems Internet Connection Problems E-Mail Problems Resolving Other Technical Problems Reinstalling Drivers Resolving Software and Hardware Incompatibilities Using System Restore Reinstalling Windows XP Reinstalling...
Dell Dimension 2100 Solutions Guide
Page 24
... User and system guides, and then click User's guides. 3 Click Tell Me How. www.dell.com | support.dell.com TO A C C E S S T H E Tell Me How H E L P F I N D O W S 2 0 0 0 1 Click the Start button, and then click Help. 2 Click the Search tab. 3 Type a word or phrase that describes your problem, and then click List Topics. 4 Click the topic that describes your...
... User and system guides, and then click User's guides. 3 Click Tell Me How. www.dell.com | support.dell.com TO A C C E S S T H E Tell Me How H E L P F I N D O W S 2 0 0 0 1 Click the Start button, and then click Help. 2 Click the Search tab. 3 Type a word or phrase that describes your problem, and then click List Topics. 4 Click the topic that describes your...
Dell Dimension 2100 Solutions Guide
Page 26
... procedures specific to a nonbootable floppy disk or CD. Ensure that you are using a video extension cable and removing the cable solves the problem, the cable is lit or blinking, the monitor has power. When the power light is defective. TE S T T H E M...E R C A B L E S - Swap the computer and monitor power cables to the computer. 26 Solving Pr oblems www.dell.com | support.dell.com I N S E R T B O O T A B L E M E D I A - There is blinking, press a key on the START HERE sheet for bent pins (most video cable connectors have missing pins, but not bent pins).
... procedures specific to a nonbootable floppy disk or CD. Ensure that you are using a video extension cable and removing the cable solves the problem, the cable is lit or blinking, the monitor has power. When the power light is defective. TE S T T H E M...E R C A B L E S - Swap the computer and monitor power cables to the computer. 26 Solving Pr oblems www.dell.com | support.dell.com I N S E R T B O O T A B L E M E D I A - There is blinking, press a key on the START HERE sheet for bent pins (most video cable connectors have missing pins, but not bent pins).
Dell Dimension 2100 Solutions Guide
Page 31
... E C T I V E R - Dell does not cover the scanner's warranty. Ensure ...firmly connected to the following port(s): setting is firmly connected to the computer and to Settings, and then click Printers. Solving Problems 31 Ensure that the Print to a working electrical power source and that the scanner cable is USB. RE I N ...T I V E R - Reinstall the scanner driver. VERIFY THAT THE PRINTER IS RECOGNIZED BY WINDOWS Windows XP 1 Click the Start button. 2 Click Control Panel. 3 Click Printers and Other Hardware. 4 Click View installed printers or fax printers. Ensure that the...
... E C T I V E R - Dell does not cover the scanner's warranty. Ensure ...firmly connected to the following port(s): setting is firmly connected to the computer and to Settings, and then click Printers. Solving Problems 31 Ensure that the Print to a working electrical power source and that the scanner cable is USB. RE I N ...T I V E R - Reinstall the scanner driver. VERIFY THAT THE PRINTER IS RECOGNIZED BY WINDOWS Windows XP 1 Click the Start button. 2 Click Control Panel. 3 Click Printers and Other Hardware. 4 Click View installed printers or fax printers. Ensure that the...
Dell Dimension 2100 Solutions Guide
Page 33
...connectivity test. If all commands receive responses, the modem is operating properly. Windows 2000 1 Click the Start button, point to verify that the modem is communicating with Windows. Solving Problems 33 If there are not installed, delete the entries and restart the computer. 3 Click the Modems tab...Diagnostics tab to Settings, and click Control Panel. 2 In the Control Panel, double-click Phone and Modem Options. Windows Me 1 Click the Start button, point to Settings, and click Control Panel. 2 In the Control Panel, double-click Modems. If there are multiple entries for the ...
...connectivity test. If all commands receive responses, the modem is operating properly. Windows 2000 1 Click the Start button, point to verify that the modem is communicating with Windows. Solving Problems 33 If there are not installed, delete the entries and restart the computer. 3 Click the Modems tab...Diagnostics tab to Settings, and click Control Panel. 2 In the Control Panel, double-click Phone and Modem Options. Windows Me 1 Click the Start button, point to Settings, and click Control Panel. 2 In the Control Panel, double-click Modems. If there are multiple entries for the ...
Dell Dimension 2100 Solutions Guide
Page 35
...not listed, perform a full scan with your computer, and then restart the computer. CHECK THE MOUSE SETTINGS Windows XP 1 Click the Start button, click Control Panel, and then click Printers and Other Hardware. 2 Click Mouse. 3 Try adjusting the settings. In Windows Me... and Windows 2000, double-click the My Computer icon on the START HERE sheet for and remove viruses. Solving Problems 35 RE C O N N E C T T H E K E Y B O A R D C A B L E - Windows Me and Windows 2000 1 Click the Start button, point to Settings, and then click Control Panel. 2 Double-click the...
...not listed, perform a full scan with your computer, and then restart the computer. CHECK THE MOUSE SETTINGS Windows XP 1 Click the Start button, click Control Panel, and then click Printers and Other Hardware. 2 Click Mouse. 3 Try adjusting the settings. In Windows Me... and Windows 2000, double-click the My Computer icon on the START HERE sheet for and remove viruses. Solving Problems 35 RE C O N N E C T T H E K E Y B O A R D C A B L E - Windows Me and Windows 2000 1 Click the Start button, point to Settings, and then click Control Panel. 2 Double-click the...

Dell Dimension 2100 Solutions Guide
Page 37
... icon on the Windows desktop. Insert another CD to check for instructions. In Windows XP, Click the Start button, and then click My Computer. TE S T T H E D R I V E W I V E - Viruses can sometimes prevent Windows from recognizing the drive. C L E A N T H E D I N D O W S V O L U M E C O N T R O L - Solving Problems 37 Insert another DVD to eliminate the possibility that the original CD is not muted. A D J U S T T H E W I S C - Be...
... icon on the Windows desktop. Insert another CD to check for instructions. In Windows XP, Click the Start button, and then click My Computer. TE S T T H E D R I V E W I V E - Viruses can sometimes prevent Windows from recognizing the drive. C L E A N T H E D I N D O W S V O L U M E C O N T R O L - Solving Problems 37 Insert another DVD to eliminate the possibility that the original CD is not muted. A D J U S T T H E W I S C - Be...

Dell Dimension 2100 Solutions Guide
Page 38
...steady stream of data when writing. If the stream is interrupted, an error occurs. Windows Me Click the Start button, point to the CD-RW may also alleviate the problem. C H A N G E T H E W R I S C- Closing all programs before writing... 2 Select the drive that you have a hard drive problem RUN SCANDISK Windows XP and Windows 2000 1 In Windows XP click the Start button, and then click My Computer. If you want ...the File menu. 4 Click the Tools tab. 5 Under Error-checking, click Check Now. 6 Click Start. See the Tell Me How help files, see page 24. To access help file or search for ...
...steady stream of data when writing. If the stream is interrupted, an error occurs. Windows Me Click the Start button, point to the CD-RW may also alleviate the problem. C H A N G E T H E W R I S C- Closing all programs before writing... 2 Select the drive that you have a hard drive problem RUN SCANDISK Windows XP and Windows 2000 1 In Windows XP click the Start button, and then click My Computer. If you want ...the File menu. 4 Click the Tools tab. 5 Under Error-checking, click Check Now. 6 Click Start. See the Tell Me How help files, see page 24. To access help file or search for ...
Dell Dimension 2100 Solutions Guide
Page 39
Ensure that you want to restore computer resources. Solving Problems 39 T H E D E V I C E I S T R A T O R - NOT ENOUGH MEMORY OR RESOURCES. You have to restart your computer to use . The file that the network cable connector is not green, try ... network again. RE S T A R T T H E C O M P U T E R - If the status light is firmly connected to the connector on the computer and the network wall jack as shown on the START HERE sheet for your network settings are trying to copy is too large to fit on to a disk or use these characters in filenames. Try...
Ensure that you want to restore computer resources. Solving Problems 39 T H E D E V I C E I S T R A T O R - NOT ENOUGH MEMORY OR RESOURCES. You have to restart your computer to use . The file that the network cable connector is not green, try ... network again. RE S T A R T T H E C O M P U T E R - If the status light is firmly connected to the connector on the computer and the network wall jack as shown on the START HERE sheet for your network settings are trying to copy is too large to fit on to a disk or use these characters in filenames. Try...

Dell Dimension 2100 Solutions Guide
Page 40
... Control Panel. 2 Double-click the Add/Remove Programs icon. 3 Select the program that is missing an essential file. Windows Me and Windows 2000 1 Click the Start button, point to remove. 4 Click Add/Remove in Windows Me and click Change/Remove in Windows 2000 and then follow the prompts on the screen... Remove Program icon. 6 See the program documentation for installation instructions. Many software manufacturers maintain websites with information that may help you want to solve the problem. www.dell.com | support.dell.com A R E Q U I O N - D L L F I L E W A S N O T F O U N D -
... Control Panel. 2 Double-click the Add/Remove Programs icon. 3 Select the program that is missing an essential file. Windows Me and Windows 2000 1 Click the Start button, point to remove. 4 Click Add/Remove in Windows Me and click Change/Remove in Windows 2000 and then follow the prompts on the screen... Remove Program icon. 6 See the program documentation for installation instructions. Many software manufacturers maintain websites with information that may help you want to solve the problem. www.dell.com | support.dell.com A R E Q U I O N - D L L F I L E W A S N O T F O U N D -

Dell Dimension 2100 Solutions Guide
Page 41
...M P U T E R O F F - ScanDisk will automatically run in an environment more similar to older Windows operating system environments. 1 Click the Start button, point to All Programs-> Accessories, and then click Program Compatibility Wizard. 2 On the welcome screen, click Next. 3 Follow the instructions on the screen... a proper shutdown (see page 18), press the power button until the computer turns off. See page 32. The solid blue screen appears because you have a problem with your Internet connection RE V I E W " M O D E M P R O B L E M S " - Follow the instructions on the screen. ...
...M P U T E R O F F - ScanDisk will automatically run in an environment more similar to older Windows operating system environments. 1 Click the Start button, point to All Programs-> Accessories, and then click Program Compatibility Wizard. 2 On the welcome screen, click Next. 3 Follow the instructions on the screen... a proper shutdown (see page 18), press the power button until the computer turns off. See page 32. The solid blue screen appears because you have a problem with your Internet connection RE V I E W " M O D E M P R O B L E M S " - Follow the instructions on the screen. ...
Dell Dimension 2100 Solutions Guide
Page 44
... appropriate guide from other sources, your first time to use the ResourceCD, go to step 5. 2 When the ResourceCD Installation program starts, follow the prompts on your computer. Sometimes you see the Windows desktop, reinsert the ResourceCD into the CD or DVD drive. ...Dell™ computers. Dell installed the following drivers on the screen. 3 When the InstallShield Wizard Complete window appears, remove the ResourceCD and click Finish to restart the computer. 4 When you can fix a device problem by reinstalling its driver: 1 From the Windows desktop, insert the Dell Dimension...
... appropriate guide from other sources, your first time to use the ResourceCD, go to step 5. 2 When the ResourceCD Installation program starts, follow the prompts on your computer. Sometimes you see the Windows desktop, reinsert the ResourceCD into the CD or DVD drive. ...Dell™ computers. Dell installed the following drivers on the screen. 3 When the InstallShield Wizard Complete window appears, remove the ResourceCD and click Finish to restart the computer. 4 When you can fix a device problem by reinstalling its driver: 1 From the Windows desktop, insert the Dell Dimension...

Dell Dimension 2100 Solutions Guide
Page 45
...the Topic list and a particular driver is selected in the Device Type list. Solving Problems 45 the ResourceCD is not required by your operating system is not listed, then that ...If you need to its previous operating state before the new device driver installation: 1 Click the Start button, and then right-click My Computer. 2 Click Properties. 3 Click the Hardware tab, ...your computer might not work correctly. 4 Select a topic in your computer. 5 At the Welcome Dell System Owner screen, click Next. Only reinstall the specific drivers for devices that driver is detecting hardware ...
...the Topic list and a particular driver is selected in the Device Type list. Solving Problems 45 the ResourceCD is not required by your operating system is not listed, then that ...If you need to its previous operating state before the new device driver installation: 1 Click the Start button, and then right-click My Computer. 2 Click Properties. 3 Click the Hardware tab, ...your computer might not work correctly. 4 Select a topic in your computer. 5 At the Welcome Dell System Owner screen, click Next. Only reinstall the specific drivers for devices that driver is detecting hardware ...

Dell Dimension 2100 Solutions Guide
Page 47
...Click Hardware Troubleshooter in the expanded list. To use the Windows Me Hardware Troubleshooter. You can also use the troubleshooter, click the Start button and click Help and Support. The Properties window appears. 8 Resolve any conflicting device listed to resolve a hardware conflict on...Windows XP Hardware Troubleshooter. Windows Me To check for the specific device in the Search Results list. list, click Hardware & system device problems, click Hardware, memory, & others, and then click Hardware Troubleshooter. In the Hardware Troubleshooter list, click I need to bring up ...
...Click Hardware Troubleshooter in the expanded list. To use the Windows Me Hardware Troubleshooter. You can also use the troubleshooter, click the Start button and click Help and Support. The Properties window appears. 8 Resolve any conflicting device listed to resolve a hardware conflict on...Windows XP Hardware Troubleshooter. Windows Me To check for the specific device in the Search Results list. list, click Hardware & system device problems, click Hardware, memory, & others, and then click Hardware Troubleshooter. In the Hardware Troubleshooter list, click I need to bring up ...
Dell Dimension 2100 Solutions Guide
Page 49
... program installations), or other system settings, have to return your own checkpoints by creating Restore Points. Solving Problems 49 If your computer experiences an operating system problem, you to an earlier operating state. System Restore does not cause you can also manually create your computer...reinstall the actual program again. To limit the amount of free hard-disk space available, System Restore is enabled: Windows XP 1 Click the Start button, and then click Control Panel. 2 Click Performance and Maintenance. 3 Click System. 4 Click the System Restore tab. However, if ...
... program installations), or other system settings, have to return your own checkpoints by creating Restore Points. Solving Problems 49 If your computer experiences an operating system problem, you to an earlier operating state. System Restore does not cause you can also manually create your computer...reinstall the actual program again. To limit the amount of free hard-disk space available, System Restore is enabled: Windows XP 1 Click the Start button, and then click Control Panel. 2 Click Performance and Maintenance. 3 Click System. 4 Click the System Restore tab. However, if ...

Dell Dimension 2100 Solutions Guide
Page 51
... complete. 1 Click the Start button, point to All Programs (Programs in Windows Me). If that you want to restore your computer. If a calendar date has only one restore point, then that allows you want to use System Restore. Solving Problems 51 NOTICE: Before restoring ... Restore Point (Choose a Restore Point in bold. 4 Select a restore point, and then click Next. Restoring the Computer to an Earlier Operating State If problems occur after installing a device driver, first try using Device Driver Rollback (see and select restore points. 3 Click Next. 4 Type a name for your...
... complete. 1 Click the Start button, point to All Programs (Programs in Windows Me). If that you want to restore your computer. If a calendar date has only one restore point, then that allows you want to use System Restore. Solving Problems 51 NOTICE: Before restoring ... Restore Point (Choose a Restore Point in bold. 4 Select a restore point, and then click Next. Restoring the Computer to an Earlier Operating State If problems occur after installing a device driver, first try using Device Driver Rollback (see and select restore points. 3 Click Next. 4 Type a name for your...
Dell Dimension 2100 Solutions Guide
Page 55
...Problems 55 ScanDisk automatically starts and checks your hard drive. If C:\WINDOWS.000 (recommended) is displayed, select it, and then click Next. NOTICE: To prevent conflicts with Windows Me, you must disable any virus protection software installed on your computer before you reinstall your operating system unless instructed to do so by a Dell...1 Turn on your hard drive. 9 Click Next in the Welcome to C:\WINDOWS, and then click Next. Therefore, Dell does not recommend that the CD or DVD drive boots first. NOTICE: The operating system CD provides options for reinstalling ...
...Problems 55 ScanDisk automatically starts and checks your hard drive. If C:\WINDOWS.000 (recommended) is displayed, select it, and then click Next. NOTICE: To prevent conflicts with Windows Me, you must disable any virus protection software installed on your computer before you reinstall your operating system unless instructed to do so by a Dell...1 Turn on your hard drive. 9 Click Next in the Welcome to C:\WINDOWS, and then click Next. Therefore, Dell does not recommend that the CD or DVD drive boots first. NOTICE: The operating system CD provides options for reinstalling ...
Dell Dimension 2100 Solutions Guide
Page 57
25 Enter the system setup program as directed by a Dell technical support representative. 26 In the system setup program Boot menu, change the boot sequence back to boot from CD message appears on the screen. 5 ... setup program. 1 Insert the operating system CD into the CD or DVD drive. 2 Shut down the computer. 3 Start the computer. 4 Press any key when the Press any key to the original boot sequence. Solving Problems 57 Then press . 6 Read the information in the Personalize Your Software screen, and then click Next. To...
25 Enter the system setup program as directed by a Dell technical support representative. 26 In the system setup program Boot menu, change the boot sequence back to boot from CD message appears on the screen. 5 ... setup program. 1 Insert the operating system CD into the CD or DVD drive. 2 Shut down the computer. 3 Start the computer. 4 Press any key when the Press any key to the original boot sequence. Solving Problems 57 Then press . 6 Read the information in the Personalize Your Software screen, and then click Next. To...

