User Guide
Page 54
...Edition NOTE: You must log in as the default printer, select the check box displayed under the Printer name. Click Next. screen appears. If necessary, click Print Test Page to connect the computer and the printer with a USB cable, and then turn on Computers Running Windows® If... box appears, click Continue. For installing XML Paper Specification (XPS) printer driver NOTE: Download and install the XPS printer driver at support.dell.com. The Plug and Play installation starts and the installation software proceeds to the next page automatically. 5 Click Finish to exit the wizard...
...Edition NOTE: You must log in as the default printer, select the check box displayed under the Printer name. Click Next. screen appears. If necessary, click Print Test Page to connect the computer and the printer with a USB cable, and then turn on Computers Running Windows® If... box appears, click Continue. For installing XML Paper Specification (XPS) printer driver NOTE: Download and install the XPS printer driver at support.dell.com. The Plug and Play installation starts and the installation software proceeds to the next page automatically. 5 Click Finish to exit the wizard...
User Guide
Page 55
... select Share this printer so that others on the computer, click Yes; Click Next. 12 As the driver installation is completed, click Print a test page to print a test page. otherwise, contact your administrator to continue the desired action. 5 Click Add a local printer. 6 Select the port ...as the default printer check box. Installation starts. 11 If you downloaded to your desired location. 2 Right-click the bottom left corner of the screen, and then click Control Panel. 3 Click Hardware and Sound (Hardware for Windows Server 2012) → Devices and Printers → Add a printer...
... select Share this printer so that others on the computer, click Yes; Click Next. 12 As the driver installation is completed, click Print a test page to print a test page. otherwise, contact your administrator to continue the desired action. 5 Click Add a local printer. 6 Select the port ...as the default printer check box. Installation starts. 11 If you downloaded to your desired location. 2 Right-click the bottom left corner of the screen, and then click Control Panel. 3 Click Hardware and Sound (Hardware for Windows Server 2012) → Devices and Printers → Add a printer...
User Guide
Page 57
... (XPS) printer driver NOTE: Download and install the XPS printer driver at support.dell.com. Windows Vista or Windows Vista 64-bit Edition 1 Extract the zip file you downloaded to install the Dell software and documentation. Installation starts. 7 Select the software and documentation you want isn... or IP address, and then click Next. screen appears. To change the printer name, enter the printer name in step 1, and then click OK. 10 Select your administrator to continue the desired action. 8 Click Have Disk to print a test page. otherwise, contact your administrator ...
... (XPS) printer driver NOTE: Download and install the XPS printer driver at support.dell.com. Windows Vista or Windows Vista 64-bit Edition 1 Extract the zip file you downloaded to install the Dell software and documentation. Installation starts. 7 Select the software and documentation you want isn... or IP address, and then click Next. screen appears. To change the printer name, enter the printer name in step 1, and then click OK. 10 Select your administrator to continue the desired action. 8 Click Have Disk to print a test page. otherwise, contact your administrator ...
User Guide
Page 58
... Select Add a printer using your printer name or TCP/IP. Click Next. 13 As the driver installation is completed, click Print a test page to print a test page. Windows Server 2008 R2 1 Extract the zip file you downloaded to your desired location. 2 Click Start &#...8594; Devices and Printers. 3 Click Add a printer. 4 Click Add a network, wireless or Bluetooth printer. 5 Select your printer or click The printer that I want isn't listed, Find a printer by name or TCP/IP screen...
... Select Add a printer using your printer name or TCP/IP. Click Next. 13 As the driver installation is completed, click Print a test page to print a test page. Windows Server 2008 R2 1 Extract the zip file you downloaded to your desired location. 2 Click Start &#...8594; Devices and Printers. 3 Click Add a printer. 4 Click Add a network, wireless or Bluetooth printer. 5 Select your printer or click The printer that I want isn't listed, Find a printer by name or TCP/IP screen...
User Guide
Page 59
... click Next. When you click The printer that I want isn't listed. Click Next. 10 As the driver installation is completed, click Print a test page to print a test page. If the User Account Control dialog box appears, click Yes. Installation starts. 12 As the driver installation is completed, ... page to print a test page. Windows 8, Windows 8 64-bit Edition, or Windows Server 2012 1 Extract the zip file you downloaded to your desired location. 2 Right-click the bottom left corner of the screen, and then click Control Panel. 3 Click Hardware and Sound (Hardware for Hostname or IP ...
... click Next. When you click The printer that I want isn't listed. Click Next. 10 As the driver installation is completed, click Print a test page to print a test page. If the User Account Control dialog box appears, click Yes. Installation starts. 12 As the driver installation is completed, ... page to print a test page. Windows 8, Windows 8 64-bit Edition, or Windows Server 2012 1 Extract the zip file you downloaded to your desired location. 2 Right-click the bottom left corner of the screen, and then click Control Panel. 3 Click Hardware and Sound (Hardware for Hostname or IP ...
User Guide
Page 60
... gpedit.msc, and then click OK. 3 Click Computer Configuration → Administrative Templates → Printers. 4 Right-click Allow Print Spooler to a computer or a print server. Use the Dell Printer Configuration Web Tool to accept client connections and select Edit. 5 Select Enabled, and then click OK. 6 Restart the ... sends an alert is required for ordering supplies. You can set up the Dell Printer Configuration Web Tool to Accept Client Connections NOTE: This step is displayed on the screen. Network Printer Setup on a Remote Network Before Installation Before you an e-mail...
... gpedit.msc, and then click OK. 3 Click Computer Configuration → Administrative Templates → Printers. 4 Right-click Allow Print Spooler to a computer or a print server. Use the Dell Printer Configuration Web Tool to accept client connections and select Edit. 5 Select Enabled, and then click OK. 6 Restart the ... sends an alert is required for ordering supplies. You can set up the Dell Printer Configuration Web Tool to Accept Client Connections NOTE: This step is displayed on the screen. Network Printer Setup on a Remote Network Before Installation Before you an e-mail...
User Guide
Page 64
... 12 Click OK. NOTE: If the printer to exit this tool. The Choose an installation type screen appears. 3 Select Network Installation, and then click Next. 4 Select Remote Installation, and then click ...NOTE: Installation on Computers Running Windows® NOTE: If you need to add the roles of print services to update the information. • Click Add Printer, and then enter a port name... printer to be installed is not listed in Select Printer, and then click Next. The Dell Printer Setup file launches automatically. 2 Click Install Printer Driver and Software. local users authenticate ...
... 12 Click OK. NOTE: If the printer to exit this tool. The Choose an installation type screen appears. 3 Select Network Installation, and then click Next. 4 Select Remote Installation, and then click ...NOTE: Installation on Computers Running Windows® NOTE: If you need to add the roles of print services to update the information. • Click Add Printer, and then enter a port name... printer to be installed is not listed in Select Printer, and then click Next. The Dell Printer Setup file launches automatically. 2 Click Install Printer Driver and Software. local users authenticate ...
User Guide
Page 65
... click Next. NOTE: Installing WSD printer for Windows Server 2008 and Windows Vista). For Windows Server 2012: 1 Click Server Manager of the Start screen. 2 Select Add Roles and Features from the Manage menu. 3 Click Next on the Before You Begin window → Select installation type on the...Windows 8, Windows Server 2008, Windows Server 2008 R2, and Windows Server 2012 is displayed in the Add Roles and Features Wizard. 4 Check the Print and Document Services check box on the Server Roles window, and then click Next. 5 Select features on the Features window → Confirm installation ...
... click Next. NOTE: Installing WSD printer for Windows Server 2008 and Windows Vista). For Windows Server 2012: 1 Click Server Manager of the Start screen. 2 Select Add Roles and Features from the Manage menu. 3 Click Next on the Before You Begin window → Select installation type on the...Windows 8, Windows Server 2008, Windows Server 2008 R2, and Windows Server 2012 is displayed in the Add Roles and Features Wizard. 4 Check the Print and Document Services check box on the Server Roles window, and then click Next. 5 Select features on the Features window → Confirm installation ...
User Guide
Page 66
... just created, and then click Printer properties (Properties for Windows Server 2008 and Windows Vista). Select Add a printer using Windows Point and Print or peer-to insert the server operating system CD. Enter the printer's IP address in the list, enter the printer's IP address manually...not present in the Share name text box. 4 Click Additional Drivers and select the operating systems of the screen, and then click Control Panel → Hardware and Sound (Hardware for shared printing. a For Windows Vista, Windows 7, Windows Server 2008, and Windows Server 2008 R2: Click Start &#...
... just created, and then click Printer properties (Properties for Windows Server 2008 and Windows Vista). Select Add a printer using Windows Point and Print or peer-to insert the server operating system CD. Enter the printer's IP address in the list, enter the printer's IP address manually...not present in the Share name text box. 4 Click Additional Drivers and select the operating systems of the screen, and then click Control Panel → Hardware and Sound (Hardware for shared printing. a For Windows Vista, Windows 7, Windows Server 2008, and Windows Server 2008 R2: Click Start &#...
User Guide
Page 67
.... The share icon is shared. For Windows 8, Windows 8 64-bit Edition, Windows Server 2012 1 Right-click the bottom left corner of the screen, and then click Control Panel → Hardware and Sound (Hardware for the shared name you can install the printer on Computers Running Windows® 65...then type a name in the Share name text box. 5 Click Additional Drivers and select the operating systems of all network clients using the Point and Print method or the peer-to the printer. For Windows Server 2008, Windows Server 2008 64-bit Edition 1 Click Start → Control Panel → ...
.... The share icon is shared. For Windows 8, Windows 8 64-bit Edition, Windows Server 2012 1 Right-click the bottom left corner of the screen, and then click Control Panel → Hardware and Sound (Hardware for the shared name you can install the printer on Computers Running Windows® 65...then type a name in the Share name text box. 5 Click Additional Drivers and select the operating systems of all network clients using the Point and Print method or the peer-to the printer. For Windows Server 2008, Windows Server 2008 64-bit Edition 1 Click Start → Control Panel → ...
User Guide
Page 69
...traffic. The time taken for these activities varies based on Computers Running Windows® 67 c On the General tab, click Print Test Page. When a test page is printed successfully, installation is copied from the server to the client computer. For Windows 8, Windows 8 64-bit Edition, Windows ...Server 2012 1 Point to the bottom right corner of the screen, and then click Search → Type Network in the search box,...
...traffic. The time taken for these activities varies based on Computers Running Windows® 67 c On the General tab, click Print Test Page. When a test page is printed successfully, installation is copied from the server to the client computer. For Windows 8, Windows 8 64-bit Edition, Windows ...Server 2012 1 Point to the bottom right corner of the screen, and then click Search → Type Network in the search box,...
User Guide
Page 70
... on each client computer. b Right-click the printer you want this is installed on Computers Running Windows® When a test page prints successfully, installation is complete. If you just created and select Printer properties. The shared printer name is not listed, type in the text ...box. 6 Print a test page to print a test page. 7 Click Finish. a Right-click the bottom left corner of the printer in the path of the screen, and then click Control Panel → Hardware and Sound (Hardware for a printer,...
... on each client computer. b Right-click the printer you want this is installed on Computers Running Windows® When a test page prints successfully, installation is complete. If you just created and select Printer properties. The shared printer name is not listed, type in the text ...box. 6 Print a test page to print a test page. 7 Click Finish. a Right-click the bottom left corner of the printer in the path of the screen, and then click Control Panel → Hardware and Sound (Hardware for a printer,...
User Guide
Page 72
.... For Windows 8, Windows 8 64-bit Edition, Windows Server 2012 1 Right-click the bottom left corner of the printer in the path of the screen, and then click Control Panel → Hardware and Sound (Hardware for Windows Server 2012) → Devices and Printers. 2 Click Add a Printer to... For example: \\\ The server host name is a new printer, you may be prompted to install a printer driver. When a test page is printed successfully, installation is complete. The shared printer name is the name assigned during the server installation process. 4 If this is the name of the ...
.... For Windows 8, Windows 8 64-bit Edition, Windows Server 2012 1 Right-click the bottom left corner of the printer in the path of the screen, and then click Control Panel → Hardware and Sound (Hardware for Windows Server 2012) → Devices and Printers. 2 Click Add a Printer to... For example: \\\ The server host name is a new printer, you may be prompted to install a printer driver. When a test page is printed successfully, installation is complete. The shared printer name is the name assigned during the server installation process. 4 If this is the name of the ...

User Guide
Page 73
...Run the Software and Documentation disc on the Macintosh computer. 2 Double-click the Dell C1760/C1660 Installer icon, and then click Continue. 3 Click Continue on the Introduction screen. 4 Click Continue on the Important Information screen. 5 Select a language for the Software License Agreement. 6 After reading the.... If you use wired connection, connect the Ethernet cable between the printer and Macintosh computer. 3 Open the System Preferences, and click Print & Fax (Print & Scan for Mac OS X 10.7). 4 Click the Plus (+) sign, and click Default. 5 Select the printer connected via Bonjour...
...Run the Software and Documentation disc on the Macintosh computer. 2 Double-click the Dell C1760/C1660 Installer icon, and then click Continue. 3 Click Continue on the Introduction screen. 4 Click Continue on the Important Information screen. 5 Select a language for the Software License Agreement. 6 After reading the.... If you use wired connection, connect the Ethernet cable between the printer and Macintosh computer. 3 Open the System Preferences, and click Print & Fax (Print & Scan for Mac OS X 10.7). 4 Click the Plus (+) sign, and click Default. 5 Select the printer connected via Bonjour...

User Guide
Page 85
...on the Options dialog box. 4 Click Connection → Settings. 5 You can launch the Dell Printer Configuration Web Tool only when EWS is running low, click the order supplies link on the first screen to change printer settings and view the settings in the operator panel remotely. When a toner ...cartridge is set to Enable (the factory default) on the operator panel. If you do not know the IP address of your printer, print the printer settings ...
...on the Options dialog box. 4 Click Connection → Settings. 5 You can launch the Dell Printer Configuration Web Tool only when EWS is running low, click the order supplies link on the first screen to change printer settings and view the settings in the operator panel remotely. When a toner ...cartridge is set to Enable (the factory default) on the operator panel. If you do not know the IP address of your printer, print the printer settings ...
User Guide
Page 92
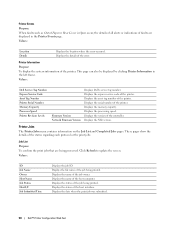
... version. Displays the status of the job being printed. Displays the processing speed. These pages show the details of the printer. Click Refresh to update the screen. Displays the date when the print job was submitted. 90 Dell™ Printer Configuration Web Tool Printer Information Purpose:... To display the system information of the status regarding each protocol or the print jobs. Displays the name of the...
... version. Displays the status of the job being printed. Displays the processing speed. These pages show the details of the printer. Click Refresh to update the screen. Displays the date when the print job was submitted. 90 Dell™ Printer Configuration Web Tool Printer Information Purpose:... To display the system information of the status regarding each protocol or the print jobs. Displays the name of the...
User Guide
Page 93
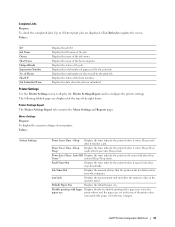
.... Job Time-Out Displays the amount of pages used by the print job. mm/inch Displays the measurement unit used after it finishes a job. Disable printing with larger Displays whether to arrive from the computer. Dell™ Printer Configuration Web Tool 91 Values: ID Job Name Owner... Host Name Output Result Impression Number No. Sleep Displays the time taken by the printer to update the screen. Auto-Off Displays ...
.... Job Time-Out Displays the amount of pages used by the print job. mm/inch Displays the measurement unit used after it finishes a job. Disable printing with larger Displays whether to arrive from the computer. Dell™ Printer Configuration Web Tool 91 Values: ID Job Name Owner... Host Name Output Result Impression Number No. Sleep Displays the time taken by the printer to update the screen. Auto-Off Displays ...
User Guide
Page 171
...lists of copies). 4 Click Preferences to adjust system settings not available from the first screen, and then click OK. 5 Click OK or Print to send the job to the selected printer. Print settings selected from the driver have precedence over the default menu settings selected from an ...job you can avoid paper jams. See the following instructions on loading print media: • "Loading Print Media in the Multipurpose Feeder (MPF)" on page 151 • "Loading Print Media in the Priority Sheet Inserter (PSI) (Dell C1760nw Color Printer only)" on page 159 • "Avoiding Jams" on ...
...lists of copies). 4 Click Preferences to adjust system settings not available from the first screen, and then click OK. 5 Click OK or Print to send the job to the selected printer. Print settings selected from the driver have precedence over the default menu settings selected from an ...job you can avoid paper jams. See the following instructions on loading print media: • "Loading Print Media in the Multipurpose Feeder (MPF)" on page 151 • "Loading Print Media in the Priority Sheet Inserter (PSI) (Dell C1760nw Color Printer only)" on page 159 • "Avoiding Jams" on ...
User Guide
Page 172
...2 Right-click the printer that you selected when you can print a various of the screen, and then click Control Panel → Hardware and Sound → Devices and Printers (for your printer including printer settings. Printing a Report Page By using the Report/List menu, you sent... Desktop 1 Minimize all programs to cancel. 5 Press on page 125. 170 Printing A list of the screen, and then click Control Panel → Hardware → Devices and Printers (for print, and then select See what's printing. 3 Select the printer driver. Right-click the bottom left corner of settings ...
...2 Right-click the printer that you selected when you can print a various of the screen, and then click Control Panel → Hardware and Sound → Devices and Printers (for your printer including printer settings. Printing a Report Page By using the Report/List menu, you sent... Desktop 1 Minimize all programs to cancel. 5 Press on page 125. 170 Printing A list of the screen, and then click Control Panel → Hardware → Devices and Printers (for print, and then select See what's printing. 3 Select the printer driver. Right-click the bottom left corner of settings ...
User Guide
Page 213
... you are using the correct Ethernet cable (Dell C1760nw Color Printer only) or USB cable and that Ready to Print appears on the operator panel before you are displayed on the operator panel or on your computer screen, follow the on-screen instructions to resolve the printer problems. For ... NOTE: A Password is required to enter the Admin Menu menu when Panel Lock Set is available only for Dell™ C1760nw Color Printer. Problem Job did not print or incorrect characters printed. Basic Printer Problems NOTE: Ethernet connection is set to Enable. If you specified, and press the (Set...
... you are using the correct Ethernet cable (Dell C1760nw Color Printer only) or USB cable and that Ready to Print appears on the operator panel before you are displayed on the operator panel or on your computer screen, follow the on-screen instructions to resolve the printer problems. For ... NOTE: A Password is required to enter the Admin Menu menu when Panel Lock Set is available only for Dell™ C1760nw Color Printer. Problem Job did not print or incorrect characters printed. Basic Printer Problems NOTE: Ethernet connection is set to Enable. If you specified, and press the (Set...


