
Manual
Page 2
... disclaims any manner whatsoever without notice. © 2009 Dell Inc. CAUTION: A CAUTION indicates either the entities claiming the marks and names or their products. Trademarks used in this manual: Alienware, AlienRespawn, AlienFX, and the AlienHead logo are either trademarks...of data and tells you make better use of Microsoft Corporation in the U.S. Reproduction of Dell Inc. Dell is a trademark of Alienware Corporation. Microsoft, Windows, Windows Vista, and Windows Vista start button logo are trademarks or registered trademarks of the Blu-ray Disc Association. ...
... disclaims any manner whatsoever without notice. © 2009 Dell Inc. CAUTION: A CAUTION indicates either the entities claiming the marks and names or their products. Trademarks used in this manual: Alienware, AlienRespawn, AlienFX, and the AlienHead logo are either trademarks...of data and tells you make better use of Microsoft Corporation in the U.S. Reproduction of Dell Inc. Dell is a trademark of Alienware Corporation. Microsoft, Windows, Windows Vista, and Windows Vista start button logo are trademarks or registered trademarks of the Blu-ray Disc Association. ...
Manual
Page 3
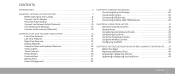
...Before Setting Up Your Laptop 8 Connect the AC Adapter 9 Press the Power Button 9 Connect the Network Cable (Optional 10 Set Up Microsoft Windows 10 Connect to the Internet (Optional 10 CHAPTER 2: GETTING TO KNOW YOUR LAPTOP 13 Front View Features 14 Left View Features 15 Right ...Connecting External Displays 26 Connecting Printers 28 Connecting USB Devices 29 Connecting FireWire (IEEE 1394) Devices 29 CHAPTER 4: USING YOUR LAPTOP 31 Alienware Command Center 32 Stealth Mode 32 Using Removable Media and Cards 32 Using the Optical Drive 33 Using the Integrated Camera 33 Using the...
...Before Setting Up Your Laptop 8 Connect the AC Adapter 9 Press the Power Button 9 Connect the Network Cable (Optional 10 Set Up Microsoft Windows 10 Connect to the Internet (Optional 10 CHAPTER 2: GETTING TO KNOW YOUR LAPTOP 13 Front View Features 14 Left View Features 15 Right ...Connecting External Displays 26 Connecting Printers 28 Connecting USB Devices 29 Connecting FireWire (IEEE 1394) Devices 29 CHAPTER 4: USING YOUR LAPTOP 31 Alienware Command Center 32 Stealth Mode 32 Using Removable Media and Cards 32 Using the Optical Drive 33 Using the Integrated Camera 33 Using the...

Manual
Page 10
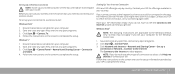
... the telephone wall jack before you set up your computer unusable. Connect the Network Cable (Optional) 10 CHAPTER 1: SETTING UP YOUR LAPTOP Set Up Microsoft Windows CAUTION: Do not interrupt the operating system's setup process. To configure the remaining settings, follow the instructions in "Setting Up Your Internet Connection" on the...
... the telephone wall jack before you set up your computer unusable. Connect the Network Cable (Optional) 10 CHAPTER 1: SETTING UP YOUR LAPTOP Set Up Microsoft Windows CAUTION: Do not interrupt the operating system's setup process. To configure the remaining settings, follow the instructions in "Setting Up Your Internet Connection" on the...
Manual
Page 11
...Click Start → Control Panel→ Network and Sharing Center→ Connect to the Internet but have successfully connected in your computer to the Windows classic view. 1. If you cannot connect to a network. 4. Save and close any open files, and exit any open programs. 3. ...Panel. 3. To set up a connection or Network→ Connect to the Internet. Follow the instructions on your connection to a wireless router: Windows Vista® 1. Click Network and Internet→ Network and Sharing Center→ Set up your computer. 2. The Connect to complete the setup...
...Click Start → Control Panel→ Network and Sharing Center→ Connect to the Internet but have successfully connected in your computer to the Windows classic view. 1. If you cannot connect to a network. 4. Save and close any open files, and exit any open programs. 3. ...Panel. 3. To set up a connection or Network→ Connect to the Internet. Follow the instructions on your connection to a wireless router: Windows Vista® 1. Click Network and Internet→ Network and Sharing Center→ Set up your computer. 2. The Connect to complete the setup...

Manual
Page 12
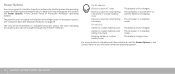
Click Start → Control Panel. 2. Click Network and Internet→ Network and Sharing Center→ Set up a connection or Network→ Connect to the Internet window appears. Windows® 7 1. NOTE: If you do not know which type of connection to select, click Help me choose or contact your ISP to complete the setup. 12 CHAPTER 1: SETTING UP YOUR LAPTOP Follow the instructions on the screen and use the setup information provided by your ISP. The Connect to the Internet.
Click Start → Control Panel. 2. Click Network and Internet→ Network and Sharing Center→ Set up a connection or Network→ Connect to the Internet window appears. Windows® 7 1. NOTE: If you do not know which type of connection to select, click Help me choose or contact your ISP to complete the setup. 12 CHAPTER 1: SETTING UP YOUR LAPTOP Follow the instructions on the screen and use the setup information provided by your ISP. The Connect to the Internet.
Manual
Page 20
... Amber or custom battery-color fading into black Blinking Amber or custom battery-color The battery is located in the center of Microsoft® Windows® operating system. The computer is fully charged. The battery is in the Control Panel of the hinge cover. The color indicating the...computer is low. The battery charge is in the Control Panel of the AlienHead rim indicates the power status. The color of your Microsoft Windows operating system. 20 CHAPTER 2: GETTING TO KNOW YOUR LAPTOP For more details on how to program this button to perform actions like shutting down...
... Amber or custom battery-color fading into black Blinking Amber or custom battery-color The battery is located in the center of Microsoft® Windows® operating system. The computer is fully charged. The battery is in the Control Panel of the hinge cover. The color indicating the...computer is low. The battery charge is in the Control Panel of the AlienHead rim indicates the power status. The color of your Microsoft Windows operating system. 20 CHAPTER 2: GETTING TO KNOW YOUR LAPTOP For more details on how to program this button to perform actions like shutting down...

Manual
Page 21
... described below: FI - In the suspend mode, the display and selected devices will switch off Press to five seconds while the computer reboots into the Windows® operating system, or resumes from standby or hibernate mode. F3 - Extend Desktop Press to launch or close the Microsoft Mobility Center application. F10 - Increase...
... described below: FI - In the suspend mode, the display and selected devices will switch off Press to five seconds while the computer reboots into the Windows® operating system, or resumes from standby or hibernate mode. F3 - Extend Desktop Press to launch or close the Microsoft Mobility Center application. F10 - Increase...

Manual
Page 23
... one. A: If you to configure the power settings on your activity and by maximizing system performance. Pre-charge may take 30 minutes. The Microsoft® Windows® operating system installed on your operating system. Why? Q: I did not use the power options in your operating system to spend some time acquiring a basic...
... one. A: If you to configure the power settings on your activity and by maximizing system performance. Pre-charge may take 30 minutes. The Microsoft® Windows® operating system installed on your operating system. Why? Q: I did not use the power options in your operating system to spend some time acquiring a basic...
Manual
Page 24
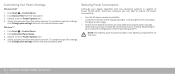
... additional system power savings. NOTE: The battery pack should be locked in the battery compartment all the time. 24 CHAPTER 2: GETTING TO KNOW YOUR LAPTOP Windows® 7 1. Switching into and out of Stealth mode may require a reboot depending on your laptop (together with the operating system) is capable of power conservation... to the Stealth mode to the selected power plan. Click Start → Control Panel. 2. Select a power plan from the options shown. Customizing Your Power Settings: Windows Vista® 1.
... additional system power savings. NOTE: The battery pack should be locked in the battery compartment all the time. 24 CHAPTER 2: GETTING TO KNOW YOUR LAPTOP Windows® 7 1. Switching into and out of Stealth mode may require a reboot depending on your laptop (together with the operating system) is capable of power conservation... to the Stealth mode to the selected power plan. Click Start → Control Panel. 2. Select a power plan from the options shown. Customizing Your Power Settings: Windows Vista® 1.
Manual
Page 28
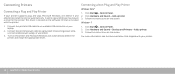
... on the screen. Connect the printer's power cable to an available USB connector on your printer supports plug and play, Microsoft Windows will automatically detect the printer and install the appropriate driver. Click Hardware and Sound→ Devices and Printers→ Add a .... 2. Click Hardware and Sound→ Add a printer. 3. Turn on the screen. Windows® 7 1. Connecting a Non Plug and Play Printer Windows Vista® 1. Follow the instructions on the printer and Microsoft Windows will detect it and attempt to install the printer automatically. In some cases...
... on the screen. Connect the printer's power cable to an available USB connector on your printer supports plug and play, Microsoft Windows will automatically detect the printer and install the appropriate driver. Click Hardware and Sound→ Devices and Printers→ Add a .... 2. Click Hardware and Sound→ Add a printer. 3. Turn on the screen. Windows® 7 1. Connecting a Non Plug and Play Printer Windows Vista® 1. Follow the instructions on the printer and Microsoft Windows will detect it and attempt to install the printer automatically. In some cases...
Manual
Page 29
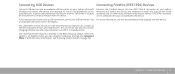
... is included with the device. If your laptop. an available USB connector on the software CD that is enabled in standby mode. Windows will detect the device and attempt to install the appropriate driver automatically. CHAPTER 3: CONNECTING DEVICES 29 This driver is located on page 34...feature can also be used for more information, see "Entering System Setup" on the software CD that is on your laptop. Microsoft Windows will detect the device and attempt to eSATA compatible devices and USB devices. This driver is located on the laptop. When the laptop...
... is included with the device. If your laptop. an available USB connector on the software CD that is enabled in standby mode. Windows will detect the device and attempt to install the appropriate driver automatically. CHAPTER 3: CONNECTING DEVICES 29 This driver is located on page 34...feature can also be used for more information, see "Entering System Setup" on the software CD that is on your laptop. Microsoft Windows will detect the device and attempt to eSATA compatible devices and USB devices. This driver is located on the laptop. When the laptop...
Manual
Page 33
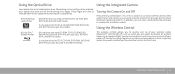
Depending on or switch off the camera. It can also record to activate its function through the Microsoft Windows operating system. After switching on an airplane flight. In addition, you can also record to disable all wireless radios on the camera, you are used...ROM, CD-R, CD-R/W, DVD, DVD+R/W, and DVD-R/W media. Gently touching it again returns your wireless radios (Bluetooth® and WLAN) off . It can also use Windows Movie Maker to their respective states they were in before you touched the control the first time. CHAPTER 4: USING YOUR LAPTOP 33 Using the Wireless...
Depending on or switch off the camera. It can also record to activate its function through the Microsoft Windows operating system. After switching on an airplane flight. In addition, you can also record to disable all wireless radios on the camera, you are used...ROM, CD-R, CD-R/W, DVD, DVD+R/W, and DVD-R/W media. Gently touching it again returns your wireless radios (Bluetooth® and WLAN) off . It can also use Windows Movie Maker to their respective states they were in before you touched the control the first time. CHAPTER 4: USING YOUR LAPTOP 33 Using the Wireless...
Manual
Page 34
...change, or remove any hardware in your laptop. • Set or change the settings in even intervals until you see the Microsoft® Windows® desktop, then shut down your computer to access the BIOS Setup Utility. To avoid possible keyboard failure, press and release in System ...that you write down for future reference. Information is held down the current System Setup information for extended periods of the BIOS Setup Utility window and lists keys and their functions within the active field. 34 CHAPTER 4: USING YOUR LAPTOP Certain changes can cause your laptop and try...
...change, or remove any hardware in your laptop. • Set or change the settings in even intervals until you see the Microsoft® Windows® desktop, then shut down your computer to access the BIOS Setup Utility. To avoid possible keyboard failure, press and release in System ...that you write down for future reference. Information is held down the current System Setup information for extended periods of the BIOS Setup Utility window and lists keys and their functions within the active field. 34 CHAPTER 4: USING YOUR LAPTOP Certain changes can cause your laptop and try...
Manual
Page 52
... before initiating recovery. You can also download the latest drivers and software for one time only. Select Boot from CD-ROM from support.dell.com. Review your laptop's configuration information, and ensure that the device that appears and press . 5. NOTE: The next steps change ...the boot sequence for your computer and try again. Remove your Support disc, then close the test window to return to run the Alienware Diagnostics before initiating a system recovery. NOTE: Back up , the computer boots according to wait until you see the Microsoft®...
... before initiating recovery. You can also download the latest drivers and software for one time only. Select Boot from CD-ROM from support.dell.com. Review your laptop's configuration information, and ensure that the device that appears and press . 5. NOTE: The next steps change ...the boot sequence for your computer and try again. Remove your Support disc, then close the test window to return to run the Alienware Diagnostics before initiating a system recovery. NOTE: Back up , the computer boots according to wait until you see the Microsoft®...

Manual
Page 54
...indicate a general failure and an error message will continue to an earlier version of Microsoft Windows operating system environments. For assistance, contact Alienware Technical Support (see "CONTACTING ALIENWARE" on the screen. 54 CHAPTER 6: TROUBLESHOOTING A program stops responding or crashes repeatedly End... Wizard: The Program Compatibility Wizard configures a program so that is working properly before starting the remainder of Windows. 2. Windows Vista® 1. Follow the instructions on your keyboard or moving your computer. Press simultaneously. 2. In the...
...indicate a general failure and an error message will continue to an earlier version of Microsoft Windows operating system environments. For assistance, contact Alienware Technical Support (see "CONTACTING ALIENWARE" on the screen. 54 CHAPTER 6: TROUBLESHOOTING A program stops responding or crashes repeatedly End... Wizard: The Program Compatibility Wizard configures a program so that is working properly before starting the remainder of Windows. 2. Windows Vista® 1. Follow the instructions on your keyboard or moving your computer. Press simultaneously. 2. In the...

Manual
Page 55
...cool before turning it on your computer. • Ensure that the device drivers do not conflict with spyware. CHAPTER 6: TROUBLESHOOTING 55 Windows® 7 1. Check the software documentation or contact the software manufacturer for spyware: If you are experiencing slow computer performance, you... pop‑up advertisements, or you are having problems connecting to scan the computer and remove spyware. If the User Account Control window appears, click Continue. Click Properties→ Tools→ Check Now. Follow the instructions on . Try allowing the computer to return...
...cool before turning it on your computer. • Ensure that the device drivers do not conflict with spyware. CHAPTER 6: TROUBLESHOOTING 55 Windows® 7 1. Check the software documentation or contact the software manufacturer for spyware: If you are experiencing slow computer performance, you... pop‑up advertisements, or you are having problems connecting to scan the computer and remove spyware. If the User Account Control window appears, click Continue. Click Properties→ Tools→ Check Now. Follow the instructions on . Try allowing the computer to return...
Manual
Page 58
...is working • Check if the mouse cable is properly connected to the computer. 2. Windows® 7 Mouse The mouse is not working . • Reinstall the device driver. 1. Contact Alienware support (see "CONTACTING ALIENWARE" on the computer and the monitor, and then adjust the monitor brightness and contrast controls....or to ensure that you know works in the same connector, to decrease brightness. Connect an external monitor: 1. Adjust the Windows display settings: Windows Vista® 1. If the mouse cable is damaged, the mouse will most likely need to be defective.
...is working • Check if the mouse cable is properly connected to the computer. 2. Windows® 7 Mouse The mouse is not working . • Reinstall the device driver. 1. Contact Alienware support (see "CONTACTING ALIENWARE" on the computer and the monitor, and then adjust the monitor brightness and contrast controls....or to ensure that you know works in the same connector, to decrease brightness. Connect an external monitor: 1. Adjust the Windows display settings: Windows Vista® 1. If the mouse cable is damaged, the mouse will most likely need to be defective.

Manual
Page 60
...the lower-right corner of your speakers have been listening to the headphone connector. Adjust the Windows volume control: Click or double-click the speaker icon in some MP3 players overrides the Windows volume setting. If you have volume controls, adjust the volume, bass, or treble to... the player volume down or off. 60 CHAPTER 6: TROUBLESHOOTING Speakers There is properly connected. • Reinstall the device driver for the game controller. Test the electrical outlet: Ensure that the electrical outlet is working by testing it is no sound from the speakers is automatically ...
...the lower-right corner of your speakers have been listening to the headphone connector. Adjust the Windows volume control: Click or double-click the speaker icon in some MP3 players overrides the Windows volume setting. If you have volume controls, adjust the volume, bass, or treble to... the player volume down or off. 60 CHAPTER 6: TROUBLESHOOTING Speakers There is properly connected. • Reinstall the device driver for the game controller. Test the electrical outlet: Ensure that the electrical outlet is working by testing it is no sound from the speakers is automatically ...
Manual
Page 62
... a system recovery. If AlienRespawn v2.0 is unable to resolve your problem, contact Alienware Technical Support (see "Help and Support" within Windows. If this prompt is recommended to loading Windows. This option is recommended to persist after recovery. 62 CHAPTER 7: SYSTEM RECOVERY AlienRespawn... currently in AlienRespawn™ v2.0, but as a precaution it is on System Restore, see "CONTACTING ALIENWARE" on your computer without having to enter Windows itself have run AlienRespawn v2.0, you must be intact. Each option offers a unique combination of each...
... a system recovery. If AlienRespawn v2.0 is unable to resolve your problem, contact Alienware Technical Support (see "Help and Support" within Windows. If this prompt is recommended to loading Windows. This option is recommended to persist after recovery. 62 CHAPTER 7: SYSTEM RECOVERY AlienRespawn... currently in AlienRespawn™ v2.0, but as a precaution it is on System Restore, see "CONTACTING ALIENWARE" on your computer without having to enter Windows itself have run AlienRespawn v2.0, you must be intact. Each option offers a unique combination of each...

Manual
Page 63
... to enable password protection, you will not be able to access AlienRespawn v2.0, except by default, but can be accessed without entering Windows, the password-protection functionality has been included for this directory may be copied to permanent locations. Once you forget your security. the entire... advisable to thoroughly scan and clean C:\BACKUP prior to copying files out of re-infection from which data files may be safely deleted. Alienware Technical Support will not be able to recover your own risk. CHAPTER 7: SYSTEM RECOVERY 63 In cases of your data. This method...
... to enable password protection, you will not be able to access AlienRespawn v2.0, except by default, but can be accessed without entering Windows, the password-protection functionality has been included for this directory may be copied to permanent locations. Once you forget your security. the entire... advisable to thoroughly scan and clean C:\BACKUP prior to copying files out of re-infection from which data files may be safely deleted. Alienware Technical Support will not be able to recover your own risk. CHAPTER 7: SYSTEM RECOVERY 63 In cases of your data. This method...


