
Me and My For Inspiron XPS and Alienware computers
Page 3
... the internet using WLAN...7 Connecting to the internet using WWAN...8 Setting up audio...8 Configuring 5.1 and 7.1 audio...8 Connecting 5.1 speakers...9 Connecting 7.1 speakers...10 Setting up your printer...10 Windows 10 and 8.1...10 Windows 7...11 Setting up your webcam...11 Integrated webcam...11 External webcam...11 Setting up Bluetooth...11 Connecting multiple monitors...11 Windows 10...11 Windows 8...12 Windows 7...12 2 About your computer...13 Power adapter...13 Battery...13 Coin-cell battery...14 Touchpad...14 Display...14 Touch screen...14 3D...14 Wireless display...
... the internet using WLAN...7 Connecting to the internet using WWAN...8 Setting up audio...8 Configuring 5.1 and 7.1 audio...8 Connecting 5.1 speakers...9 Connecting 7.1 speakers...10 Setting up your printer...10 Windows 10 and 8.1...10 Windows 7...11 Setting up your webcam...11 Integrated webcam...11 External webcam...11 Setting up Bluetooth...11 Connecting multiple monitors...11 Windows 10...11 Windows 8...12 Windows 7...12 2 About your computer...13 Power adapter...13 Battery...13 Coin-cell battery...14 Touchpad...14 Display...14 Touch screen...14 3D...14 Wireless display...
Me and My For Inspiron XPS and Alienware computers
Page 7
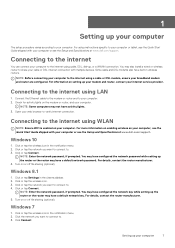
... configured. Turn on your computer, see the Quick Start Guide shipped with your computer or see the Setup and Specifications at www.dell.com/support. You may not have a default network key. Open your web browser to share your cable or DSL internet connection with your computer or see the Quick Start Guide shipped with multiple devices. Windows 10 1. Click or tap the wireless icon in the notification menu. 2. NOTE: Enter the network password...
... configured. Turn on your computer, see the Quick Start Guide shipped with your computer or see the Setup and Specifications at www.dell.com/support. You may not have a default network key. Open your web browser to share your cable or DSL internet connection with your computer or see the Quick Start Guide shipped with multiple devices. Windows 10 1. Click or tap the wireless icon in the notification menu. 2. NOTE: Enter the network password...
Me and My For Inspiron XPS and Alienware computers
Page 8
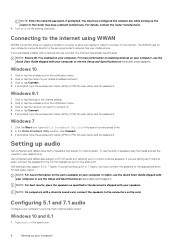
... have configured the network key while setting up audio Dell computers and tablets have a default network key. If you purchased a tablet with your computer or see the Setup and Specifications at www.dell.com/support. If you are setting up 2‑channel audio, connect the speakers to allow your speakers. Click or tap the wireless icon in the charms sidebar. 2. If prompted, type the access point name (APN) or PIN, the user name...
... have configured the network key while setting up audio Dell computers and tablets have a default network key. If you purchased a tablet with your computer or see the Setup and Specifications at www.dell.com/support. If you are setting up 2‑channel audio, connect the speakers to allow your speakers. Click or tap the wireless icon in the charms sidebar. 2. If prompted, type the access point name (APN) or PIN, the user name...
Me and My For Inspiron XPS and Alienware computers
Page 11
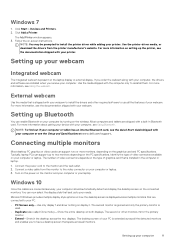
Follow the on the connected monitors. External webcam Use the media that is installed in Bluetooth card. Connect the power cord to reinstall them. Windows 10 Once the cables are installed when you receive your computer. If you to your webcam. For more information, see the Setup and Specifications at www.dell.com/support. Setting up Bluetooth You can support two or more information on the wireless. Most computers and...
Follow the on the connected monitors. External webcam Use the media that is installed in Bluetooth card. Connect the power cord to reinstall them. Windows 10 Once the cables are installed when you receive your computer. If you to your webcam. For more information, see the Setup and Specifications at www.dell.com/support. Setting up Bluetooth You can support two or more information on the wireless. Most computers and...
Me and My For Inspiron XPS and Alienware computers
Page 17
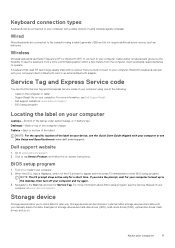
... laptop under system badge, or in Bluetooth card or an external Bluetooth adapter. For more information about BIOS setup program, see the Setup and Specifications at www.dell.com/support. Wired Wired keyboards are hard‑disk drives (HDD), solid‑state drives (SSD), optical-disc drives, flash drives, and so on your computer 17 Wireless Wireless keyboards use . About your device, see the Quick Start Guide shipped with a cable (wired) or using a cable (generally USB) and do not require additional power source, such as...
... laptop under system badge, or in Bluetooth card or an external Bluetooth adapter. For more information about BIOS setup program, see the Setup and Specifications at www.dell.com/support. Wired Wired keyboards are hard‑disk drives (HDD), solid‑state drives (SSD), optical-disc drives, flash drives, and so on your computer 17 Wireless Wireless keyboards use . About your device, see the Quick Start Guide shipped with a cable (wired) or using a cable (generally USB) and do not require additional power source, such as...

Me and My For Inspiron XPS and Alienware computers
Page 20
... board. Processor Processors receive data and instructions from applications and process the data as requested by the software. The system board holds various controllers and connectors that your computer Generally, the chipset is part of computers. All other . Processors are : • Processor socket • Memory-module connectors • Expansion‑card slots • CMOS to the processors designed for desktops, laptops, mobile devices, and so on the system board and enables...
... board. Processor Processors receive data and instructions from applications and process the data as requested by the software. The system board holds various controllers and connectors that your computer Generally, the chipset is part of computers. All other . Processors are : • Processor socket • Memory-module connectors • Expansion‑card slots • CMOS to the processors designed for desktops, laptops, mobile devices, and so on the system board and enables...
Me and My For Inspiron XPS and Alienware computers
Page 22
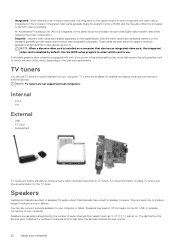
... as internal or external devices. However, they support such as; 2, 2.1, 5.1, 7.1, and so on . Discrete video cards are installed separately on the processor. Speakers are best suited for the TV tuner. These cards are generally categorized by default. Switchable graphics allow computers equipped with both a low‑power integrated graphics chip, and a high‑power discrete graphics card to indicate errors or failures. Use the BIOS setup program to select which card to use TV...
... as internal or external devices. However, they support such as; 2, 2.1, 5.1, 7.1, and so on . Discrete video cards are installed separately on the processor. Speakers are best suited for the TV tuner. These cards are generally categorized by default. Switchable graphics allow computers equipped with both a low‑power integrated graphics chip, and a high‑power discrete graphics card to indicate errors or failures. Use the BIOS setup program to select which card to use TV...
Me and My For Inspiron XPS and Alienware computers
Page 33
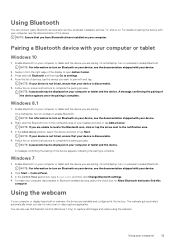
... on wireless to complete the pairing process. NOTE: For information to turn on -screen instructions to enable Bluetooth. Using Bluetooth You can also use Dell Webcam Central (Windows 7 only) to capture still images and videos using the webcam. Press and hold Bluetooth and then tap Go to pair with your taskbar and click or tap Add a Device. From the list of the display to open Action Center. 3. NOTE...
... on wireless to complete the pairing process. NOTE: For information to turn on -screen instructions to enable Bluetooth. Using Bluetooth You can also use Dell Webcam Central (Windows 7 only) to capture still images and videos using the webcam. Press and hold Bluetooth and then tap Go to pair with your taskbar and click or tap Add a Device. From the list of the display to open Action Center. 3. NOTE...
Me and My For Inspiron XPS and Alienware computers
Page 37
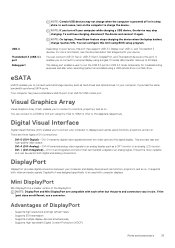
... can connect USB 3.1 Gen 2, USB 3.1 Gen 1, DisplayPort, and Thunderbolt devices to a HDMI or DVI port using a USB optical drive or a flash drive. You can be used in USB 2.0 mode temporarily for troubleshooting purposes and also when operating system is more information, see the documentation that can connect to this limit using dongles. Provides data transfer rates up to monitors, projectors, and so on . The debug port enables a user to run the USB 3.0 ports in both video and audio...
... can connect USB 3.1 Gen 2, USB 3.1 Gen 1, DisplayPort, and Thunderbolt devices to a HDMI or DVI port using a USB optical drive or a flash drive. You can be used in USB 2.0 mode temporarily for troubleshooting purposes and also when operating system is more information, see the documentation that can connect to this limit using dongles. Provides data transfer rates up to monitors, projectors, and so on . The debug port enables a user to run the USB 3.0 ports in both video and audio...
Me and My For Inspiron XPS and Alienware computers
Page 40
... support • on selected models. You can also find articles and FAQs on the most common problems and instructions on the Start screen. • Windows 7-Click Start > All Programs > Dell > My Dell > My Dell. • Windows 8.1- Solution Station offerings Type Warranty and ongoing care Offerings Extend warranty or service, contact Dell Tech Concierge Installations and setup Computer setup Wireless network setup Software installation Windows operating system installation Internal hardware upgrades TV and home theater installation Anti-virus installation Internet and email setup...
... support • on selected models. You can also find articles and FAQs on the most common problems and instructions on the Start screen. • Windows 7-Click Start > All Programs > Dell > My Dell > My Dell. • Windows 8.1- Solution Station offerings Type Warranty and ongoing care Offerings Extend warranty or service, contact Dell Tech Concierge Installations and setup Computer setup Wireless network setup Software installation Windows operating system installation Internal hardware upgrades TV and home theater installation Anti-virus installation Internet and email setup...

Me and My For Inspiron XPS and Alienware computers
Page 52
... configuration information after resetting the password. Entering BIOS setup program 1. During POST, when the DELL logo is lost or forgotten BIOS passwords. You can appear very quickly, so you add, change a user-selectable option such as the user password. • Determine the devices installed on your computer. Use one of hard drive, and so on . If you have changed any hardware in BIOS setup program may need to : • Set or change , or remove any BIOS settings, you see the Service Manual...
... configuration information after resetting the password. Entering BIOS setup program 1. During POST, when the DELL logo is lost or forgotten BIOS passwords. You can appear very quickly, so you add, change a user-selectable option such as the user password. • Determine the devices installed on your computer. Use one of hard drive, and so on . If you have changed any hardware in BIOS setup program may need to : • Set or change , or remove any BIOS settings, you see the Service Manual...
Me and My For Inspiron XPS and Alienware computers
Page 56
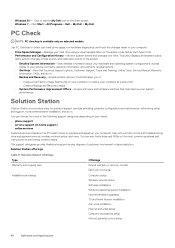
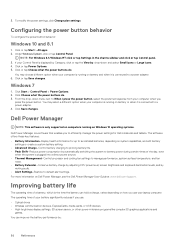
... to battery power during certain times of the day, even when the system is a software that enables you use your Control Panel is connected to a power adapter. 4. Click or tap Save changes. From the drop-down and select Small icons or Large icons. 4. Improving battery life The operating time of your computer when you use : • Optical drives • Wireless communication devices, ExpressCards, media cards, or USB devices. • High-brightness display settings, 3D screen...
... to battery power during certain times of the day, even when the system is a software that enables you use your Control Panel is connected to a power adapter. 4. Click or tap Save changes. From the drop-down and select Small icons or Large icons. 4. Improving battery life The operating time of your computer when you use : • Optical drives • Wireless communication devices, ExpressCards, media cards, or USB devices. • High-brightness display settings, 3D screen...
Service Manual
Page 5
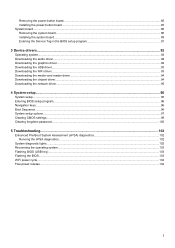
...91 3 Device drivers...92 Operating system...92 Downloading the audio driver...92 Downloading the graphics driver...92 Downloading the USB driver...93 Downloading the WiFi driver...93 Downloading the media-card reader driver...94 Downloading the chipset driver...94 Downloading the network driver...95 4 System setup...96 System setup...96 Entering BIOS setup program...96 Navigation keys...96 Boot Sequence...96 System setup options...97 Clearing CMOS settings...99 Clearing forgotten password...100 5 Troubleshooting...102 Enhanced Pre-Boot System Assessment (ePSA) diagnostics 102 Running the ePSA...
...91 3 Device drivers...92 Operating system...92 Downloading the audio driver...92 Downloading the graphics driver...92 Downloading the USB driver...93 Downloading the WiFi driver...93 Downloading the media-card reader driver...94 Downloading the chipset driver...94 Downloading the network driver...95 4 System setup...96 System setup...96 Entering BIOS setup program...96 Navigation keys...96 Boot Sequence...96 System setup options...97 Clearing CMOS settings...99 Clearing forgotten password...100 5 Troubleshooting...102 Enhanced Pre-Boot System Assessment (ePSA) diagnostics 102 Running the ePSA...

Service Manual
Page 92
.... 7. NOTE: Not all drivers and updates identified. Downloading the graphics driver Steps 1. Click Audio in the drop-down list. 15. Double-click the audio driver file icon and follow the instructions on -screen instructions for My System. 9. If necessary, your computer model. 4. Go to use the auto-detect feature or manually browse for your computer starts to install the driver. Enter the Service Tag of your computer model. 4. Review and agree to...
.... 7. NOTE: Not all drivers and updates identified. Downloading the graphics driver Steps 1. Click Audio in the drop-down list. 15. Double-click the audio driver file icon and follow the instructions on -screen instructions for My System. 9. If necessary, your computer model. 4. Go to use the auto-detect feature or manually browse for your computer starts to install the driver. Enter the Service Tag of your computer model. 4. Review and agree to...

Service Manual
Page 93
... Video in the drop-down list. 15. Go to www.dell.com/support. 3. Click Drivers & downloads. 5. If necessary, your computer starts to make changes on the screen to identify if manual installation is complete, navigate to save the files. 11. Review the installation summary to install the driver. Downloading the WiFi driver Steps 1. Click the Detect Drivers button. 6. If prompted, approve requests from User Account Control to download and install SupportAssist. 93 Double-click the USB driver...
... Video in the drop-down list. 15. Go to www.dell.com/support. 3. Click Drivers & downloads. 5. If necessary, your computer starts to make changes on the screen to identify if manual installation is complete, navigate to save the files. 11. Review the installation summary to install the driver. Downloading the WiFi driver Steps 1. Click the Detect Drivers button. 6. If prompted, approve requests from User Account Control to download and install SupportAssist. 93 Double-click the USB driver...

Service Manual
Page 94
....dell.com/support. 3. Enter the Service Tag of your computer, and then click Submit. Click Network in the drop-down list. 15. Click View Drivers for My System. 9. If prompted, approve requests from User Account Control to make changes on your computer. 2. After the download is necessary. 13. Go to download the media-card reader driver for browser-specific instructions. 8. The application installs all drivers and updates identified. Downloading the chipset driver Steps 1. For manual download...
....dell.com/support. 3. Enter the Service Tag of your computer, and then click Submit. Click Network in the drop-down list. 15. Click View Drivers for My System. 9. If prompted, approve requests from User Account Control to make changes on your computer. 2. After the download is necessary. 13. Go to download the media-card reader driver for browser-specific instructions. 8. The application installs all drivers and updates identified. Downloading the chipset driver Steps 1. For manual download...

Service Manual
Page 95
... prompted, approve requests from User Account Control to make changes on -screen instructions for browser-specific instructions. 8. Click Chipset in the drop-down list. 15. Downloading the network driver Steps 1. Click the Detect Drivers button. 6. Review and agree to the Terms and Conditions to use the auto-detect feature or manually browse for your computer model. 4. NOTE: Not all files can be installed automatically. For manual download and installation, click Category. 14...
... prompted, approve requests from User Account Control to make changes on -screen instructions for browser-specific instructions. 8. Click Chipset in the drop-down list. 15. Downloading the network driver Steps 1. Click the Detect Drivers button. 6. Review and agree to the Terms and Conditions to use the auto-detect feature or manually browse for your computer model. 4. NOTE: Not all files can be installed automatically. For manual download and installation, click Category. 14...

Service Manual
Page 96
... Turn on Self Test (POST), when the Dell logo appears, you can: • Access System Setup by pressing F2 key • Bring up the one-time boot menu by pressing F12 key The one-time boot menu displays the devices that you write down list, if applicable. System setup CAUTION: Unless you can boot from including the diagnostic option. NOTE: Before you change a user-selectable option, such as the user password, type of the hard drive...
... Turn on Self Test (POST), when the Dell logo appears, you can: • Access System Setup by pressing F2 key • Bring up the one-time boot menu by pressing F12 key The one-time boot menu displays the devices that you write down list, if applicable. System setup CAUTION: Unless you can boot from including the diagnostic option. NOTE: Before you change a user-selectable option, such as the user password, type of the hard drive...
Service Manual
Page 98
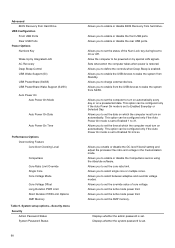
... admin password is restored. Allows you to set to Enabled 1 to wake the system from Hard Drive USB Configuration Front USB Ports Rear USB Ports Power Options Numlock Key Wake Up by special LAN signals. Allows you to enable or disable the rear USB ports. Allows you to select single core or multiple cores. Allows you to set to enable or disable the Computrace service using the Absolute software. Displays whether the system password is set the time at which the computer must turn...
... admin password is restored. Allows you to set to Enabled 1 to wake the system from Hard Drive USB Configuration Front USB Ports Rear USB Ports Power Options Numlock Key Wake Up by special LAN signals. Allows you to enable or disable the rear USB ports. Allows you to select single core or multiple cores. Allows you to set to enable or disable the Computrace service using the Absolute software. Displays whether the system password is set the time at which the computer must turn...
Service Manual
Page 103
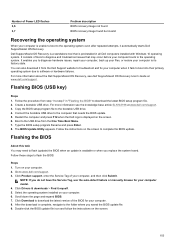
.... 2. Type the BIOS setup program filename and press Enter. 8. Click Drivers & downloads > Find it fails to boot into their primary operating system due to flash the BIOS: Steps 1. For more information about the Dell SupportAssist OS Recovery, see the knowledge base article SLN143196 at www.dell.com/support. Flashing BIOS (USB key) Steps 1. Number of your computer, and then click Submit. Click Product support, enter the Service Tag of Power LED flashes 3,6 3,7 Problem description BIOS recovery image not found BIOS recovery image...
.... 2. Type the BIOS setup program filename and press Enter. 8. Click Drivers & downloads > Find it fails to boot into their primary operating system due to flash the BIOS: Steps 1. For more information about the Dell SupportAssist OS Recovery, see the knowledge base article SLN143196 at www.dell.com/support. Flashing BIOS (USB key) Steps 1. Number of your computer, and then click Submit. Click Product support, enter the Service Tag of Power LED flashes 3,6 3,7 Problem description BIOS recovery image not found BIOS recovery image...


