WLAN solutions for HP enterprise notebooks and Tablet PCs
Page 4
... and Smart Card technology. Defined as part of the IEEE 802.11 family of WLAN specifications, WEP security was intended to make wireless networks as secure as 802.1x and the ability to import and export WLAN profiles-can be used for WEP. Manageability features of HP WLAN solutions include: Restricted user rights User rights to certain settings may be restricted...
... and Smart Card technology. Defined as part of the IEEE 802.11 family of WLAN specifications, WEP security was intended to make wireless networks as secure as 802.1x and the ability to import and export WLAN profiles-can be used for WEP. Manageability features of HP WLAN solutions include: Restricted user rights User rights to certain settings may be restricted...

Reference Guide
Page 5
... an Audio Device 5-3 To Connect a TV to Your Notebook (Select Models Only 5-4 Switching the Display to the External Monitor (Select Models Only 5-5 To Connect a 1394 Device (Select Models Only 5-7 To Connect an Infrared Device (Select Models Only 5-7 Installing Additional RAM (Memory 5-9 To Install a RAM Expansion Module 5-9 To Remove a RAM Expansion Module 5-10 Replacing the Hard Drive 5-12 To Replace the Hard Drive 5-12 To Replace the Hard Drive Holder 5-13 To Prepare a New Hard Drive 5-14 6 Troubleshooting Troubleshooting Your Notebook 6-1 Audio Problems 6-2 CD-ROM and DVD...
... an Audio Device 5-3 To Connect a TV to Your Notebook (Select Models Only 5-4 Switching the Display to the External Monitor (Select Models Only 5-5 To Connect a 1394 Device (Select Models Only 5-7 To Connect an Infrared Device (Select Models Only 5-7 Installing Additional RAM (Memory 5-9 To Install a RAM Expansion Module 5-9 To Remove a RAM Expansion Module 5-10 Replacing the Hard Drive 5-12 To Replace the Hard Drive 5-12 To Replace the Hard Drive Holder 5-13 To Prepare a New Hard Drive 5-14 6 Troubleshooting Troubleshooting Your Notebook 6-1 Audio Problems 6-2 CD-ROM and DVD...

Reference Guide
Page 9
...) e Volume control r Audio mute button and audio mute light t Diskette drive (select models only) Reference Guide 1-3 Getting Started with Your Notebook Left Panel and Back Panel Components 1 AC adapter jack 2 Universal serial bus (USB) ports 3 RJ-45 jack: connects a network cable 4 S-Video out jack (select models only) 5 Parallel port (LPT1): use this port for a parallel printer or other parallel device (select models only) 6 Serial port (COM1): use this port for a serial mouse, modem, printer, or other serial device (select models only) 7 External monitor port 8 Cable lock slot (security...
...) e Volume control r Audio mute button and audio mute light t Diskette drive (select models only) Reference Guide 1-3 Getting Started with Your Notebook Left Panel and Back Panel Components 1 AC adapter jack 2 Universal serial bus (USB) ports 3 RJ-45 jack: connects a network cable 4 S-Video out jack (select models only) 5 Parallel port (LPT1): use this port for a parallel printer or other parallel device (select models only) 6 Serial port (COM1): use this port for a serial mouse, modem, printer, or other serial device (select models only) 7 External monitor port 8 Cable lock slot (security...

Reference Guide
Page 11
... status lights that report power and battery status, drive activity, and keyboard functions such as Caps Lock and Num Lock. Getting Started with Your Notebook Status Lights The notebook includes a number of the notebook. 1 Power mode ■ On-notebook is on (even if the display is off) ■ Blinking-notebook is in Standby ■ Off-notebook is off or in Hibernation 2 Hard drive activity On-notebook is accessing the hard drive 3 Battery status ■ Green-AC adapter is connected and the battery pack...
... status lights that report power and battery status, drive activity, and keyboard functions such as Caps Lock and Num Lock. Getting Started with Your Notebook Status Lights The notebook includes a number of the notebook. 1 Power mode ■ On-notebook is on (even if the display is off) ■ Blinking-notebook is in Standby ■ Off-notebook is off or in Hibernation 2 Hard drive activity On-notebook is accessing the hard drive 3 Battery status ■ Green-AC adapter is connected and the battery pack...

Reference Guide
Page 20
... internal hard drive. See "Configuring Your Notebook" in the "Troubleshooting" chapter in this guide. To Change the Boot Device The notebook normally boots from a diskette drive, a CD-ROM drive, or an internal network interface card. 1. Use the arrow keys to restart. Press the power button again to restart. -or- ■ Insert the tip of a paper clip into the reset button on the bottom of the notebook, then press the power button to select the boot device, then press enter. Select Start > Turn...
... internal hard drive. See "Configuring Your Notebook" in the "Troubleshooting" chapter in this guide. To Change the Boot Device The notebook normally boots from a diskette drive, a CD-ROM drive, or an internal network interface card. 1. Use the arrow keys to restart. Press the power button again to restart. -or- ■ Insert the tip of a paper clip into the reset button on the bottom of the notebook, then press the power button to select the boot device, then press enter. Select Start > Turn...

Reference Guide
Page 34
... of the keyboard). ■ If you are using a screen saver or other software that prevents the notebook from changing to Display-off or Standby mode after a time delay. ■ Do not disable Display-off or Standby timeouts. ■ If you use a screen saver, enable the option to shut off the display after a timeout period. Reference Guide 2-17 If you are not using an external monitor, set the Turn off monitor timeouts (for...
... of the keyboard). ■ If you are using a screen saver or other software that prevents the notebook from changing to Display-off or Standby mode after a time delay. ■ Do not disable Display-off or Standby timeouts. ■ If you use a screen saver, enable the option to shut off the display after a timeout period. Reference Guide 2-17 If you are not using an external monitor, set the Turn off monitor timeouts (for...

Reference Guide
Page 67
.... The system displays an error message asking for media. If a DVD Does Not Play with Two Displays If you are active, press the TV Now! Troubleshooting ■ Restart the system: remove the disc from the drive, and select Start > Turn Off Computer > Restart. ■ If you created the CD on a DVD/CD-RW combo-type drive, try using the Extended Desktop (dual displays), move the player window to one...
.... The system displays an error message asking for media. If a DVD Does Not Play with Two Displays If you are active, press the TV Now! Troubleshooting ■ Restart the system: remove the disc from the drive, and select Start > Turn Off Computer > Restart. ■ If you created the CD on a DVD/CD-RW combo-type drive, try using the Extended Desktop (dual displays), move the player window to one...
Reference Guide
Page 68
... optional S-Video port, you must activate the TV. In the BIOS Setup utility, try setting Video Display Device to Both in the System Devices menu. ■ If you are using a TV connected to its default setting of the notebook. ■ Remove and reinsert the hard drive. If necessary, connect the AC adapter, and make sure it is coming from elsewhere, such as from the fan or a PC Card drive. ■ Back up the drive immediately. If an External Display Does Not Work...
... optional S-Video port, you must activate the TV. In the BIOS Setup utility, try setting Video Display Device to Both in the System Devices menu. ■ If you are using a TV connected to its default setting of the notebook. ■ Remove and reinsert the hard drive. If necessary, connect the AC adapter, and make sure it is coming from elsewhere, such as from the fan or a PC Card drive. ■ Back up the drive immediately. If an External Display Does Not Work...

Reference Guide
Page 70
... the BIOS Setup utility. You can change this happens, try the following: press a key on the light. ■ Do not touch the TouchPad while the notebook is using the infrared port. Select Start > Control Panel > Performance and Maintenance > System. 2. See "Configuring Your Notebook" in or external devices. Troubleshooting ■ Check settings in pointing devices are normally disabled. If the TouchPad Does Not Work ■ Press the TouchPad on-off button to turn on the keyboard to Control Adjust the pointer controls. Select Start > Turn...
... the BIOS Setup utility. You can change this happens, try the following: press a key on the light. ■ Do not touch the TouchPad while the notebook is using the infrared port. Select Start > Control Panel > Performance and Maintenance > System. 2. See "Configuring Your Notebook" in or external devices. Troubleshooting ■ Check settings in pointing devices are normally disabled. If the TouchPad Does Not Work ■ Press the TouchPad on-off button to turn on the keyboard to Control Adjust the pointer controls. Select Start > Turn...

Reference Guide
Page 71
...-T operation, or Category 5 for a notebook. If it . Select Start > Control Panel > Performance and Maintenance > System. If the network interface is using IPX/SPX protocol, you type. Troubleshooting If the TouchPad Moves the Pointer or Cursor While You Type Press the TouchPad on-off button to turn off the TouchPad while you may need to force your network administrator. 6-8 Reference Guide Local Area Network (LAN) Problems If the Built-In Network Adapter Does Not Connect to...
...-T operation, or Category 5 for a notebook. If it . Select Start > Control Panel > Performance and Maintenance > System. If the network interface is using IPX/SPX protocol, you type. Troubleshooting If the TouchPad Moves the Pointer or Cursor While You Type Press the TouchPad on-off button to turn off the TouchPad while you may need to force your network administrator. 6-8 Reference Guide Local Area Network (LAN) Problems If the Built-In Network Adapter Does Not Connect to...

Reference Guide
Page 76
... the card functions properly. ■ Zoomed Video is not supported. ■ If the card requires an IRQ, make sure one is available. You must not use a digital line. Open the hardware Device Manager. Reference Guide 6-13 Select Start > Turn Off Computer > Restart. ■ Try the card in the Control Panel. PC Card (PCMCIA) Problems If the Notebook Does Not Recognize a PC Card ■ Remove and reinsert the PC Card. ■ Restart the notebook. Select Start > Control Panel > Performance and Maintenance > System. Troubleshooting...
... the card functions properly. ■ Zoomed Video is not supported. ■ If the card requires an IRQ, make sure one is available. You must not use a digital line. Open the hardware Device Manager. Reference Guide 6-13 Select Start > Turn Off Computer > Restart. ■ Try the card in the Control Panel. PC Card (PCMCIA) Problems If the Notebook Does Not Recognize a PC Card ■ Remove and reinsert the PC Card. ■ Restart the notebook. Select Start > Control Panel > Performance and Maintenance > System. Troubleshooting...

Reference Guide
Page 94
... repair the notebook, you can reinstall the operating system. Å WARNING: Personal data and software you have installed on the notebook. 2. Press and hold the power button for 5 seconds to set up your data, make a backup copy of the operating system without repairing. 9. When prompted, press any key to continue setup using this partition. Press enter to accept the agreement and continue. The Setup window is displayed. 7. Press enter to turn on the notebook...
... repair the notebook, you can reinstall the operating system. Å WARNING: Personal data and software you have installed on the notebook. 2. Press and hold the power button for 5 seconds to set up your data, make a backup copy of the operating system without repairing. 9. When prompted, press any key to continue setup using this partition. Press enter to accept the agreement and continue. The Setup window is displayed. 7. Press enter to turn on the notebook...

Reference Guide
Page 98
... port connecting a device 5-7 location 1-2 transferring files 5-8 troubleshooting 6-6 using the port 5-8 inserting battery pack 1-7 CD 2-10 DVD 2-10 PC Card 5-1 RAM (memory) 5-9 K keyboard status lights 1-2, 1-6 troubleshooting 6-7 keys ALT GR 2-9 Applications 2-8 Fn (Function) 2-6 Windows 2-8 L LAN connection 4-5 troubleshooting 6-8 left panel components 1-3 locking the hard drive 2-15 low-battery warning 3-4 M maintenance and care 2-15, 2-16, 2-17 mini PCI cover 1-4 modem AT commands 4-4 blackout periods 4-3 settings 4-4 troubleshooting 6-10 monitor resolution 5-5 N network jack, location...
... port connecting a device 5-7 location 1-2 transferring files 5-8 troubleshooting 6-6 using the port 5-8 inserting battery pack 1-7 CD 2-10 DVD 2-10 PC Card 5-1 RAM (memory) 5-9 K keyboard status lights 1-2, 1-6 troubleshooting 6-7 keys ALT GR 2-9 Applications 2-8 Fn (Function) 2-6 Windows 2-8 L LAN connection 4-5 troubleshooting 6-8 left panel components 1-3 locking the hard drive 2-15 low-battery warning 3-4 M maintenance and care 2-15, 2-16, 2-17 mini PCI cover 1-4 modem AT commands 4-4 blackout periods 4-3 settings 4-4 troubleshooting 6-10 monitor resolution 5-5 N network jack, location...

Reference Guide
Page 100
..., BIOS 6-24 setup utility 6-23 slot location cable lock 1-3 PC Card and CardBus 1-3 software, restoring 6-32 software, updating 6-28 Standby mode 2-2 status lights battery charge 1-5 hard drive 1-5 keyboard 1-2, 1-6 location 1-2 main 1-2, 1-5 meanings 1-5 wireless indicator 1-2 S-Video out jack location 1-3 using 5-4 switching the display, external monitor 5-5 system recovery 6-28 T telephone line connection 1-9 1394 port connecting 5-7 location 1-3 toggling built-in keypad 2-6 TouchPad 1-2, 2-4 functions 2-5 troubleshooting audio 6-2 battery packs 6-15 CD-ROM drive 6-3 display 6-4 DVD drive...
..., BIOS 6-24 setup utility 6-23 slot location cable lock 1-3 PC Card and CardBus 1-3 software, restoring 6-32 software, updating 6-28 Standby mode 2-2 status lights battery charge 1-5 hard drive 1-5 keyboard 1-2, 1-6 location 1-2 main 1-2, 1-5 meanings 1-5 wireless indicator 1-2 S-Video out jack location 1-3 using 5-4 switching the display, external monitor 5-5 system recovery 6-28 T telephone line connection 1-9 1394 port connecting 5-7 location 1-3 toggling built-in keypad 2-6 TouchPad 1-2, 2-4 functions 2-5 troubleshooting audio 6-2 battery packs 6-15 CD-ROM drive 6-3 display 6-4 DVD drive...
HP Compaq nx9020, nx9030 and nx9040 Notebook PCs- Startup Guide
Page 36
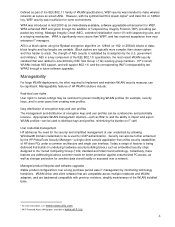
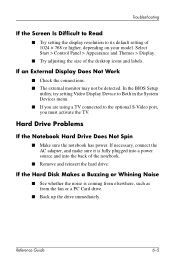
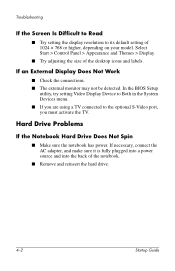
...; Try setting the display resolution to the optional S-Video port, you must activate the TV. In the BIOS Setup utility, try setting Video Display Device to Both in the System Devices menu. ■ If you are using a TV connected to its default setting of the notebook. ■ Remove and reinsert the hard drive. 4-2 Startup Guide Hard Drive Problems If the Notebook Hard Drive Does Not Spin ■ Make sure the notebook has power. If necessary, connect the AC adapter, and make sure it...
...; Try setting the display resolution to the optional S-Video port, you must activate the TV. In the BIOS Setup utility, try setting Video Display Device to Both in the System Devices menu. ■ If you are using a TV connected to its default setting of the notebook. ■ Remove and reinsert the hard drive. 4-2 Startup Guide Hard Drive Problems If the Notebook Hard Drive Does Not Spin ■ Make sure the notebook has power. If necessary, connect the AC adapter, and make sure it...

HP Compaq nx9020, nx9030 and nx9040 Notebook PCs- Startup Guide
Page 45
... CD reinstall. Press enter to continue installing a fresh copy of My Documents before reinstalling your files. A Licensing Agreement screen is displayed. 8. Press esc to continue. To reinstall the operating system: 1. Press the power button again to continue setup using this partition. Press C to start the notebook. 5. Connect the notebook to Setup screen opens. 6. The Setup window is displayed. 7. After a few minutes, the Welcome to external power and turn off the notebook. 4. Startup Guide 4-11 Immediately insert...
... CD reinstall. Press enter to continue installing a fresh copy of My Documents before reinstalling your files. A Licensing Agreement screen is displayed. 8. Press esc to continue. To reinstall the operating system: 1. Press the power button again to continue setup using this partition. Press C to start the notebook. 5. Connect the notebook to Setup screen opens. 6. The Setup window is displayed. 7. After a few minutes, the Welcome to external power and turn off the notebook. 4. Startup Guide 4-11 Immediately insert...

HP Compaq nx9020, nx9030 and nx9040 Notebook PCs- Startup Guide
Page 48
... Library CD 1-12 drivers reinstalling 4-12 DVD drive creating data disc 2-7 creating movie disc 2-7 location 1-3 playing movies 2-7 setting region code 2-7 E external monitor connecting 2-8 port location 1-4 F front panel components 1-3 function hot keys 2-6 H hard drive activity status light 1-6 location 1-3, 1-5 troubleshooting 4-2 Hibernation mode 2-2 hot keys 2-6 I identifying components 1-2 increasing display brightness 2-6 infrared port connecting a device 2-8 location 1-3 printing 2-9 transferring files 2-9 using the port 2-9 inserting the battery pack 1-8 K keyboard status lights...
... Library CD 1-12 drivers reinstalling 4-12 DVD drive creating data disc 2-7 creating movie disc 2-7 location 1-3 playing movies 2-7 setting region code 2-7 E external monitor connecting 2-8 port location 1-4 F front panel components 1-3 function hot keys 2-6 H hard drive activity status light 1-6 location 1-3, 1-5 troubleshooting 4-2 Hibernation mode 2-2 hot keys 2-6 I identifying components 1-2 increasing display brightness 2-6 infrared port connecting a device 2-8 location 1-3 printing 2-9 transferring files 2-9 using the port 2-9 inserting the battery pack 1-8 K keyboard status lights...

Startup Guide
Page 32
.... In the BIOS Setup utility, try setting Video Display Device to Both in Display-off mode. ■ If the notebook is cold, allow it is in the System Devices menu. ■ If you are using a TV connected to the optional S-Video port, you must activate the TV. 4-2 Startup Guide If the Screen Is Difficult to Read ■ Try setting the display resolution to warm up. Select Start > Control Panel > Appearance and Themes > Display. ■ Try adjusting the size...
.... In the BIOS Setup utility, try setting Video Display Device to Both in Display-off mode. ■ If the notebook is cold, allow it is in the System Devices menu. ■ If you are using a TV connected to the optional S-Video port, you must activate the TV. 4-2 Startup Guide If the Screen Is Difficult to Read ■ Try setting the display resolution to warm up. Select Start > Control Panel > Appearance and Themes > Display. ■ Try adjusting the size...

Startup Guide
Page 41
... power button for 5 seconds to set up your operating system. When prompted, press any key to Setup screen opens. 6. Press enter to turn on the notebook will be lost during the OS CD reinstall. Troubleshooting OS CD Reinstall If other recovery efforts do not successfully repair the notebook, you can reinstall the operating system. Å WARNING: Personal data and software you have installed on the notebook. 2. Visit Help and Support...
... power button for 5 seconds to set up your operating system. When prompted, press any key to Setup screen opens. 6. Press enter to turn on the notebook will be lost during the OS CD reinstall. Troubleshooting OS CD Reinstall If other recovery efforts do not successfully repair the notebook, you can reinstall the operating system. Å WARNING: Personal data and software you have installed on the notebook. 2. Visit Help and Support...

Startup Guide
Page 44
... Library CD 1-12 drivers reinstalling 4-12 DVD drive creating data disc 2-7 creating movie disc 2-7 location 1-3 playing movies 2-7 setting region code 2-7 E external monitor connecting 2-8 port location 1-4 F front panel components 1-3 function hot keys 2-6 H hard drive activity status light 1-6 location 1-3, 1-5 troubleshooting 4-3 Hibernation mode 2-2 hot keys 2-6 I identifying components 1-2 increasing display brightness 2-6 infrared port connecting a device 2-8 location 1-3 printing 2-9 transferring files 2-9 using the port 2-9 inserting the battery pack 1-8 K keyboard status lights...
... Library CD 1-12 drivers reinstalling 4-12 DVD drive creating data disc 2-7 creating movie disc 2-7 location 1-3 playing movies 2-7 setting region code 2-7 E external monitor connecting 2-8 port location 1-4 F front panel components 1-3 function hot keys 2-6 H hard drive activity status light 1-6 location 1-3, 1-5 troubleshooting 4-3 Hibernation mode 2-2 hot keys 2-6 I identifying components 1-2 increasing display brightness 2-6 infrared port connecting a device 2-8 location 1-3 printing 2-9 transferring files 2-9 using the port 2-9 inserting the battery pack 1-8 K keyboard status lights...


