ProtectTools (Select Models Only) - Windows Vista
Page 46
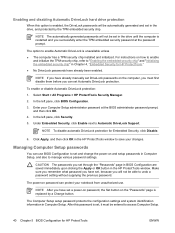
...and system identification information in the HP ProtectTools window. Enabling and disabling Automatic DriveLock hard drive protection When this password is set, it must first disable them before you have... be automatically generated and set and change the power-on password can protect your notebook from unauthorized use BIOS Configuration to save your Computer Setup administrator password at the ...All Programs > HP ProtectTools Security Manager. 2. Enter your changes. After this option is replaced by the TPM embedded security chip. NOTE If you can use . NOTE To disable...
...and system identification information in the HP ProtectTools window. Enabling and disabling Automatic DriveLock hard drive protection When this password is set, it must first disable them before you have... be automatically generated and set and change the power-on password can protect your notebook from unauthorized use BIOS Configuration to save your Computer Setup administrator password at the ...All Programs > HP ProtectTools Security Manager. 2. Enter your changes. After this option is replaced by the TPM embedded security chip. NOTE If you can use . NOTE To disable...
Client Management and Mobile Printing
Page 6
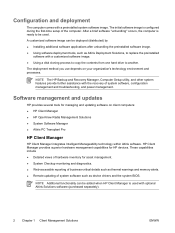
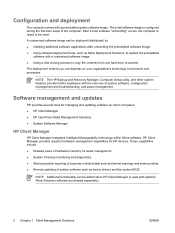
... HP Client Manager ● HP OpenView Radia Management Solutions ● System Software Manager ● Altiris PC Transplant Pro HP Client Manager HP Client Manager integrates Intelligent Manageability technology within Altiris software. NOTE The HP...and diagnostics. ● Web-accessible reporting of business-critical details such as Altiris Deployment Solutions, to replace the preinstalled software with a preinstalled system software image. Software management and updates HP provides several tools ... a disk cloning process to copy the contents from one hard drive to another.
... HP Client Manager ● HP OpenView Radia Management Solutions ● System Software Manager ● Altiris PC Transplant Pro HP Client Manager HP Client Manager integrates Intelligent Manageability technology within Altiris software. NOTE The HP...and diagnostics. ● Web-accessible reporting of business-critical details such as Altiris Deployment Solutions, to replace the preinstalled software with a preinstalled system software image. Software management and updates HP provides several tools ... a disk cloning process to copy the contents from one hard drive to another.
Client Management and Mobile Printing Solutions - Windows Vista
Page 6
... Manager is used . A customized software image can be used with a customized software image. ● Using a disk cloning process to copy the contents from one hard drive to replace the preinstalled software with optional Altiris Solutions software (purchased separately). 2 Chapter 1 Client Management Solutions ENWW These capabilities include ● Detailed views of hardware inventory for...
... Manager is used . A customized software image can be used with a customized software image. ● Using a disk cloning process to copy the contents from one hard drive to replace the preinstalled software with optional Altiris Solutions software (purchased separately). 2 Chapter 1 Client Management Solutions ENWW These capabilities include ● Detailed views of hardware inventory for...

Drives
Page 3
Table of contents 1 Drive care 2 Drive light 3 Hard drives HP Mobile Data Protection with digital accelerometer 5 HP Mobile Data Protection status 5 HP Mobile Data Protection software 6 Replacing the hard drive ...7 4 Optical drives(select models only) Inserting an optical disc ...14 Removing an optical disc (with power 15 Removing an optical disc (without power 16 Avoiding standby or hibernation ...17 5 External drives Optional external devices ...20 Optional External MultiBay and External MultiBay II 21 Index ...23 ENWW iii
Table of contents 1 Drive care 2 Drive light 3 Hard drives HP Mobile Data Protection with digital accelerometer 5 HP Mobile Data Protection status 5 HP Mobile Data Protection software 6 Replacing the hard drive ...7 4 Optical drives(select models only) Inserting an optical disc ...14 Removing an optical disc (with power 15 Removing an optical disc (without power 16 Avoiding standby or hibernation ...17 5 External drives Optional external devices ...20 Optional External MultiBay and External MultiBay II 21 Index ...23 ENWW iii

Drives
Page 11
.... 2. Unplug the power cord from the computer. 7. If you , loosen the 2 hard drive cover screws (1). 8. To remove the hard drive: 1. Then shut down the computer and close the display. 3. Turn the computer upside down the computer before removing the hard drive from the computer (2). 9. Replacing the hard drive CAUTION To prevent system lockup and loss of information: Shut down...
.... 2. Unplug the power cord from the computer. 7. If you , loosen the 2 hard drive cover screws (1). 8. To remove the hard drive: 1. Then shut down the computer and close the display. 3. Turn the computer upside down the computer before removing the hard drive from the computer (2). 9. Replacing the hard drive CAUTION To prevent system lockup and loss of information: Shut down...

Drives
Page 13
Lift the hard drive away from the computer. To install a hard drive: 1. Align the end of the hard drive cable with the hard drive cable connector (1) and press down gently until it is fully seated. 2. 13. ENWW Replacing the hard drive 9 Insert the hard drive into the hard drive bay until the hard drive cable snaps into place.
Lift the hard drive away from the computer. To install a hard drive: 1. Align the end of the hard drive cable with the hard drive cable connector (1) and press down gently until it is fully seated. 2. 13. ENWW Replacing the hard drive 9 Insert the hard drive into the hard drive bay until the hard drive cable snaps into place.

Drives
Page 14
Close the cover (2). 10 Chapter 3 Hard drives ENWW Tighten the hard drive retention bracket screws (2). 6. Replace the hard drive retention bracket (1). 5. 3. Align the tabs (1) on the hard drive cover with the notches on the computer. 7. Replace the hard drive cable connector screw (2). 4.
Close the cover (2). 10 Chapter 3 Hard drives ENWW Tighten the hard drive retention bracket screws (2). 6. Replace the hard drive retention bracket (1). 5. 3. Align the tabs (1) on the hard drive cover with the notches on the computer. 7. Replace the hard drive cable connector screw (2). 4.

Drives
Page 15
8. Tighten the hard drive cover screws (3). ENWW Replacing the hard drive 11
8. Tighten the hard drive cover screws (3). ENWW Replacing the hard drive 11

Drives
Page 27
... inserting 14 removing, with power 15 removing, without power 16 DVD drive 13, 19 E external drive 19 H hard disk drive external 19 HP Mobile Data Protection 5 installing 9 removing 7 replacing 7 hard drive external 19 HP Mobile Data Protection 5 installing 9 removing 7 replacing 7 hibernation 17 HP Mobile Data Protection 5 L light, drive 3, 5 M MultiBay 19, 21 O optical disc inserting 14 removing, with power 15...
... inserting 14 removing, with power 15 removing, without power 16 DVD drive 13, 19 E external drive 19 H hard disk drive external 19 HP Mobile Data Protection 5 installing 9 removing 7 replacing 7 hard drive external 19 HP Mobile Data Protection 5 installing 9 removing 7 replacing 7 hibernation 17 HP Mobile Data Protection 5 L light, drive 3, 5 M MultiBay 19, 21 O optical disc inserting 14 removing, with power 15...

Drives - Windows Vista
Page 3
... Mobile Data Protection 3D with digital accelerometer 4 HP Mobile Data Protection 3D status 4 HP Mobile Data Protection 3D software 4 Replacing the hard drive ...6 4 Optical drives (select models only) Inserting an optical disc ...12 Removing an optical disc when running on battery or external power 13 Removing an optical disc when ...
... Mobile Data Protection 3D with digital accelerometer 4 HP Mobile Data Protection 3D status 4 HP Mobile Data Protection 3D software 4 Replacing the hard drive ...6 4 Optical drives (select models only) Inserting an optical disc ...12 Removing an optical disc when running on battery or external power 13 Removing an optical disc when ...

Drives - Windows Vista
Page 10
.... 6. Then shut down the computer and close the display. 3. Shut down the computer through the operating system. Replacing the hard drive CAUTION To prevent system lockup and loss of information: Shut down the computer before removing the hard drive from the computer. 7. Save your work. 2. Turn the computer upside down on by pressing the power...
.... 6. Then shut down the computer and close the display. 3. Shut down the computer through the operating system. Replacing the hard drive CAUTION To prevent system lockup and loss of information: Shut down the computer before removing the hard drive from the computer. 7. Save your work. 2. Turn the computer upside down on by pressing the power...

Drives - Windows Vista
Page 11
Gently pull the end of the hard drive cable up to release the cable from the hard drive cable connector (2). Remove the hard drive retention bracket (2). 11. ENWW Replacing the hard drive 7 10. Remove the hard drive cable connector screw (1). 12.
Gently pull the end of the hard drive cable up to release the cable from the hard drive cable connector (2). Remove the hard drive retention bracket (2). 11. ENWW Replacing the hard drive 7 10. Remove the hard drive cable connector screw (1). 12.

Drives - Windows Vista
Page 13
3. Replace the hard drive cable connector screw (2). 4. Close the cover (2). Replace the hard drive retention bracket (1). 5. Tighten the hard drive retention bracket screws (2). 6. ENWW Replacing the hard drive 9 Align the tabs (1) on the hard drive cover with the notches on the computer. 7.
3. Replace the hard drive cable connector screw (2). 4. Close the cover (2). Replace the hard drive retention bracket (1). 5. Tighten the hard drive retention bracket screws (2). 6. ENWW Replacing the hard drive 9 Align the tabs (1) on the hard drive cover with the notches on the computer. 7.

Drives - Windows Vista
Page 23
... removing, without power 14 CD drive 11, 16 D digital accelerometer 4 diskette drive 16 drive light 2, 4 drives caring for 1 diskette 16 drive light 2 external 16 hard 6, 8, 16 MultiBay 16, 18 optical 11, 16 See also hard drive, optical drive DVD inserting 12 removing, with power 13 removing, without power 14 DVD drive 11, 16 removing 6 replacing 6 hard drive external 16 HP Mobile Data Protection...
... removing, without power 14 CD drive 11, 16 D digital accelerometer 4 diskette drive 16 drive light 2, 4 drives caring for 1 diskette 16 drive light 2 external 16 hard 6, 8, 16 MultiBay 16, 18 optical 11, 16 See also hard drive, optical drive DVD inserting 12 removing, with power 13 removing, without power 14 DVD drive 11, 16 removing 6 replacing 6 hard drive external 16 HP Mobile Data Protection...

Memory Modules
Page 13
Index H hard disk drive space 7 hard drive space 7 hibernation file 7 M memory displaying free space 7 increasing 7 replacing memory modules 1 memory module inserting 3 removing 2 replacing 1 memory module compartment cover removing 2 replacing 4 ENWW Index 9
Index H hard disk drive space 7 hard drive space 7 hibernation file 7 M memory displaying free space 7 increasing 7 replacing memory modules 1 memory module inserting 3 removing 2 replacing 1 memory module compartment cover removing 2 replacing 4 ENWW Index 9

Notebook Tour
Page 17
...soft surface, such as pillows or thick rugs or clothing, to block airflow. (4) Battery pack release latches (5) Battery bay (6) Hard drive bay (7) Business card holder (8) Mini Card compartment (9) Bluetooth compartment NOTE The computer fan starts up automatically to restore computer functionality...country, If you replace the device and then receive a warning message, remove the device to cool internal components and prevent overheating. ENWW Bottom components 13 Holds the hard drive. Holds a standard sized business card. Enable airflow to cycle on a hard, flat surface. ...
...soft surface, such as pillows or thick rugs or clothing, to block airflow. (4) Battery pack release latches (5) Battery bay (6) Hard drive bay (7) Business card holder (8) Mini Card compartment (9) Bluetooth compartment NOTE The computer fan starts up automatically to restore computer functionality...country, If you replace the device and then receive a warning message, remove the device to cool internal components and prevent overheating. ENWW Bottom components 13 Holds the hard drive. Holds a standard sized business card. Enable airflow to cycle on a hard, flat surface. ...

ProtectTools
Page 49
.... ENWW Advanced tasks 43 In the left pane, select Security. 5. Enter your notebook from unauthorized use BIOS Configuration to set and change the power-on the "Passwords" page is replaced by the TPM embedded security chip. CAUTION The passwords you have already been enabled....settings. Managing Computer Setup passwords You can protect your Computer Setup administrator password at the password prompt. Enabling and disabling Automatic DriveLock hard drive protection When this password is set, it must first disable them before you will not be entered to save your changes. ...
.... ENWW Advanced tasks 43 In the left pane, select Security. 5. Enter your notebook from unauthorized use BIOS Configuration to set and change the power-on the "Passwords" page is replaced by the TPM embedded security chip. CAUTION The passwords you have already been enabled....settings. Managing Computer Setup passwords You can protect your Computer Setup administrator password at the password prompt. Enabling and disabling Automatic DriveLock hard drive protection When this password is set, it must first disable them before you will not be entered to save your changes. ...


