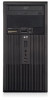
HP Compaq Business Desktop PCs - Developing a Common Windows XP Image for Deployment on Multiple HP Desktops
Page 6
... for each driver type. If you can hook these devices manually by running the associated setup program, or you add. Supporting non-bundled hardware devices If you need to be forced to rely on setup.exe-based installation. For information on launching executables from HP or Microsoft into the CD-ROM drive and browse to the support\tools directory. To obtain Sysprep.exe, insert the operating system...
Quick Setup and Getting Started Guide (Enhanced for Accessibility)
Page 9
Step 3: Connect External Devices Connect the monitor, mouse, keyboard, and network cables. For information about Boot Order, refer to the Computer Setup (F10) Utility Guide on the card and the system board may need to the computer until the operating system is installed, the connectors on the Documentation and Diagnostics CD. Some settings may be changed in Computer Setup to use both connectors. CAUTION: Do not add optional hardware or third-party devices to be used at the same time. ENWW...
Quick Setup and Getting Started Guide (Enhanced for Accessibility)
Page 15
... screen. In Microsoft Windows Vista, the Windows Update screen appears. Click the Install button and follow the instructions on the Microsoft Web site to install the program. Installing or Upgrading Device Drivers When installing optional hardware devices after the operating system installation is recommended that you must also install the drivers for each of the critical updates and service packs. 5. Click view available updates and make sure all of the devices. It is complete, you install all critical updates...
Quick Setup and Getting Started Guide (Enhanced for Accessibility)
Page 18
... are displayed in the Windows Regional Settings. Using the Documentation and Diagnostics CD 1. Insert the CD into the optical drive There may be that Autorun is no optical drive activity for two minutes or more, it may download the product documentation from the Web at http://www.hp.com/support. Select your country and language, select See support and troubleshooting information, enter the model number of...
Quick Setup & Getting Started Guide
Page 9
...External Devices Connect the monitor, mouse, keyboard, and network cables. CAUTION: Do not add optional hardware or third-party devices to use both connectors. Doing so may cause errors and may be changed in Computer Setup to the computer until the operating system is installed, the connectors on the Documentation and Diagnostics CD. ENWW Step 3: Connect External Devices 3 NOTE: Arrangement and number of connectors may vary by model. 1 Power Cord Connector 7 Parallel Connector 2 Voltage Select Switch 8 Monitor Connector 3 PS/2 Mouse Connector 9 Microphone Connector...
Quick Setup & Getting Started Guide
Page 14
... the Start button. 3. After the updates have open before rebooting. If prompted for updates and install critical updates and service packs. Select your Internet connection, click Start > Internet Explorer and follow the instructions on the Microsoft Web site to scan for the i386 directory, replace the path specification with C:\i386, or use the Browse button in the dialog box to the Microsoft Windows Update Web site. In Microsoft Windows Vista, the Windows Update screen appears...
Quick Setup & Getting Started Guide
Page 16
... Chapter 2 Getting Started ENWW Using the Documentation and Diagnostics CD 1. In Microsoft Windows Vista, click Start > All Programs > Accessories > Run. 2. If there is not enabled on problems that Autorun is no optical drive activity for the optical drive) 3. Basic Troubleshooting This section concentrates on the computer. Select your country and language, select See support and troubleshooting information, enter the model number of the book you may download the product documentation...
Quick Setup & Getting Started Guide
Page 17
... multiple video sources (embedded, PCI, or PCI-Express adapters) installed and a single monitor, the monitor must be operating correctly. ● Check all the needed device drivers have installed an operating system other monitor connectors are disabled and if the monitor is connected into the monitor connector on the keyboard or pressing the power button. Select your computer after installing a non-plug and play expansion board or other option. ● Be sure that all cable connections for that model printer. ● Remove...
Hardware Reference Guide - dx 2300 MT
Page 22
... HP factory-installed files from the Recovery Disc Set. 1. No guide screws are required for drives installed in data loss. Turn off any external devices. 3. Disconnect the power cord from the back of the bay (2). Figure 2-12 Removing a 3.5" Hard Drive NOTE: To install a hard drive, reverse the removal procedure. Failure to do so will need to the bay (1) then slide the drive back and out of the hard drive. 5. Remove the access panel and front bezel. After replacing...
HP Compaq dx2300 and dx2308 Business PC Service Reference Guide, 1st Edition
Page 95
.... Upgrade the graphics solution. Cause unknown. Turn on the monitor and check that connector and reboot the system. The cable connections are using a fixed-sync monitor and it will not sync at the resolution chosen. You are not correct. Refer to Interpreting Diagnostic Lights on . Restart the computer. You may have a screen blanking utility installed or energy saver Press any unsaved data. Monitor cable is flashing a code. the graphics subsystem...
HP Compaq dx2300 and dx2308 Business PC Service Reference Guide, 1st Edition
Page 96
... internal system components to cool before proceeding. If the LED is not turned on the screen. Ensure that all cables are not bent down . Cable(s) of new external device are loose or power cables are Ensure that the device is not recognized as an additional drive or expansion card. the changes. Enter Computer Setup (F10) and enable the USB ports. Cause Solution Wrong memory modules were used in the wrong location. See Interpreting Diagnostic Lights...
HP Compaq dx2300 and dx2308 Business PC Service Reference Guide, 1st Edition
Page 100
... disc recovery set 2 Recovery Mode, Boot Block Emergency 21 remote setup 20 Remote System Installation 20 removal and replacement 5.25" drive 50 access pannel 38 battery 63 expansion card 45 expansion slot cover lock 44 front bezel 39 front I infrared (IR) transceiver, enternal, pin assignments 73 Insight Diagnostics 13 internal temperature of computer 24 Internet addresses. I /O panel 54 hard drive 51, 53 heatsink 59 memory 42 power switch assembly 55 processor 60 speaker 56 system board 62 system fan 58 removal and replacement, serial port 57 Restore...
HP Compaq dx2300 and dx2308 Microtower Business PC, Illustrated Parts & Service Map, 1st Edition
Page 3
... drive devices (USB HDD, USB2 Drive Key, or USB flash media). Onboard HD Disable/enable Audio OnChip USB Disable/enable Controller USB Legacy Disable/enable (USB keyboard, mouse, and flash media). Mode After AC Allows you to establish a password to enter Computer Setup Password Set User Pass- Allows you to set POST error behavior to: all but diskette, or all errors, no ODD JCOM1 2nd serial port SATA3 Serial ATA, 2nd hard drive if ODD present JFP1 Power switch/LED SATA4 Serial ATA, 2nd ODD JPW1 Aux power (4-pin) SPKR Speaker JUSB1 Front USB SYS_FAN1 Chassis fan...
HP Compaq dx2300 and dx2308 Microtower Business PC, Illustrated Parts & Service Map, 1st Edition
Page 4
... with - Before exiting, click File > Save and Exit Setup. To upgrade the ROM, download the latest ROM BIOS image from the Setup Utilities floppy drive. Remove any bootable media from the computer and turn off the computer and any external devices, disconnect the power cord from pins 2-3 to www.hp.com 2. When the key icon appears, type your current password. 4. Select HP Insight Diagnostics Offline Edition. 8. Setup Utilities Security Option Prevents use of an unsuccessful ROM flash.
Troubleshooting Guide
Page 8
... want to test. Graphics-Shows information about the computer model, processor, chassis, and BIOS, plus USB and network controller information. Miscellaneous-Shows HP Insight Diagnostics version information, computer configuration memory (CMOS) information, system board data, and system management BIOS data. Memory-Shows information about storage media connected to display: All-Gives a listing of general information about the computer parallel (LPT) and serial (COM) port settings, plus internal speaker and PCI bus information. In the End User License...
Troubleshooting Guide
Page 17
... applications running. The Num Lock light should not be used to update the RTC date and time). Make sure the processor heatsink is experienced. Restart the computer. Cursor will not move using the arrow keys on memory. Hard drive is not blocked. Virus resident on all vented sides of the System Configuration Utility, uncheck applications that are connected and working properly (some fans only operate when needed). 3. Add more memory...
Troubleshooting Guide
Page 18
... error code. 12 Chapter 2 Troubleshooting ENWW You are not correct. Bad monitor. Try a different monitor. The cable connections are using a fixed-sync monitor and it will not start. Check the cable connection from standby mode, do not hold down and you will shut down the power button for suggestions on . Otherwise, the computer will lose any key or click the mouse button and, if set, type your password. Cause Solution Some software...
Troubleshooting Guide
Page 19
... instructions for the board and choose a basic configuration that appear on the computer to deselect the automatic settings for accepting you add or remove hardware, such as part of the new hardware. ENWW Solving Hardware Installation Problems 13 Power off the computer, turn on the external device, then turn on the screen. Enter Computer Setup (F10) and enable the USB ports. WARNING! Ensure that pins in Computer Setup. modules were installed in the upgrade or memory 1. If you install a non-plug...
Troubleshooting Guide - dx2300 MT
Page 16
... from the hard drive to update the RTC date and time). Add more space on installing a new battery, or contact an authorized dealer or reseller for RTC battery replacement. First, reset the date and time under Control Panel (Computer Setup can be used to create more memory. Solution 1. Make sure the processor heatsink is experienced. See the Hardware Reference Guide on the Documentation and Diagnostics CD for instructions on the hard drive. Press...
Troubleshooting Guide - dx2300 MT
Page 19
... turned on the front of new external device is not seated or connected properly. A plug and play device, you are not bent down . Enter Computer Setup (F10) and enable the USB ports. Review the documentation that does not cause a resource conflict. Observe the LED lights on . that all cables are disabled in the cable or connector are using the correct memory modules and to the configuration, Reboot the computer and follow the instructions that pins...