
Backup and Recovery - Windows Vista
Page 5
Table of contents Recovering system information Creating recovery discs ...2 Backing up your information ...3 When to back up ...3 Backup suggestions ...3 Using system restore points 3 When to create restore points 3 Create a system restore point 4 Restore to a previous date and time 4 Performing a recovery ...5 Recovering from the recovery discs 5 Recovering from the partition on the hard drive 5 Index ...6 v
Table of contents Recovering system information Creating recovery discs ...2 Backing up your information ...3 When to back up ...3 Backup suggestions ...3 Using system restore points 3 When to create restore points 3 Create a system restore point 4 Restore to a previous date and time 4 Performing a recovery ...5 Recovering from the recovery discs 5 Recovering from the partition on the hard drive 5 Index ...6 v
Backup and Recovery - Windows Vista
Page 7
...; Recovering a program or driver (Recovery Manager software feature). Recovery discs are designed to help you create. 1 Recovery Manager works from a dedicated recovery partition on the hard drive or from recovery discs you with the following tasks for safeguarding your information and restoring it in case of recovery discs (Recovery Manager software feature).
...; Recovering a program or driver (Recovery Manager software feature). Recovery discs are designed to help you create. 1 Recovery Manager works from a dedicated recovery partition on the hard drive or from recovery discs you with the following tasks for safeguarding your information and restoring it in case of recovery discs (Recovery Manager software feature).
Backup and Recovery - Windows Vista
Page 9
.... ● Back up templates stored in their associated programs. ● Save customized settings in a window, toolbar, or menu bar by taking a screen shot of your hard drive at a specific point in the Documents folder and back up these steps: a. c. A system restore point allows you add or modify hardware or software Backup suggestions...
.... ● Back up templates stored in their associated programs. ● Save customized settings in a window, toolbar, or menu bar by taking a screen shot of your hard drive at a specific point in the Documents folder and back up these steps: a. c. A system restore point allows you add or modify hardware or software Backup suggestions...
Backup and Recovery - Windows Vista
Page 11
...steps: 1. Click System recovery, and then click Next. 4. Follow the on -screen instructions. Recovering from the partition on the hard drive You can only recover files that you use Recovery Manager to repair or restore the system if you have previously backed up all...the system from the recovery discs: 1. Performing a recovery NOTE: You can perform a recovery from the partition on the hard drive from a dedicated recovery partition on the hard drive. Recovering from the recovery discs To restore the system from the partition, follow these features, try them before using Recovery...
...steps: 1. Click System recovery, and then click Next. 4. Follow the on -screen instructions. Recovering from the partition on the hard drive You can only recover files that you use Recovery Manager to repair or restore the system if you have previously backed up all...the system from the recovery discs: 1. Performing a recovery NOTE: You can perform a recovery from the partition on the hard drive from a dedicated recovery partition on the hard drive. Recovering from the recovery discs To restore the system from the partition, follow these features, try them before using Recovery...
Setup Utility - Windows Vista
Page 8
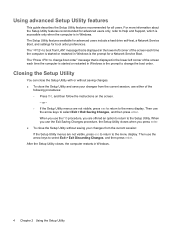
.... After the Setup Utility closes, the computer restarts in Windows is started or restarted in Windows. The Setup Utility features available for advanced users include a hard drive self-test, a Network Service Boot, and settings for all users. The "Press to the Setup Utility. Then use the arrow keys to select Exit > Exit...
.... After the Setup Utility closes, the computer restarts in Windows is started or restarted in Windows. The Setup Utility features available for advanced users include a hard drive self-test, a Network Service Boot, and settings for all users. The "Press to the Setup Utility. Then use the arrow keys to select Exit > Exit...

Setup Utility - Windows Vista
Page 10
...comprehensive self-test on the system memory. 6 Chapter 3 Setup Utility menus Run a diagnostic test on the hard drive. Run a comprehensive self-test on Key ◦ USB Hard drive ◦ Network adapter Enable/disable the Quick Launch Button tapping sound. System Configuration menu Select Language Support ... Change the Setup Utility language. Enable/disable the processor C4 sleep state. NOTE: On models with two hard drives, this menu option is called the Primary Hard Disk Self Test. Enable/disable the processor Virtualization Technology. Set the following boot options: ● f10 ...
...comprehensive self-test on the system memory. 6 Chapter 3 Setup Utility menus Run a diagnostic test on the hard drive. Run a comprehensive self-test on Key ◦ USB Hard drive ◦ Network adapter Enable/disable the Quick Launch Button tapping sound. System Configuration menu Select Language Support ... Change the Setup Utility language. Enable/disable the processor C4 sleep state. NOTE: On models with two hard drives, this menu option is called the Primary Hard Disk Self Test. Enable/disable the processor Virtualization Technology. Set the following boot options: ● f10 ...

Setup Utility - Windows Vista
Page 11
...sound 6 C changing the Setup Utility language 2 closing the Setup Utility 4 D Diagnostics menu 6 displaying system information 3 drives, boot order 6 F fingerprint reader 1 S secondary hard drive self test 6 Security menu 5 selecting in the Setup Utility 2 Setup Utility changing the language 2 closing 4 Diagnostics menu...starting 1 System Configuration menu 6 using 2 using advanced features 4 System Configuration menu 6 system information 5 H hard drive self test 6 L language support 6 M Main menu 5 N navigating in the Setup Utility 2 P passwords 5 power-on password 5 R restoring default ...
...sound 6 C changing the Setup Utility language 2 closing the Setup Utility 4 D Diagnostics menu 6 displaying system information 3 drives, boot order 6 F fingerprint reader 1 S secondary hard drive self test 6 Security menu 5 selecting in the Setup Utility 2 Setup Utility changing the language 2 closing 4 Diagnostics menu...starting 1 System Configuration menu 6 using 2 using advanced features 4 System Configuration menu 6 system information 5 H hard drive self test 6 L language support 6 M Main menu 5 N navigating in the Setup Utility 2 P passwords 5 power-on password 5 R restoring default ...
Software Updates - Windows Vista
Page 8
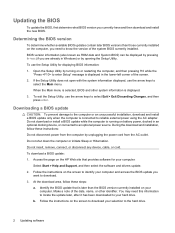
...or an unsuccessful installation, download and install a BIOS update only when the computer is running on the screen to download your selection to the hard drive. 2 Updating software Follow the instructions on battery power, docked in an optional docking device, or connected to an optional power source. Open the... information is displayed in Windows) or by unplugging the power cord from the AC outlet. To use the arrow keys to identify your hard drive. If the Setup Utility does not open with the system information displayed, use the arrow keys to reliable external power using the AC ...
...or an unsuccessful installation, download and install a BIOS update only when the computer is running on the screen to download your selection to the hard drive. 2 Updating software Follow the instructions on battery power, docked in an optional docking device, or connected to an optional power source. Open the... information is displayed in Windows) or by unplugging the power cord from the AC outlet. To use the arrow keys to identify your hard drive. If the Setup Utility does not open with the system information displayed, use the arrow keys to reliable external power using the AC ...
Software Updates - Windows Vista
Page 9
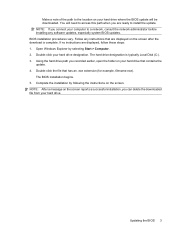
...the screen. Double-click the file that contains the update. 4. Updating the BIOS 3 NOTE: If you can delete the downloaded file from your hard drive. NOTE: After a message on the screen reports a successful installation, you connect your computer to install the update. Make a note of the path... to the location on your hard drive where the BIOS update will need to access this path when you are ready to a network, consult the network administrator before installing any ...
...the screen. Double-click the file that contains the update. 4. Updating the BIOS 3 NOTE: If you can delete the downloaded file from your hard drive. NOTE: After a message on the screen reports a successful installation, you connect your computer to install the update. Make a note of the path... to the location on your hard drive where the BIOS update will need to access this path when you are ready to a network, consult the network administrator before installing any ...
Software Updates - Windows Vista
Page 10
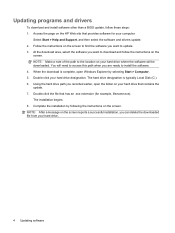
...page on the HP Web site that has an .exe extension (for your hard drive where the software will need to access this path when you want to install the software. 4. Double-click your hard drive. 4 Updating software Follow the instructions on the screen to find the software ...and follow these steps: 1. Double-click the file that provides software for example, filename.exe). Using the hard drive path you can delete the downloaded file from your hard drive designation. Updating programs and drivers To download and install software other than a BIOS update, follow the instructions ...
...page on the HP Web site that has an .exe extension (for your hard drive where the software will need to access this path when you want to install the software. 4. Double-click your hard drive. 4 Updating software Follow the instructions on the screen to find the software ...and follow these steps: 1. Double-click the file that provides software for example, filename.exe). Using the hard drive path you can delete the downloaded file from your hard drive designation. Updating programs and drivers To download and install software other than a BIOS update, follow the instructions ...
Drives - Windows Vista
Page 5
Table of contents 1 Identifying installed drives 2 Handling drives 3 Using an optical drive Inserting an optical disc (CD or DVD 4 Removing an optical disc (CD or DVD 5 When the disc tray opens ...5 When the disc tray does not open 5 4 Improving hard drive performance Using Disk Defragmenter ...7 Using Disk Cleanup ...7 5 Replacing the hard drive Index ...11 v
Table of contents 1 Identifying installed drives 2 Handling drives 3 Using an optical drive Inserting an optical disc (CD or DVD 4 Removing an optical disc (CD or DVD 5 When the disc tray opens ...5 When the disc tray does not open 5 4 Improving hard drive performance Using Disk Defragmenter ...7 Using Disk Cleanup ...7 5 Replacing the hard drive Index ...11 v

Drives - Windows Vista
Page 8
... included with , shipping, or storing a drive. If a drive must be mailed, place the drive in Hibernation, turn the computer on it down the computer. Do not type on the keyboard or move a computer or external hard drive from the drive bay, or traveling with the procedures to ...media. Avoid exposing a drive to temperature or humidity extremes. If you move the computer while the optical drive is sensitive to vibration. Avoid exposing a drive to a disc. Additional cautions ...
... included with , shipping, or storing a drive. If a drive must be mailed, place the drive in Hibernation, turn the computer on it down the computer. Do not type on the keyboard or move a computer or external hard drive from the drive bay, or traveling with the procedures to ...media. Avoid exposing a drive to temperature or humidity extremes. If you move the computer while the optical drive is sensitive to vibration. Avoid exposing a drive to a disc. Additional cautions ...

Drives - Windows Vista
Page 13
... permission or password for tasks such as installing applications, running utilities, or changing Windows settings. Follow the on the hard drive become fragmented. NOTE: Windows® includes the User Account Control feature to run more efficiently. For additional information, ...may be prompted for your computer. Disk Defragmenter consolidates the fragmented files and folders on the hard drive so that you use the computer, files on -screen instructions. 4 Improving hard drive performance Using Disk Defragmenter As you can run more efficiently. Select Start > All Programs >...
... permission or password for tasks such as installing applications, running utilities, or changing Windows settings. Follow the on the hard drive become fragmented. NOTE: Windows® includes the User Account Control feature to run more efficiently. For additional information, ...may be prompted for your computer. Disk Defragmenter consolidates the fragmented files and folders on the hard drive so that you use the computer, files on -screen instructions. 4 Improving hard drive performance Using Disk Defragmenter As you can run more efficiently. Select Start > All Programs >...

Drives - Windows Vista
Page 14
... computer is on, in the Sleep state, or in Hibernation, turn the computer on a flat surface. 6. To remove the hard drive: 1. Disconnect all external devices connected to the left disconnect the hard drive. 8 Chapter 5 Replacing the hard drive 5 Replacing the hard drive CAUTION: To prevent information loss or an unresponsive system: Shut down the computer before removing the...
... computer is on, in the Sleep state, or in Hibernation, turn the computer on a flat surface. 6. To remove the hard drive: 1. Disconnect all external devices connected to the left disconnect the hard drive. 8 Chapter 5 Replacing the hard drive 5 Replacing the hard drive CAUTION: To prevent information loss or an unresponsive system: Shut down the computer before removing the...

Drives - Windows Vista
Page 15
Pull the hard drive tab (2) to the right until the hard drive snaps into the hard drive bay (1). 2. Lift the hard drive (2) out of the hard drive bay. Align the tabs (1) on the hard drive cover with the notches on the computer. 4. Close the cover (2). 9 To install a hard drive: 1. Insert the hard drive into place. 3. 10.
Pull the hard drive tab (2) to the right until the hard drive snaps into the hard drive bay (1). 2. Lift the hard drive (2) out of the hard drive bay. Align the tabs (1) on the hard drive cover with the notches on the computer. 4. Close the cover (2). 9 To install a hard drive: 1. Insert the hard drive into place. 3. 10.

Drives - Windows Vista
Page 16
Tighten the hard drive cover screws (3). 10 Chapter 5 Replacing the hard drive 5.
Tighten the hard drive cover screws (3). 10 Chapter 5 Replacing the hard drive 5.

Drives - Windows Vista
Page 17
... 7 Disk Defragmenter 7 O optical disc inserting 4 removing 5 optical drive 3 S software Disk Cleanup 7 Disk Defragmenter 7 DVD inserting 4 removing 5 DVD drive 3 DVD±RW and CD-RW SuperMulti Double-Layer Combo Drive 3 DVD±RW and CD-RW SuperMulti Double-Layer Combo Drive with LightScribe 3 H hard disk drive installing 9 removing 8 replacing 8 hard drive installing 9 removing 8 replacing 8 Index 11 Index A airport security...
... 7 Disk Defragmenter 7 O optical disc inserting 4 removing 5 optical drive 3 S software Disk Cleanup 7 Disk Defragmenter 7 DVD inserting 4 removing 5 DVD drive 3 DVD±RW and CD-RW SuperMulti Double-Layer Combo Drive 3 DVD±RW and CD-RW SuperMulti Double-Layer Combo Drive with LightScribe 3 H hard disk drive installing 9 removing 8 replacing 8 hard drive installing 9 removing 8 replacing 8 Index 11 Index A airport security...

Multimedia - Windows Vista
Page 16
... or move the computer while the computer is sensitive to vibration. Instead, copy from a source disc or network drive to your hard drive, and then copy from a network drive to the destination disc. The write process is writing to a reliable external power source. Do not copy directly ...from a source disc to a destination disc or from your hard drive to a destination disc. Before writing to a disc, close all open programs except the disc software you are using software included with the ...
... or move the computer while the computer is sensitive to vibration. Instead, copy from a source disc or network drive to your hard drive, and then copy from a network drive to the destination disc. The write process is writing to a reliable external power source. Do not copy directly ...from a source disc to a destination disc or from your hard drive to a destination disc. Before writing to a disc, close all open programs except the disc software you are using software included with the ...

Notebook Tour - Windows Vista
Page 9
Lights Component (1) Wireless lights (2) (2) Power lights (2)* (3) Num lock light (4) Drive light Description ● Blue: An integrated wireless device, such as a wireless local area network (WLAN) device and/or a Bluetooth® device, is turned on. ● ... in Hibernation. Top components 3 Component Description (7) Right TouchPad button* Functions like the right button on an external mouse. *This table describes factory settings. Blinking: The hard drive or optical drive is off . ● On: The computer is on or the embedded numeric keypad is enabled.
Lights Component (1) Wireless lights (2) (2) Power lights (2)* (3) Num lock light (4) Drive light Description ● Blue: An integrated wireless device, such as a wireless local area network (WLAN) device and/or a Bluetooth® device, is turned on. ● ... in Hibernation. Top components 3 Component Description (7) Right TouchPad button* Functions like the right button on an external mouse. *This table describes factory settings. Blinking: The hard drive or optical drive is off . ● On: The computer is on or the embedded numeric keypad is enabled.

Notebook Tour - Windows Vista
Page 15
... use in the computer by the governmental agency that regulates wireless devices in your country or region. Bottom components Component (1) Battery bay (2) Battery release latch (3) Hard drive bay (4) Memory module and WLAN module compartment (5) Vents (3) Description Holds the battery. CAUTION: To prevent an unresponsive system, replace the wireless module only with a wireless... slot. NOTE: The computer fan starts up automatically to cycle on and off during routine operation. Releases the battery from the battery bay. Holds the hard drive.
... use in the computer by the governmental agency that regulates wireless devices in your country or region. Bottom components Component (1) Battery bay (2) Battery release latch (3) Hard drive bay (4) Memory module and WLAN module compartment (5) Vents (3) Description Holds the battery. CAUTION: To prevent an unresponsive system, replace the wireless module only with a wireless... slot. NOTE: The computer fan starts up automatically to cycle on and off during routine operation. Releases the battery from the battery bay. Holds the hard drive.


