HP Client Manager 6.1
Page 3
... Flash: HPCM can be configured to change the BIOS settings, such as the Storage Options or the Boot Order, as new or missing PCs, memory, battery, disk drives, CPUs, and monitors. Note: This requires HPCM 6.1 SP1. There are three classes of information that you can ...Client diagnostics are performed only on client computers. Software installations are performed on the HPCM Server. Normally, a SoftPaq would be used to upgrade the BIOS firmware on those client computers that contain hardware supported by HP to ensure that include the ProtectTools embedded security chip. With HPCM...
... Flash: HPCM can be configured to change the BIOS settings, such as the Storage Options or the Boot Order, as new or missing PCs, memory, battery, disk drives, CPUs, and monitors. Note: This requires HPCM 6.1 SP1. There are three classes of information that you can ...Client diagnostics are performed only on client computers. Software installations are performed on the HPCM Server. Normally, a SoftPaq would be used to upgrade the BIOS firmware on those client computers that contain hardware supported by HP to ensure that include the ProtectTools embedded security chip. With HPCM...
Hard Drive White Paper
Page 5
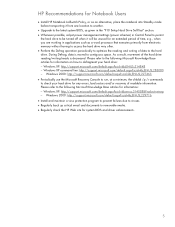
...result, movement of data to the hard drive. HP Recommendations for Notebook Users • Install HP Notebook LidSwitch Policy, or as an alternative, place the notebook into Standby mode before transporting it from one location to another. • Upgrade to the latest system BIOS, as given in the "F10 Setup... for an extended period of time, e.g., when you are working in applications such as a word processor that executes primarily from electronic memory without having to access the hard drive very often. • Perform the Defrag operation periodically to optimize the reading and writing of ...
...result, movement of data to the hard drive. HP Recommendations for Notebook Users • Install HP Notebook LidSwitch Policy, or as an alternative, place the notebook into Standby mode before transporting it from one location to another. • Upgrade to the latest system BIOS, as given in the "F10 Setup... for an extended period of time, e.g., when you are working in applications such as a word processor that executes primarily from electronic memory without having to access the hard drive very often. • Perform the Defrag operation periodically to optimize the reading and writing of ...
Compaq Evo Notebook N400c Hardware Guide
Page 5
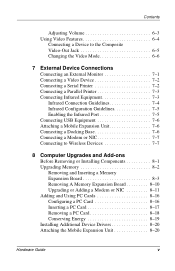
... or NIC 7-7 Connecting to Wireless Devices 7-7 8 Computer Upgrades and Add-ons Before Removing or Installing Components 8-1 Upgrading Memory 8-2 Removing and Inserting a Memory Expansion Board 8-3 Removing A Memory Expansion Board 8-10 Upgrading or Adding a Modem or NIC 8-11 Adding and Using PC Cards 8-16 Configuring a PC Card 8-16 Inserting a PC Card 8-17 Removing a PC Card 8-18 Conserving Energy 8-19 Installing Additional Device...
... or NIC 7-7 Connecting to Wireless Devices 7-7 8 Computer Upgrades and Add-ons Before Removing or Installing Components 8-1 Upgrading Memory 8-2 Removing and Inserting a Memory Expansion Board 8-3 Removing A Memory Expansion Board 8-10 Upgrading or Adding a Modem or NIC 8-11 Adding and Using PC Cards 8-16 Configuring a PC Card 8-16 Inserting a PC Card 8-17 Removing a PC Card 8-18 Conserving Energy 8-19 Installing Additional Device...
Compaq Evo Notebook N400c Hardware Guide
Page 82
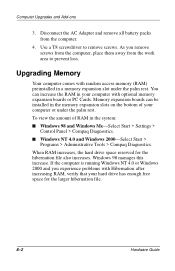
...> Programs > Administrative Tools > Compaq Diagnostics. If the computer is running Windows NT 4.0 or Windows 2000 and you remove screws from the computer, place them away from the computer. 4. Upgrading Memory Your computer comes with random access memory (RAM) preinstalled in your computer... Panel > Compaq Diagnostics. When RAM increases, the hard drive space reserved for the larger hibernation file. 8-2 Hardware Guide As you experience problems with optional memory expansion boards or PC Cards. Memory expansion boards can increase the RAM in a memory expansion slot under...
...> Programs > Administrative Tools > Compaq Diagnostics. If the computer is running Windows NT 4.0 or Windows 2000 and you remove screws from the computer, place them away from the computer. 4. Upgrading Memory Your computer comes with random access memory (RAM) preinstalled in your computer... Panel > Compaq Diagnostics. When RAM increases, the hard drive space reserved for the larger hibernation file. 8-2 Hardware Guide As you experience problems with optional memory expansion boards or PC Cards. Memory expansion boards can increase the RAM in a memory expansion slot under...
Compaq Evo Notebook N400c Hardware Guide
Page 83
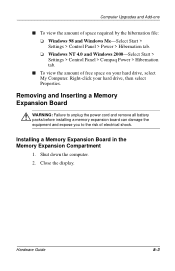
... on your hard drive, then select Properties. Removing and Inserting a Memory Expansion Board Å WARNING: Failure to unplug the power cord and remove all battery packs before installing a memory expansion board can damage the equipment and expose you to the risk ... > Hibernation tab. ❏ Windows NT 4.0 and Windows 2000-Select Start > Settings > Control Panel > Compaq Power > Hibernation tab. Hardware Guide 8-3 Shut down the computer. 2. Close the display. Computer Upgrades and Add-ons s To view the amount of electrical shock. Right-click your hard drive, select My Computer...
... on your hard drive, then select Properties. Removing and Inserting a Memory Expansion Board Å WARNING: Failure to unplug the power cord and remove all battery packs before installing a memory expansion board can damage the equipment and expose you to the risk ... > Hibernation tab. ❏ Windows NT 4.0 and Windows 2000-Select Start > Settings > Control Panel > Compaq Power > Hibernation tab. Hardware Guide 8-3 Shut down the computer. 2. Close the display. Computer Upgrades and Add-ons s To view the amount of electrical shock. Right-click your hard drive, select My Computer...
Compaq Evo Notebook N400c Hardware Guide
Page 84
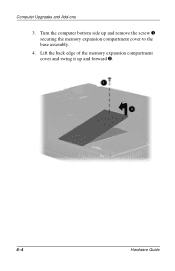
Computer Upgrades and Add-ons 3. Lift the back edge of the memory expansion compartment cover and swing it up and remove the screw 1 securing the memory expansion compartment cover to the base assembly. 4. Turn the computer bottom side up and forward 2. 8-4 Hardware Guide
Computer Upgrades and Add-ons 3. Lift the back edge of the memory expansion compartment cover and swing it up and remove the screw 1 securing the memory expansion compartment cover to the base assembly. 4. Turn the computer bottom side up and forward 2. 8-4 Hardware Guide
Compaq Evo Notebook N400c Hardware Guide
Page 85
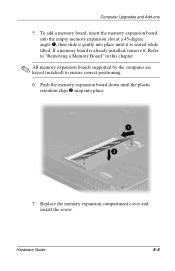
... Guide 8-5 If a memory board is seated while tilted. Replace the memory expansion compartment cover and install the screw. To add a memory board, insert the memory expansion board into place. 7. Refer to "Removing a Memory Board" in this chapter. ✎ All memory expansion boards supported by the computer are keyed (notched) to ensure correct positioning. 6. Computer Upgrades and Add...
... Guide 8-5 If a memory board is seated while tilted. Replace the memory expansion compartment cover and install the screw. To add a memory board, insert the memory expansion board into place. 7. Refer to "Removing a Memory Board" in this chapter. ✎ All memory expansion boards supported by the computer are keyed (notched) to ensure correct positioning. 6. Computer Upgrades and Add...
Compaq Evo Notebook N400c Hardware Guide
Page 86
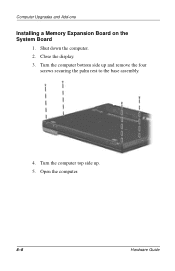
Turn the computer bottom side up . 5. Open the computer. 8-6 Hardware Guide Close the display. 3. Computer Upgrades and Add-ons Installing a Memory Expansion Board on the System Board 1. Shut down the computer. 2. Turn the computer top side up and remove the four screws securing the palm rest to the base assembly. 4.
Turn the computer bottom side up . 5. Open the computer. 8-6 Hardware Guide Close the display. 3. Computer Upgrades and Add-ons Installing a Memory Expansion Board on the System Board 1. Shut down the computer. 2. Turn the computer top side up and remove the four screws securing the palm rest to the base assembly. 4.
Compaq Evo Notebook N400c Hardware Guide
Page 89
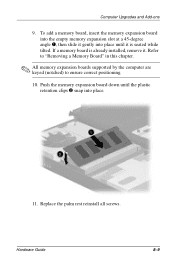
...Upgrades and Add-ons 9. To add a memory board, insert the memory expansion board into the empty memory expansion slot at a 45-degree angle 1, then slide it gently into place until the plastic retention clips 2 snap into place. 11. Refer to "Removing a Memory Board" in this chapter. ✎ All memory... expansion boards supported by the computer are keyed (notched) to ensure correct positioning. 10. Replace the palm rest reinstall all screws. Hardware Guide 8-9 If a memory board is already installed, remove ...
...Upgrades and Add-ons 9. To add a memory board, insert the memory expansion board into the empty memory expansion slot at a 45-degree angle 1, then slide it gently into place until the plastic retention clips 2 snap into place. 11. Refer to "Removing a Memory Board" in this chapter. ✎ All memory... expansion boards supported by the computer are keyed (notched) to ensure correct positioning. 10. Replace the palm rest reinstall all screws. Hardware Guide 8-9 If a memory board is already installed, remove ...
Compaq Evo Notebook N400c Hardware Guide
Page 90
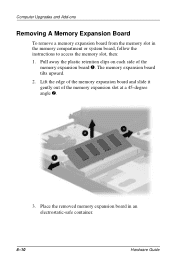
Lift the edge of the memory expansion board and slide it gently out of the memory expansion board 1. Computer Upgrades and Add-ons Removing A Memory Expansion Board To remove a memory expansion board from the memory slot in an electrostatic-safe container. 8-10 Hardware Guide Place the removed memory expansion board in the memory compartment or system board, follow the instructions to access the memory slot, then: 1. The memory expansion board tilts upward. 2. Pull away the plastic retention clips on each side of the memory expansion slot at a 45-degree angle 2. 3.
Lift the edge of the memory expansion board and slide it gently out of the memory expansion board 1. Computer Upgrades and Add-ons Removing A Memory Expansion Board To remove a memory expansion board from the memory slot in an electrostatic-safe container. 8-10 Hardware Guide Place the removed memory expansion board in the memory compartment or system board, follow the instructions to access the memory slot, then: 1. The memory expansion board tilts upward. 2. Pull away the plastic retention clips on each side of the memory expansion slot at a 45-degree angle 2. 3.
Compaq Evo Notebook N400c Hardware Guide
Page 91
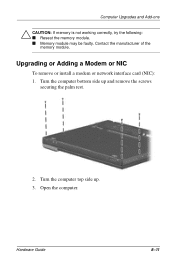
Contact the manufacturer of the memory module. Upgrading or Adding a Modem or NIC To remove or install a modem or network interface card (NIC): 1. Turn the computer bottom side up . 3. Computer Upgrades and Add-ons Ä CAUTION: If memory is not working correctly, try the following: s Reseat the memory module. Open the computer. s Memory module may be faulty. Hardware Guide 8-11 Turn the computer top side up and remove the screws securing the palm rest. 2.
Contact the manufacturer of the memory module. Upgrading or Adding a Modem or NIC To remove or install a modem or network interface card (NIC): 1. Turn the computer bottom side up . 3. Computer Upgrades and Add-ons Ä CAUTION: If memory is not working correctly, try the following: s Reseat the memory module. Open the computer. s Memory module may be faulty. Hardware Guide 8-11 Turn the computer top side up and remove the screws securing the palm rest. 2.
Compaq Evo Notebook N400c Hardware Guide
Page 96
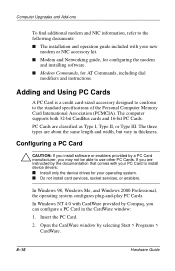
... Memory Card International Association (PCMCIA). In Windows NT 4.0 with CardWare provided by selecting Start > Programs > CardWare. 8-16 Hardware Guide If you can configure a PC Card in thickness. s Do not install card services, socket services, or enablers. Open the CardWare window by Compaq, you are classified as Type I, Type II, or Type III. Computer Upgrades...
... Memory Card International Association (PCMCIA). In Windows NT 4.0 with CardWare provided by selecting Start > Programs > CardWare. 8-16 Hardware Guide If you can configure a PC Card in thickness. s Do not install card services, socket services, or enablers. Open the CardWare window by Compaq, you are classified as Type I, Type II, or Type III. Computer Upgrades...
Compaq Evo Notebook N400c Hardware Guide
Page 100
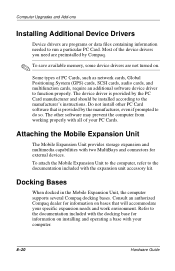
The other PC Card software that will accommodate your specific expansion needs and work environment. Consult an authorized Compaq dealer for information on bases that is provided by Compaq. ✎ To save available memory, some device drivers are programs or data files containing information needed to ...docking base for external devices. Docking Bases When docked in the Mobile Expansion Unit, the computer supports several Compaq docking bases. Computer Upgrades and Add-ons Installing Additional Device Drivers Device drivers are not turned on installing and operating a base with ...
The other PC Card software that will accommodate your specific expansion needs and work environment. Consult an authorized Compaq dealer for information on bases that is provided by Compaq. ✎ To save available memory, some device drivers are programs or data files containing information needed to ...docking base for external devices. Docking Bases When docked in the Mobile Expansion Unit, the computer supports several Compaq docking bases. Computer Upgrades and Add-ons Installing Additional Device Drivers Device drivers are not turned on installing and operating a base with ...
Compaq Evo Notebook N400c Hardware Guide
Page 107
... lock light 2-5 cautions battery pack safety 4-10 computer damage 7-1 electrostatic discharge 8-1 external device damage 6-3 file corruption 1-6 hard drive damage 5-1, 5-6 initiate Hibernation 4-3 loss of information 5-6 memory troubleshooting 8-11 PC Card connector damage 8-17 removal 8-18 software 8-16 Certificate of Authenticity label 1-1, 2-11 COM port settings 9-3 components 2-1 composite video-out jack connecting a device 6-5 location...
... lock light 2-5 cautions battery pack safety 4-10 computer damage 7-1 electrostatic discharge 8-1 external device damage 6-3 file corruption 1-6 hard drive damage 5-1, 5-6 initiate Hibernation 4-3 loss of information 5-6 memory troubleshooting 8-11 PC Card connector damage 8-17 removal 8-18 software 8-16 Certificate of Authenticity label 1-1, 2-11 COM port settings 9-3 components 2-1 composite video-out jack connecting a device 6-5 location...
Compaq Evo Notebook N400c Hardware Guide
Page 109
Index L left side components 2-8 lights 2-4, 2-5 M memory compartment cover 2-11 expansion board installation 8-3, 8-6 removing 8-10 upgrading 8-2 microphone 6-2 connecting 6-3 jack 2-6, 6-2 location 2-3 Microsoft logo key 2-3 Mobile Expansion Unit (MEU... connecting 7-7 installing 8-11 Notebook Products Reference Library CD 2-14 num lock light 2-5 numeric keypad disabling 3-10 using 3-9 O operating environment specifications 9-2 optional applications, installing 1-7 P palm rest location 2-3 removing 5-2, 8-6, 8-11 parallel connector 2-12 connecting a printer 7-3 PC Card configuring 8-16 eject ...
Index L left side components 2-8 lights 2-4, 2-5 M memory compartment cover 2-11 expansion board installation 8-3, 8-6 removing 8-10 upgrading 8-2 microphone 6-2 connecting 6-3 jack 2-6, 6-2 location 2-3 Microsoft logo key 2-3 Mobile Expansion Unit (MEU... connecting 7-7 installing 8-11 Notebook Products Reference Library CD 2-14 num lock light 2-5 numeric keypad disabling 3-10 using 3-9 O operating environment specifications 9-2 optional applications, installing 1-7 P palm rest location 2-3 removing 5-2, 8-6, 8-11 parallel connector 2-12 connecting a printer 7-3 PC Card configuring 8-16 eject ...

