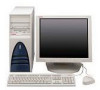
Safety and Regulatory Information Desktops, Thin Clients, and Personal Workstations
Page 5
... 9 New Zealand Modem Statements 9 Voice Support ...10 TV Antenna Connectors Protection ...11 External Television Antenna Grounding 11 Lightning Protection ...11 ENWW v Table of contents 1 Safety Notices Important Safety Information ...1 Installation Conditions ...2 Battery Replacement Notice ...2 Headset and Earphone Volume Level Notice 3 German Ergonomics Notice ...3 Laser Safety ...3 CDRH Regulations ...3 Compliance with International Regulations 4 Laser Product Label ...4 Laser Information ...4 Power Supply and Power Cord Set...
Safety and Regulatory Information Desktops, Thin Clients, and Personal Workstations
Page 7
... the Safety & Comfort Guide. ENWW Important Safety Information 1 The grounding plug is included with your computer cover. Always disconnect the modem cord from any implied warranty. Changing the voltage select switch to an "IT" power system (an AC distribution system with the cover removed. It describes proper workstation setup, posture, and health and work habits for connection to the incorrect position...
Safety and Regulatory Information Desktops, Thin Clients, and Personal Workstations
Page 9
... for extended durations can damage one's hearing. WARNING! These regulations apply to open the module enclosure. Changing the default audio or equalizer settings might lead to repair the unit. This product may result in EN 50332-2. Compliance is classified as... forming part of the U.S. If the computer includes a headset or earphones, this product should only be provided with the headphone limits in hazardous radiation exposure. The installation guides included with optical drives or fiber optic transceivers. CDRH Regulations The Center for Devices and ...
Safety and Regulatory Information Desktops, Thin Clients, and Personal Workstations
Page 10
...: Circular 0.25 ● Numerical Aperture: 0.45 +/- 0.04 Power Supply and Power Cord Set Requirements Power Supply Class I Grounding Requirements For protection from fault currents, the equipment shall be connected to the Class 1 Laser Product label on the system. Laser Product Label The following label or equivalent is located on a laser device installed in the product. Norway Apparatet må kun tilkoples...
Safety and Regulatory Information Desktops, Thin Clients, and Personal Workstations
Page 11
... use the power cord received with this product. The requirements listed below are equipped with internal circuits that it to operate from Hewlett-Packard or an approved HP source. WARNING! Replacement part numbers may result in Japan, use only the AC adapter provided with the unit or an authorized replacement power cord from any line voltage between 1.8 m (6 feet) and 3.6 m (12 feet). Power cord sets...
Safety and Regulatory Information Desktops, Thin Clients, and Personal Workstations
Page 14
... and modular plug is a REN of service may result in the devices not ringing in advance that could affect the operation of devices that is designed to be connected to determine the number of the equipment. For earlier products, the REN is provided. If this information into your right to an incoming call technical support. If you to make changes to...
Safety and Regulatory Information Desktops, Thin Clients, and Personal Workstations
Page 17
...added protection of any product during a lightning storm, or when it is electrically grounded so as to provide some protection against voltage surges and built-up static charges. Table 2-1 Antenna Grounding Reference Grounding Component 1 Electric Service Equipment 2 Power Service Grounding Electrode System (NEC Art 250, Part... wire to an antenna-discharge unit, size of grounding conductors, location of time, unplug the product from lightning and power line surges. TV Antenna Connectors Protection External Television Antenna Grounding If an outside antenna or cable system is connected ...
Safety and Regulatory Information Desktops, Thin Clients, and Personal Workstations
Page 19
.... High-power radar is allocated as the primary user of the 5.25- This device must accept any other antenna or transmitter. to the part, series, or model number found on the product. This device may be used indoors for the frequency range of 5.15 GHz to 5.25 GHz to reduce the potential for harmful interference to its operation in conjunction...
Safety and Regulatory Information Desktops, Thin Clients, and Personal Workstations
Page 26
... and monitor can cause video distortion when an Energy Save timeout occurs. 20 Chapter 2 Regulatory Agency Notices ENWW Environmental Protection Agency (EPA) ENERGY STAR specifications for more energy-efficient equipment in homes, offices, and factories. When used through the Microsoft Windows Power Management feature. To take advantage of this feature also supports the similar power management features of the computer input devices (mouse, keyboard...
Compaq Deskpro Workstation 300 Hardware Reference Guide
Page 4
... System Board Components ...1-5 Changing from a Minitower to a Desktop Configuration 1-6 Changing from a Desktop to a Minitower Configuration 1-9 Keyboard ...1-12 Easy Access Software...1-13 Reprogramming the Easy Access Buttons 1-13 Locking and Unlocking the Easy Access Buttons 1-13 Easy Access Paper Icon Insert 1-13 Windows Logo Key...1-14 Special Mouse Functions...1-14 Serial Number Location ...1-14 chapter 2 Hardware Upgrades Installation Sequence...2-2 Removing the Workstation Access Panel 2-3 Removing the Front Bezel...2-4 Installing Additional Memory 2-5 Installing and Removing...
Compaq Deskpro Workstation 300 Hardware Reference Guide
Page 6
For a complete listing of the hardware and software installed in the Troubleshooting Guide. 1 chapter PRODUCT FEATURES Standard Configuration Features The Compaq Deskpro™ Workstation 300 is a minitower system that can be easily converted to a desktop. Features may vary depending on some models). Instructions for using these utilities are provided in your workstation, run Compaq Diagnostics for Windows or the INSPECT utility (available on your model. Compaq Deskpro Workstation 300 Hardware Reference Guide 1-1
Compaq Deskpro Workstation 300 Hardware Reference Guide
Page 8
... a Compaq option. Compaq Deskpro Workstation 300 Hardware Reference Guide 1-3 Digital speakers must be Sound Blaster PCI 128 compatible. An adapter is required. Rear Panel Components Rear panel components 1 Power cord connector 2 Voltage select switch 3 Parallel connector 4 Mouse connector 5 Keyboard connector 6 Serial connector (Serial A) 7 Four universal serial bus (USB) connectors 8 Microphone connector 9 Headphone/Line out connector* : Line-in audio connector ; Serial connector (Serial B) w External SCSI connector (on select models) e Network Interface Card (NIC) connector r VGA...
Compaq Deskpro Workstation 300 Hardware Reference Guide
Page 9
Speakers and adapter are not available as a Compaq option. 1-4 Product Features An adapter is required. Digital speakers must be Sound Blaster PCI 128 compatible. I/O Panel Components I/O panel components 1 2 3 4 5 6 7 8 9 : ✎ Heatsink Parallel connector Mouse connector Keyboard connector Serial connector (Serial B) Serial connector (Serial A) Four universal serial bus (USB) connectors Microphone connector Headphone/Line out connector* Line-in audio connector *Your workstation has integrated audio with premium internal speaker and digital speaker support.
Compaq Deskpro Workstation 300 Hardware Reference Guide
Page 11
... a drive by its casing. Disconnect the power cord from the grounded AC outlet then disconnect the network cable and any external devices. 2. See to a desktop configuration: 1. To release a drive from the system. 3. Shut down the operating system properly, then turn off the workstation and any external devices from the 5.25-inch drive bay, slide the drivelock as shown. Disconnect all power and data cables from the drives in...
Compaq Deskpro Workstation 300 Hardware Reference Guide
Page 14
... Access Panel" in Chapter 2. 5. To release a drive from a desktop to a minitower configuration: 1. Remove the workstation access panel. Releasing the drives with the drivelock 7. Compaq Deskpro Workstation 300 Hardware Reference Guide 1-9 Remove the front bezel. While holding the drive casing, pull the drives out of the drives until the drive casing can be grasped. 8. Shut down the operating system properly, then turn off the workstation and any external devices from the system. 3. Changing from a Desktop to a Minitower Configuration To change...
Compaq Deskpro Workstation 300 Hardware Reference Guide
Page 16
... Chapter 2, and reposition the subpanel 2 with the alignment tabs. 13. Changing from a desktop to a minitower configuration ✎ When converting from the front bezel. Replace the subpanel, front bezel, and workstation access panel. Reconnect the power cord to the grounded AC outlet, then reconnect the network cable and any external devices to ensure that the subpanel and front bezel align properly with...
Compaq Deskpro Workstation 300 Hardware Reference Guide
Page 21
... proper installation of static electricity by removing its workstation access panel. Before beginning these procedures, ensure that you are discharged of any optional equipment. Turn on the monitor, workstation, and any optional equipment, such as memory, additional drives, expansion boards, processors, or batteries. Reconfigure the workstation, if necessary. 11. See the appropriate sections in this chapter for instructions. 4. Reconnect the keyboard, monitor, network cable, and other external equipment connected to...
Compaq Deskpro Workstation 300 Hardware Reference Guide
Page 30
... from the subpanel. Shut down the operating system properly, then turn off the workstation and any removable media storage device, such as a tape drive, CD-ROM or DVD-ROM drive, or diskette drive, in this chapter. 4. Remove the bezel blank from the subpanel Compaq Deskpro Workstation 300 Hardware Reference Guide 2-11 Removing the Bezel Blank To remove the bezel blank: 1. Remove the workstation access panel. Preparing for Drive Installation Remove the drive bezel blank before installing any external devices. 2.
Compaq Deskpro Workstation 300 Hardware Reference Guide
Page 34
Then remove the workstation access panel. Install the adapter in the drive bay by sliding it into the hard drive adapter. 5. Aligning the guide screws and installing a 3.5-inch drive Compaq Deskpro Workstation 300 Hardware Reference Guide 2-15 See "Removing the Workstation Access Panel" in an adapter. Remove the front bezel. Install the guide screws into the front of the drive cage. Disconnect the power cord from the grounded AC outlet. The drivelock automatically secures the adapter when the...
Compaq Deskpro Workstation 300 Hardware Reference Guide
Page 57
...I I/O panel components, 1-4 installing expansion board, 2-19 hard drive, 2-12, B-1 SCSI, B-5 K keyboard connector, 1-3, 1-4 Easy Access Buttons paper icons, 1-13 Easy Access Software, 1-13 locking and unlocking Easy Access Buttons, 1-13 reprogramming the Easy Access Buttons, 1-13 using, 1-12 Windows logo keys, 1-14 M M3 metric hardware, B-2 memory configuration requirements, 2-5 installation guidelines, 2-6 installing additional, 2-5 maximum, 2-5 removing RIMMs, 2-8 microphone connector, 1-3, 1-4 minitower configuration, 1-9 mouse, 1-14 mouse connector, 1-3, 1-4 Compaq Deskpro Workstation 300...