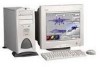
Reference Guide
Page 5
... Internal Components 6-6 Removing the Expansion Board Assembly 6-8 Removing the Removable Hard Drive Cage 6-9 Identifying the System Board Components 6-11 Chapter 7 Memory Upgrades Installing Additional Memory 7-1 Important Guidelines for DIMM Installation 7-3 Installing DIMM Modules 7-3 Chapter 8 Drives Installing Additional Drives 8-1 Removing a Blank Drive Bezel for Removable... SCSI Cable and Guidelines 8-11 SCSI Cables ...8-11 SCSI Guidelines for Installing SCSI Devices 8-12 SCSI Guidelines for Optimizing Performance 8-13 Compaq Professional Workstation AP500 Reference Guide
... Internal Components 6-6 Removing the Expansion Board Assembly 6-8 Removing the Removable Hard Drive Cage 6-9 Identifying the System Board Components 6-11 Chapter 7 Memory Upgrades Installing Additional Memory 7-1 Important Guidelines for DIMM Installation 7-3 Installing DIMM Modules 7-3 Chapter 8 Drives Installing Additional Drives 8-1 Removing a Blank Drive Bezel for Removable... SCSI Cable and Guidelines 8-11 SCSI Cables ...8-11 SCSI Guidelines for Installing SCSI Devices 8-12 SCSI Guidelines for Optimizing Performance 8-13 Compaq Professional Workstation AP500 Reference Guide

Reference Guide
Page 6
... 11-3 Minor Problems...11-3 Diskette Drive Problems 11-5 Display Problems ...11-6 Audio Problems...11-8 Printer Problems...11-8 Hardware Installation Problems 11-9 Network Problems 11-10 Memory Problems 11-14 CD-ROM Drive Problems 11-15
... 11-3 Minor Problems...11-3 Diskette Drive Problems 11-5 Display Problems ...11-6 Audio Problems...11-8 Printer Problems...11-8 Hardware Installation Problems 11-9 Network Problems 11-10 Memory Problems 11-14 CD-ROM Drive Problems 11-15
Reference Guide
Page 14
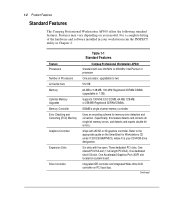
... Processors L2 Cache Size Memory Optional Memory Upgrades Memory Controller Error Checking and Correcting (ECC) Memory Graphics Controller Expansion Slots Drive Controller Table 1-1 Standard Features Compaq Professional Workstation AP500 Standard with five open. Three dedicated PCI slots. One shared PCI/ISA slot (1 full-length PCI/ISA). Supports 100-MHz ECC 32-MB, 64-MB, 128-MB, or 256-MB Registered SDRAM DIMMs...
... Processors L2 Cache Size Memory Optional Memory Upgrades Memory Controller Error Checking and Correcting (ECC) Memory Graphics Controller Expansion Slots Drive Controller Table 1-1 Standard Features Compaq Professional Workstation AP500 Standard with five open. Three dedicated PCI slots. One shared PCI/ISA slot (1 full-length PCI/ISA). Supports 100-MHz ECC 32-MB, 64-MB, 128-MB, or 256-MB Registered SDRAM DIMMs...
Reference Guide
Page 27
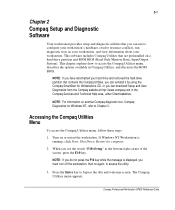
... bypass the title and welcome screen. Compaq Professional Workstation AP500 Reference Guide This software includes Compaq Utilities that are preinstalled on another Compaq diagnostic tool, Compaq Diagnostics for Workstations CD, or you can use to access the utility. 3. NOTE: For information on a hard drive partition and ROM BIOS (Read Only Memory Basic Input/Output System). Accessing the...
... bypass the title and welcome screen. Compaq Professional Workstation AP500 Reference Guide This software includes Compaq Utilities that are preinstalled on another Compaq diagnostic tool, Compaq Diagnostics for Workstations CD, or you can use to access the utility. 3. NOTE: For information on a hard drive partition and ROM BIOS (Read Only Memory Basic Input/Output System). Accessing the...
Reference Guide
Page 29
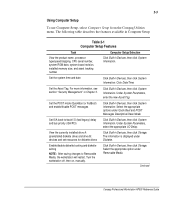
...product name, processor type/speed/stepping, CPU serial number, system ROM date, system board revision, installed memory size, and asset tracking number Computer Setup Selection Click Built-in Chapter 3. Under System Parameters, enter ...Media, the workstation will restart. 2-3 Using Computer Setup To use Computer Setup, select Computer Setup from the Compaq Utilities menu. Click Date/Time. Click Built-in Devices, then click System Information. Select the appropriate option... Boot and POST Messages Descriptive/Clean Mode. Continued Compaq Professional Workstation AP500 Reference Guide
...product name, processor type/speed/stepping, CPU serial number, system ROM date, system board revision, installed memory size, and asset tracking number Computer Setup Selection Click Built-in Chapter 3. Under System Parameters, enter ...Media, the workstation will restart. 2-3 Using Computer Setup To use Computer Setup, select Computer Setup from the Compaq Utilities menu. Click Date/Time. Click Built-in Devices, then click System Information. Select the appropriate option... Boot and POST Messages Descriptive/Clean Mode. Continued Compaq Professional Workstation AP500 Reference Guide
Reference Guide
Page 31
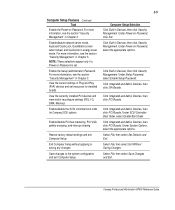
...installed boards View the currently installed PCI devices and view and/or reconfigure settings (IRQ, I/O, DMA, Memory) Enable/disable the SCSI controller boot order for Compaq SCSI options Enable/disable PCI bus mastering, PCI VGA palette snooping, and interrupt sharing Restore factory default ... or saving any changes Save changes to the system configuration and exit Computer Setup Computer Setup Selection Click Built-in Chapter 3. Compaq Professional Workstation AP500 Reference Guide View the current settings of Plug and Play (PnP) devices and set . Select File, then select Set Defaults...
...installed boards View the currently installed PCI devices and view and/or reconfigure settings (IRQ, I/O, DMA, Memory) Enable/disable the SCSI controller boot order for Compaq SCSI options Enable/disable PCI bus mastering, PCI VGA palette snooping, and interrupt sharing Restore factory default ... or saving any changes Save changes to the system configuration and exit Computer Setup Computer Setup Selection Click Built-in Chapter 3. Compaq Professional Workstation AP500 Reference Guide View the current settings of Plug and Play (PnP) devices and set . Select File, then select Set Defaults...

Reference Guide
Page 34
... steps: 1. NOTE: The Diagnostics and Setup diskettes can also be created. From the Compaq Utilities menu, select Create a Diagnostics Diskette. 2-8 Compaq Setup and Diagnostic Software The information provided by INSPECT includes: s Contents of the operating system startup files s Current memory configuration s ROM versions s Type of processor and coprocessor s Diskette, CD-ROM, tape, or...
... steps: 1. NOTE: The Diagnostics and Setup diskettes can also be created. From the Compaq Utilities menu, select Create a Diagnostics Diskette. 2-8 Compaq Setup and Diagnostic Software The information provided by INSPECT includes: s Contents of the operating system startup files s Current memory configuration s ROM versions s Type of processor and coprocessor s Diskette, CD-ROM, tape, or...
Reference Guide
Page 35
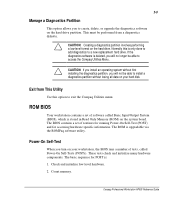
... stored in Read Only Memory (ROM) on your workstation, the BIOS runs a number of software called Power-On Self-Tests (POSTs). 2-9 Manage a Diagnostics Partition This option allows you to exit the Compaq Utilities menu. The BIOS contains a set of tests, called Basic Input/Output System (BIOS), which is : 1. Compaq Professional Workstation AP500 Reference Guide Normally...
... stored in Read Only Memory (ROM) on your workstation, the BIOS runs a number of software called Power-On Self-Tests (POSTs). 2-9 Manage a Diagnostics Partition This option allows you to exit the Compaq Utilities menu. The BIOS contains a set of tests, called Basic Input/Output System (BIOS), which is : 1. Compaq Professional Workstation AP500 Reference Guide Normally...
Reference Guide
Page 38
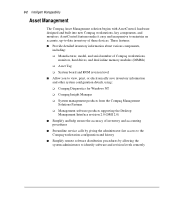
... various components, including: t Manufacturer, model, and serial number of Compaq workstations, monitors, hard drives, and dual inline memory modules (DIMMs) t Asset Tag t System board and ROM revision level s Allow you to identify software and revision levels remotely 3-2 Intelligent Manageability Asset Management The Compaq Asset Management solution begins with AssetControl, hardware designed and built...
... various components, including: t Manufacturer, model, and serial number of Compaq workstations, monitors, hard drives, and dual inline memory modules (DIMMs) t Asset Tag t System board and ROM revision level s Allow you to identify software and revision levels remotely 3-2 Intelligent Manageability Asset Management The Compaq Asset Management solution begins with AssetControl, hardware designed and built...
Reference Guide
Page 39
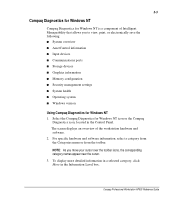
...Categories menu or from the toolbar. 3-3 Compaq Diagnostics for Windows NT Compaq Diagnostics for Windows NT is a component of the workstation hardware and software. 2. Select the Compaq Diagnostics for Windows NT 1. The screen ...Memory configuration s Security management settings s System health s Operating system s Windows version Using Compaq Diagnostics for Windows NT icon or the Compaq Diagnostics icon, located in the Information Level box. To display more detailed information in a selected category, click More in the Control Panel. Compaq Professional Workstation AP500...
...Categories menu or from the toolbar. 3-3 Compaq Diagnostics for Windows NT Compaq Diagnostics for Windows NT is a component of the workstation hardware and software. 2. Select the Compaq Diagnostics for Windows NT 1. The screen ...Memory configuration s Security management settings s System health s Operating system s Windows version Using Compaq Diagnostics for Windows NT icon or the Compaq Diagnostics icon, located in the Information Level box. To display more detailed information in a selected category, click More in the Control Panel. Compaq Professional Workstation AP500...
Reference Guide
Page 41
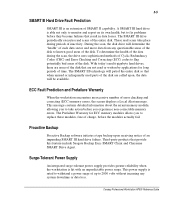
...provide this feature include Seagate Backup Exec SMART Client and Cheyenne SMART Drive Agent. This message contains detailed information about the errant memory module, allowing you to take place during the scan, the drive uses sophisticated methods of each data sector and move data from...long periods of charge, before you to known good areas of the entire disk. Third-party products that result in data losses. Compaq Professional Workstation AP500 Reference Guide A SMART III hard drive is rated to withstand a power surge of up to 2000 volts without incurring any questionable...
...provide this feature include Seagate Backup Exec SMART Client and Cheyenne SMART Drive Agent. This message contains detailed information about the errant memory module, allowing you to take place during the scan, the drive uses sophisticated methods of each data sector and move data from...long periods of charge, before you to known good areas of the entire disk. Third-party products that result in data losses. Compaq Professional Workstation AP500 Reference Guide A SMART III hard drive is rated to withstand a power surge of up to 2000 volts without incurring any questionable...
Reference Guide
Page 55
... equipment, see the related chapter. This chapter also identifies all internal components. IMPORTANT: Compaq recommends that you finish the setup procedures for the installation of optional hardware upgrades. s Memory (Chapter 7) s Drives (Chapter 8) s Expansion Boards (Chapter 9) s Processors (Chapter 10) Compaq Professional Workstation AP500 Reference Guide 6-1 Chapter 6 Hardware Upgrade Preparations This chapter explains how to the Software...
... equipment, see the related chapter. This chapter also identifies all internal components. IMPORTANT: Compaq recommends that you finish the setup procedures for the installation of optional hardware upgrades. s Memory (Chapter 7) s Drives (Chapter 8) s Expansion Boards (Chapter 9) s Processors (Chapter 10) Compaq Professional Workstation AP500 Reference Guide 6-1 Chapter 6 Hardware Upgrade Preparations This chapter explains how to the Software...
Reference Guide
Page 56
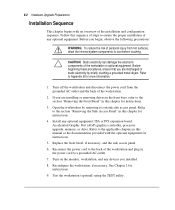
... drives in the power cord to the back of any optional equipment: ISA or PCI expansion board, Accelerated Graphic Port (AGP) graphics controller, processor upgrade, memory, or drive. Open the workstation by briefly touching a grounded metal object. Before you installed. 8. Reconnect the power cord to a grounded AC outlet. 7. Reconfigure the workstation...
... drives in the power cord to the back of any optional equipment: ISA or PCI expansion board, Accelerated Graphic Port (AGP) graphics controller, processor upgrade, memory, or drive. Open the workstation by briefly touching a grounded metal object. Before you installed. 8. Reconnect the power cord to a grounded AC outlet. 7. Reconfigure the workstation...
Reference Guide
Page 67
... support up to upgrade the memory. Compaq Professional Workstation AP500 Reference Guide Installing Additional Memory Your workstation supports Registered 100-MHz Error Checking and Correcting (ECC) SDRAM dual inline memory modules (DIMMs). The workstation has four DIMM sockets on preparing the workstation for upgrades, see Chapter 6. Additional DIMMs (32-MB, 64-MB, 128-MB, or 256-MB) are numbered from DIMM1...
... support up to upgrade the memory. Compaq Professional Workstation AP500 Reference Guide Installing Additional Memory Your workstation supports Registered 100-MHz Error Checking and Correcting (ECC) SDRAM dual inline memory modules (DIMMs). The workstation has four DIMM sockets on preparing the workstation for upgrades, see Chapter 6. Additional DIMMs (32-MB, 64-MB, 128-MB, or 256-MB) are numbered from DIMM1...

Reference Guide
Page 68
7-2 Memory Upgrades The following section. Location of all DIMM sockets. DIMM1 is located closest to the processor, and DIMM4 is located closest to be installed in pairs, and can be installed in sequence from 1-4. Note that DIMMs do not need to the edge of the available DIMM sockets. IMPORTANT: Before installing additional DIMMs, read "Important Guidelines for DIMM Installation" in the following figure illustrates the physical location of DIMM sockets: DIMM sockets 1-4 NOTE: The DIMM sockets are numbered in any of the board. DIMM 4 DIMM 3 DIMM 2 DIMM 1 è Figure 7-1.
7-2 Memory Upgrades The following section. Location of all DIMM sockets. DIMM1 is located closest to the processor, and DIMM4 is located closest to be installed in pairs, and can be installed in sequence from 1-4. Note that DIMMs do not need to the edge of the available DIMM sockets. IMPORTANT: Before installing additional DIMMs, read "Important Guidelines for DIMM Installation" in the following figure illustrates the physical location of DIMM sockets: DIMM sockets 1-4 NOTE: The DIMM sockets are numbered in any of the board. DIMM 4 DIMM 3 DIMM 2 DIMM 1 è Figure 7-1.
Reference Guide
Page 69
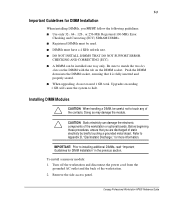
...128-, or 256-MB, Registered 100-MHz Error Checking and Correcting (ECC) SDRAM DIMMs. s Registered DIMMs must have a 4 KHz refresh rate. Doing so may damage the module. IMPORTANT: Prior to halt. s When upgrading, do not exceed 1 GB total. Before beginning these procedures, ensure that it is fully inserted and properly seated. Compaq Professional Workstation AP500.... Installing DIMM Modules CAUTION: When handling a DIMM, be installed one way only. To install a memory module: 1. Refer to touch any of the workstation. 2. Remove the side access panel. Be sure...
...128-, or 256-MB, Registered 100-MHz Error Checking and Correcting (ECC) SDRAM DIMMs. s Registered DIMMs must have a 4 KHz refresh rate. Doing so may damage the module. IMPORTANT: Prior to halt. s When upgrading, do not exceed 1 GB total. Before beginning these procedures, ensure that it is fully inserted and properly seated. Compaq Professional Workstation AP500.... Installing DIMM Modules CAUTION: When handling a DIMM, be installed one way only. To install a memory module: 1. Refer to touch any of the workstation. 2. Remove the side access panel. Be sure...

Reference Guide
Page 70
7-4 Memory Upgrades 3. Installing a DIMM module To remove a memory module, reverse the above procedure. Remove the AGP graphics controller, if necessary. 4. Refer to the following illustration to install a DIMM module. 2 1 2 Figure 7-2.
7-4 Memory Upgrades 3. Installing a DIMM module To remove a memory module, reverse the above procedure. Remove the AGP graphics controller, if necessary. 4. Refer to the following illustration to install a DIMM module. 2 1 2 Figure 7-2.
Reference Guide
Page 93
... This chapter provides information on how to identify and correct some common disk, display, memory, network, SCSI, and software problems. It also identifies and explains some common messages you encounter a minor problem with your keyboard is dim. Compaq Professional Workstation AP500 Reference Guide s Check to see that the workstation and monitor are plugged into...
... This chapter provides information on how to identify and correct some common disk, display, memory, network, SCSI, and software problems. It also identifies and explains some common messages you encounter a minor problem with your keyboard is dim. Compaq Professional Workstation AP500 Reference Guide s Check to see that the workstation and monitor are plugged into...
Reference Guide
Page 103
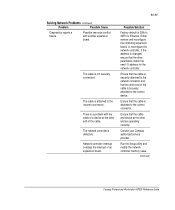
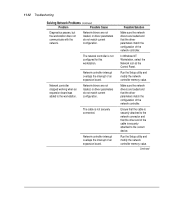
...Possible Cause Diagnostics reports a failure. Network controller interrupt overlaps the interrupt of the cable is 300h to the incorrect connector. Contact your Compaq authorized service provider. Continued Compaq Professional Workstation AP500 Reference Guide Possible resource conflict with the cable or a device at the other end of an expansion board. 11-11 Possible Solution Factory... expansion board. Either remove and reconfigure the conflicting expansion board, or reconfigure the network controller. Run the Setup utility and modify the network controller memory value.
...Possible Cause Diagnostics reports a failure. Network controller interrupt overlaps the interrupt of the cable is 300h to the incorrect connector. Contact your Compaq authorized service provider. Continued Compaq Professional Workstation AP500 Reference Guide Possible resource conflict with the cable or a device at the other end of an expansion board. 11-11 Possible Solution Factory... expansion board. Either remove and reconfigure the conflicting expansion board, or reconfigure the network controller. Run the Setup utility and modify the network controller memory value.
Reference Guide
Page 104
... the driver parameters match the configuration of the network controller. Continued Run the Setup utility and modify the network controller memory value. Possible Solution Make sure the network drivers are loaded and that the driver parameters match the configuration of the network... current configuration. The network controller is not configured for this workstation. Run the Setup utility and modify the network controller memory value. Network controller interrupt overlaps the interrupt of an expansion board. Network controller stopped working when an expansion board was ...
... the driver parameters match the configuration of the network controller. Continued Run the Setup utility and modify the network controller memory value. Possible Solution Make sure the network drivers are loaded and that the driver parameters match the configuration of the network... current configuration. The network controller is not configured for this workstation. Run the Setup utility and modify the network controller memory value. Network controller interrupt overlaps the interrupt of an expansion board. Network controller stopped working when an expansion board was ...


