
User Guide
Page 3
...and product names are subject to do while using the IP Phone. Wash hands after handling. This question mark provides you with the Wireless-G IP Phone easier than ever. Look for the following items when ...IP Phone. WIP300-UG-60217NC CB Linksys is something you might need to change without notice. Wireless-G IP Phone Copyright and Trademarks Specifications are trademarks or registered trademarks of their respective holders. Warning: This product contains chemicals, including lead, known to the State of California to while using the IP Phone. Copyright © 2006 Cisco...
...and product names are subject to do while using the IP Phone. Wash hands after handling. This question mark provides you with the Wireless-G IP Phone easier than ever. Look for the following items when ...IP Phone. WIP300-UG-60217NC CB Linksys is something you might need to change without notice. Wireless-G IP Phone Copyright and Trademarks Specifications are trademarks or registered trademarks of their respective holders. Warning: This product contains chemicals, including lead, known to the State of California to while using the IP Phone. Copyright © 2006 Cisco...

User Guide
Page 4
... Bottom Panel 3 The Front Panel 4 The Side Panel 5 The Back Panel 6 Chapter 3: Installing and Using the Wireless-G IP Phone 7 Overview 7 Charging the IP Phone's Battery 8 Setting up the Wireless-G IP Phone 9 Using the Wireless-G IP Phone 21 Chapter 4: Configuring the Wireless-G IP Phone 23 Status Information 23 Main Menu 24 Appendix A: Troubleshooting 41 Appendix B: Glossary 47 Appendix C: Specifications 51 Appendix D: Warranty Information 53 Appendix...
... Bottom Panel 3 The Front Panel 4 The Side Panel 5 The Back Panel 6 Chapter 3: Installing and Using the Wireless-G IP Phone 7 Overview 7 Charging the IP Phone's Battery 8 Setting up the Wireless-G IP Phone 9 Using the Wireless-G IP Phone 21 Chapter 4: Configuring the Wireless-G IP Phone 23 Status Information 23 Main Menu 24 Appendix A: Troubleshooting 41 Appendix B: Glossary 47 Appendix C: Specifications 51 Appendix D: Warranty Information 53 Appendix...

User Guide
Page 6
... Thank you set up with your computer. So, networks not only are useful tools for choosing the Linksys Wireless-G IP Phone. Note: For information about your Internet phone service, refer to make phone calls using your cable or DSL Internet connection. Chapter 1: Introduction 1 Welcome You'll be fun. But what does all you need to...
... Thank you set up with your computer. So, networks not only are useful tools for choosing the Linksys Wireless-G IP Phone. Note: For information about your Internet phone service, refer to make phone calls using your cable or DSL Internet connection. Chapter 1: Introduction 1 Welcome You'll be fun. But what does all you need to...

User Guide
Page 7
..., and troubleshooting the Wireless-G IP Phone. • Chapter 1: Introduction Describes the IP Phone's applications and this User Guide. • Chapter 2: Getting to Know the Wireless-G IP Phone Describes the physical features of the IP Phone. • Chapter 3: Installing and Using the Wireless-G IP Phone Explains how to install the IP Phone and use it. • Chapter 4: Configuring the Wireless-G IP Phone Discusses how to configure the IP Phone's settings. •...
..., and troubleshooting the Wireless-G IP Phone. • Chapter 1: Introduction Describes the IP Phone's applications and this User Guide. • Chapter 2: Getting to Know the Wireless-G IP Phone Describes the physical features of the IP Phone. • Chapter 3: Installing and Using the Wireless-G IP Phone Explains how to install the IP Phone and use it. • Chapter 4: Configuring the Wireless-G IP Phone Discusses how to configure the IP Phone's settings. •...

User Guide
Page 8
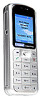
Wireless-G IP Phone Getting to Know the Wireless-G IP Phone 3 The Bottom Panel USB mini-B Port Chapter 2: Getting to Know the Wireless-G IP Phone The Bottom Panel The IP Phone's USB mini-B port is located on the bottom panel of the Phone. Use the USB mini-B port to connect the included AC adapter to the IP Phone to charge its battery.
Wireless-G IP Phone Getting to Know the Wireless-G IP Phone 3 The Bottom Panel USB mini-B Port Chapter 2: Getting to Know the Wireless-G IP Phone The Bottom Panel The IP Phone's USB mini-B port is located on the bottom panel of the Phone. Use the USB mini-B port to connect the included AC adapter to the IP Phone to charge its battery.

User Guide
Page 9
...character is displayed on the LCD screen.) 4 Chapter 2: Getting to scroll through menus and settings. Wireless-G IP Phone The Front Panel The IP Phone's buttons and their functions are described in the Phone. You can also press the Navigation button to the Home screen. If you need to enter letters...characters, press the * [Star] or 1 keys until the letter you are entering information into the Phone. Navigation Button Move the Navigation button up or down to Know the Wireless-G IP Phone The Front Panel You can also press the Power/End Call button to quickly exit a menu and ...
...character is displayed on the LCD screen.) 4 Chapter 2: Getting to scroll through menus and settings. Wireless-G IP Phone The Front Panel The IP Phone's buttons and their functions are described in the Phone. You can also press the Navigation button to the Home screen. If you need to enter letters...characters, press the * [Star] or 1 keys until the letter you are entering information into the Phone. Navigation Button Move the Navigation button up or down to Know the Wireless-G IP Phone The Front Panel You can also press the Power/End Call button to quickly exit a menu and ...

User Guide
Page 10
Wireless-G IP Phone Headset Jack Chapter 2: Getting to connect a headset for hands-free operation. Use it to Know the Wireless-G IP Phone 5 The Side Panel The Side Panel The IP Phone's Headset jack is located on the side panel of the Phone.
Wireless-G IP Phone Headset Jack Chapter 2: Getting to connect a headset for hands-free operation. Use it to Know the Wireless-G IP Phone 5 The Side Panel The Side Panel The IP Phone's Headset jack is located on the side panel of the Phone.

User Guide
Page 11
For directions on the back panel of the IP Phone. Wireless-G IP Phone The Back Panel The IP Phone's battery compartment is located on how to insert the battery, refer to Know the Wireless-G IP Phone The Back Panel Battery compartment 6 Chapter 2: Getting to "Chapter 3: Installing and Using the Wireless-G IP Phone".
For directions on the back panel of the IP Phone. Wireless-G IP Phone The Back Panel The IP Phone's battery compartment is located on how to insert the battery, refer to Know the Wireless-G IP Phone The Back Panel Battery compartment 6 Chapter 2: Getting to "Chapter 3: Installing and Using the Wireless-G IP Phone".

User Guide
Page 12
.... Insert the battery with the metal contacts facing the contacts at the bottom of the IP Phone. Replace the battery cover by sliding it clicks into place. Chapter 3: Installing and Using the Wireless-G IP Phone 7 Overview Wireless-G IP Phone Installing and Using the Wireless-G IP Phone Overview This chapter provides instructions for first-time installation and basic use of the battery...
.... Insert the battery with the metal contacts facing the contacts at the bottom of the IP Phone. Replace the battery cover by sliding it clicks into place. Chapter 3: Installing and Using the Wireless-G IP Phone 7 Overview Wireless-G IP Phone Installing and Using the Wireless-G IP Phone Overview This chapter provides instructions for first-time installation and basic use of the battery...

User Guide
Page 13
... the battery to charge for use . Plug the other end of the IP Phone. Connect the small end of the included AC power adapter to "Setting up the Wireless-G IP Phone" on the bottom of the adapter into a standard electrical outlet. Wireless-G IP Phone Charging the IP Phone's Battery 1. USB mini-B port 2. When the battery is fully charged and ready...
... the battery to charge for use . Plug the other end of the IP Phone. Connect the small end of the included AC power adapter to "Setting up the Wireless-G IP Phone" on the bottom of the adapter into a standard electrical outlet. Wireless-G IP Phone Charging the IP Phone's Battery 1. USB mini-B port 2. When the battery is fully charged and ready...

User Guide
Page 14
.... Scroll to Profile, then press the Navigation button to turn the display back on the Phone. 2. Chapter 3: Installing and Using the Wireless-G IP Phone 9 Setting up the Wireless-G IP Phone Wireless-G IP Phone Before you begin, make sure you are configuring the Phone, press any key to turn on and continue configuring the Phone. 1. Press the Menu Soft Key. 3. Setting up the...
.... Scroll to Profile, then press the Navigation button to turn the display back on the Phone. 2. Chapter 3: Installing and Using the Wireless-G IP Phone 9 Setting up the Wireless-G IP Phone Wireless-G IP Phone Before you begin, make sure you are configuring the Phone, press any key to turn on and continue configuring the Phone. 1. Press the Menu Soft Key. 3. Setting up the...
User Guide
Page 15
When you are finished entering a password, press the Navigation button to save it to access the Profile menu. 6. Scroll to SIP Account, then press the Select Soft Key to enter a password. 5. Press the Navigation button, then use the numeric keypad to enter the SIP Account menu. 10 Chapter 3: Installing and Using the Wireless-G IP Phone Setting up the Wireless-G IP Phone Note: After you have created a password, you to enter it . Wireless-G IP Phone 4. You see a message asking you will need to create a password.
When you are finished entering a password, press the Navigation button to save it to access the Profile menu. 6. Scroll to SIP Account, then press the Select Soft Key to enter a password. 5. Press the Navigation button, then use the numeric keypad to enter the SIP Account menu. 10 Chapter 3: Installing and Using the Wireless-G IP Phone Setting up the Wireless-G IP Phone Note: After you have created a password, you to enter it . Wireless-G IP Phone 4. You see a message asking you will need to create a password.
User Guide
Page 16
Wireless-G IP Phone 8. Highlight each setting your changes. When you to change, then press the Select Soft Key to save your service provider requires you are finished changing a setting, press the Navigation button to change the setting. Chapter 3: Installing and Using the Wireless-G IP Phone 11 Setting up the Wireless-G IP Phone 7. Press the Option Soft Key, then press the Select Soft Key to edit the default SIP account.
Wireless-G IP Phone 8. Highlight each setting your changes. When you to change, then press the Select Soft Key to save your service provider requires you are finished changing a setting, press the Navigation button to change the setting. Chapter 3: Installing and Using the Wireless-G IP Phone 11 Setting up the Wireless-G IP Phone 7. Press the Option Soft Key, then press the Select Soft Key to edit the default SIP account.

User Guide
Page 17
...changes. 11. When you to change, then press the Select Soft Key to the Profile menu. 12 Chapter 3: Installing and Using the Wireless-G IP Phone Setting up the Wireless-G IP Phone When you are finished making changes in the advanced settings menu, press the Back Soft Key until you need to change the setting.... Wireless-G IP Phone 9. If you return to change a setting that does not appear on the Edit screen, scroll to Advanced, then press the Select Soft Key...
...changes. 11. When you to change, then press the Select Soft Key to the Profile menu. 12 Chapter 3: Installing and Using the Wireless-G IP Phone Setting up the Wireless-G IP Phone When you are finished making changes in the advanced settings menu, press the Back Soft Key until you need to change the setting.... Wireless-G IP Phone 9. If you return to change a setting that does not appear on the Edit screen, scroll to Advanced, then press the Select Soft Key...

User Guide
Page 18
Chapter 3: Installing and Using the Wireless-G IP Phone 13 Setting up the Wireless-G IP Phone 12. Wireless-G IP Phone 13. If you 're using for your wireless network, highlight OPEN. Highlight Network Profile, then press the Select Soft key to enter the Network Profile menu. Highlight the network profile that matches the type of security you don't have security enabled on your wireless network.
Chapter 3: Installing and Using the Wireless-G IP Phone 13 Setting up the Wireless-G IP Phone 12. Wireless-G IP Phone 13. If you 're using for your wireless network, highlight OPEN. Highlight Network Profile, then press the Select Soft key to enter the Network Profile menu. Highlight the network profile that matches the type of security you don't have security enabled on your wireless network.

User Guide
Page 19
Wireless-G IP Phone 14. Press the Option Soft Key to enter the Profile Options menu, then press the Select Soft Key to enter the Wireless Settings menu. 14 Chapter 3: Installing and Using the Wireless-G IP Phone Setting up the Wireless-G IP Phone Highlight Wireless Settings, then press the Select Soft Key to edit the network profile. 15.
Wireless-G IP Phone 14. Press the Option Soft Key to enter the Profile Options menu, then press the Select Soft Key to enter the Wireless Settings menu. 14 Chapter 3: Installing and Using the Wireless-G IP Phone Setting up the Wireless-G IP Phone Highlight Wireless Settings, then press the Select Soft Key to edit the network profile. 15.

User Guide
Page 20
Wireless-G IP Phone Chapter 3: Installing and Using the Wireless-G IP Phone 15 Setting up the Wireless-G IP Phone Highlight ESSID, then press the Select Soft Key to scan for your wireless network. Highlight Site Survey, then press the Navigation button to enter the ESSID menu. 17. 16.
Wireless-G IP Phone Chapter 3: Installing and Using the Wireless-G IP Phone 15 Setting up the Wireless-G IP Phone Highlight ESSID, then press the Select Soft Key to scan for your wireless network. Highlight Site Survey, then press the Navigation button to enter the ESSID menu. 17. 16.

User Guide
Page 21
... button to select it . 16 Chapter 3: Installing and Using the Wireless-G IP Phone Setting up the Wireless-G IP Phone When you don't see a list of wireless networks in range of the Phone. Continue with step 18. 18. Wireless-G IP Phone You see your wireless network's ESSID name in the list, your wireless network's ESSID name in the list, then press the Navigation button...
... button to select it . 16 Chapter 3: Installing and Using the Wireless-G IP Phone Setting up the Wireless-G IP Phone When you don't see a list of wireless networks in range of the Phone. Continue with step 18. 18. Wireless-G IP Phone You see your wireless network's ESSID name in the list, your wireless network's ESSID name in the list, then press the Navigation button...

User Guide
Page 22
Highlight Security, then press the Navigation button to the Wireless Settings menu. 20. Wireless-G IP Phone Chapter 3: Installing and Using the Wireless-G IP Phone 17 Setting up the Wireless-G IP Phone Press the Back Soft Key until you return to enter the Security menu. 19.
Highlight Security, then press the Navigation button to the Wireless Settings menu. 20. Wireless-G IP Phone Chapter 3: Installing and Using the Wireless-G IP Phone 17 Setting up the Wireless-G IP Phone Press the Back Soft Key until you return to enter the Security menu. 19.

User Guide
Page 23
Then change the settings to select it. Highlight the type of security you have security enabled on your wireless network and press the Navigation button to match your wireless network, select OPEN. 22. Wireless-G IP Phone 21. When you are finished selecting wireless security settings, press the Back Soft Key until you don't have enabled on your wireless network. If you return to the Edit menu. 18 Chapter 3: Installing and Using the Wireless-G IP Phone Setting up the Wireless-G IP Phone
Then change the settings to select it. Highlight the type of security you have security enabled on your wireless network and press the Navigation button to match your wireless network, select OPEN. 22. Wireless-G IP Phone 21. When you are finished selecting wireless security settings, press the Back Soft Key until you don't have enabled on your wireless network. If you return to the Edit menu. 18 Chapter 3: Installing and Using the Wireless-G IP Phone Setting up the Wireless-G IP Phone

