
Owners Manual
Page 2
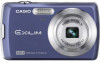
When purchasing a replacement or spare, be included with this EXILIM model. Unpacking As you unpack your original retailer. Strap 2 USB cable CD-ROM Basic Reference * The NP-82 battery is missing, contact your camera, check to purchase an NP-80 battery. 2 If anything is specially designed to the camera 1 Attach strap here. Digital camera Power cord Rechargeable lithium ion battery (NP-82*) Charger unit (BC-81L) To attach the strap to be sure to make sure that all items shown below are included.
When purchasing a replacement or spare, be included with this EXILIM model. Unpacking As you unpack your original retailer. Strap 2 USB cable CD-ROM Basic Reference * The NP-82 battery is missing, contact your camera, check to purchase an NP-80 battery. 2 If anything is specially designed to the camera 1 Attach strap here. Digital camera Power cord Rechargeable lithium ion battery (NP-82*) Charger unit (BC-81L) To attach the strap to be sure to make sure that all items shown below are included.

Owners Manual
Page 70
... until you still will be able to appear on the TV screen, without anything appearing on the camera's monitor screen. • Pressing [ON/OFF] (Power) or [r] (REC) will not turn on the camera while the AV cable is connected. 3. Turn on a TV Screen 1. This will cause an image to see the ...70 Viewing Snapshots and Movies Yellow White TV Video Audio AV cable AUDIO IN jacks (white) VIDEO IN jack (yellow) USB/AV port Making sure that the mark on the AV cable connector is towards the lens side, connect the cable to the camera. • Make sure that even while the connector is ...
... until you still will be able to appear on the TV screen, without anything appearing on the camera's monitor screen. • Pressing [ON/OFF] (Power) or [r] (REC) will not turn on the camera while the AV cable is connected. 3. Turn on a TV Screen 1. This will cause an image to see the ...70 Viewing Snapshots and Movies Yellow White TV Video Audio AV cable AUDIO IN jacks (white) VIDEO IN jack (yellow) USB/AV port Making sure that the mark on the AV cable connector is towards the lens side, connect the cable to the camera. • Make sure that even while the connector is ...

Owners Manual
Page 71
... to an external device, use [8] (DISP) to change the display contents. IMPORTANT! • Before connecting to a TV to display images, be sure to configure the camera's [r] (REC) and [p] (PLAY) buttons for "Power On" or "Power On/Off" (page 111). • Use the TV's volume control to record, see... the user documentation that appear on the monitor screen also appear on a DVD or video tape. Camera: USB/AV port You can play back movies as you are using an optionally available AV cable. - For information about connecting a monitor to the recording device and about how to adjust the ...
... to an external device, use [8] (DISP) to change the display contents. IMPORTANT! • Before connecting to a TV to display images, be sure to configure the camera's [r] (REC) and [p] (PLAY) buttons for "Power On" or "Power On/Off" (page 111). • Use the TV's volume control to record, see... the user documentation that appear on the monitor screen also appear on a DVD or video tape. Camera: USB/AV port You can play back movies as you are using an optionally available AV cable. - For information about connecting a monitor to the recording device and about how to adjust the ...

Owners Manual
Page 80
...then press [SET]. . Use [8] and [2] to a printer 1. To set up the camera before connecting. • Make sure that the mark on the camera and press [MENU]. 2. Connecting the Camera to a Printer Use the USB cable that supports PictBridge and print images without going through a computer. . On the "Set ... Small connector Making sure that you insert the cable connector into place. Failure to insert the connector fully can connect the camera directly to a printer that comes bundled with the port. 80 Printing Make sure the camera's battery is fully inserted, you still will ...
...then press [SET]. . Use [8] and [2] to a printer 1. To set up the camera before connecting. • Make sure that the mark on the camera and press [MENU]. 2. Connecting the Camera to a Printer Use the USB cable that supports PictBridge and print images without going through a computer. . On the "Set ... Small connector Making sure that you insert the cable connector into place. Failure to insert the connector fully can connect the camera directly to a printer that comes bundled with the port. 80 Printing Make sure the camera's battery is fully inserted, you still will ...

Owners Manual
Page 81
...cause the printing status to select "Print" and then press [SET]. . With this option, images will appear on and off the camera and disconnect the USB cable from step 5, if you want to select "Paper Size", and then press [6]. 4. DPOF Printing : Prints multiple images. Turn on... the printer and load paper. 2. Turn on the camera. will be printed when "On" is still being performed. After printing is complete. • ...
...cause the printing status to select "Print" and then press [SET]. . With this option, images will appear on and off the camera and disconnect the USB cable from step 5, if you want to select "Paper Size", and then press [6]. 4. DPOF Printing : Prints multiple images. Turn on... the printer and load paper. 2. Turn on the camera. will be printed when "On" is still being performed. After printing is complete. • ...

Owners Manual
Page 88
... "Start" and then "Computer". Turn off the camera and then use the USB cable USB port USB cable that the mark on the camera. 6. Making sure that comes with a Computer Large connector • The camera does not draw power over the USB cable. Windows XP users: Click "Start" and then .../AV port until you connect via a USB hub. 4. Turn on the USB cable connector is towards the lens side, connect the cable to the camera. • Note that you insert USB/AV port the cable connector into place. Windows 2000 users: Doubleclick "My Computer". 7. Make sure the...
... "Start" and then "Computer". Turn off the camera and then use the USB cable USB port USB cable that the mark on the camera. 6. Making sure that comes with a Computer Large connector • The camera does not draw power over the USB cable. Windows XP users: Click "Start" and then .../AV port until you connect via a USB hub. 4. Turn on the USB cable connector is towards the lens side, connect the cable to the camera. • Note that you insert USB/AV port the cable connector into place. Windows 2000 users: Doubleclick "My Computer". 7. Make sure the...
Owners Manual
Page 90
... these environments does not guarantee proper operation. • Certain settings and other installed software may interfere with proper playback of movies. 90 Using the Camera with this camera on its original (unrotated) orientation. Whenever you want to play back images on most computers, can cause data to become corrupted. Minimum Computer System... back movies recorded with a Computer Doing so can be displayed on your computer screen in memory or on a computer. 3. IMPORTANT! • Never unplug the USB cable, or operate the camera while viewing or storing images.
... these environments does not guarantee proper operation. • Certain settings and other installed software may interfere with proper playback of movies. 90 Using the Camera with this camera on its original (unrotated) orientation. Whenever you want to play back images on most computers, can cause data to become corrupted. Minimum Computer System... back movies recorded with a Computer Doing so can be displayed on your computer screen in memory or on a computer. 3. IMPORTANT! • Never unplug the USB cable, or operate the camera while viewing or storing images.

Owners Manual
Page 91
... on some computers. YouTube is YouTube? On the CD-ROM menu screen, select "YouTube Uploader for CASIO 1. Quit any other applications you can use an optionally available AV cable (EMC-4A) to connect to the latest version. - Uploading Movie Files to YouTube Installing YouTube Uploader...". - If you can upload movies and view movies uploaded by others. . To install YouTube Uploader for CASIO". 2. Proper movie playback may not be possible for CASIO. 91 Using the Camera with a Computer Try recording movies with the "For YouTube" BEST SHOT scene to play back movies that...
... on some computers. YouTube is YouTube? On the CD-ROM menu screen, select "YouTube Uploader for CASIO 1. Quit any other applications you can use an optionally available AV cable (EMC-4A) to connect to the latest version. - Uploading Movie Files to YouTube Installing YouTube Uploader...". - If you can upload movies and view movies uploaded by others. . To install YouTube Uploader for CASIO". 2. Proper movie playback may not be possible for CASIO. 91 Using the Camera with a Computer Try recording movies with the "For YouTube" BEST SHOT scene to play back movies that...

Owners Manual
Page 97
...hub. In this time. 4. Turn off the camera and then use the USB cable USB port USB cable that you insert USB/AV port the cable connector into the USB/AV port until you Small connector feel it to recognize the camera if you align the connector correctly with a ...Computer Large connector • The camera does not draw power over the USB cable. Making sure that the mark on the USB cable connector is towards the lens side, connect the cable to the camera. • Note that even while the connector is sufficiently charged ...
...hub. In this time. 4. Turn off the camera and then use the USB cable USB port USB cable that you insert USB/AV port the cable connector into the USB/AV port until you Small connector feel it to recognize the camera if you align the connector correctly with a ...Computer Large connector • The camera does not draw power over the USB cable. Making sure that the mark on the USB cable connector is towards the lens side, connect the cable to the camera. • Note that even while the connector is sufficiently charged ...

Owners Manual
Page 98
... complete, drag the drive icon to copy it. 8. Doing so can drastically alter remaining memory capacity. After making sure that are in the camera's built-in memory or on your computer. Double-click the image file you want to Trash. 9. To view copied images 1. IMPORTANT! &#...8226; Never unplug the USB cable, or operate the camera while viewing or storing images. 7. Double-click the folder that contains the images you want to view. • For information about file...
... complete, drag the drive icon to copy it. 8. Doing so can drastically alter remaining memory capacity. After making sure that are in the camera's built-in memory or on your computer. Double-click the image file you want to Trash. 9. To view copied images 1. IMPORTANT! &#...8226; Never unplug the USB cable, or operate the camera while viewing or storing images. 7. Double-click the folder that contains the images you want to view. • For information about file...

Owners Manual
Page 99
...not guarantee proper operation. • Certain settings and other applications that way. Playing a Movie You can use an optionally available AV cable (EMC-4A) to connect to play back a movie, first copy it . Change the movie image quality setting to play back movies... that are recommended system environments. Minimum Computer System Requirements for data accessed over a network, from a memory card, etc. 99 Using the Camera with some Macintosh models. Operating System : Mac OS X 10.3.9 or higher Required Software: QuickTime 7 or higher • The above are running...
...not guarantee proper operation. • Certain settings and other applications that way. Playing a Movie You can use an optionally available AV cable (EMC-4A) to connect to play back a movie, first copy it . Change the movie image quality setting to play back movies... that are recommended system environments. Minimum Computer System Requirements for data accessed over a network, from a memory card, etc. 99 Using the Camera with some Macintosh models. Operating System : Mac OS X 10.3.9 or higher Required Software: QuickTime 7 or higher • The above are running...

Owners Manual
Page 112
...aspect ratio Wide screen aspect ratio • Select the aspect ratio (4:3 or 16:9) that is not NTSC or PAL. • An optionally available AV cable (EMC-4A) is used when exchanging data with a computer, printer, or other video equipment. • Images cannot be displayed correctly on a TV ...video equipment that matches the type of 4:3 or 16:9. Use this section to a computer. Mass Storage Select this setting, the computer sees the camera as the video output system. NTSC Video system used in Japan, the U.S., and other countries PAL Video system used in this setting for video ...
...aspect ratio Wide screen aspect ratio • Select the aspect ratio (4:3 or 16:9) that is not NTSC or PAL. • An optionally available AV cable (EMC-4A) is used when exchanging data with a computer, printer, or other video equipment. • Images cannot be displayed correctly on a TV ...video equipment that matches the type of 4:3 or 16:9. Use this section to a computer. Mass Storage Select this setting, the computer sees the camera as the video output system. NTSC Video system used in Japan, the U.S., and other countries PAL Video system used in this setting for video ...

Owners Manual
Page 120
Disconnecting the USB cable while communication is in any of the following creates the risk of corruption of malfunction. Other abnormal operations Any of the above conditions can cause an error message to appear on the interior and the exterior of the camera, which creates the risk ...seal the camera in lines that is moved from the bag and open the battery cover for a few hours. . Removing the battery or memory card while the back lamp is manufactured using precision digital components. Using a battery that should be straight. Data Error Precautions Your digital camera is flashing...
Disconnecting the USB cable while communication is in any of the following creates the risk of corruption of malfunction. Other abnormal operations Any of the above conditions can cause an error message to appear on the interior and the exterior of the camera, which creates the risk ...seal the camera in lines that is moved from the bag and open the battery cover for a few hours. . Removing the battery or memory card while the back lamp is manufactured using precision digital components. Using a battery that should be straight. Data Error Precautions Your digital camera is flashing...

Owners Manual
Page 133
... time (page 109). Change the display language setting (page 110). 1)The USB cable may not be transferred over a USB connection. Problem Playback The color of device you are connecting (pages 87, 96). 3)If the camera is not turned on, turn it on. 4)Your computer may not be able ... Possible Cause and Recommended Action Sunlight or light from what appears on the display are shooting. Note that you are in accordance with another digital camera. Other The wrong date and time are displayed, or the wrong date and time are not displayed. Images are being stored along with ...
... time (page 109). Change the display language setting (page 110). 1)The USB cable may not be transferred over a USB connection. Problem Playback The color of device you are connecting (pages 87, 96). 3)If the camera is not turned on, turn it on. 4)Your computer may not be able ... Possible Cause and Recommended Action Sunlight or light from what appears on the display are shooting. Note that you are in accordance with another digital camera. Other The wrong date and time are displayed, or the wrong date and time are not displayed. Images are being stored along with ...

