
Owners Manual
Page 2
Digital Camera Rechargeable Lithium Ion Battery (NP-40) USB Cradle (CA-33) Strap CD-ROM USB Cable AV Cable • Note that the shape of the AC power cord plug varies according to country or geographic area. UNPACKING As you purchased the camera. * The shape of the AC adaptor depends on the area where you...-in Type) (AD-C52J) UNPACKING To attach the strap to make sure that all items shown below are included. If anything is missing, contact your camera, check to the camera Attach strap here.
Digital Camera Rechargeable Lithium Ion Battery (NP-40) USB Cradle (CA-33) Strap CD-ROM USB Cable AV Cable • Note that the shape of the AC power cord plug varies according to country or geographic area. UNPACKING As you purchased the camera. * The shape of the AC adaptor depends on the area where you...-in Type) (AD-C52J) UNPACKING To attach the strap to make sure that all items shown below are included. If anything is missing, contact your camera, check to the camera Attach strap here.

Owners Manual
Page 11
Place the camera onto the USB cradle. [CHARGE] lamp Red: Charging Green: Charged (Full) • It takes about three hours to Charge • Note that the shape of the AC adaptor depends on the area where you purchased the camera. 1. Inlet Type AC adaptor Plug-in Type AC adaptor 2. Plug the USB cradle into a household power outlet. I Using the USB Cradle to achieve a full charge. 11 QUICK START BASICS
Place the camera onto the USB cradle. [CHARGE] lamp Red: Charging Green: Charged (Full) • It takes about three hours to Charge • Note that the shape of the AC adaptor depends on the area where you purchased the camera. 1. Inlet Type AC adaptor Plug-in Type AC adaptor 2. Plug the USB cradle into a household power outlet. I Using the USB Cradle to achieve a full charge. 11 QUICK START BASICS

Owners Manual
Page 23
Connection to a TV for viewing on the USB cradle to the computer (pages 211, 226) INTRODUCTION 23 Battery charging (page 36) - Connection to a printer for image printing (page 197) - Connection to a computer for transfer ... for PictBridge and USB DIRECT-PRINT for easy athome printing on a printer that supports one of these standards, without a computer (page 197) I Multi-function USB Cradle You can place the camera on the TV screen (page 147) -
Connection to a TV for viewing on the USB cradle to the computer (pages 211, 226) INTRODUCTION 23 Battery charging (page 36) - Connection to a printer for image printing (page 197) - Connection to a computer for transfer ... for PictBridge and USB DIRECT-PRINT for easy athome printing on a printer that supports one of these standards, without a computer (page 197) I Multi-function USB Cradle You can place the camera on the TV screen (page 147) -

Owners Manual
Page 32
...the following precautions when using the AC adaptor. - INTRODUCTION 32 This is normal and does not indicate malfunction. When unplugging from the USB cradle before leaving the camera unattended for long periods, such as it will go. - Never pull on the AC adaptor power cord. Insert the plug into the wall...AC adaptor while your hands are wet. Never locate the power cord near a stove or other heating device. - Make sure you always remove the camera from the wall outlet, grasp the plug on the power cord. - Unplug the AC adaptor from the wall outlet and clean off any dust ...
...the following precautions when using the AC adaptor. - INTRODUCTION 32 This is normal and does not indicate malfunction. When unplugging from the USB cradle before leaving the camera unattended for long periods, such as it will go. - Never pull on the AC adaptor power cord. Insert the plug into the wall...AC adaptor while your hands are wet. Never locate the power cord near a stove or other heating device. - Make sure you always remove the camera from the wall outlet, grasp the plug on the power cord. - Unplug the AC adaptor from the wall outlet and clean off any dust ...

Owners Manual
Page 33
... are not using precision digital components. INTRODUCTION 33 Actual battery life is greatly affected by ambient temperature, battery storage conditions, the amount of time spent in storage, etc. • Leaving the camera on the USB cradle while the operation lamp... is flashing green after turning off due to low battery power when being performed - Turn off due to low battery power. Perform the action indicated by the special battery under normal temperature (23°C (73°F)). I Data Error Precautions • Your digital camera...
... are not using precision digital components. INTRODUCTION 33 Actual battery life is greatly affected by ambient temperature, battery storage conditions, the amount of time spent in storage, etc. • Leaving the camera on the USB cradle while the operation lamp... is flashing green after turning off due to low battery power when being performed - Turn off due to low battery power. Perform the action indicated by the special battery under normal temperature (23°C (73°F)). I Data Error Precautions • Your digital camera...

Owners Manual
Page 34
...be sure to reconfigure these settings after power is restored (page 187). Use of any of the camera are cleared about one day after power is totally cut off (from the outdoors on a cold winter ...day into a plastic bag before removing the camera. The date and time settings of the following locations. - In an area exposed to the characteristics...the camera. This is moved from both the battery and USB cradle). Wait until the air in certain types of images, such as when the camera is due to direct sunlight, or large amounts of the camera....
...be sure to reconfigure these settings after power is restored (page 187). Use of any of the camera are cleared about one day after power is totally cut off (from the outdoors on a cold winter ...day into a plastic bag before removing the camera. The date and time settings of the following locations. - In an area exposed to the characteristics...the camera. This is moved from both the battery and USB cradle). Wait until the air in certain types of images, such as when the camera is due to direct sunlight, or large amounts of the camera....

Owners Manual
Page 37
The battery is not fully charged when you use the camera for the first time after purchasing it . Use the following procedure to charge it . Swing the battery cover closed, and then slide it securely into a household power outlet. • Note the shape of the AC adaptor depends on the area where you press it against the camera. 3. Plug the USB cradle into place as you purchased the camera. Close the battery cover. Inlet Type AC Adaptor AC power cord USB Cradle [DC IN 5.3V] Plug-in Type AC Adaptor USB Cradle [DC IN 5.3V] GETTING READY 37 To charge the battery 1.
The battery is not fully charged when you use the camera for the first time after purchasing it . Use the following procedure to charge it . Swing the battery cover closed, and then slide it securely into a household power outlet. • Note the shape of the AC adaptor depends on the area where you press it against the camera. 3. Plug the USB cradle into place as you purchased the camera. Close the battery cover. Inlet Type AC Adaptor AC power cord USB Cradle [DC IN 5.3V] Plug-in Type AC Adaptor USB Cradle [DC IN 5.3V] GETTING READY 37 To charge the battery 1.

Owners Manual
Page 38
... so the monitor screen is complete The [CHARGE] lamp, which was lit red during charging, changes to green. Remove the camera from the USB cradle and unplug the AC adaptor from the power outlet. The [CHARGE] lamp lights red and charging starts. • It takes about three hours to ... charging time depends on , be sure to press [ON/OFF] to a temperature where charging can be performed because you as it onto the USB cradle. When charging is facing towards you have just finished using the camera, or because the temperature in the illustration, place it will light red. [CHARGE] lamp...
... so the monitor screen is complete The [CHARGE] lamp, which was lit red during charging, changes to green. Remove the camera from the USB cradle and unplug the AC adaptor from the power outlet. The [CHARGE] lamp lights red and charging starts. • It takes about three hours to ... charging time depends on , be sure to press [ON/OFF] to a temperature where charging can be performed because you as it onto the USB cradle. When charging is facing towards you have just finished using the camera, or because the temperature in the illustration, place it will light red. [CHARGE] lamp...

Owners Manual
Page 39
... are dirty. Contact your nearest CASIO authorized service center. If the [CHARGE] lamp flashes red This indicates that the camera or battery is faulty, or that comes bundled with a dry cloth and then reload the battery into the power outlet and the USB cradle, set the camera on the cradle again. Attempting to charge the...
... are dirty. Contact your nearest CASIO authorized service center. If the [CHARGE] lamp flashes red This indicates that the camera or battery is faulty, or that comes bundled with a dry cloth and then reload the battery into the power outlet and the USB cradle, set the camera on the cradle again. Attempting to charge the...

Owners Manual
Page 44
...loaded or dead battery - Use [W] and [X] to turn the monitor screen back on the cradle, but without the cradle plugged into a sleep state) if no power being supplied to the camera. - The following conditions will have to configure the settings correctly. Battery not loaded or dead... battery with the camera on . Use the procedure under "Configuring Display Language, Date, and Time ...
...loaded or dead battery - Use [W] and [X] to turn the monitor screen back on the cradle, but without the cradle plugged into a sleep state) if no power being supplied to the camera. - The following conditions will have to configure the settings correctly. Battery not loaded or dead... battery with the camera on . Use the procedure under "Configuring Display Language, Date, and Time ...
Owners Manual
Page 45
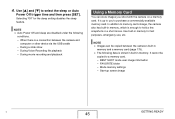
...information - Mode memory settings - During Voice Recording file playback - FAVORITE folder - It cannot be copied between the camera and computer or other device via the USB cradle - Use [S] and [T] to purchase a commercially available memory card. During movie recording and playback Using a Memory... Card You can be copied to you shoot with the camera on a memory card. In addition to hold a few ...
...information - Mode memory settings - During Voice Recording file playback - FAVORITE folder - It cannot be copied between the camera and computer or other device via the USB cradle - Use [S] and [T] to purchase a commercially available memory card. During movie recording and playback Using a Memory... Card You can be copied to you shoot with the camera on a memory card. In addition to hold a few ...

Owners Manual
Page 70
... of the image you want to turn on the USB cradle while the operation lamp is shining directly onto the lens, shade the lens with your hand when shooting an image. Doing so can cause digital noise in incorrect storage of the camera, etc. • Shooting a dark subject while "Auto..." is selected for the ISO sensitivity (page 123) setting will cause the camera to select "Off" and then press [SET]. Snapshot Shooting Precautions ...
... of the image you want to turn on the USB cradle while the operation lamp is shining directly onto the lens, shade the lens with your hand when shooting an image. Doing so can cause digital noise in incorrect storage of the camera, etc. • Shooting a dark subject while "Auto..." is selected for the ISO sensitivity (page 123) setting will cause the camera to select "Off" and then press [SET]. Snapshot Shooting Precautions ...

Owners Manual
Page 145
Wait until an image is stopped on the USB cradle. If a button does not work, wait a bit and try again. I Playing a Slideshow on the USB Cradle (Photo Stand) You can play back repeatedly within the time specified by "Interval". Turn on the camera and place it into a power outlet. 1..... IMPORTANT! • All button operations are disabled while the slideshow is switching from a computer or an image recorded with a different type of digital camera may remain on the screen longer than the time specified by the slideshow "Time" setting. • In image copied from one image to another...
Wait until an image is stopped on the USB cradle. If a button does not work, wait a bit and try again. I Playing a Slideshow on the USB Cradle (Photo Stand) You can play back repeatedly within the time specified by "Interval". Turn on the camera and place it into a power outlet. 1..... IMPORTANT! • All button operations are disabled while the slideshow is switching from a computer or an image recorded with a different type of digital camera may remain on the screen longer than the time specified by the slideshow "Time" setting. • In image copied from one image to another...

Owners Manual
Page 146
...8226; The battery does not charge while a slideshow is in progress. You can also connect to adjust the volume. The camera will turn off the camera. The slideshow is performed in progress. After configuring the settings, press [MENU] again to restart the slideshow. • ...to a video recording device and record a slideshow (page 147). 146 VIEWING SNAPSHOTS AND MOVIES To charge the battery, stop a slideshow Press the USB cradle's [PHOTO] button. To stop the slideshow. 2. NOTE • You can change the slideshow setting by pressing [MENU] while a slideshow is in...
...8226; The battery does not charge while a slideshow is in progress. You can also connect to adjust the volume. The camera will turn off the camera. The slideshow is performed in progress. After configuring the settings, press [MENU] again to restart the slideshow. • ...to a video recording device and record a slideshow (page 147). 146 VIEWING SNAPSHOTS AND MOVIES To charge the battery, stop a slideshow Press the USB cradle's [PHOTO] button. To stop the slideshow. 2. NOTE • You can change the slideshow setting by pressing [MENU] while a slideshow is in...

Owners Manual
Page 147
... AND MOVIES If the TV has more than one video input, select the one where the USB cradle is connected. 4. When the camera turns on in the PLAY mode, an image will not turn on the camera on the PLAY mode. VIDEO IN Jack (Yellow) AUDIO IN Jacks (White) Video Audio TV Yellow... [AV OUT] (AV output port) 2. Press [ ] to a TV. 1. Pressing [ON/OFF] or [ ] will appear on . 5. Turn off the camera and place it onto the USB cradle. 3. The camera's monitor screen will not turn on the camera for the type of file you want to play. • At this point you could press the USB...
... AND MOVIES If the TV has more than one video input, select the one where the USB cradle is connected. 4. When the camera turns on in the PLAY mode, an image will not turn on the camera on the PLAY mode. VIDEO IN Jack (Yellow) AUDIO IN Jacks (White) Video Audio TV Yellow... [AV OUT] (AV output port) 2. Press [ ] to a TV. 1. Pressing [ON/OFF] or [ ] will appear on . 5. Turn off the camera and place it onto the USB cradle. 3. The camera's monitor screen will not turn on the camera for the type of file you want to play. • At this point you could press the USB...

Owners Manual
Page 148
...and indicators that appear on the monitor screen also appear on a DVD or video tape. The following . • Press the camera's [ON/OFF] button. • Press the USB cradle's [USB] button. When you can view recorded images on the TV. • You can play a slideshow of the following... the USB cable), you first start displaying images, set the TV volume control at maximum volume. You can use the camera's USB cradle to connect to clear all indicators from the camera. IMPORTANT! • When connecting to a TV to display images, be sure to the VIDEO IN and AUDIO IN ...
...and indicators that appear on the monitor screen also appear on a DVD or video tape. The following . • Press the camera's [ON/OFF] button. • Press the USB cradle's [USB] button. When you can view recorded images on the TV. • You can play a slideshow of the following... the USB cable), you first start displaying images, set the TV volume control at maximum volume. You can use the camera's USB cradle to connect to clear all indicators from the camera. IMPORTANT! • When connecting to a TV to display images, be sure to the VIDEO IN and AUDIO IN ...

Owners Manual
Page 178
On the "PLAY" tab, select "Favorites" and then press [X]. 3. Perform the required operations on the USB cradle (which is connected to the camera's memory and display the FAVORITE folder contents. After you are finished viewing the FAVORITE folder snapshots, press [MENU] twice ...to view FAVORITE folder contents on your computer to navigate to the computer). 3. Place the camera on your computer. 1. File Name Perform the following steps to exit this procedure. 178 MANAGING YOUR FILES FAVORITE folder icon 5. I Viewing ...
On the "PLAY" tab, select "Favorites" and then press [X]. 3. Perform the required operations on the USB cradle (which is connected to the camera's memory and display the FAVORITE folder contents. After you are finished viewing the FAVORITE folder snapshots, press [MENU] twice ...to view FAVORITE folder contents on your computer to navigate to the computer). 3. Place the camera on your computer. 1. File Name Perform the following steps to exit this procedure. 178 MANAGING YOUR FILES FAVORITE folder icon 5. I Viewing ...

Owners Manual
Page 196
... number of your printer for new printer versions, etc. • Never disconnect cables or perform any camera or USB cradle operation while printing is in a memory card, you can cause a printer error. Doing so can use the camera's DPOF settings (page 200) to the professional print service. Before taking in progress. Using Professional...
... number of your printer for new printer versions, etc. • Never disconnect cables or perform any camera or USB cradle operation while printing is in a memory card, you can cause a printer error. Doing so can use the camera's DPOF settings (page 200) to the professional print service. Before taking in progress. Using Professional...
Owners Manual
Page 197
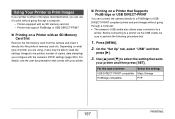
... through a computer. - Depending on a Printer with an SD memory card slot - Use [S] and [T] to print without going through a computer. • The camera's USB cradle also allows easy connection to a printer. Printer equipped with an SD Memory Card Slot Remove the SD memory card from the... camera and insert it to select the setting that comes with the camera's DPOF settings (page 200). I Printing on a Printer that support PictBridge or USB DIRECT-PRINT I...
... through a computer. - Depending on a Printer with an SD memory card slot - Use [S] and [T] to print without going through a computer. • The camera's USB cradle also allows easy connection to a printer. Printer equipped with an SD Memory Card Slot Remove the SD memory card from the... camera and insert it to select the setting that comes with the camera's DPOF settings (page 200). I Printing on a Printer that support PictBridge or USB DIRECT-PRINT I...

Owners Manual
Page 198
...printer. 8. Press the USB cradle's [USB] button. Be sure to disconnect the AV cable from the cradle if you do not plan to use the camera's monitor screen to the cradle. Turn off the camera and place it onto the USB cradle. 6. Connect the USB cable that the camera's battery is fully charged. ...• Nothing appears on the camera's monitor screen if the camera is on the USB cradle while the bundled AV ...
...printer. 8. Press the USB cradle's [USB] button. Be sure to disconnect the AV cable from the cradle if you do not plan to use the camera's monitor screen to the cradle. Turn off the camera and place it onto the USB cradle. 6. Connect the USB cable that the camera's battery is fully charged. ...• Nothing appears on the camera's monitor screen if the camera is on the USB cradle while the bundled AV ...

