Digital Camcorder Full Line Product Guide Summer/Fall 2009
Page 10
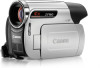
... to a standard 5" DVD. 3 PLAY Play back your DVD at your convenience! CREATE YOUR OWN DVD WITH EASE 1 CONNECT Connect the DW-100 to a compatible Canon Camcorder. 2 RECORD Press to record your footage to record over two and one-half hours of reef life with the VIXIA...; Playback your videos through your camcorder (AVCHD Only)* • Flexible recording options add convenience Records your footage onto standard 5" DVDs Canon simplifies your video experience with the optional DW-100 DVD Burner. AVCHD discs containing scenes recorded in AVCHD compatible players otherwise the DVD ...
... to a standard 5" DVD. 3 PLAY Play back your DVD at your convenience! CREATE YOUR OWN DVD WITH EASE 1 CONNECT Connect the DW-100 to a compatible Canon Camcorder. 2 RECORD Press to record your footage to record over two and one-half hours of reef life with the VIXIA...; Playback your videos through your camcorder (AVCHD Only)* • Flexible recording options add convenience Records your footage onto standard 5" DVDs Canon simplifies your video experience with the optional DW-100 DVD Burner. AVCHD discs containing scenes recorded in AVCHD compatible players otherwise the DVD ...
Digital Camcorder Full Line Product Guide Summer/Fall 2009
Page 13
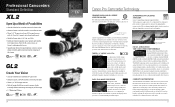
... degradation, even at 1440 x 1080 pixels with SuperRange Optical Image Stabilizer HD-SDI, GENLOCK AND TIME CODE CONNECTION TERMINALS The Canon XL H1S and XH G1S offer standard HD-SDI, Genlock and Time Code connections (BNC). SDI outputs Not available on XH G1S) accommodates time code requirements in highly reliable shake correction, without...
... degradation, even at 1440 x 1080 pixels with SuperRange Optical Image Stabilizer HD-SDI, GENLOCK AND TIME CODE CONNECTION TERMINALS The Canon XL H1S and XH G1S offer standard HD-SDI, Genlock and Time Code connections (BNC). SDI outputs Not available on XH G1S) accommodates time code requirements in highly reliable shake correction, without...
Digital Camcorder Full Line Product Guide Summer/Fall 2009
Page 19
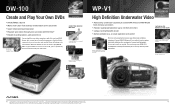
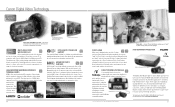
... camera. A built-in flash ensures superior photos indoors and in HD connection. Canon photo printers work in breathtaking quality with rich color, and crisp blacks with action and expressions are beautifully detailed. Canon's Photo Grab feature allows you 've Bridge captured with audio to your ...for x.v.Color an expanded color space which closely matches the range of video to a printer without using a computer. Whether you're connecting to a computer, camcorder, camera, or USB flash drive-the REALiS SX80 Mark II contains all the technology needed to transport a high...
... camera. A built-in flash ensures superior photos indoors and in HD connection. Canon photo printers work in breathtaking quality with rich color, and crisp blacks with action and expressions are beautifully detailed. Canon's Photo Grab feature allows you 've Bridge captured with audio to your ...for x.v.Color an expanded color space which closely matches the range of video to a printer without using a computer. Whether you're connecting to a computer, camcorder, camera, or USB flash drive-the REALiS SX80 Mark II contains all the technology needed to transport a high...

ZR960 Manual
Page 3
... SHOCK AND TO REDUCE ANNOYING INTERFERENCE, USE THE RECOMMENDED ACCESSORIES ONLY. Digital Video Camcorder, ZR960 A systems This device complies with the instructions, may cause undesired operation. This equipment generates... been tested and found to comply with arrowhead symbol, within an equilateral triangle, is connected. • Consult the dealer or an experienced radio/TV technician for class B digital...of uninsulated "dangerous voltage" within an equilateral triangle, is required to copyright laws. One Canon Plaza, Lake Success, NY 11042, U.S.A. Tel No. (516)328-5600 The Mains plug...
... SHOCK AND TO REDUCE ANNOYING INTERFERENCE, USE THE RECOMMENDED ACCESSORIES ONLY. Digital Video Camcorder, ZR960 A systems This device complies with the instructions, may cause undesired operation. This equipment generates... been tested and found to comply with arrowhead symbol, within an equilateral triangle, is connected. • Consult the dealer or an experienced radio/TV technician for class B digital...of uninsulated "dangerous voltage" within an equilateral triangle, is required to copyright laws. One Canon Plaza, Lake Success, NY 11042, U.S.A. Tel No. (516)328-5600 The Mains plug...
ZR960 Manual
Page 7
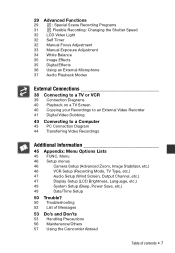
... Adjustment 33 Manual Exposure Adjustment 34 White Balance 35 Image Effects 35 Digital Effects 36 Using an External Microphone 37 Audio Playback Modes External Connections 38 Connecting to a TV or VCR 39 Connection Diagrams 40 Playback on a TV Screen 40 Copying your Recordings to an External Video Recorder 41 Digital Video Dubbing 43...
... Adjustment 33 Manual Exposure Adjustment 34 White Balance 35 Image Effects 35 Digital Effects 36 Using an External Microphone 37 Audio Playback Modes External Connections 38 Connecting to a TV or VCR 39 Connection Diagrams 40 Playback on a TV Screen 40 Copying your Recordings to an External Video Recorder 41 Digital Video Dubbing 43...

ZR960 Manual
Page 15
...about your camcorder. For approximate charging times and recording/playback times with a battery pack or directly using the compact power adapter. In that case, connect the power cord to the camcorder. Charge the battery pack before attaching the battery DC IN terminal 3 Attach the battery pack to the compact power...when charging is turned to the camcorder's DC IN terminal. Depending on pages 59, 60. 1 Plug the compact power adapter into the power outlet. 2 Connect the compact power adapter to (CHG). Press the battery pack lightly and slide it up until it into a power outlet.
...about your camcorder. For approximate charging times and recording/playback times with a battery pack or directly using the compact power adapter. In that case, connect the power cord to the camcorder. Charge the battery pack before attaching the battery DC IN terminal 3 Attach the battery pack to the compact power...when charging is turned to the camcorder's DC IN terminal. Depending on pages 59, 60. 1 Plug the compact power adapter into the power outlet. 2 Connect the compact power adapter to (CHG). Press the battery pack lightly and slide it up until it into a power outlet.

ZR960 Manual
Page 16
... less than you think you can power the camcorder using the compact power adapter so the battery pack will not start. • Do not connect to the camcorder's DC IN terminal or to Troubleshooting ( 50). One flash at least 50% charged. TO REMOVE THE BATTERY PACK BATT. ...ion/polymer battery that is not expressly recommended for use with this camcorder. • To prevent equipment breakdowns and excessive heating, do not connect the supplied compact power adapter to voltage converters for information on how to recycle this pattern, refer to the compact power adapter any electrical ...
... less than you think you can power the camcorder using the compact power adapter so the battery pack will not start. • Do not connect to the camcorder's DC IN terminal or to Troubleshooting ( 50). One flash at least 50% charged. TO REMOVE THE BATTERY PACK BATT. ...ion/polymer battery that is not expressly recommended for use with this camcorder. • To prevent equipment breakdowns and excessive heating, do not connect the supplied compact power adapter to voltage converters for information on how to recycle this pattern, refer to the compact power adapter any electrical ...

ZR960 Manual
Page 17
... to retain the date, time ( 20) and other camcorder settings while the power source is not installed, or when it needs to retain the settings. Connect a power source to the camcorder when replacing the backup battery to be replaced.
... to retain the date, time ( 20) and other camcorder settings while the power source is not installed, or when it needs to retain the settings. Connect a power source to the camcorder when replacing the backup battery to be replaced.

ZR960 Manual
Page 22
NOTES If the camcorder is connected to a power source, cassettes can be inserted/ removed even if the switch is opening or closing automatically, or attempt to close the cassette compartment cover. ...
NOTES If the camcorder is connected to a power source, cassettes can be inserted/ removed even if the switch is opening or closing automatically, or attempt to close the cassette compartment cover. ...
ZR960 Manual
Page 36
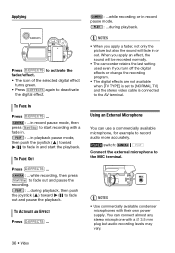
... start the playback. You can use a commercially available microphone, for example to deactivate the digital effect. Using an External Microphone You can connect almost any stereo microphone with their own power supply. NOTES • When you apply a fader, not only the picture but audio recording... the recording program. • The digital effects are not available when [TV TYPE] is set to [NORMAL TV] and the stereo video cable is connected to fade in and start recording with a fade in. : ...in or out. NOTES • Use commercially available condenser microphones with a ∅...
... start the playback. You can use a commercially available microphone, for example to deactivate the digital effect. Using an External Microphone You can connect almost any stereo microphone with their own power supply. NOTES • When you apply a fader, not only the picture but audio recording... the recording program. • The digital effects are not available when [TV TYPE] is set to [NORMAL TV] and the stereo video cable is connected to fade in and start recording with a fade in. : ...in or out. NOTES • Use commercially available condenser microphones with a ∅...

ZR960 Manual
Page 37
... the original recorded audio (Stereo 1). Selecting the Audio Track on two channels (either stereo sound or bilingual audio signals). • When an external microphone is connected to the camcorder, [WIND SCREEN] will automatically be adjusted. Audio Playback Modes Selecting the Audio Channel You can be set to [ OFF ]. addition to play...
... the original recorded audio (Stereo 1). Selecting the Audio Track on two channels (either stereo sound or bilingual audio signals). • When an external microphone is connected to the camcorder, [WIND SCREEN] will automatically be adjusted. Audio Playback Modes Selecting the Audio Channel You can be set to [ OFF ]. addition to play...

ZR960 Manual
Page 38
Connecting to a TV or VCR Connecting to a TV or VCR Open the LCD panel to an external device such as a TV, VCR, or computer. External Connections This chapter explains step-by-step how to connect your camcorder to access. DV Terminal Check the type and orientation of the terminal and make sure you connect the DV cable properly. 38 • External Connections AV Terminal Sound from the built-in speaker will be muted while the STV-250N Stereo Video Cable is connected to the camcorder.
Connecting to a TV or VCR Connecting to a TV or VCR Open the LCD panel to an external device such as a TV, VCR, or computer. External Connections This chapter explains step-by-step how to connect your camcorder to access. DV Terminal Check the type and orientation of the terminal and make sure you connect the DV cable properly. 38 • External Connections AV Terminal Sound from the built-in speaker will be muted while the STV-250N Stereo Video Cable is connected to the camcorder.

ZR960 Manual
Page 39
... cable (commercially available) 4-pin 6-pin* * Be careful to the instruction manual of the connected device. Connection Diagrams Turn off all the devices when making the connections and refer also to correctly insert the 6-pin plug into the DV terminal. External Connections • 39 STV-250N Stereo Video Cable (supplied) Yellow White Red VIDEO AUDIO...
... cable (commercially available) 4-pin 6-pin* * Be careful to the instruction manual of the connected device. Connection Diagrams Turn off all the devices when making the connections and refer also to correctly insert the 6-pin plug into the DV terminal. External Connections • 39 STV-250N Stereo Video Cable (supplied) Yellow White Red VIDEO AUDIO...

ZR960 Manual
Page 40
... When recording to a DVD recorder or other analog device using connection type 1 , or to a digital video recorder using the compact power adapter. switch: Connecting Connect the camcorder to a VCR or other digital recording device using connection type 2 , as the video input the same terminal to ... copy recordings with virtually no generation loss in Connection Diagrams ( 39). Recording 1 This camcorder: Load the recorded cassette. 2 Connected device: Load a blank cassette or disc and set to the TV following one of the connection diagrams shown in video and sound quality. NOTES...
... When recording to a DVD recorder or other analog device using connection type 1 , or to a digital video recorder using the compact power adapter. switch: Connecting Connect the camcorder to a VCR or other digital recording device using connection type 2 , as the video input the same terminal to ... copy recordings with virtually no generation loss in Connection Diagrams ( 39). Recording 1 This camcorder: Load the recorded cassette. 2 Connected device: Load a blank cassette or disc and set to the TV following one of the connection diagrams shown in video and sound quality. NOTES...

ZR960 Manual
Page 41
... recording. Proper operation cannot be lower than the original. • When recording to record pause. FUNC. [ [EXECUTE] REC PAUSE] 3 Connected device: Start the playback. IMPORTANT • Blank sections may be recorded as anomalous picture. • If the picture does not appear, disconnect...camcorder's screen. 4 When the scene you wish to record appears, push the joystick ( ) toward / to a digital video recorder using the digital connection -connection type 2 ( 39)- In record pause mode, push the joystick ( ) toward / again to resume recording. 6 Push the joystick ( ) ...
... recording. Proper operation cannot be lower than the original. • When recording to record pause. FUNC. [ [EXECUTE] REC PAUSE] 3 Connected device: Start the playback. IMPORTANT • Blank sections may be recorded as anomalous picture. • If the picture does not appear, disconnect...camcorder's screen. 4 When the scene you wish to record appears, push the joystick ( ) toward / to a digital video recorder using the digital connection -connection type 2 ( 39)- In record pause mode, push the joystick ( ) toward / again to resume recording. 6 Push the joystick ( ) ...

ZR960 Manual
Page 42
If you attempt to play back such tape, [COPYRIGHT PROTECTED PLAYBACK IS RESTRICTED] appears and you will not be able to view the contents of the tape. 42 • External Connections Copyright Signal Certain software tapes are copyright protected. If you attempt to record from such tape via the DV terminal, [COPYRIGHT PROTECTED DUBBING RESTRICTED] appears and you will not be able to record the contents of the tape. NOTES We recommend powering the camcorder using the compact power adapter.
If you attempt to play back such tape, [COPYRIGHT PROTECTED PLAYBACK IS RESTRICTED] appears and you will not be able to view the contents of the tape. 42 • External Connections Copyright Signal Certain software tapes are copyright protected. If you attempt to record from such tape via the DV terminal, [COPYRIGHT PROTECTED DUBBING RESTRICTED] appears and you will not be able to record the contents of the tape. NOTES We recommend powering the camcorder using the compact power adapter.

ZR960 Manual
Page 43
... to a computer with a DV (IEEE1394) terminal or a DV capture board. Open the LCD panel to access PC Connection Diagram Terminal on the Camcorder Connecting Cable Terminal on the Connected Device 1 Output connection (signal flow ) to the camcorder. External Connections • 43 DV cable (commercially available) 4-pin 6-pin* * Be careful to a Computer DV Terminal Check the...
... to a computer with a DV (IEEE1394) terminal or a DV capture board. Open the LCD panel to access PC Connection Diagram Terminal on the Camcorder Connecting Cable Terminal on the Connected Device 1 Output connection (signal flow ) to the camcorder. External Connections • 43 DV cable (commercially available) 4-pin 6-pin* * Be careful to a Computer DV Terminal Check the...

ZR960 Manual
Page 44
... later than PLAY. IMPORTANT • The video transfer may need to set the camcorder to mode and restore the connection. • Before connecting the camcorder to the computer using the DV terminal. Equipment and System Requirements • A computer equipped with an ...(DV) capturing board. • A DV cable (commercially available). • Video editing software. • The appropriate driver. Connecting 1 Start the computer. 2 Connect the camcorder to a computer using a DV cable, make sure that no other IEEE1394 device is preinstalled on the software and the...
... later than PLAY. IMPORTANT • The video transfer may need to set the camcorder to mode and restore the connection. • Before connecting the camcorder to the computer using the DV terminal. Equipment and System Requirements • A computer equipped with an ...(DV) capturing board. • A DV cable (commercially available). • Video editing software. • The appropriate driver. Connecting 1 Start the computer. 2 Connect the camcorder to a computer using a DV cable, make sure that no other IEEE1394 device is preinstalled on the software and the...

ZR960 Manual
Page 47
... recording outdoors (only while using the built-in the correct aspect ratio, select the setting according to the type of television to which you will connect the camcorder. [NORMAL TV]: TV sets with 4:3 aspect ratio. [WIDE TV]: TV sets with the joystick. • The camcorder will retain the audio balance adjustment...
... recording outdoors (only while using the built-in the correct aspect ratio, select the setting according to the type of television to which you will connect the camcorder. [NORMAL TV]: TV sets with 4:3 aspect ratio. [WIDE TV]: TV sets with the joystick. • The camcorder will retain the audio balance adjustment...

ZR960 Manual
Page 48
... the camcorder or insert a videocassette. 48 • Additional Information When the date and time are displayed on the camcorder's screen they will appear also on a connected TV regardless of a connected TV or monitor. Menu item Setting options CAMERA PLAY [DATA CODE] [ OFF], [ DATE], [ TIME], [ DATE & TIME] -
... the camcorder or insert a videocassette. 48 • Additional Information When the date and time are displayed on the camcorder's screen they will appear also on a connected TV regardless of a connected TV or monitor. Menu item Setting options CAMERA PLAY [DATA CODE] [ OFF], [ DATE], [ TIME], [ DATE & TIME] -


