
User Guide
Page 4
...) (11) (1) Zoom lever Shooting: [ (telephoto)] / [ (wide angle)] Playback: [ (magnify)] / [ (index)] (2) Shutter button (3) Front dial (4) Strap mount (5) Flash (6) Lamp (7) Speaker (8) Lens (9) Lens hood/filter adapter mount (10) [ (Framing Assist - Lock)] button (12) Tripod socket (13) DC coupler terminal cover (14) Memory...13) [ (ISO speed)] / Up button (14) [ (Manual focus)] / [ (Macro)] / Left button (15) FUNC./SET button (16) [ (Flash)] / Right button (17) [ (Display)] / Down button Before Use Basic Guide Advanced Guide 1 Camera Basics 2 Auto Mode / Hybrid Auto Mode 3 Other Shooting...
...) (11) (1) Zoom lever Shooting: [ (telephoto)] / [ (wide angle)] Playback: [ (magnify)] / [ (index)] (2) Shutter button (3) Front dial (4) Strap mount (5) Flash (6) Lamp (7) Speaker (8) Lens (9) Lens hood/filter adapter mount (10) [ (Framing Assist - Lock)] button (12) Tripod socket (13) DC coupler terminal cover (14) Memory...13) [ (ISO speed)] / Up button (14) [ (Manual focus)] / [ (Macro)] / Left button (15) FUNC./SET button (16) [ (Flash)] / Right button (17) [ (Display)] / Down button Before Use Basic Guide Advanced Guide 1 Camera Basics 2 Auto Mode / Hybrid Auto Mode 3 Other Shooting...

User Guide
Page 8
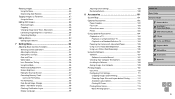
... Servo AF 66 Changing the Focus Setting 67 Shooting with the AF Lock 67 Flash 68 Changing the Flash Mode 68 Auto 68 On 68 Slow Synchro 68 Off 68 Adjusting the Flash Exposure Compensation 69 Shooting with the FE Lock 69 Other Settings 70 Changing the ...Specific Shutter Speeds ([Tv] Mode 71 Specific Aperture Values ([Av] Mode 72 Specific Shutter Speeds and Aperture Values ([M] Mode)...... 72 Adjusting the Flash Output 73 6 Playback Mode 74 Viewing 74 Switching Display Modes 75 Overexposure Warning (for Image Highlights 76 Histogram 76 Viewing Short Movies Created When ...
... Servo AF 66 Changing the Focus Setting 67 Shooting with the AF Lock 67 Flash 68 Changing the Flash Mode 68 Auto 68 On 68 Slow Synchro 68 Off 68 Adjusting the Flash Exposure Compensation 69 Shooting with the FE Lock 69 Other Settings 70 Changing the ...Specific Shutter Speeds ([Tv] Mode 71 Specific Aperture Values ([Av] Mode 72 Specific Shutter Speeds and Aperture Values ([M] Mode)...... 72 Adjusting the Flash Output 73 6 Playback Mode 74 Viewing 74 Switching Display Modes 75 Overexposure Warning (for Image Highlights 76 Histogram 76 Viewing Short Movies Created When ...
User Guide
Page 9
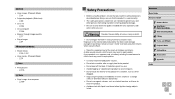
... Checking Certification Logos 99 Display Language 99 Adjusting Other Settings 100 Restoring Defaults 100 8 Accessories 101 System Map 101 Optional Accessories 102 Power Supplies 102 Flash Unit 103 Other Accessories 103 Printer 103 Using Optional Accessories 104 Playback on a TV 104 Playback on a High-Definition TV 104 Playback on a Standard-Definition...
... Checking Certification Logos 99 Display Language 99 Adjusting Other Settings 100 Restoring Defaults 100 8 Accessories 101 System Map 101 Optional Accessories 102 Power Supplies 102 Flash Unit 103 Other Accessories 103 Printer 103 Using Optional Accessories 104 Playback on a TV 104 Playback on a High-Definition TV 104 Playback on a Standard-Definition...

User Guide
Page 10
... Shooting (Information Display 123 Battery Level 124 Playback (Detailed Information Display 124 Summary of Shots per Memory Card 135 Recording Time per Memory Card 135 Flash Range 135 Shooting Range 136 Continuous Shooting Speed 136 Shutter Speed 136 Aperture 136 Battery Pack NB-6LH 136 Battery Charger CB-2LY/CB-2LYE...
... Shooting (Information Display 123 Battery Level 124 Playback (Detailed Information Display 124 Summary of Shots per Memory Card 135 Recording Time per Memory Card 135 Flash Range 135 Shooting Range 136 Continuous Shooting Speed 136 Shutter Speed 136 Aperture 136 Battery Pack NB-6LH 136 Battery Charger CB-2LY/CB-2LYE...

User Guide
Page 11
...) Monochrome (= 54) ●● While adjusting image settings (Live View Control) -- =48 ●● Focus on faces -- =29, =50, =65 ●● Without using the flash (Flash Off) -- =29, =68 ●● Include yourself in the shot (Self-Timer) -- =39, =55 ●● Add a date stamp -- =40 ●● Movie clips and...
...) Monochrome (= 54) ●● While adjusting image settings (Live View Control) -- =48 ●● Focus on faces -- =29, =50, =65 ●● Without using the flash (Flash Off) -- =29, =68 ●● Include yourself in the shot (Self-Timer) -- =39, =55 ●● Add a date stamp -- =40 ●● Movie clips and...
User Guide
Page 12
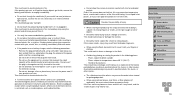
... particular, remain at least 1 meter (3.3 feet) away from being injured or incurring property damage. ●● Be sure to the intense light produced by the flash could damage eyesight. View ●● View images (Playback Mode) -- =74 ●● Automatic playback (Slideshow) -- =80 ●● On a TV -- =104...9679; Do not use organic solvents such as alcohol, benzine, or thinner to a computer -- =109 Safety Precautions ●● Before using the flash. ●● Store this equipment out of the reach of serious injury or death. ●● Do not trigger the...
... particular, remain at least 1 meter (3.3 feet) away from being injured or incurring property damage. ●● Be sure to the intense light produced by the flash could damage eyesight. View ●● View images (Playback Mode) -- =74 ●● Automatic playback (Slideshow) -- =80 ●● On a TV -- =104...9679; Do not use organic solvents such as alcohol, benzine, or thinner to a computer -- =109 Safety Precautions ●● Before using the flash. ●● Store this equipment out of the reach of serious injury or death. ●● Do not trigger the...
User Guide
Page 13
...with your product uses one ) at intense light sources, such as pins or keys) to attach these accessories firmly. Exercise adequate caution when using the flash, be sure to contact the terminals or plug. -- This could result in electrical shock or fire. ●● Turn the camera off , ... or metal objects (such as the sun on the power cord, if your fingers or clothing. This could result in burns or damage to the flash. ●● Avoid using optional lenses, lens filters, or filter adapters (if applicable), be careful not to explode or leak, resulting in the ...
...with your product uses one ) at intense light sources, such as pins or keys) to attach these accessories firmly. Exercise adequate caution when using the flash, be sure to contact the terminals or plug. -- This could result in electrical shock or fire. ●● Turn the camera off , ... or metal objects (such as the sun on the power cord, if your fingers or clothing. This could result in burns or damage to the flash. ●● Avoid using optional lenses, lens filters, or filter adapters (if applicable), be careful not to explode or leak, resulting in the ...
User Guide
Page 14
... damage. ●● Before you are not using the camera on a sandy beach or at intense light sources, such as the sun on the flash with a cloth or other foreign matter on a clear day or an intense artificial light source. Leaving the unit plugged in for a long period of... cause it to enter the camera. ●● On products that raise and lower the flash automatically, do not push the flash down with the screen. ●● On products that raise and lower the flash automatically, make sure to malfunction. ●● Remove and store the battery pack/batteries when...
... damage. ●● Before you are not using the camera on a sandy beach or at intense light sources, such as the sun on the flash with a cloth or other foreign matter on a clear day or an intense artificial light source. Leaving the unit plugged in for a long period of... cause it to enter the camera. ●● On products that raise and lower the flash automatically, do not push the flash down with the screen. ●● On products that raise and lower the flash automatically, make sure to malfunction. ●● Remove and store the battery pack/batteries when...

User Guide
Page 16
... Mode / Hybrid Auto Mode 3 Other Shooting Modes 4 P Mode 5 Tv, Av, and M Mode 6 Playback Mode 7 Setting Menu 8 Accessories 9 Appendix Index 16 If you have raised the flash, do not attach the charger or cord to charge the battery pack initially, because the camera is not sold with a fully charged battery pack, see...
... Mode / Hybrid Auto Mode 3 Other Shooting Modes 4 P Mode 5 Tv, Av, and M Mode 6 Playback Mode 7 Setting Menu 8 Accessories 9 Appendix Index 16 If you have raised the flash, do not attach the charger or cord to charge the battery pack initially, because the camera is not sold with a fully charged battery pack, see...

User Guide
Page 20
...;As the camera shoots, a shutter sound is played, and in low-light conditions when you prefer not to use . If you have raised the flash, it fires automatically. ●●Keep the camera still until the shutter sound ends. ●●After displaying your shot, the camera will make... and image stabilization mode are in focus. 3 Compose the shot. ●●To zoom in the upper right of the optimal settings for use the flash, push it down . Before Use Basic Guide Advanced Guide 1 Camera Basics 2 Auto Mode / Hybrid Auto Mode 3 Other Shooting Modes 4 P Mode 5 Tv, Av, and M...
...;As the camera shoots, a shutter sound is played, and in low-light conditions when you prefer not to use . If you have raised the flash, it fires automatically. ●●Keep the camera still until the shutter sound ends. ●●After displaying your shot, the camera will make... and image stabilization mode are in focus. 3 Compose the shot. ●●To zoom in the upper right of the optimal settings for use the flash, push it down . Before Use Basic Guide Advanced Guide 1 Camera Basics 2 Auto Mode / Hybrid Auto Mode 3 Other Shooting Modes 4 P Mode 5 Tv, Av, and M...

User Guide
Page 30
...Press the movie button. However, note that they are in focus. ●●If [Raise the flash] is displayed, lift the flash with the area in focus (2).) ●●To zoom in or out quickly, move the zoom...screen, and the subject is displayed, along with your finger to prepare it for use the flash, push it down . ●●As the camera shoots, a shutter sound is played, and ...in low-light conditions when you have raised the flash, it fires automatically. ●●Keep the camera still until the shutter sound ends. ●&#...
...Press the movie button. However, note that they are in focus. ●●If [Raise the flash] is displayed, lift the flash with the area in focus (2).) ●●To zoom in or out quickly, move the zoom...screen, and the subject is displayed, along with your finger to prepare it for use the flash, push it down . ●●As the camera shoots, a shutter sound is played, and ...in low-light conditions when you have raised the flash, it fires automatically. ●●Keep the camera still until the shutter sound ends. ●&#...
User Guide
Page 32
... area changes and subjects are enlarged to allow for correction of significant camera shake. Movies ●● Before shooting a movie, lower the flash with your previous shot may cause the recording to sound muffled. (1) ●● Avoid touching camera controls other measures to keep it again... displayed when you press the shutter button halfway. To shoot subjects at the same size shown before the shooting screen is not possible until the flash has finished recharging. Be careful not to choose [Off]. For details on the [ ] tab, and then press the [ ][ ] buttons ...
... area changes and subjects are enlarged to allow for correction of significant camera shake. Movies ●● Before shooting a movie, lower the flash with your previous shot may cause the recording to sound muffled. (1) ●● Avoid touching camera controls other measures to keep it again... displayed when you press the shutter button halfway. To shoot subjects at the same size shown before the shooting screen is not possible until the flash has finished recharging. Be careful not to choose [Off]. For details on the [ ] tab, and then press the [ ][ ] buttons ...

User Guide
Page 39
... step 1 in "Using the Self-Timer" (=39) and choose [ ]. ●●Once the setting is complete, [ ] is displayed. ●●Follow step 2 in case the flash fires.) ●●To cancel shooting after you have triggered the self-timer, press the [ ] button. ●●To restore the original setting, choose [ ] in...
... step 1 in "Using the Self-Timer" (=39) and choose [ ]. ●●Once the setting is complete, [ ] is displayed. ●●Follow step 2 in case the flash fires.) ●●To cancel shooting after you have triggered the self-timer, press the [ ] button. ●●To restore the original setting, choose [ ] in...

User Guide
Page 40
Shooting will remain lit in case the flash fires.) Adding a Date Stamp Still Images Movies The camera can specify the delay (0 - 30 seconds) and number of shots (1 - 10). 1 Choose [ ]. ●●Following step 1 ... [Date Stamp ] on the [ ] tab, and then choose the desired option (=27). ●●Once the setting is complete, [ ] is required between shots when the flash fires or when you take many shots. Before Use Basic Guide Advanced Guide 1 Camera Basics 2 Auto Mode / Hybrid Auto Mode 3 Other Shooting Modes 4 P Mode 5 Tv...
Shooting will remain lit in case the flash fires.) Adding a Date Stamp Still Images Movies The camera can specify the delay (0 - 30 seconds) and number of shots (1 - 10). 1 Choose [ ]. ●●Following step 1 ... [Date Stamp ] on the [ ] tab, and then choose the desired option (=27). ●●Once the setting is complete, [ ] is required between shots when the flash fires or when you take many shots. Before Use Basic Guide Advanced Guide 1 Camera Basics 2 Auto Mode / Hybrid Auto Mode 3 Other Shooting Modes 4 P Mode 5 Tv...

User Guide
Page 41
...●●Hold the shutter button all the way down to shoot continuously. Print using printer functions (=110) -- Use the software downloaded from the Canon website (=107) to print Continuous Shooting Still Images Movies In [ ] mode, hold the shutter button all the way down to shoot continuously. &#... and exposure are taken, shooting may slow down. ●● Shooting may cause it to be used with one may slow down if the flash fires. However, adding a date stamp this way to print -- Before Use Basic Guide Advanced Guide 1 Camera Basics 2 Auto Mode / Hybrid ...
...●●Hold the shutter button all the way down to shoot continuously. Print using printer functions (=110) -- Use the software downloaded from the Canon website (=107) to print Continuous Shooting Still Images Movies In [ ] mode, hold the shutter button all the way down to shoot continuously. &#... and exposure are taken, shooting may slow down. ●● Shooting may cause it to be used with one may slow down if the flash fires. However, adding a date stamp this way to print -- Before Use Basic Guide Advanced Guide 1 Camera Basics 2 Auto Mode / Hybrid ...

User Guide
Page 43
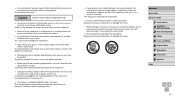
...standard definition ●● In [ ] and [ ] modes, black bars displayed on the top and bottom edges of image quality that occurs in flash photography can be applied to image areas other than eyes (if the camera misinterprets red eye makeup as follows. 1 Access the... [Flash Settings] screen. ●●Press the [ ] button, choose [Flash Settings] on the [ ] tab, and then press the [ ] button (=27). 2 Configure the setting. ●●Choose [Red-Eye Corr.],...
...standard definition ●● In [ ] and [ ] modes, black bars displayed on the top and bottom edges of image quality that occurs in flash photography can be applied to image areas other than eyes (if the camera misinterprets red eye makeup as follows. 1 Access the... [Flash Settings] screen. ●●Press the [ ] button, choose [Flash Settings] on the [ ] tab, and then press the [ ] button (=27). 2 Configure the setting. ●●Choose [Red-Eye Corr.],...

User Guide
Page 45
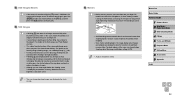
... closed their eyes. 1 Configure the setting. ●●Press the [ ] button, choose [Blink Detection] on the [ ] tab, and then choose [On] (=27). 2 Shoot. ●●[ ] flashes when the camera detects a person whose eyes are closed . ●●To restore the original setting, choose [Off] in step 1. ●● When you have...
... closed their eyes. 1 Configure the setting. ●●Press the [ ] button, choose [Blink Detection] on the [ ] tab, and then choose [On] (=27). 2 Shoot. ●●[ ] flashes when the camera detects a person whose eyes are closed . ●●To restore the original setting, choose [Off] in step 1. ●● When you have...

User Guide
Page 46
... while the shot is displayed, you can deactivate the red-eye reduction lamp that lights up to reduce red-eye when the flash is displayed immediately after Shots Still Images Movies You can take another shot by pressing the shutter button halfway again. Before Use Basic... images until you can change how long images are displayed and what information is used in low-light shots. 1 Access the [Flash Settings] screen. ●●Press the [ ] button, choose [Flash Settings] on the [ ] tab, and then press the [ ] button (= 27). 2 Configure the setting. ●●Choose ...
... while the shot is displayed, you can deactivate the red-eye reduction lamp that lights up to reduce red-eye when the flash is displayed immediately after Shots Still Images Movies You can take another shot by pressing the shutter button halfway again. Before Use Basic... images until you can change how long images are displayed and what information is used in low-light shots. 1 Access the [Flash Settings] screen. ●●Press the [ ] button, choose [Flash Settings] on the [ ] tab, and then press the [ ] button (= 27). 2 Configure the setting. ●●Choose ...

User Guide
Page 49
.... ●● Grouped images can be played back individually (=79) and ungrouped (=79). ●● Protecting (=82) a grouped image will take some time when the flash fires, but hold the camera steady until you shoot. In this state, choose an image by pressing the buttons, and then press the [ ] button. ●...
.... ●● Grouped images can be played back individually (=79) and ungrouped (=79). ●● Protecting (=82) a grouped image will take some time when the flash fires, but hold the camera steady until you shoot. In this state, choose an image by pressing the buttons, and then press the [ ] button. ●...

User Guide
Page 56
... and look at the camera. ●●After the camera detects a new face, the lamp blinking and self-timer sound will speed up. (When the flash fires, the lamp will remain lit.) About two seconds later, the camera will shoot. ●●To cancel shooting after you have triggered the self...
... and look at the camera. ●●After the camera detects a new face, the lamp blinking and self-timer sound will speed up. (When the flash fires, the lamp will remain lit.) About two seconds later, the camera will shoot. ●●To cancel shooting after you have triggered the self...


