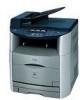
imageCLASS MF8180c Basic Guide
Page 3
...; Software Installation and Instructions • Printing and Scanning Instructions • Troubleshooting • Remote User Interface Instructions Facsimile Guide Software Guide CD-ROM Remote UI Guide CD-ROM • Network Connectivity and Setup Instructions Network Guide CD-ROM Model Name • F148800 (Color imageCLASS MF8180c) • The machine illustration on the cover may differ slightly...
imageCLASS MF8180c Basic Guide
Page 4
Considerable effort has been made to ensure that this machine and the index. However, as we are constantly improving our products, if you need an exact specification, please contact Canon. How This Manual Is Organized Chapter 1 Introduction Chapter 2 Paper Handling Chapter 3 Document Handling Chapter 4 Printing from Your Computer Chapter 5 Copying Chapter 6 Scanning Chapter 7 System Monitor Chapter 8 Maintenance Chapter 9 Troubleshooting Chapter 10 Machine Settings Chapter 11 Appendix Includes the specifications of this manual is free of inaccuracies and omissions.
imageCLASS MF8180c Basic Guide
Page 8
... Handling the Drum Cartridge 8-30 Storing a Drum Cartridge 8-32 Condensation 8-32 Repacking and Transporting Your Machine 8-33 Carrying the Machine by the Sides 8-34 Chapter 9 Troubleshooting Clearing Jams 9-1 Paper Jam Inside the Machine 9-2 Paper Jam Behind the Machine 9-9 Paper Jam in the Drum Cartridge 9-21 Removing Jammed Paper from the ADF...
imageCLASS MF8180c Basic Guide
Page 21
If you think your machine needs servicing, contact Canon Authorized Service Facilities or the Canon Customer Care Center at 1-800-828-4040 between the hours of the machine. on Saturday. Customer Support 1-1 It also explains how to 8:00 ...function. Customer Support Your machine is designed with the machine's operation, try to 8:00 P.M. to solve it by using the information in Chapter 9, "Troubleshooting." Introduction 1 CHAPTER This chapter describes the main components, the operation panel and the standby display of 8:00 A.M. EST Monday through Friday and 10:00 A.M.
imageCLASS MF8180c Basic Guide
Page 119
... toner, and make it impossible to come into contact with cold water. CAUTION There are some areas inside the machine, the LCD displays and repeatedly. Troubleshooting 9 CHAPTER This chapter describes the problems you cannot solve the problem by yourself. Take adequate precaution when performing internal inspections to high voltages and high...
imageCLASS MF8180c Basic Guide
Page 120
Paper Jam Inside the Machine If the message and appear in the LCD, remove the paper in the following procedure. 1 If paper is jammed in the output tray, remove the jammed paper. Troubleshooting 2 If paper is jammed in the multi-purpose tray, remove the jammed paper. 9 IMPORTANT If the jammed paper cannot be removed easily, proceed to remove it forcefully. 9-2 Clearing Jams Do not try to the next step.
imageCLASS MF8180c Basic Guide
Page 121
Do not try to the next step. 3 Pull out the paper cassette. 4 Remove the jammed paper. IMPORTANT If the jammed paper cannot be removed easily, proceed to remove it forcefully. 5 Insert the cassette in the machine. 9 Troubleshooting Clearing Jams 9-3
imageCLASS MF8180c Basic Guide
Page 122
Pull up the green handle on the drum cartridge in the direction of the arrow a, and lift the cartridge straight up b. a 9 b Troubleshooting 9-4 Clearing Jams a b 7 Remove the drum cartridge from the machine. 6 Lift the scanning platform a and open the cartridge cover until it is locked b when the whirring sound stops.
imageCLASS MF8180c Basic Guide
Page 123
... try to the machine. Drum protective shutter Sensors • Do not expose the drum cartridge to touch the drum or open the drum's protective shutter. Troubleshooting IMPORTANT • Print quality may result in damage to hold or touch the electrical contacts. It may deteriorate if you touch or damage the drum...
imageCLASS MF8180c Basic Guide
Page 124
Do not apply shock to the machine. Drum cartridge memory Imaging transfer belt 8 Place the drum cartridge in damage to the drum cartridge memory or bring it near magnetic waves. It may deteriorate. • Do not hold or touch the imaging transfer belt. The image quality may result in the protective bag. 9 Press the green lock release lever a and remove the jammed paper b. 9 b a Troubleshooting 9-6 Clearing Jams
imageCLASS MF8180c Basic Guide
Page 125
Position the triangular mark on the drum cartridge with both hands and install it down toward you b. b Clearing Jams 9-7 Troubleshooting 11 Hold the drum cartridge with the triangular mark on the machine and install the drum cartridge a. 9 Lock the drum cartridge by pushing it in the machine. 10 Take the drum cartridge out of the protective bag.
imageCLASS MF8180c Basic Guide
Page 126
IMPORTANT Lock the drum cartridge securely so that it may still be in the state shown in the figure. Re-check the various sections of the machine and remove all pieces of torn paper may be remaining inside the machine. 9-8 Clearing Jams Troubleshooting 12 Close the cartridge cover and lower the scanning platform. 9 If the message is still displayed after closing the cartridge cover, pieces of the jammed paper from inside .
imageCLASS MF8180c Basic Guide
Page 127
Paper Jam Behind the Machine If the message , appears in burns or electrical shock. 1 Open the face up cover. 9 Troubleshooting Clearing Jams 9-9 When replacing fuser unit, do not touch the fuser unit and its surroundings inside the machine may result in the LCD, remove the paper using the following procedure. CAUTION The fuser unit and its surroundings, as doing so may become hot during use.
imageCLASS MF8180c Basic Guide
Page 128
Troubleshooting 9 4 Lift the scanning platform a and open the cartridge cover b. a b 9-10 Clearing Jams 2 Tilt both the green pressure release lever on the left and right side of the fuser unit towards you to release the pressure in the fuser unit. 3 Remove the jammed paper.
imageCLASS MF8180c Basic Guide
Page 129
a b If paper is jammed in the removed drum cartridge, do not try to pull the paper out forcefully but see "Paper Jam in the direction of the arrow a, and lift the cartridge straight up b. 5 Remove the drum cartridge from the machine. Pull the green handle on the drum cartridge in the Drum Cartridge," on p. 9-21. 9 Troubleshooting Clearing Jams 9-11
imageCLASS MF8180c Basic Guide
Page 130
Troubleshooting IMPORTANT • Print quality may deteriorate if you touch or damage the drum that are not described for this procedure such as the sensors. Drum ...
imageCLASS MF8180c Basic Guide
Page 131
... the drum cartridge after performing the procedure up to this case, skip Step 8 to Step 10 and start with Step 11 ( ➞ p. 9-16) to clear. Troubleshooting Clearing Jams 9-13 In doing so, never close the cartridge cover. b a IMPORTANT 9 If no paper jam has been found after removing the paper.
imageCLASS MF8180c Basic Guide
Page 132
Troubleshooting 8 Take the drum cartridge out of the protective bag. 9 Hold the drum cartridge with the triangular mark on the drum cartridge with both hands and install it down toward you b. Position the triangular mark on the machine and install the drum cartridge a. 9 Lock the drum cartridge by pushing it in the machine. b 9-14 Clearing Jams
imageCLASS MF8180c Basic Guide
Page 133
Troubleshooting IMPORTANT Lock the drum cartridge securely so that it may be in the state shown in the figure. 10 Close the cartridge cover and lower the scanning platform. 9 If the message is still displayed after closing the cartridge cover and lowering the scanning platform, proceed to the following procedure. Clearing Jams 9-15
imageCLASS MF8180c Basic Guide
Page 134
Perform the following procedure after the fuser unit has cooled down completely. Troubleshooting 11 If the paper jam message is still hot may result in burns. 9 12 Return the green pressure release levers on the fuser unit to their original positions. 9-16 Clearing Jams Touching the fuser unit when it is still displayed, unplug the power cord from the wall outlet. CAUTION The fuser unit and the surrounding area can become extremely hot during operation.