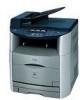
imageCLASS MF8180c Basic Guide
Page 24
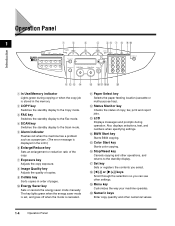
...numbers when specifying settings. q Set key Sets or registers the contents you can see other operations, and returns to the Fax mode. p Stop/Reset key Cancels copying and other settings. b COPY key Switches the standby display to the Scan mode. The key lights green when the energy saver...07 08 09 10 In Use/ Memory COPY FAX SCAN Alarm Enlarge/ Reduce Exposure Image Quality Paper Select Menu Status Monitor B&W Start Set Color Start Stop/Reset ABC DEF 123 GHI JKL MNO 456 PQRS 7 TUV WXYZ 89 SYMBOLS 0 TONE Collate Energy Saver klm n a In Use/Memory indicator...
...numbers when specifying settings. q Set key Sets or registers the contents you can see other operations, and returns to the Fax mode. p Stop/Reset key Cancels copying and other settings. b COPY key Switches the standby display to the Scan mode. The key lights green when the energy saver...07 08 09 10 In Use/ Memory COPY FAX SCAN Alarm Enlarge/ Reduce Exposure Image Quality Paper Select Menu Status Monitor B&W Start Set Color Start Stop/Reset ABC DEF 123 GHI JKL MNO 456 PQRS 7 TUV WXYZ 89 SYMBOLS 0 TONE Collate Energy Saver klm n a In Use/Memory indicator...
imageCLASS MF8180c Basic Guide
Page 46
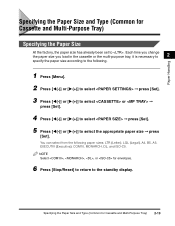
... (Letter), LGL (Legal), A4, B5, A5, EXECUTIV (Executive), COM10, MONARCH, DL, and ISO-C5. Specifying the Paper Size and Type (Common for envelopes. 6 Press [Stop/Reset] to return to the standby display. Paper Handling Specifying the Paper Size and Type (Common for Cassette and Multi-Purpose Tray) Specifying the Paper Size...
... (Letter), LGL (Legal), A4, B5, A5, EXECUTIV (Executive), COM10, MONARCH, DL, and ISO-C5. Specifying the Paper Size and Type (Common for envelopes. 6 Press [Stop/Reset] to return to the standby display. Paper Handling Specifying the Paper Size and Type (Common for Cassette and Multi-Purpose Tray) Specifying the Paper Size...
imageCLASS MF8180c Basic Guide
Page 47
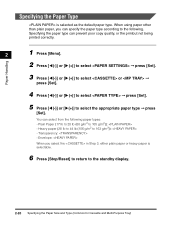
... can select from the following . Plain Paper (17 lb to 28 lb (60 g/m2 to 105 g/m2)): - Specifying the Paper Type is selectable. 6 Press [Stop/Reset] to return to the standby display. 2-20 Specifying the Paper Size and Type (Common for Cassette and Multi-Purpose Tray)
... can select from the following . Plain Paper (17 lb to 28 lb (60 g/m2 to 105 g/m2)): - Specifying the Paper Type is selectable. 6 Press [Stop/Reset] to return to the standby display. 2-20 Specifying the Paper Size and Type (Common for Cassette and Multi-Purpose Tray)

imageCLASS MF8180c Basic Guide
Page 65
... ADF," on p. 7-3. • When you make copies immediately after making sure the whirring sound stops. 5 Copying Making Copies 5-3 NOTE • To cancel copying, press [Stop/Reset] ➞ follow the instructions in the ADF. See "Confirming and Deleting a Copy Job," on p. 9-22.) IMPORTANT When you cancel copying while scanning a document from the... copies after connecting the power cord, the print quality may jam in the LCD. You can also cancel copying using [Status Monitor]. 5 Press [B&W Start] or [Color Start].
... ADF," on p. 7-3. • When you make copies immediately after making sure the whirring sound stops. 5 Copying Making Copies 5-3 NOTE • To cancel copying, press [Stop/Reset] ➞ follow the instructions in the ADF. See "Confirming and Deleting a Copy Job," on p. 9-22.) IMPORTANT When you cancel copying while scanning a document from the... copies after connecting the power cord, the print quality may jam in the LCD. You can also cancel copying using [Status Monitor]. 5 Press [B&W Start] or [Color Start].
imageCLASS MF8180c Basic Guide
Page 71
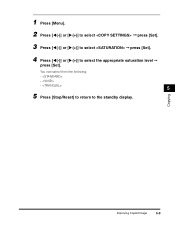
You can select from the following: - - - 5 5 Press [Stop/Reset] to return to select the appropriate saturation level ➞ press [Set]. Copying Improving Copied Image 5-9 1 Press [Menu]. 2 Press [((-)] or [)(+)] to select ➞ press [Set]. 3 Press [((-)] or [)(+)] to select ➞ press [Set]. 4 Press [((-)] or [)(+)] to the standby display.
You can select from the following: - - - 5 5 Press [Stop/Reset] to return to select the appropriate saturation level ➞ press [Set]. Copying Improving Copied Image 5-9 1 Press [Menu]. 2 Press [((-)] or [)(+)] to select ➞ press [Set]. 3 Press [((-)] or [)(+)] to select ➞ press [Set]. 4 Press [((-)] or [)(+)] to the standby display.
imageCLASS MF8180c Basic Guide
Page 72
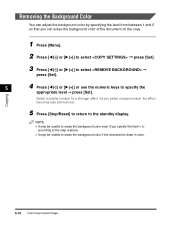
Copying 5 Press [Stop/Reset] to return to specify the appropriate level ➞ press [Set]. Select a smaller number for a stronger effect. NOTE • It may be unable to erase the background color if the document is deep in color. 5-10 Improving Copied Image As you specify the level according to the... step 4 above. • It may be unable to erase the background color even if you select a larger number, the effect becomes less pronounced. Removing the Background Color You can adjust the background color by specifying the level from between 1 and 5 so that you can erase ...
Copying 5 Press [Stop/Reset] to return to specify the appropriate level ➞ press [Set]. Select a smaller number for a stronger effect. NOTE • It may be unable to erase the background color if the document is deep in color. 5-10 Improving Copied Image As you specify the level according to the... step 4 above. • It may be unable to erase the background color even if you select a larger number, the effect becomes less pronounced. Removing the Background Color You can adjust the background color by specifying the level from between 1 and 5 so that you can erase ...
imageCLASS MF8180c Basic Guide
Page 75
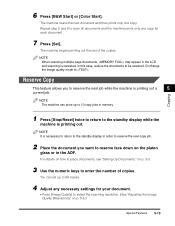
...next job while the machine is canceled. NOTE When scanning multiple page documents, may appear in the ADF. Copying 6 Press [B&W Start] or [Color Start]. The machine scans the next document and then prints only one copy for your document. • Press [Image Quality] to the standby... [Set]. The machine begins printing out the rest of copies. NOTE It is necessary to return to the standby display in memory. 1 Press [Stop/Reset] twice to return to select the scanning resolution. (See "Adjusting the Image Quality (Resolution)," on p. 3-3. 3 Use the numeric keys to scan all...
...next job while the machine is canceled. NOTE When scanning multiple page documents, may appear in the ADF. Copying 6 Press [B&W Start] or [Color Start]. The machine scans the next document and then prints only one copy for your document. • Press [Image Quality] to the standby... [Set]. The machine begins printing out the rest of copies. NOTE It is necessary to return to the standby display in memory. 1 Press [Stop/Reset] twice to return to select the scanning resolution. (See "Adjusting the Image Quality (Resolution)," on p. 3-3. 3 Use the numeric keys to scan all...
imageCLASS MF8180c Basic Guide
Page 81
... decide to any of the Jobs Stored in the LCD mean the following: - Once the job is deleted, the job cannot be restored. 6 Press [Stop/Reset] to return to be sent first is only one fax job, go to delete the fax job, press [Set]. to : A received document (RX) 3 Press [((-)] or...
... decide to any of the Jobs Stored in the LCD mean the following: - Once the job is deleted, the job cannot be restored. 6 Press [Stop/Reset] to return to be sent first is only one fax job, go to delete the fax job, press [Set]. to : A received document (RX) 3 Press [((-)] or...
imageCLASS MF8180c Basic Guide
Page 82
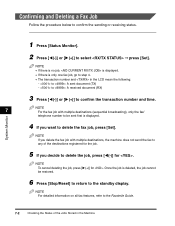
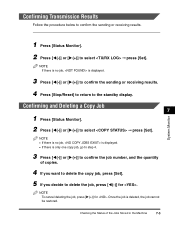
... no job, is deleted, the job cannot be restored. Once the job is displayed. 3 Press [((-)] or [)(+)] to confirm the sending or receiving results. 4 Press [Stop/Reset] to return to confirm the sending or receiving results. Confirming and Deleting a Copy Job 7 1 Press [Status Monitor]. 2 Press [((-)] or [)(+)] to select ➞ press [Set]. NOTE...
... no job, is deleted, the job cannot be restored. Once the job is displayed. 3 Press [((-)] or [)(+)] to confirm the sending or receiving results. 4 Press [Stop/Reset] to return to confirm the sending or receiving results. Confirming and Deleting a Copy Job 7 1 Press [Status Monitor]. 2 Press [((-)] or [)(+)] to select ➞ press [Set]. NOTE...
imageCLASS MF8180c Basic Guide
Page 83
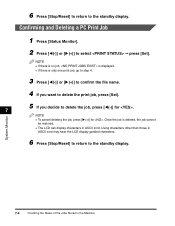
Using characters other than those in ASCII cord may have the LCD display garbled characters. 6 Press [Stop/Reset] to return to the standby display. 6 Press [Stop/Reset] to return to the standby display. Confirming and Deleting a PC Print Job 1 Press [Status Monitor]. 2 Press [((-)] or [)(+)] to delete the job, press [((-)] for . 7 NOTE • ...
Using characters other than those in ASCII cord may have the LCD display garbled characters. 6 Press [Stop/Reset] to return to the standby display. 6 Press [Stop/Reset] to return to the standby display. Confirming and Deleting a PC Print Job 1 Press [Status Monitor]. 2 Press [((-)] or [)(+)] to delete the job, press [((-)] for . 7 NOTE • ...

imageCLASS MF8180c Basic Guide
Page 84
... the job, press [((-)] for . NOTE • If there is no job, is displayed. • If there is deleted, the job cannot be restored. 7 6 Press [Stop/Reset] to return to select ➞ press [Set]. Confirming and Deleting a Report Job 1 Press [Status Monitor]. 2 Press [((-)] or [)(+)] to the standby display. NOTE To cancel deleting...
... the job, press [((-)] for . NOTE • If there is no job, is displayed. • If there is deleted, the job cannot be restored. 7 6 Press [Stop/Reset] to return to select ➞ press [Set]. Confirming and Deleting a Report Job 1 Press [Status Monitor]. 2 Press [((-)] or [)(+)] to the standby display. NOTE To cancel deleting...
imageCLASS MF8180c Basic Guide
Page 142
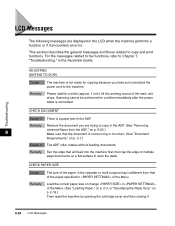
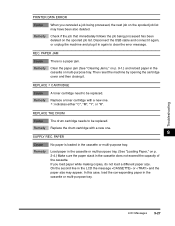
... be performed for a while (approx. 1 min.) till the working sound of the Menu. (See "Loading Paper," on p. 2-4, or "Specifying the Paper Size," on p. 2-19.) Then reset the machine by opening the cartridge cover and then closing it encounters an error. Remedy Fan the edge that will feed into the machine first...
... be performed for a while (approx. 1 min.) till the working sound of the Menu. (See "Loading Paper," on p. 2-4, or "Specifying the Paper Size," on p. 2-19.) Then reset the machine by opening the cartridge cover and then closing it encounters an error. Remedy Fan the edge that will feed into the machine first...
imageCLASS MF8180c Basic Guide
Page 143
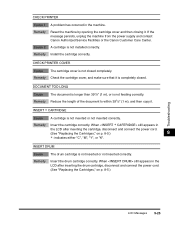
...after inserting the cartridge, disconnect and connect the power cord. (See "Replacing the Cartridges," on p. 8-5.) Troubleshooting LCD Messages 9-25 Remedy Reset the machine by opening the cartridge cover and then closing it . When still appears in the machine. If the message persists, unplug ...the machine from the power supply and contact Canon Authorized Service Facilities or the Canon Customer Care Center. CHECK PRINTER COVER Cause The cartridge cover is completely closed completely. Cause 2 A cartridge is not...
...after inserting the cartridge, disconnect and connect the power cord. (See "Replacing the Cartridges," on p. 8-5.) Troubleshooting LCD Messages 9-25 Remedy Reset the machine by opening the cartridge cover and then closing it . When still appears in the machine. If the message persists, unplug ...the machine from the power supply and contact Canon Authorized Service Facilities or the Canon Customer Care Center. CHECK PRINTER COVER Cause The cartridge cover is completely closed completely. Cause 2 A cartridge is not...
imageCLASS MF8180c Basic Guide
Page 145
Then reset the machine by opening the cartridge cover and then closing it in again to clear the error message. REPLACE ∗ CARTRIDGE Cause A toner cartridge need ...
Then reset the machine by opening the cartridge cover and then closing it in again to clear the error message. REPLACE ∗ CARTRIDGE Cause A toner cartridge need ...
imageCLASS MF8180c Basic Guide
Page 159
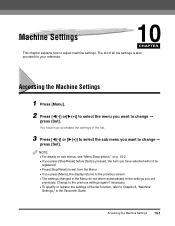
... • For details on sub menus, see "Menu Descriptions," on p. 10-2. • If you press [Stop/Reset] before [Set] is also provided for your reference. You have selected will not be registered. • Press [Stop/Reset] to exit from the Menu. • If you press [Menu], the display returns to the previous...
... • For details on sub menus, see "Menu Descriptions," on p. 10-2. • If you press [Stop/Reset] before [Set] is also provided for your reference. You have selected will not be registered. • Press [Stop/Reset] to exit from the Menu. • If you press [Menu], the display returns to the previous...

imageCLASS MF8180c Basic Guide
Page 162
... default setting: . Shows the language displayed in the LCD. Depending on print pages. Note: After correcting problems, reset to 3 (1) Sets the toner saver mode for color printing. The special print mode function is not recommended to print on the reverse. It is turned off . Note... carefully before specifying this case, select to print on both sides of the paper, select when printing on the reverse of high color density is turned off . Otherwise the print quality may appear on the operating environment (especially the humid environment) some smudged marks of...
... default setting: . Shows the language displayed in the LCD. Depending on print pages. Note: After correcting problems, reset to 3 (1) Sets the toner saver mode for color printing. The special print mode function is not recommended to print on the reverse. It is turned off . Note... carefully before specifying this case, select to print on both sides of the paper, select when printing on the reverse of high color density is turned off . Otherwise the print quality may appear on the operating environment (especially the humid environment) some smudged marks of...
imageCLASS MF8180c Basic Guide
Page 173
... setting, 10-3 U USB port, 1-3 V VOLUME CONTROL settings, 10-3 W Weight document, 3-1 machine, 11-2 print media, 2-2 Z Zoom, 5-5 ZOOM RATIO setting, 10-6 11-6 Index IMAGEQUALITY setting, 10-6 Stop/Reset key, 1-4 SUPPLY REC. Appendix S SATURATION settings, 10-7 SCAN DONE TONE setting, 10-3 SCAN key, 1-4 Scanned area, 3-2 Scanning areas, 3-2 beforehand, 6-1 documents, 6-2 problems, 9-38 Scanning platform, 1-2 Set...
... setting, 10-3 U USB port, 1-3 V VOLUME CONTROL settings, 10-3 W Weight document, 3-1 machine, 11-2 print media, 2-2 Z Zoom, 5-5 ZOOM RATIO setting, 10-6 11-6 Index IMAGEQUALITY setting, 10-6 Stop/Reset key, 1-4 SUPPLY REC. Appendix S SATURATION settings, 10-7 SCAN DONE TONE setting, 10-3 SCAN key, 1-4 Scanned area, 3-2 Scanning areas, 3-2 beforehand, 6-1 documents, 6-2 problems, 9-38 Scanning platform, 1-2 Set...


