Owners Manual
Page 5
...FILTER CARE AND CLEANING CLEANING PROJECTION LENS 37 37 LAMP REPLACEMENT 38 TURNING ON / OFF PROJECTOR 19 LAMP REPLACE COUNTER 38 ADJUSTING SCREEN 20 TROUBLESHOOTING 39 ZOOM ADJUSTMENT 20 TECHNICAL SPECIFICATIONS 41 FOCUS ADJUSTMENT 20 KEYSTONE ADJUSTMENT 20 PICTURE FREEZE FUNCTION... IMAGE LEVEL ADJUSTMENT 28 MOUNTING LENS COVER 10 PICTURE SCREEN ADJUSTMENT 29 MOVING PROJECTOR 10 VIDEO INPUT 30 CONNECTING PROJECTOR 11 SELECTING INPUT SOURCE 30 TERMINALS OF PROJECTOR 11 SELECTING VIDEO SYSTEM 31 CONNECTING TO COMPUTER 12 PICTURE IMAGE ADJUSTMENT 32 ...
...FILTER CARE AND CLEANING CLEANING PROJECTION LENS 37 37 LAMP REPLACEMENT 38 TURNING ON / OFF PROJECTOR 19 LAMP REPLACE COUNTER 38 ADJUSTING SCREEN 20 TROUBLESHOOTING 39 ZOOM ADJUSTMENT 20 TECHNICAL SPECIFICATIONS 41 FOCUS ADJUSTMENT 20 KEYSTONE ADJUSTMENT 20 PICTURE FREEZE FUNCTION... IMAGE LEVEL ADJUSTMENT 28 MOUNTING LENS COVER 10 PICTURE SCREEN ADJUSTMENT 29 MOVING PROJECTOR 10 VIDEO INPUT 30 CONNECTING PROJECTOR 11 SELECTING INPUT SOURCE 30 TERMINALS OF PROJECTOR 11 SELECTING VIDEO SYSTEM 31 CONNECTING TO COMPUTER 12 PICTURE IMAGE ADJUSTMENT 32 ...

Owners Manual
Page 22
...to INPUT Menu icon. 2 Press POINT DOWN button to move a red arrow pointer to the system that you want to set in this projector and PC system can be also selected manually. 1 Press MENU button and ON-SCREEN MENU will appear. When selecting Computer, this dialog box...button to move a red arrow pointer to Computer and press SET button. SELECTING COMPUTER SYSTEM This projector automatically tunes to most different types of computer and a projector is set correctly. (Refer to TROUBLESHOOTING on page 23). Make sure the connection of computers based on VGA, SVGA, XGA or SXGA ...
...to INPUT Menu icon. 2 Press POINT DOWN button to move a red arrow pointer to the system that you want to set in this projector and PC system can be also selected manually. 1 Press MENU button and ON-SCREEN MENU will appear. When selecting Computer, this dialog box...button to move a red arrow pointer to Computer and press SET button. SELECTING COMPUTER SYSTEM This projector automatically tunes to most different types of computer and a projector is set correctly. (Refer to TROUBLESHOOTING on page 23). Make sure the connection of computers based on VGA, SVGA, XGA or SXGA ...
Owners Manual
Page 39
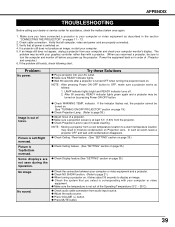
.... q Make sure the temperature is Left/Right reversed. q Press MUTE button. 39 APPENDIX TROUBLESHOOTING Before calling your computer or video equipment and a projector. Make sure you power up the projector. If the problem still exists, check following chart. q Check Ceiling / Rear feature. (...on page 35.) q Check Display feature.(See "SETTING" section on Projection Lens. If an image still does not appear, unplug a projector from the projector. Picture is switched on pages 11 ~ 13. 2. q Check WARNING TEMP. indicator. Verify that all computer, video and power cord...
.... q Make sure the temperature is Left/Right reversed. q Press MUTE button. 39 APPENDIX TROUBLESHOOTING Before calling your computer or video equipment and a projector. Make sure you power up the projector. If the problem still exists, check following chart. q Check Ceiling / Rear feature. (...on page 35.) q Check Display feature.(See "SETTING" section on Projection Lens. If an image still does not appear, unplug a projector from the projector. Picture is switched on pages 11 ~ 13. 2. q Check WARNING TEMP. indicator. Verify that all computer, video and power cord...


