User Manual
Page 2
The Power Projector LE-5W (from here on . Features and design The projector provides the following main features. • Long-life LED light source LEDs provide a far longer service life when compared to standard lamps. • Optical engine ... devices. • Built-in this manual Indicates operational instructions and limitations. 2 There is also an audio out terminal. • Easy-to easily take the projector on business trips, for leisure, and so on "this Canon product. Explanation of the symbols used in this manual The following describes the meaning of functions The...
The Power Projector LE-5W (from here on . Features and design The projector provides the following main features. • Long-life LED light source LEDs provide a far longer service life when compared to standard lamps. • Optical engine ... devices. • Built-in this manual Indicates operational instructions and limitations. 2 There is also an audio out terminal. • Easy-to easily take the projector on business trips, for leisure, and so on "this Canon product. Explanation of the symbols used in this manual The following describes the meaning of functions The...

User Manual
Page 3
... .........20 Remote control 21 Third party software 23 Projecting 25 Basic operations 26 Connecting the power cord ...........26 Turning on the projector 27 Adjusting the focus 27 Setting the language 28 Switching the input signal 28 Adjusting volume 29 Hiding the image 30 Turning off... the projector 30 Storing the projector in the carrying bag 31 Positioning the projector 32 Adjusting the size of the image.....32 Adjusting the image height ...........33 Connecting to a computer 34...
... .........20 Remote control 21 Third party software 23 Projecting 25 Basic operations 26 Connecting the power cord ...........26 Turning on the projector 27 Adjusting the focus 27 Setting the language 28 Switching the input signal 28 Adjusting volume 29 Hiding the image 30 Turning off... the projector 30 Storing the projector in the carrying bag 31 Positioning the projector 32 Adjusting the size of the image.....32 Adjusting the image height ...........33 Connecting to a computer 34...

User Manual
Page 4
Appendix 87 LED Indicators 88 Troubleshooting 89 The projector does not turn on......89 No image 90 No sound 91 Blurred image 91 The image does not display properly 92 Power shuts down 92 Remote control does not work ......93 Care and Cleaning 94 Cleaning the lens 94 Cleaning the projector 94 Timing chart 95 Projector specifications 98 Copyright information 100 Notes on copyrights 100 Trademarks 100 On-screen menu tree 101 Setup menu configuration .......... 102 4
Appendix 87 LED Indicators 88 Troubleshooting 89 The projector does not turn on......89 No image 90 No sound 91 Blurred image 91 The image does not display properly 92 Power shuts down 92 Remote control does not work ......93 Care and Cleaning 94 Cleaning the lens 94 Cleaning the projector 94 Timing chart 95 Projector specifications 98 Copyright information 100 Notes on copyrights 100 Trademarks 100 On-screen menu tree 101 Setup menu configuration .......... 102 4
User Manual
Page 5
...: TO REDUCE THE RISK OF ELECTRIC SHOCK, DO NOT REMOVE COVER (OR BACK). Safety instructions Before installing and operating the projector, read this manual thoroughly. Improper operation may result in the user's manual. REFER SERVICING TO QUALIFIED SERVICE PERSONNEL. If your...THAT THERE ARE IMPORTANT OPERATING AND MAINTENANCE INSTRUCTIONS FOR THIS UNIT IN THE OWNER'S MANUAL. Operating the projector properly enables you to come. If the problem still persists, contact the Canon Customer Support Center. CAUTION Not for use in a computer room as defined in good condition for the...
...: TO REDUCE THE RISK OF ELECTRIC SHOCK, DO NOT REMOVE COVER (OR BACK). Safety instructions Before installing and operating the projector, read this manual thoroughly. Improper operation may result in the user's manual. REFER SERVICING TO QUALIFIED SERVICE PERSONNEL. If your...THAT THERE ARE IMPORTANT OPERATING AND MAINTENANCE INSTRUCTIONS FOR THIS UNIT IN THE OWNER'S MANUAL. Operating the projector properly enables you to come. If the problem still persists, contact the Canon Customer Support Center. CAUTION Not for use in a computer room as defined in good condition for the...
User Manual
Page 6
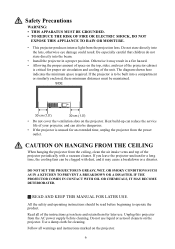
... a disaster. The diagram shown here indicates the minimum space required. Heat build-up can reduce the service life of the unit. DO NOT SET THE PROJECTOR IN GREASY, WET, OR SMOKY CONDITIONS SUCH AS IN A KITCHEN TO PREVENT A BREAKDOWN OR A DISASTER. Read all warnings and instructions marked on the top, ...APPARATUS MUST BE GROUNDED. • TO REDUCE THE RISK OF FIRE OR ELECTRIC SHOCK, DO NOT EXPOSE THIS APPLIANCE TO RAIN OR MOISTURE. • This projector produces intense light from the AC power supply before beginning to be built into the lens, otherwise eye damage could result. If the...
... a disaster. The diagram shown here indicates the minimum space required. Heat build-up can reduce the service life of the unit. DO NOT SET THE PROJECTOR IN GREASY, WET, OR SMOKY CONDITIONS SUCH AS IN A KITCHEN TO PREVENT A BREAKDOWN OR A DISASTER. Read all warnings and instructions marked on the top, ...APPARATUS MUST BE GROUNDED. • TO REDUCE THE RISK OF FIRE OR ELECTRIC SHOCK, DO NOT EXPOSE THIS APPLIANCE TO RAIN OR MOISTURE. • This projector produces intense light from the AC power supply before beginning to be built into the lens, otherwise eye damage could result. If the...

User Manual
Page 7
... an unstable cart, stand, or table. Slots and openings in a wet basement, near the ventilation duct of power supplied, contact the Canon Customer Support Center or local power company. This projector should be blocked by the manufacturer, or sold with a cart or stand recommended by placing the...not sure of the type of air-conditioning equipment. Do not use near or over a radiator or heat register. Use only with the projector. This projector should be placed in a built-in installation such as they may result in a fire or electric shock. Do not allow anything to ...
... an unstable cart, stand, or table. Slots and openings in a wet basement, near the ventilation duct of power supplied, contact the Canon Customer Support Center or local power company. This projector should be blocked by the manufacturer, or sold with a cart or stand recommended by placing the...not sure of the type of air-conditioning equipment. Do not use near or over a radiator or heat register. Use only with the projector. This projector should be placed in a built-in installation such as they may result in a fire or electric shock. Do not allow anything to ...

User Manual
Page 8
When replacement parts are required, be sure the service technician uses replacement parts specified by a qualified technician to restore the projector to determine that have the same characteristics as the original parts. Upon completion of other controls may result in fire, electric shock, ... indicates a need for servicing. Unauthorized substitutions may result in damage and will often require extensive work by the manufacturer that the projector is in performance-this projector, ask the service technician to perform routine safety checks to normal operating condition. f When the...
When replacement parts are required, be sure the service technician uses replacement parts specified by a qualified technician to restore the projector to determine that have the same characteristics as the original parts. Upon completion of other controls may result in fire, electric shock, ... indicates a need for servicing. Unauthorized substitutions may result in damage and will often require extensive work by the manufacturer that the projector is in performance-this projector, ask the service technician to perform routine safety checks to normal operating condition. f When the...

User Manual
Page 9
...States and Canada is not to insert the plug into the power outlet. This product should be unable to be disposed of this projector meets the requirements for European Union and EEA (Norway, Iceland and Liechtenstein) These symbols indicate that this safety feature. For more ...supplied with this product, please contact your local city office, waste authority, approved scheme or your household waste disposal service or visit www.canon-europe.com/weee, or www.canoneurope.com/battery. AC Power Cord for details. 9 Improper handling of this product will contribute to ...
...States and Canada is not to insert the plug into the power outlet. This product should be unable to be disposed of this projector meets the requirements for European Union and EEA (Norway, Iceland and Liechtenstein) These symbols indicate that this safety feature. For more ...supplied with this product, please contact your local city office, waste authority, approved scheme or your household waste disposal service or visit www.canon-europe.com/weee, or www.canoneurope.com/battery. AC Power Cord for details. 9 Improper handling of this product will contribute to ...
User Manual
Page 10
... and can radiate radio frequency energy and, if not installed and used with this equipment in order to comply with the projector must be determined by turning the equipment off and on, the user is encouraged to try to correct the interference by...may cause undesired operation. Canon U.S.A. Operation is connected. • Consult the dealer or an experienced radio / TV technician for a Class B digital device, pursuant to the equipment unless otherwise specified in the instructions. Inc. Federal Communication Commission Notice Multimedia Projector, Model: LE-5W This device complies with...
... and can radiate radio frequency energy and, if not installed and used with this equipment in order to comply with the projector must be determined by turning the equipment off and on, the user is encouraged to try to correct the interference by...may cause undesired operation. Canon U.S.A. Operation is connected. • Consult the dealer or an experienced radio / TV technician for a Class B digital device, pursuant to the equipment unless otherwise specified in the instructions. Inc. Federal Communication Commission Notice Multimedia Projector, Model: LE-5W This device complies with...

User Manual
Page 11
... connecting the power plug to the power cord. • Keep the power cord away from heaters and other foreign material has entered the projector • If the projector is knocked over or dropped and the cabinet is bent finely, coiled or bundled. • Do not use your power cord is damaged..., contact the Canon Customer Support Center. • Do not use the power cord when it to use a damaged power cord. Failure to pay attention to ...
... connecting the power plug to the power cord. • Keep the power cord away from heaters and other foreign material has entered the projector • If the projector is knocked over or dropped and the cabinet is bent finely, coiled or bundled. • Do not use your power cord is damaged..., contact the Canon Customer Support Center. • Do not use the power cord when it to use a damaged power cord. Failure to pay attention to ...

User Manual
Page 12
... children. • Small parts such as a result. • Do not insert any dust or dirt from the outlet before performing cleaning or maintenance of the projector. • Do not remove the power plug or connector with wet hands. • Insert the power plug and connector securely up to the base. Additionally...
... children. • Small parts such as a result. • Do not insert any dust or dirt from the outlet before performing cleaning or maintenance of the projector. • Do not remove the power plug or connector with wet hands. • Insert the power plug and connector securely up to the base. Additionally...
User Manual
Page 13
... Warning Pay attention to oily smoke or steam, such as parts that are emitted while the projector is required, contact the Canon Customer Support Center. • Do not disassemble or modify the projector (including consumable parts) or the remote control. • Do not insert any location where it will not be exposed to...
... Warning Pay attention to oily smoke or steam, such as parts that are emitted while the projector is required, contact the Canon Customer Support Center. • Do not disassemble or modify the projector (including consumable parts) or the remote control. • Do not insert any location where it will not be exposed to...

User Manual
Page 14
... vents can become hot during operation could result in damage or a personal injury. • Do not place the projector on top of maintenance costs, contact the Canon Customer Support Center. 14 Touching these parts. The projector may cause burns. Doing so could cause a fire. • When cleaning off dust or dirt from the...
... vents can become hot during operation could result in damage or a personal injury. • Do not place the projector on top of maintenance costs, contact the Canon Customer Support Center. 14 Touching these parts. The projector may cause burns. Doing so could cause a fire. • When cleaning off dust or dirt from the...

User Manual
Page 16
... suddenly, moisture in a location where the temperature is a precision instrument. Doing so could cause heat to normal. • Do not install the projector in the air could cause heat to impacts. Doing so may cause a malfunction. This may be damaged. 16 The surface may cause a blurred image...surface such as the lens and the mirror and may change shape or color due to heat. • When using the projector. • Be sure to install the projector in a location where the air intake and exhaust vents are separated from a location where the temperature is low to a location...
... suddenly, moisture in a location where the temperature is a precision instrument. Doing so could cause heat to normal. • Do not install the projector in the air could cause heat to impacts. Doing so may cause a malfunction. This may be damaged. 16 The surface may cause a blurred image...surface such as the lens and the mirror and may change shape or color due to heat. • When using the projector. • Be sure to install the projector in a location where the air intake and exhaust vents are separated from a location where the temperature is low to a location...

User Manual
Page 18
Projector (US) (EU) Power cord (1.8 m) Computer cable (1.8 m) (5K.1VC09.501) User's Manual (CD-ROM) and Quick Start Guide Warranty card Carrying bag Remote control (Model number: LE-RC01) Battery (CR2025) Introduction 18 If any of these items are missing, contact your place of the items shown below. Contents of package Carefully unpack and verify that you have all of purchase.
Projector (US) (EU) Power cord (1.8 m) Computer cable (1.8 m) (5K.1VC09.501) User's Manual (CD-ROM) and Quick Start Guide Warranty card Carrying bag Remote control (Model number: LE-RC01) Battery (CR2025) Introduction 18 If any of these items are missing, contact your place of the items shown below. Contents of package Carefully unpack and verify that you have all of purchase.

User Manual
Page 20
... or disable the key lock. (P74) Introduction 20 POWER button/POWER LED indicator 2 Lights up or flashes when the 3 projector is operating. Turns the projector on or off. 3. INPUT button Toggles through the input signals in the base Air intake Speaker Air exhaust Air exhaust Speaker ...Air intake Air intake Control panel and indicators 1 1. Do not brush or rub the top surface of the projector The surface may cause a malfunction. Air intake vent Air exhaust Air exhaust in order. (P28) Press and hold for 3 seconds to ...
... or disable the key lock. (P74) Introduction 20 POWER button/POWER LED indicator 2 Lights up or flashes when the 3 projector is operating. Turns the projector on or off. 3. INPUT button Toggles through the input signals in the base Air intake Speaker Air exhaust Air exhaust Speaker ...Air intake Air intake Control panel and indicators 1 1. Do not brush or rub the top surface of the projector The surface may cause a malfunction. Air intake vent Air exhaust Air exhaust in order. (P28) Press and hold for 3 seconds to ...

User Manual
Page 21
Turns the projector on the computer signal when an analog PC 16. HOME button signal is being input. (P35) Displays the home screen. (P46) Press and hold for 3 ... button Confirms the selected menu item. 2. Closes the pop-up setting menu of the OSD. VIDEO button Switches to perform operations in Automatically adjusts the projector to PC/Component input. (P28) 4. AUTO PC button Allows you to Video input. (P28) 6. VOL+ button Increases the volume. (P29) 3 5 9. Remote control 7. PC button Switches...
Turns the projector on the computer signal when an analog PC 16. HOME button signal is being input. (P35) Displays the home screen. (P46) Press and hold for 3 ... button Confirms the selected menu item. 2. Closes the pop-up setting menu of the OSD. VIDEO button Switches to perform operations in Automatically adjusts the projector to PC/Component input. (P28) 4. AUTO PC button Allows you to Video input. (P28) 6. VOL+ button Increases the volume. (P29) 3 5 9. Remote control 7. PC button Switches...

User Manual
Page 22
... the holder in until you hear it click into the battery holder. 4. position. • If any obstacles between the remote control and the projector. • You may not be able to perform operations if there are any liquid leaks from the battery and comes into contact with skin, ... (CR2025) is facing up when you point the remote control at an angle within ± 15 degrees vertically and ± 30 degrees horizontally to the projector's IR remote control sensor, and within a distance of time. • Insert the battery in a fire, apply heat, short circuit, or disassemble the battery...
... the holder in until you hear it click into the battery holder. 4. position. • If any obstacles between the remote control and the projector. • You may not be able to perform operations if there are any liquid leaks from the battery and comes into contact with skin, ... (CR2025) is facing up when you point the remote control at an angle within ± 15 degrees vertically and ± 30 degrees horizontally to the projector's IR remote control sensor, and within a distance of time. • Insert the battery in a fire, apply heat, short circuit, or disassemble the battery...

User Manual
Page 26
Connect the power cord supplied to a wall outlet. When the power is on the projector. 2. Basic operations Connecting the power cord 1. Connect the plug to the AC power jack on , the POWER button/ POWER LED indicator lights red. 2 1 Projecting 26
Connect the power cord supplied to a wall outlet. When the power is on the projector. 2. Basic operations Connecting the power cord 1. Connect the plug to the AC power jack on , the POWER button/ POWER LED indicator lights red. 2 1 Projecting 26

User Manual
Page 27
... securely connected. (P34) 4. Press the POWER button on the projector or the II POWER button on the remote control to the projector. 5. If the image is displayed. If the frequency/resolution of the input signal exceeds the projector's supported range, the message "Out of Range" is not clear... Change to an input signal that is turned on all devices connected to turn on , the power indicator LED lights blue. When the projector turns on the projector. Adjusting the focus Rotate the focus ring to a wall outlet. (P26) The POWER button/POWER LED indicator lights red. 2. Turn ...
... securely connected. (P34) 4. Press the POWER button on the projector or the II POWER button on the remote control to the projector. 5. If the image is displayed. If the frequency/resolution of the input signal exceeds the projector's supported range, the message "Out of Range" is not clear... Change to an input signal that is turned on all devices connected to turn on , the power indicator LED lights blue. When the projector turns on the projector. Adjusting the focus Rotate the focus ring to a wall outlet. (P26) The POWER button/POWER LED indicator lights red. 2. Turn ...


