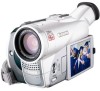
DV NETWORK SOLUTION DISK Ver.2 Software Instruction Manual
Page 50
... subject becomes smaller). This button appears only on the memory card. (Only camcorders with NETWORK mode.) Select the capture mode of still images (single, continuous, interval recording). 50 Operating Camcorders with DV Messenger Moves the focus point farther. (Cannot be used with autofocus... image on the [Contact] control panel in View & Record mode, the camcorder switches to manual focus in View & Record mode. Switches between auto focus and manual focus. (Manual focus cannot be selected when a camcorder without NETWORK mode is set to .) Moves the focus point closer. (Cannot...
ELURA70/ELURA65/ELURA60 Instruction Manual
Page 6
... Instructions 2 Important Safety Instructions 3 Using this Manual ...5 Checking Supplied Accessories 8 Components Guide ...9 Basic Functions Preparations Preparing the Power Supply 13 Loading/Unloading a Cassette 16 Installing the Backup Battery 17 Preparing the Camcorder 18 Using the Wireless Controller 20 Setting the ...Settings ...38 Recording Using the Recording Programs 45 Using the Night Modes 48 Skin Detail Function...50 Adjusting Exposure Manually 51 Adjusting the Focus Manually 52 Setting the White Balance 54 Setting the Shutter Speed 56 Using the Self-Timer...58 Changing...
ELURA70/ELURA65/ELURA60 Instruction Manual
Page 61
...SETUP]. Long microphones may differ from that of 0.14 in microphone. - You can attach a commercially available microphone or the optional DM-50 Directional Stereo Microphone to the accessory shoe. 2. Refer also to [PHONES H ] and close the menu. Attach the microphone to the...such case, we recommend using an external microphone. ❍ When using a commercially available microphone, connect it to the instruction manual of the camcorder. Almost all stereo microphones with built-in microphone may pick up to the MIC terminal. ❍ When recording in silent ...
ELURA70/ELURA65/ELURA60 Instruction Manual
Page 107
Record the second image so that it overlaps 30 to 50% of the adjoining image. For details on how to merge these images, refer to the previous image. They may appear warped or doubled up. Using a ... not include moving subject in the overlapped area can retake an image by pressing the CARD +/- button to return to the Digital Video Software Instruction Manual.
ELURA70/ELURA65/ELURA60 Instruction Manual
Page 137
Screen Displays during Recording/Playback CAMERA Mode Image stabilizer ( 79) Zoom ( 29) Skin detail ( 50) Exposure ( 51) Program AE ( 45) Shutter speed ( 56) Manual focus ( 52) White balance ( 54) Card mix ( 113) Digital effects ( 62) Date and time ( 21) AF/AE locked during still image recording ( 97) Self-timer ( ...
Digital Video Software (Windows) Ver.11 Instruction Manual
Page 50
Click [Email Images]. 50 For details, refer to an E-mail message. To use this function, the e-mail software must be enabled as MAPI client. Click [Internet] in the Main Window. 2. Attaching Still Images to E-mail Messages You can attach selected still images to the instruction manual of the e-mail software. 1.