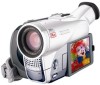
DV Messenger Ver 1.0 Instruction Manual
Page 6
..., refer to the manual of the DV cable. 4-pin: 6-pin: • Speaker or Headphones (when using DV Messenger) Requirements for Using the DV Messenger To use of the router. Make sure to confirm the following items for using the Software: • Digital Camcorder • DV NETWORK SOLUTION DISK (Supplied) • DV (IEEE1394) Cable (Commercially available) Refer to the...
DV Messenger Ver 1.0 Instruction Manual
Page 12
... the computer using the DV cable ( 22). • The driver installation starts automatically. • Depending on the setting of Windows XP Professional must first log in as an Administrator to install programs. 1 Start the computer. 2 Connect the power adapter to the camcorder. 3 Set the camcorder to CARD PLAY (VCR...: ¡ Install the driver files from the DV NETWORK SOLUTION DISK first before installing the driver ( 10). ¡ Close any programs that are running before installing the driver. ¡ Do not turn off the camcorder until the driver installation is complete, the [Scanner...
DV Messenger Ver 1.0 Instruction Manual
Page 14
Use the following procedures to change the setting. 1 Connect the power adapter to the camcorder. 2 Set the camcorder to CARD PLAY (VCR) mode. 3 Connect the camcorder to the computer using the DV cable ( 22). 4 From the [start] menu, select [My Computer]. 5 Right-click the mouse button on the camera icon and select [Properties]. 6 Click the [Events...
DV Messenger Ver 1.0 Instruction Manual
Page 16
... the power adapter to the camcorder. 2 Set the camcorder to the computer using the DV cable ( 22). • If [Scanner and Camera Wizard] or Explorer are running before uninstalling. Connect the camcorder to CARD PLAY (VCR) mode 3. Uninstalling the DV Messenger 1 From the [start] menu, select [All Programs], [Canon Utilities], [DV Messenger] and [DV Messenger Uninstall] in succession. 2 If...
DV Messenger Ver 1.0 Instruction Manual
Page 22
... power adapter before connecting it to CARD PLAY (VCR) mode, [Canon Camera Storage Device] (camera icon) or [Canon DV Camcorder] (camcorder icon) appears in the explorer view. If the driver is installed on the computer. 1 Attach the DV cable to the computer's IEEE1394 terminal and the camcorder's DV terminal. • You do not need to turn off the computer...
DV Messenger Ver 1.0 Instruction Manual
Page 23
...in the memory card, it may take a while until the [Scanner and Camera Wizard] opens. ¡If still images not recorded with Canon digital camcorders are contained in the memory card, their thumbnails (small images) may not be displayed correctly in the [Scanner and Camera Wizard]. ¡...on the folder and select [Refresh]. ¡ Still images cannot be lost. Do not remove the memory card or detach the DV cable. - Do not turn off the camcorder or the computer. - Downloading Still Images/Movies to a Computer Cautions: ¡ Observe following message appears, check if the ...
DV Messenger Ver 1.0 Instruction Manual
Page 24
Downloading Still Images/Movies to a Computer 4 Connect the camcorder to the computer using the DV cable ( 22). • The [Scanner and Camera Wizard] starts automatically. • If the program does not start automatically, select [My computer] on the [start] menu, right-click the mouse button in the camera icon and click [Get pictures]. 5 Click [Next]. • Thumbnail versions of the camcorder file appear. 6 Confirm that a check mark is on the still image/movie you wish to download and click the [Next] button. 24
DV Messenger Ver 1.0 Instruction Manual
Page 29
... the computer using the power adapter before connecting it to a computer. ¡ If you use the DV Messenger, check whether the camcorder is being powered using the DV cable ( 22). 4 From the [start] menu, select [All Programs] and [Windows Messenger]. • [Windows Messenger] appears. • If the [.NET Passport Wizard] appears, click [Cancel]. 5 From...
DV Messenger Ver 1.0 Instruction Manual
Page 51
... is correctly installed. ➜ Check if the DV (IEEE1394) cable is correctly connected. ➜ Check if a USB cable is not correctly installed. The Canon camcorder is connected to the computer via a DV cable, but is not recognized by the computer. ➜ Check if the camcorder is set to the computer again. ? Canon Camera Storage Device is not recognized. ➜...
DV Messenger Ver 1.0 Instruction Manual
Page 52
... restart the videoconference. ➜ Some Canon camcorders are equipped with an DV cable. ➜ Windows Messenger may not be able to a tape (e.g. Click [Stop Camera] and then [Start Camera] to CARD PLAY (VCR) mode. 2. If you are using the camcorder in TAPE PLAY (VCR) mode, make sure... The video picture does not appear in the [Conversation] window even though the video picture is shown in the camcorder's display. ➜ Check if your contact is using a Canon camcorder, check if the AV/C Camera Storage Subunit-WIA Driver is correctly installed. 1. Click [Stop Camera] in the ...
DV NETWORK SOLUTION DISK Ver.2 Software Instruction Manual
Page 7
... Installing the Software 17 Installing the DV Network Software 17 Installing the Canon USB Video Driver 19 Installing the AV/C Camera Storage Subunit-WIA Driver 20 Connecting the Camcorder to a Computer 23 Connecting the Camcorder Using a USB Cable 23 Connecting the Camcorder Using a DV Cable 23 DV Messenger Preparations for DV Messenger 24 Checking the Camcorder Connection 24 Setting the UPnP...
DV NETWORK SOLUTION DISK Ver.2 Software Instruction Manual
Page 14
Check the manual of your computer for using DV Messenger) 14 Required Accessories Required Accessories You need following items for which type of DV cable to browse the Net • USB Cable or DV (IEEE1394) Cable If your camcorder is not listed under category A or B in Camcorder Categories ( 13), use . 4-pin: 6-pin: • Speaker or Headphones (when using the Software: • Digital Camcorder • The Internet connection and a software that allows you to use a DV cable.
DV NETWORK SOLUTION DISK Ver.2 Software Instruction Manual
Page 20
.... 1 Connect the power adapter to the camcorder. 2 Set the camcorder to NETWORK or CARD PLAY mode. (Camcorder without NETWORK mode: Set the camcorder to CARD PLAY mode.) 3 Connect the camcorder to the computer using the DV cable ( 23). • The driver installation starts... automatically. • Depending on the setting of your computer, a video editing program may start ] menu, select [My Computer] and check if the [Canon...
DV NETWORK SOLUTION DISK Ver.2 Software Instruction Manual
Page 21
...appears allowing you to select an application program to start each time you connect the camcorder to the computer using the DV cable ( 23). 4 From the [start ] menu, select [My Computer] and check if the [Canon Camera Storage Device] icon appears. Installing the Software 21 From the [start ]... menu, select [My Computer]. 5 Right-click the mouse button on the [Canon Camera Storage Device] icon ...
DV NETWORK SOLUTION DISK Ver.2 Software Instruction Manual
Page 23
... power adapter before connecting it to a computer. Do not connect any devices to the camcorder's DV terminal when connecting the camcorder to the computer using the DV terminal. 1 Attach the DV cable to the computer's IEEE1394 terminal and the camcorder's DV terminal. • Refer to your computer manual for the location of the computer's USB ports. •...
DV NETWORK SOLUTION DISK Ver.2 Software Instruction Manual
Page 25
... you are connecting a Canon camcorder using a DV cable, check if [Canon DV Device] is displayed. • If [Canon DV Device] or [Canon USB Video] does not appear, click to display the device list and check if it is listed. • If [Canon DV Device] or [Canon USB Video] is displayed. If you are connecting a Canon camcorder using a USB cable, check if [Canon USB Video] is not...
DV NETWORK SOLUTION DISK Ver.2 Software Instruction Manual
Page 35
In PLAY (VCR) mode, the recorded video appears. If you are connecting a Canon camcorder using a E DV cable, select [Canon DV Device]. 5 When the video picture appears, click [Next]. Videoconferencing 35 If you are connecting a Canon camcorder using a USB cable, select [Canon USB Video]. DV Messenger 6 Read the explanation for speaker and microphone settings and click [Next]. In NETWORK or CAMERA mode, the live video appears. 4 Select your camcorder and click [Next].
DV NETWORK SOLUTION DISK Ver.2 Software Instruction Manual
Page 36
If you are connecting a Canon camcorder using a USB cable, select [Canon USB Video]. 7 Set [Microphone] and click [Next]. • If you are connecting a Canon camcorder using a DV cable, select [Canon DV Device]. • The installed sound device appears for [Speaker]. Proceed with the setting unchanged. 8 Click [Click to Test... the microphone volume is correctly indicated and click [Next]. • In NETWORK or CAMERA mode: Speak into the microphone of your camcorder and check if the volume indicator operates correctly. • In PLAY (VCR) mode: Play back the tape and check if the...
DV NETWORK SOLUTION DISK Ver.2 Software Instruction Manual
Page 53
...is displayed. • The settings cannot be used with camcorders equipped with your contact, the DVM panel displays a bar indicating that transfer is connected using a DV cable, the AV/C Camera Storage Subunit-WIA driver contained in a camcorder. In this case, use a PC card reader to ...download images. Sharing Images (File Transfer) With camcorders equipped with the file transfer function or the NETWORK ...
DV NETWORK SOLUTION DISK Ver.2 Software Instruction Manual
Page 71
... Driver Uninstalling the Canon USB Video Driver 71 If your camcorder is listed under category B in Camcorder Categories ( 13): Set the camcorder to PLAY (VCR) mode and connect it is listed under category A in Camcorder Categories ( 13): Set the camcorder to NETWORK mode and connect it to computer using the DV cable. 3 From the [start] menu, select [Control...