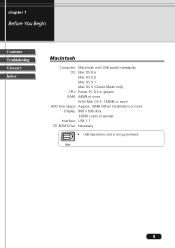
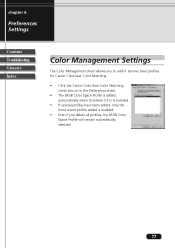
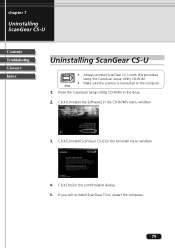
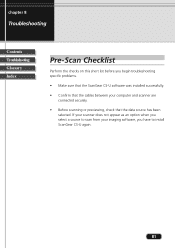
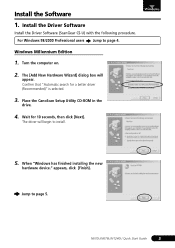
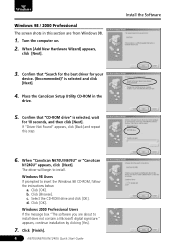
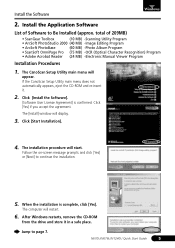
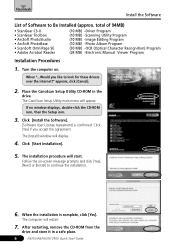
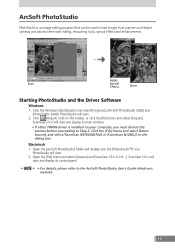
CanoScan N676U Installation - Canon
CanoScan N676U Installation

View Results Below
Free Canon CanoScan N676U manuals!
Problems with Canon CanoScan N676U?
Ask a Question
Free Canon CanoScan N676U manuals!
Problems with Canon CanoScan N676U?
Ask a Question
Related Manual Pages


Similar Questions

Install Captureontouch For Canon Dr-c125;
Cann't install CaptureOnTouch for Canon DR-C125 from CD; only Canon image formular utility
Cann't install CaptureOnTouch for Canon DR-C125 from CD; only Canon image formular utility
(Posted by schumacherwilfried 11 years ago)

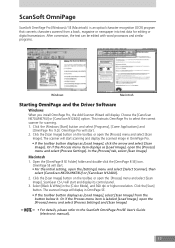
Omnipage Se Does Not Install
I have upgraded to Windows 7. Trying to install Omnipage SE from the original Canoscan lide 50 CD is...
I have upgraded to Windows 7. Trying to install Omnipage SE from the original Canoscan lide 50 CD is...
(Posted by djgrlc 12 years ago)

Canoscan Lide 100 Will Not Install
The scanner software does not install. Of coures, I unplugged the USB when installing, and I have tr...
The scanner software does not install. Of coures, I unplugged the USB when installing, and I have tr...
(Posted by gregorybstrong3 12 years ago)