User Guide
Page 2
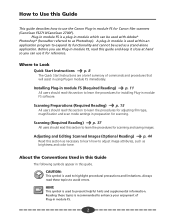
...as Photoshop). Adjusting and Editing Scanned Images (Optional Reading) p. 44 Read this section as necessary to learn the procedures for Canon film scanners (CanoScan FS2710/CanoScan 2700F). CAUTION: This symbol is used to present helpful hints and supplemental information. Always read this section to learn the procedures... to Look Quick Start Instructions p. 8 The Quick Start Instructions are a brief summary of Plug-in module which can use the Canon Plug-in module FS for scanning and saving images. Installing Plug-in module FS (Required Reading) p. 11 All users should read...
...as Photoshop). Adjusting and Editing Scanned Images (Optional Reading) p. 44 Read this section as necessary to learn the procedures for Canon film scanners (CanoScan FS2710/CanoScan 2700F). CAUTION: This symbol is used to present helpful hints and supplemental information. Always read this section to learn the procedures... to Look Quick Start Instructions p. 8 The Quick Start Instructions are a brief summary of Plug-in module which can use the Canon Plug-in module FS for scanning and saving images. Installing Plug-in module FS (Required Reading) p. 11 All users should read...

User Guide
Page 3
... Plug-in module FS 11 Installing Plug-in module FS 12 STEP 2 Scanning Preparations 15 Displaying the Plug-in module FS Control Panel 16 Selecting a Film Type 18 Previewing ...19 Setting the Scan Mode 20 Selecting the Output Device 23 Setting the Magnification 24 Setting Preferences 26 Output Device 26 Aspect...
... Plug-in module FS 11 Installing Plug-in module FS 12 STEP 2 Scanning Preparations 15 Displaying the Plug-in module FS Control Panel 16 Selecting a Film Type 18 Previewing ...19 Setting the Scan Mode 20 Selecting the Output Device 23 Setting the Magnification 24 Setting Preferences 26 Output Device 26 Aspect...

User Guide
Page 4
...48 Color Correction - Tone Curve Settings 54 Color Correction - Focus Correction 60 Film Correction - Color Balance 52 Color Correction - Gamma Value Settings 56 Color Correction - Threshold 58 Film Correction - Exposure Adjustment 62 Auto Tone Correction (ColorSync 64 Saving / Recalling ...Settings 65 Editing Scanned Images 67 Appendices 68 Troubleshooting 69 Error Messages ...71 List of Film Types Brightness and Contrast Settings 50 Color Correction - STEP 4 Adjusting and Editing Scanned Images 44 Optimum Adjustments for Image...
...48 Color Correction - Tone Curve Settings 54 Color Correction - Focus Correction 60 Film Correction - Color Balance 52 Color Correction - Gamma Value Settings 56 Color Correction - Threshold 58 Film Correction - Exposure Adjustment 62 Auto Tone Correction (ColorSync 64 Saving / Recalling ...Settings 65 Editing Scanned Images 67 Appendices 68 Troubleshooting 69 Error Messages ...71 List of Film Types Brightness and Contrast Settings 50 Color Correction - STEP 4 Adjusting and Editing Scanned Images 44 Optimum Adjustments for Image...

User Guide
Page 6
... no problem, there is no need to adjust these procedures to the Getting Started Guide that accompanied your scanner for Scanning § p. 15 • Select a Film Type p. 18 • Preview p. 19 • Set the Scan Mode p. 20 • Select the Output Device p. 23 • Set the Magnification p. 24 • Set Preferences...
... no problem, there is no need to adjust these procedures to the Getting Started Guide that accompanied your scanner for Scanning § p. 15 • Select a Film Type p. 18 • Preview p. 19 • Set the Scan Mode p. 20 • Select the Output Device p. 23 • Set the Magnification p. 24 • Set Preferences...

User Guide
Page 8
...plug-in module and cannot be previously installed before you can run as a stand- alone application. Select the film type that you require further information at any stage, read the film and show the results in the scanner. 4 2. If you intend to start scanning immediately should follow the ...procedures below. Install Plug-in module FS. 1 (1) Place the CanoScan Setup Utility CD-ROM in the CD-ROM Drive. (2)...
...plug-in module and cannot be previously installed before you can run as a stand- alone application. Select the film type that you require further information at any stage, read the film and show the results in the scanner. 4 2. If you intend to start scanning immediately should follow the ...procedures below. Install Plug-in module FS. 1 (1) Place the CanoScan Setup Utility CD-ROM in the CD-ROM Drive. (2)...

User Guide
Page 9
...; The browser image will appear on the [Browser] button. 6 • The selection tool will close. Image type (p. 18), Output device (p. 23), Size (p. 24), Preferences (p. 26), Film position after scanning (p. 34) Verifying Image Quality with precision (p.39). 9 9
...; The browser image will appear on the [Browser] button. 6 • The selection tool will close. Image type (p. 18), Output device (p. 23), Size (p. 24), Preferences (p. 26), Film position after scanning (p. 34) Verifying Image Quality with precision (p.39). 9 9

User Guide
Page 15
Displaying the Plug-in module FS Control Panel Selecting a Film Type Loading the Film and Previewing the Image Setting the Scan Mode Selecting the Output Device Setting the Magnification Setting the Preferences Output Device (p. 26) Aspect Ratio (p. 28) Unit (p. ...
Displaying the Plug-in module FS Control Panel Selecting a Film Type Loading the Film and Previewing the Image Setting the Scan Mode Selecting the Output Device Setting the Magnification Setting the Preferences Output Device (p. 26) Aspect Ratio (p. 28) Unit (p. ...

User Guide
Page 16
... Use these buttons to display more options in a pull-down menu. To quit Plug-in module FS, click on any menu item to eject the film rotate images, change the zoom setting adjust the histogram, preview and scan images. displayed here for the area of the control panel. Preview Window Displays...
... Use these buttons to display more options in a pull-down menu. To quit Plug-in module FS, click on any menu item to eject the film rotate images, change the zoom setting adjust the histogram, preview and scan images. displayed here for the area of the control panel. Preview Window Displays...

User Guide
Page 18
... 18 Hint • For a slide mount select, 35 mm Color Pos. • To change the film type, execute preview again. Positive films require greater precision when a picture is not the same for negative and positive films. Negative films provide greater latitude because the exposure can be adjusted when prints are made. Click the box...
... 18 Hint • For a slide mount select, 35 mm Color Pos. • To change the film type, execute preview again. Positive films require greater precision when a picture is not the same for negative and positive films. Negative films provide greater latitude because the exposure can be adjusted when prints are made. Click the box...

User Guide
Page 19
... the image will appear in the Preview window. ª Hint • The Preview window can be placed in the scanner, please refer to the "Placing Film" section of the scan and the final results may differ to some degree from the preview image. • Be sure to re-click the Preview... button and to check the preview image each time you replace a film or change a film type setting. 19 19 Previewing STEP 2 Before an image is scanned, it will be scanned and to make any required adjustments to the color...
... the image will appear in the Preview window. ª Hint • The Preview window can be placed in the scanner, please refer to the "Placing Film" section of the scan and the final results may differ to some degree from the preview image. • Be sure to re-click the Preview... button and to check the preview image each time you replace a film or change a film type setting. 19 19 Previewing STEP 2 Before an image is scanned, it will be scanned and to make any required adjustments to the color...

User Guide
Page 21
...RGB colors, which add up to 36 bits. Use this mode when the image is to be printed on a color printer. 36bit Color Mode (FS2710 only) In this mode, a dot can be accurately reproduced on the screen. Photoshop version 4.0 or later, and Photoshop LE provided with the package,...twice the size of a 24bit color image. However, the displayed image is useful for reproducing color prints, but generates files that are using monochrome film, you attempt to scan a 12bit grayscale or 36bit color image, your application can handle 12bit grayscale and 36bit color images. Caution • ...
...RGB colors, which add up to 36 bits. Use this mode when the image is to be printed on a color printer. 36bit Color Mode (FS2710 only) In this mode, a dot can be accurately reproduced on the screen. Photoshop version 4.0 or later, and Photoshop LE provided with the package,...twice the size of a 24bit color image. However, the displayed image is useful for reproducing color prints, but generates files that are using monochrome film, you attempt to scan a 12bit grayscale or 36bit color image, your application can handle 12bit grayscale and 36bit color images. Caution • ...

User Guide
Page 25
Slider Drag the slider bar in the 29.5 MB following sizes, which correspond to the scanning resolutions shown. 35 mm Film 7.3 MB 116 KB 170 dpi 463 KB 340 dpi 1.8 MB 680 dpi 1360 dpi 2720 dpi * These numbers are certain inconveniences associated with the 24bit ...
Slider Drag the slider bar in the 29.5 MB following sizes, which correspond to the scanning resolutions shown. 35 mm Film 7.3 MB 116 KB 170 dpi 463 KB 340 dpi 1.8 MB 680 dpi 1360 dpi 2720 dpi * These numbers are certain inconveniences associated with the 24bit ...

User Guide
Page 28
...-height ratio is 3 to 1. • Hi-Vision TV (H Type) The width-to 9. This feature is 16 to -height ratio is convenient for working with particular film formats.
...-height ratio is 3 to 1. • Hi-Vision TV (H Type) The width-to 9. This feature is 16 to -height ratio is convenient for working with particular film formats.

User Guide
Page 33
.../Contrast Brightness: 0, Contrast: 0 Color Correction Color Balance 0 Color Correction Tone Curve Straight line Color Balance Threshold 128 ColorSync Off Auto Focus On Auto Eject On Film Type Setting 35 mm Color Neg. STEP 2 Return to Default Settings Returns the preference settings and all other settings to reset the default settings. 33...
.../Contrast Brightness: 0, Contrast: 0 Color Correction Color Balance 0 Color Correction Tone Curve Straight line Color Balance Threshold 128 ColorSync Off Auto Focus On Auto Eject On Film Type Setting 35 mm Color Neg. STEP 2 Return to Default Settings Returns the preference settings and all other settings to reset the default settings. 33...

User Guide
Page 34
...the scanner automatically with the Auto Eject function. Hint • When the Auto Eject function is complete. To Set the Auto Eject Function Select the [Film] menu from the scanner. If you wish to scan the same piece of its left. Clicking on Auto Eject places or removes the check mark... to its normal position, making it easier to the eject position after the scan is off . The film does not automatically return to remove from the control panel and choose [Auto Eject]. The default factory setting is off and you wish to eject...
...the scanner automatically with the Auto Eject function. Hint • When the Auto Eject function is complete. To Set the Auto Eject Function Select the [Film] menu from the scanner. If you wish to scan the same piece of its left. Clicking on Auto Eject places or removes the check mark... to its normal position, making it easier to the eject position after the scan is off . The film does not automatically return to remove from the control panel and choose [Auto Eject]. The default factory setting is off and you wish to eject...

User Guide
Page 36
Once you have examined the browser image, click the mouse button again to close . • It does not matter where the mouse cursor is in the correct position. • The film will close the Browser window. 36 36 STEP 2 Click the mouse button when the Selection Tool is positioned to close the Browser window. • The Browser window will be read and the browser image displayed in the middle of the monitor.
Once you have examined the browser image, click the mouse button again to close . • It does not matter where the mouse cursor is in the correct position. • The film will close the Browser window. 36 36 STEP 2 Click the mouse button when the Selection Tool is positioned to close the Browser window. • The Browser window will be read and the browser image displayed in the middle of the monitor.

User Guide
Page 44
... image may be made after the image is previewed. The potential adjustments vary with the type of scan mode utilized in a variety of Mode FIlm Correction: Focus Correction FIlm Correction: Exposure Adjustment Saving/Recalling Settings Editing Scanned Images 44 44 p. 58 p. 60 p. 62 p. 65 p. 67 STEP 4 Adjusting and Editing Scanned Images Scanned...
... image may be made after the image is previewed. The potential adjustments vary with the type of scan mode utilized in a variety of Mode FIlm Correction: Focus Correction FIlm Correction: Exposure Adjustment Saving/Recalling Settings Editing Scanned Images 44 44 p. 58 p. 60 p. 62 p. 65 p. 67 STEP 4 Adjusting and Editing Scanned Images Scanned...
User Guide
Page 45
...Color Balance Correct the balance of acceptable quality with the Plug-in module FS 3.6 default settings. Yes Color correction with the original film that requires correction, you can use to the referenced page. Entire image Color correction with Brightness Adjusts the overall brightness of the ...image. (p. 50) -orFocus Correction Adjusts the amount of light (exposure) striking the film and adjusts the bright ness of the image. (p. 62) Only part of image Color correction with Contrast Correct the difference in the...
...Color Balance Correct the balance of acceptable quality with the Plug-in module FS 3.6 default settings. Yes Color correction with the original film that requires correction, you can use to the referenced page. Entire image Color correction with Brightness Adjusts the overall brightness of the ...image. (p. 50) -orFocus Correction Adjusts the amount of light (exposure) striking the film and adjusts the bright ness of the image. (p. 62) Only part of image Color correction with Contrast Correct the difference in the...

User Guide
Page 60
... the focus. Selecting auto focus causes the scanner to focus it may shift position to a small extent, throwing the focus out when scanning or previewing. Film Correction - However, the auto focus can be necessary to scan for the actual scan, browser, or zoom operations. Focus Correction STEP...
... the focus. Selecting auto focus causes the scanner to focus it may shift position to a small extent, throwing the focus out when scanning or previewing. Film Correction - However, the auto focus can be necessary to scan for the actual scan, browser, or zoom operations. Focus Correction STEP...

User Guide
Page 61
... [Manual Focus] button, then adjust the focus manually. Click the [Auto Focus] button to its state when this dialog box was opened. Click on the [Film] menu and select the [Focus] option. The results are clicked.
... [Manual Focus] button, then adjust the focus manually. Click the [Auto Focus] button to its state when this dialog box was opened. Click on the [Film] menu and select the [Focus] option. The results are clicked.


